HomeDIY
This post may contain affiliate links:full affiliate disclosure.
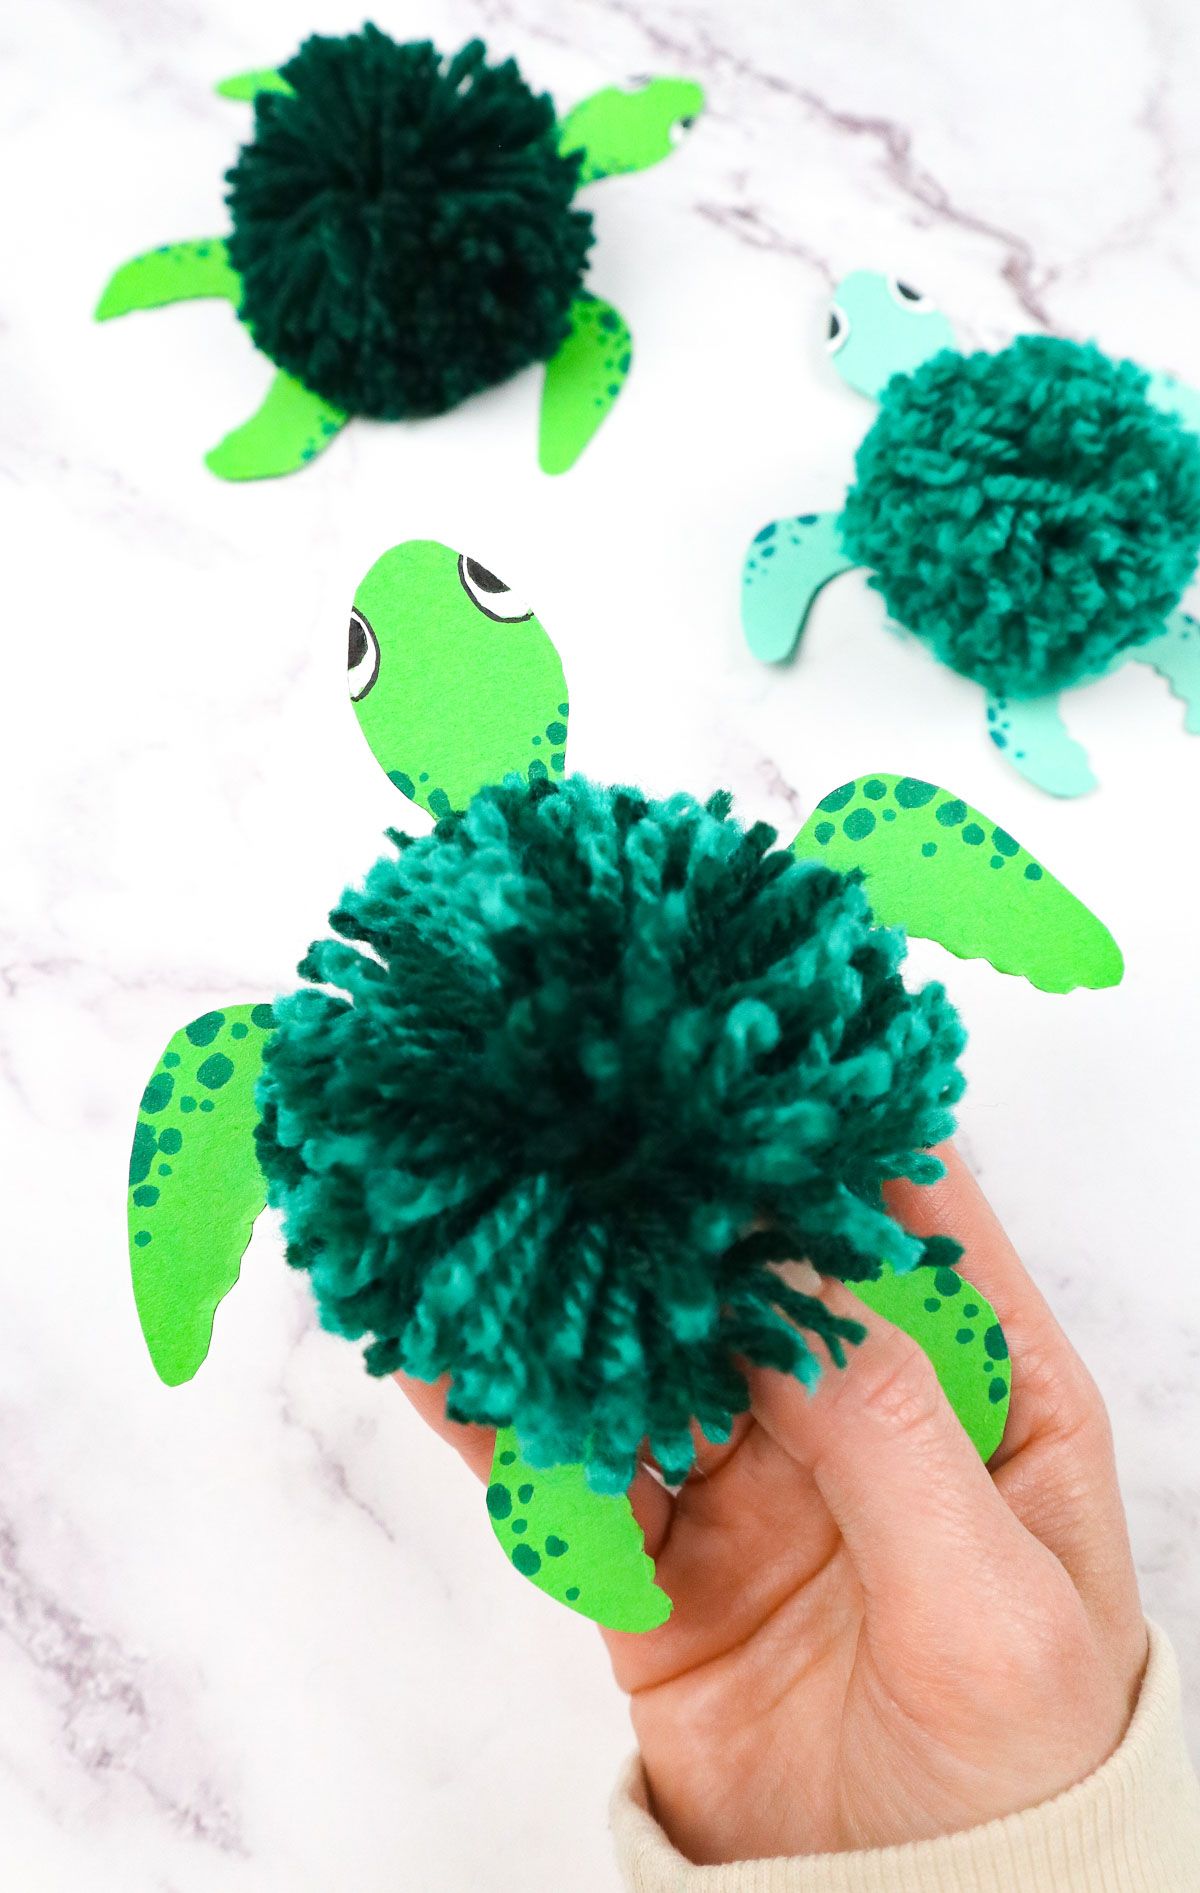
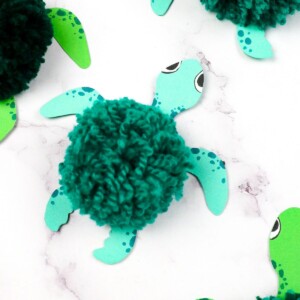
This turtle is fun, simple, and a quirky option for any crafter.
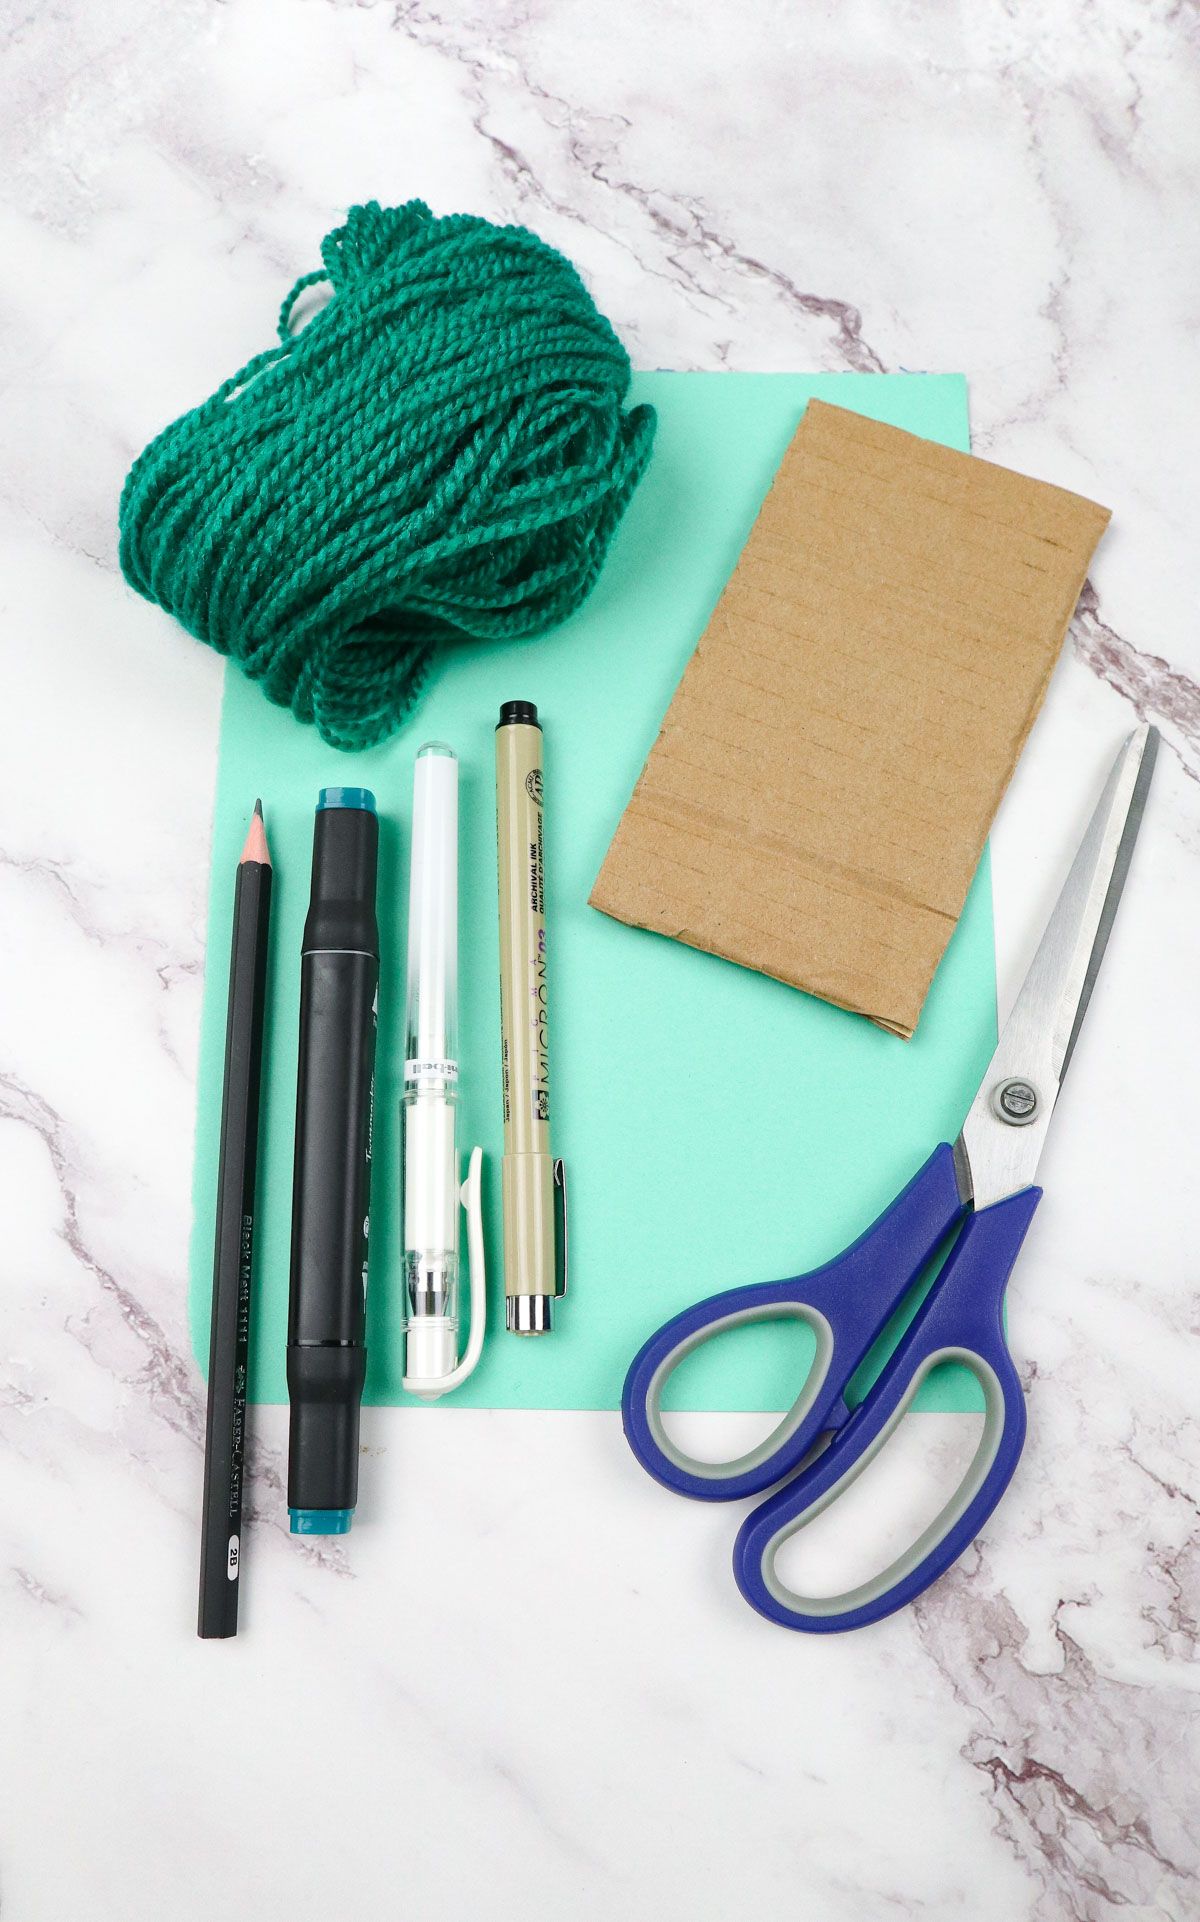
Opting for a sturdier paper option like a cardstock will ensure a longer lifespan.

With all of that said, lets move on to the post!
I hope you enjoy these turtles as much as I do!
Step 2.when you obtain your turtle drawn, its time to cut it out!
Take your time cutting the turtle out, especially for younger crafterssome angles can be delicate.
Step 4.Set your turtle body aside once its designedwere moving on to shell prep.
It starts with the piece of cardboard you have set aside.
Cut about an inch of a small, skinny rectangle out of the middle.
The resulting shape should look like a U.
Step 5.This cardboard will help create the pom pom shell for the turtle.
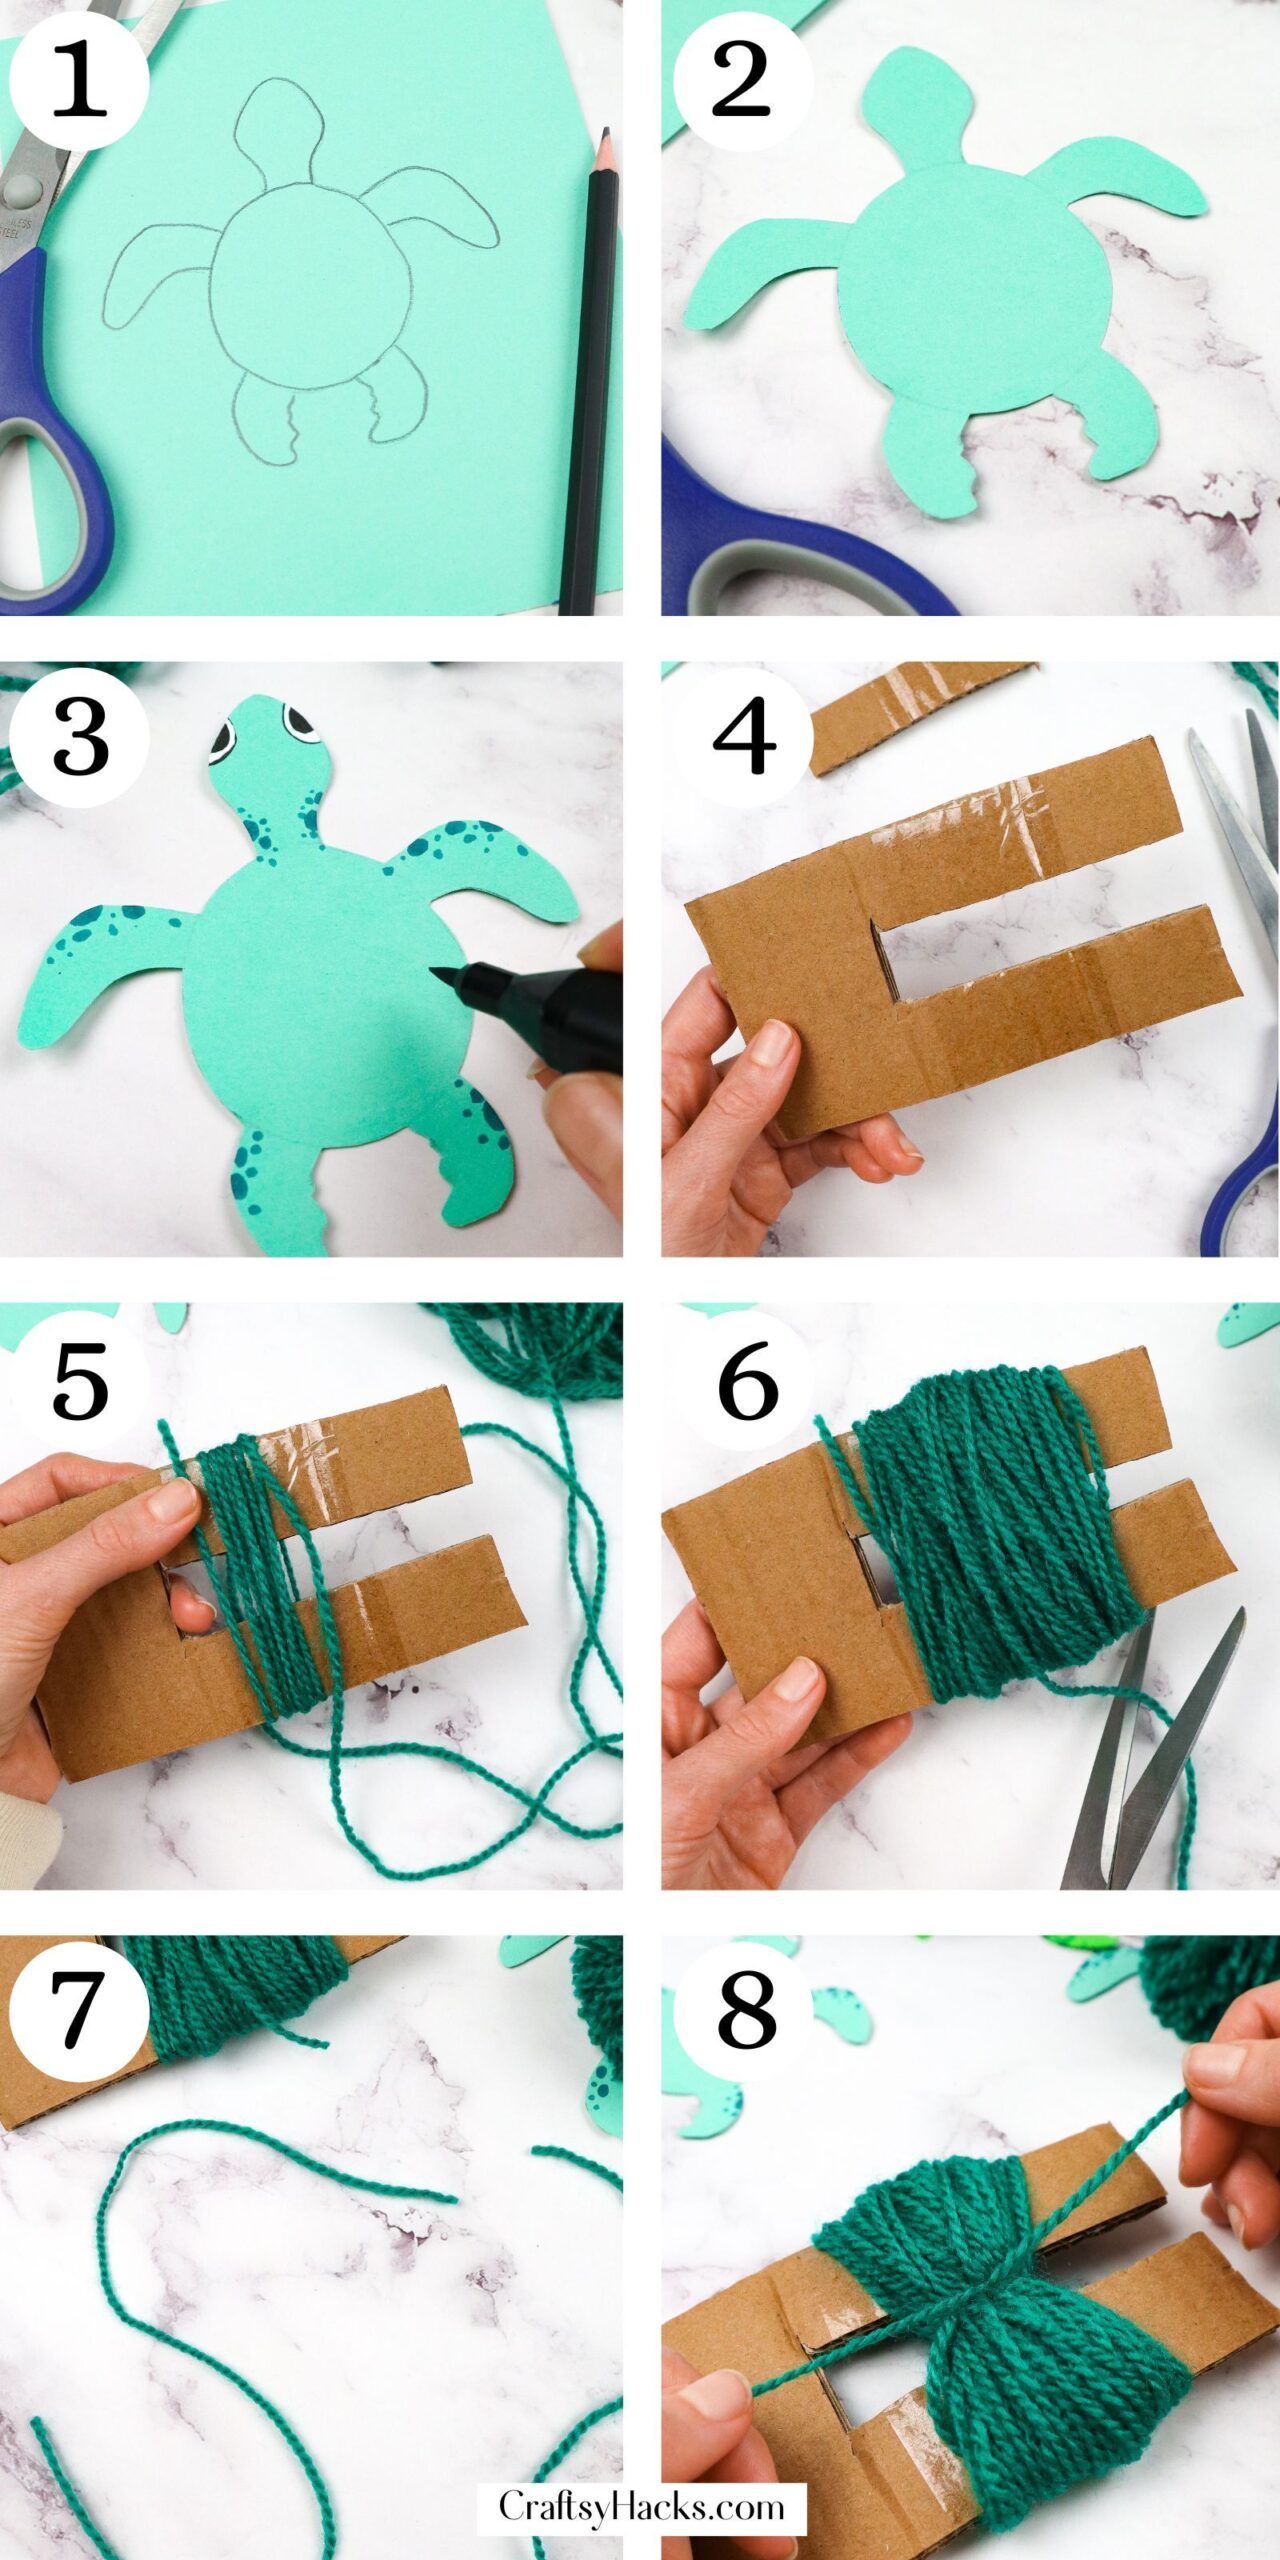
Start by wrapping your yarn around the outer parts of the rectangle.
Step 6.once you nail a sufficient amount of yarn for your shell, cut the tail.
It should be a generous amount of yarn compared to the size of the turtle youre creating.

Step 7.Put down the yarn-wrapped cardboard and cut a twelve-inch piece of yarn.
This piece of yarn will act as the binder for your pom pom shell.
Secure a knot and confirm everything looks even and settled.
Do this to either side of the cardboard edges.
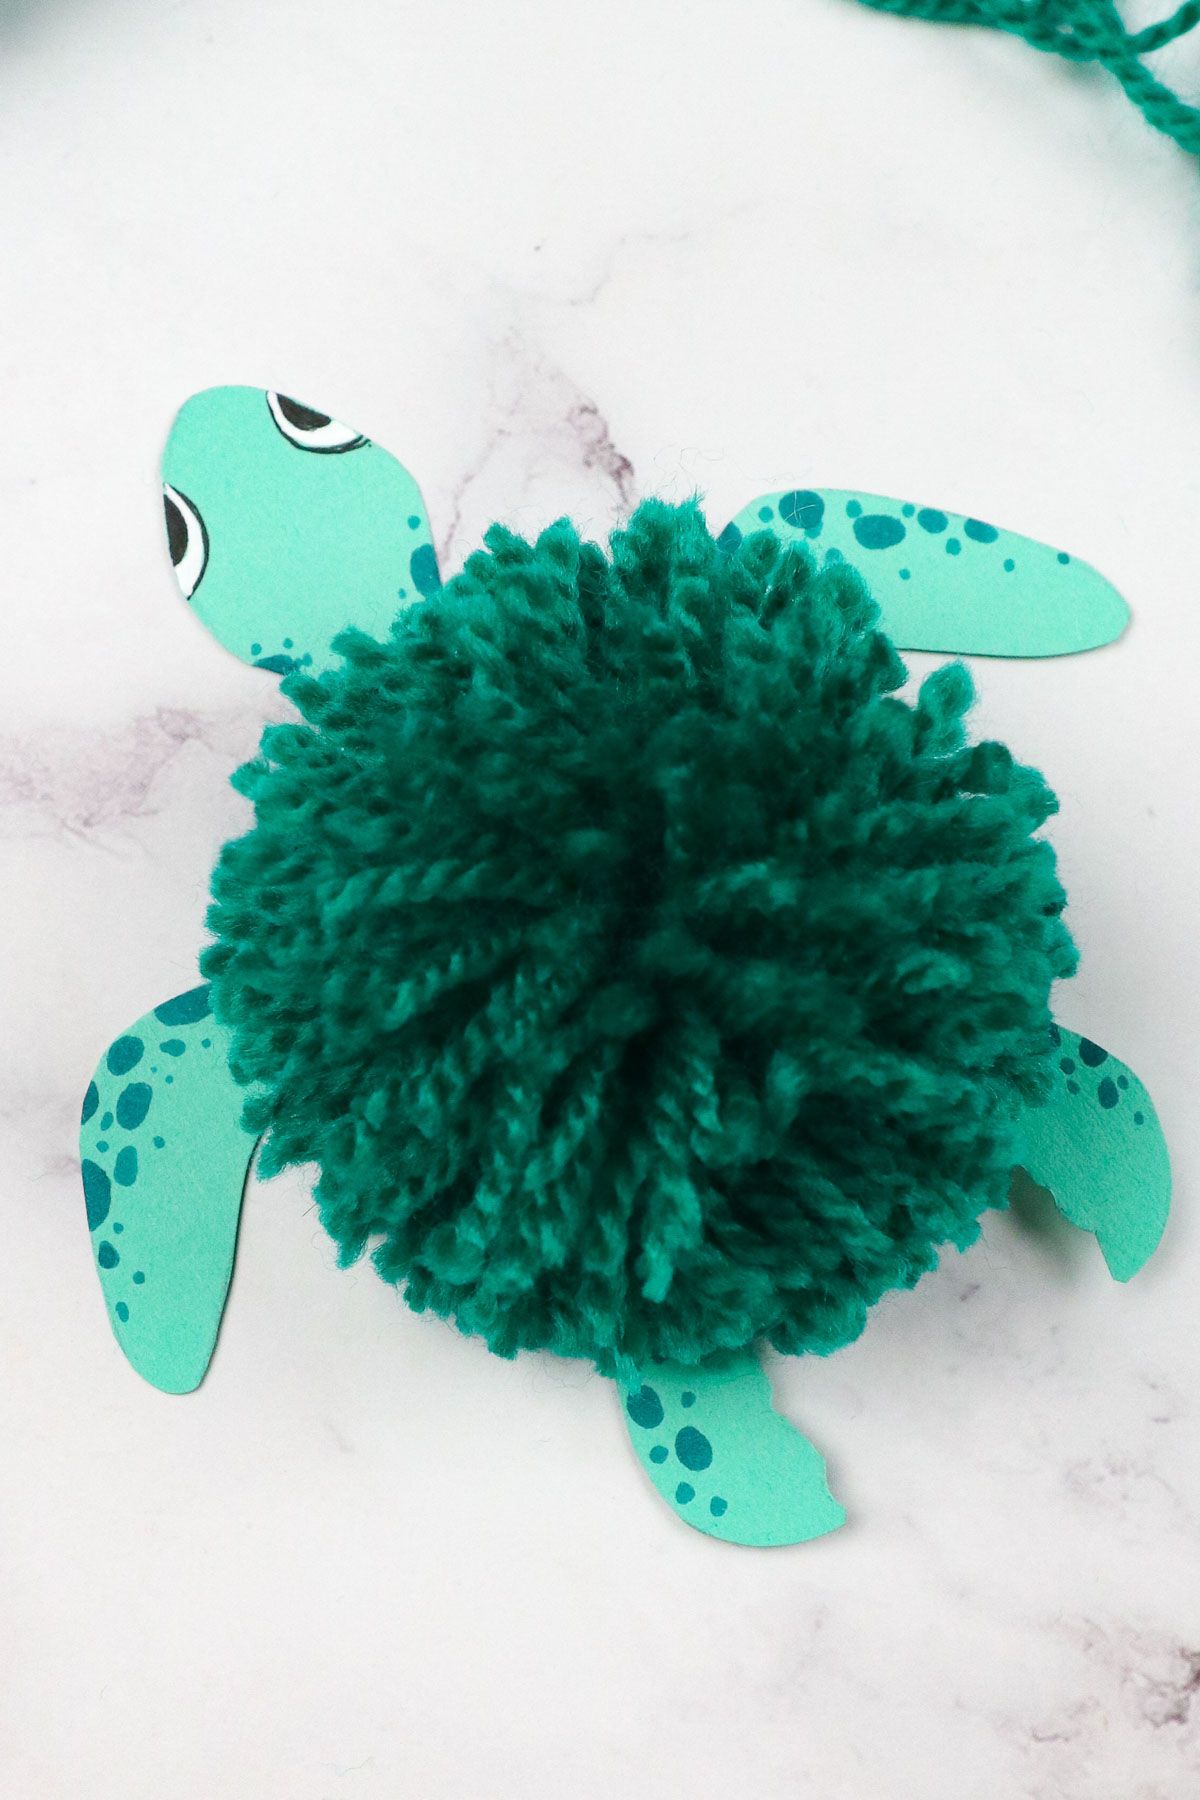
Step 10.Once each side is cut, the pom should be released from the cardboard to reveal your shell.
Re-fluff and situate your pom for the next steps.
Step 11.Trim any trouble areas as needed, but keep the tails of the knotted part.
Those tail pieces are essential in attaching the shell to the turtles body.
Step 12.As your pom pom becomes settled, set it aside and return to your turtle.
Grab your pair of scissors and cut slits on either side of the turtles stomach area.
You want just enough space to let the yarn sit comfortably in these slits.
Step 13.Pick your pom pom back up and situate it on the turtles body.
Thread the reserved tails of the pom pom into the slits and tie a knot gently onto the back.
Enjoy this beautiful DIY turtle!
