xTool recently asked us to review theirnewest, fastest portable laser, the xTool F1.
All opinions are our own.
In this post well show you:
Disclosure: This post contains affiliate links for your shopping convenience.

you could readour full disclosure policy here.
Shop the Black Friday Deals!!
!Be sure to use thexTool coupon codeXTCUT15 for $150 off your order of $1699 or more!
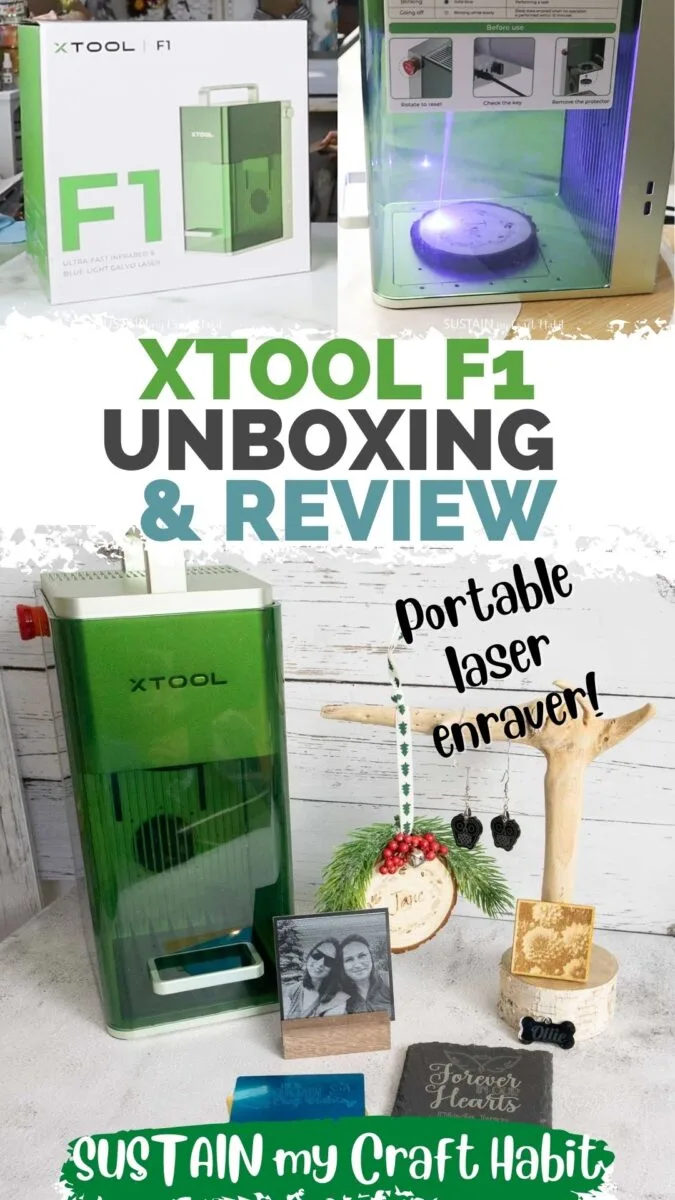
What is the xTool F1 Machine?
It also has extremely high resolution (up to 1270dpi) meaning youll get crisp lines and vivid details.
Even moreso, the lightweight and compact design of the xTool F1 means that its completely portable!
Who is the xTool F1 Ideal For?
The xTool P2 or D1 Pro would be recommended for higher volume projects.
For example, the higher priced P2 and S1 models are designed for higher volume and larger projects.

They take up more space and arent portable.
In comparison to their other laser engravers, xTool F1 is mid-priced and designed for easy, portable use.
xTool also offers several bundles with the F1 machine.

Were happy to share thexTool Creative Space filewhich we created for our seven sample projects.
Simply download and use to get your crafts started!
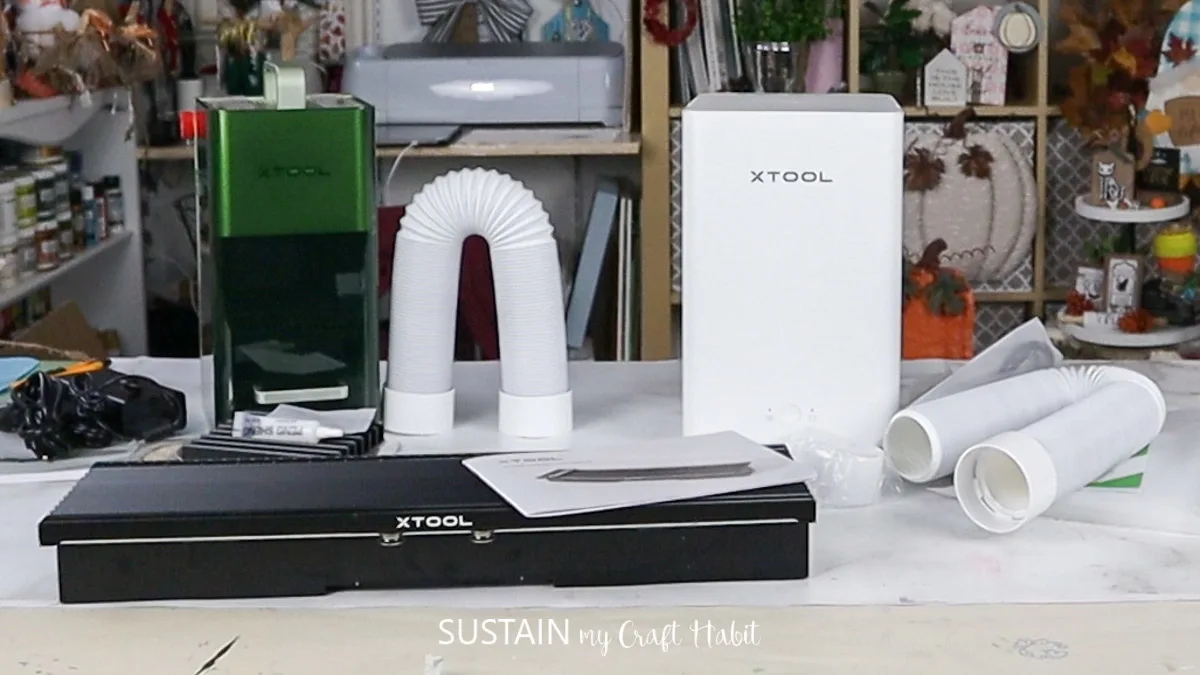
xTool F1 Set-Up
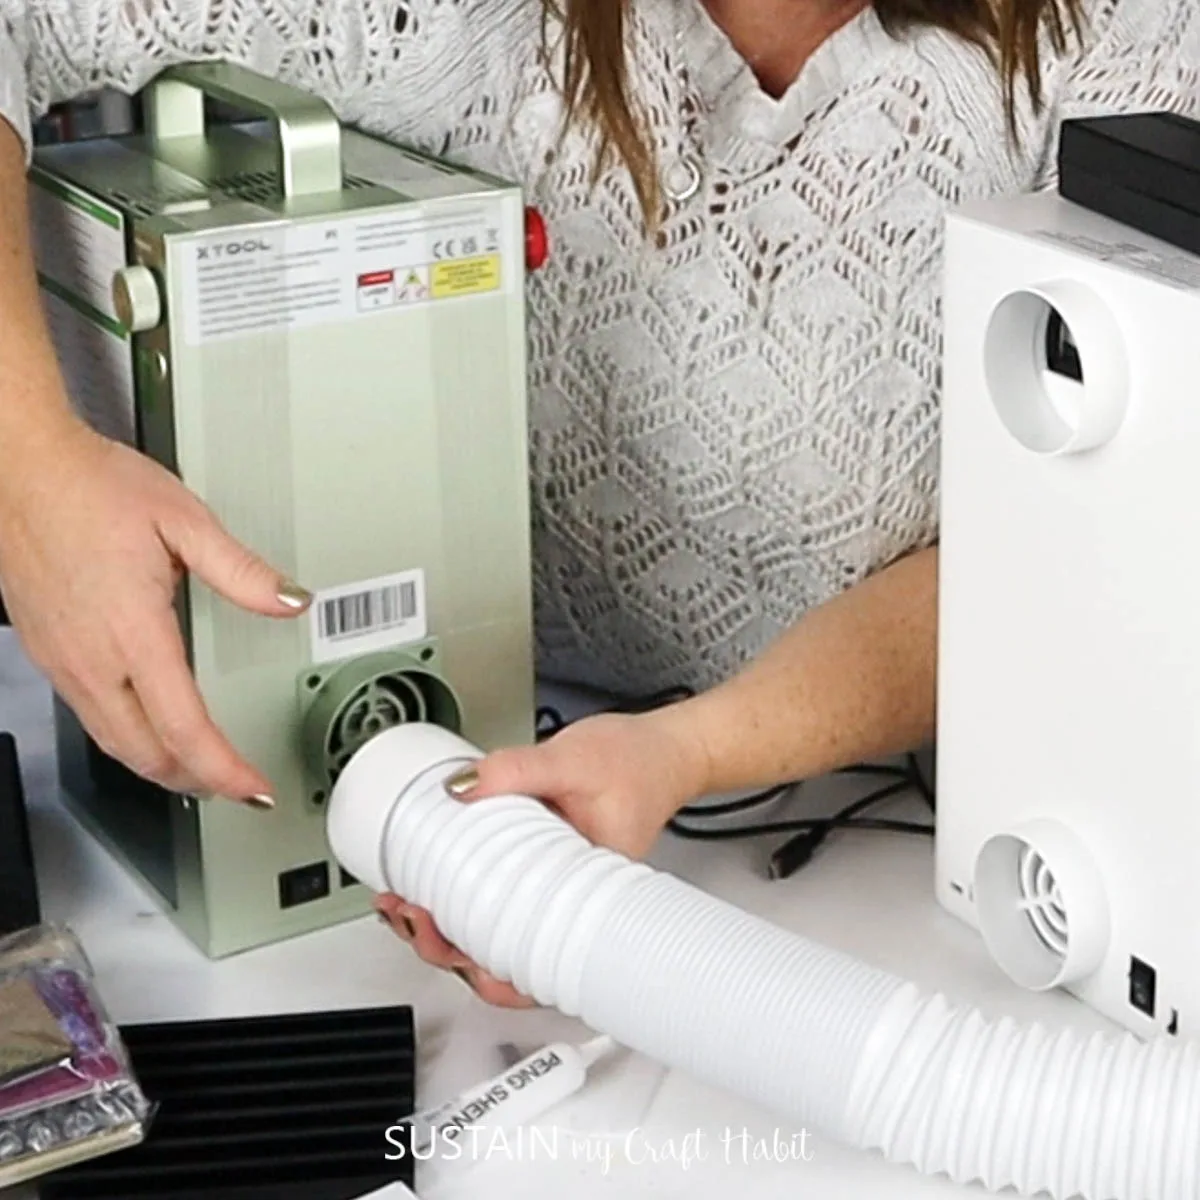
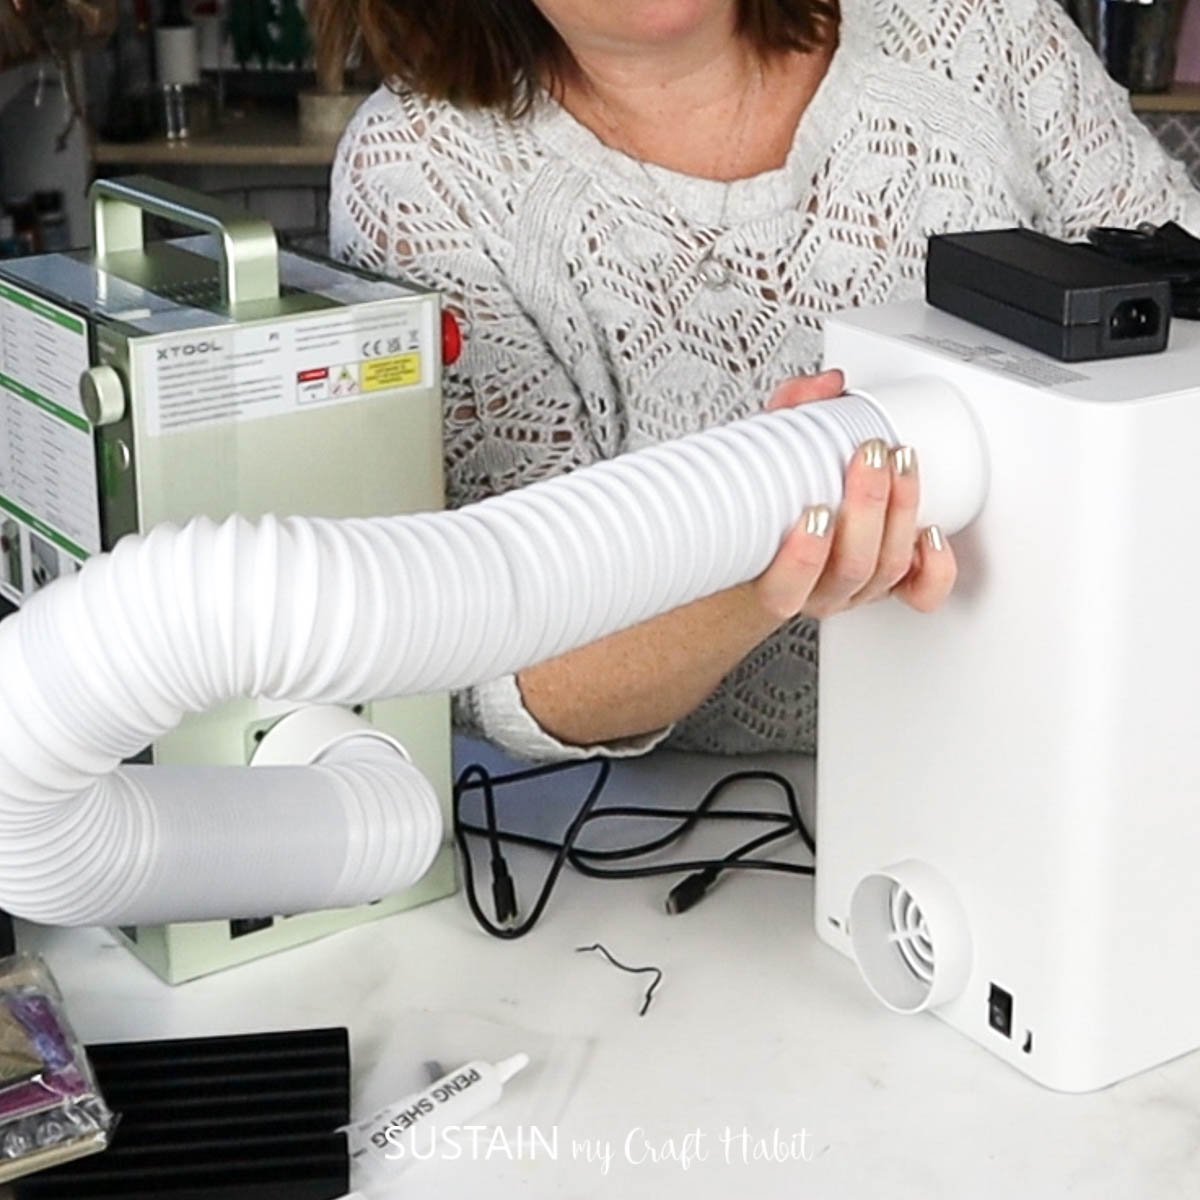
Setting up the xTool F1 machine was actually quite simple and quick.
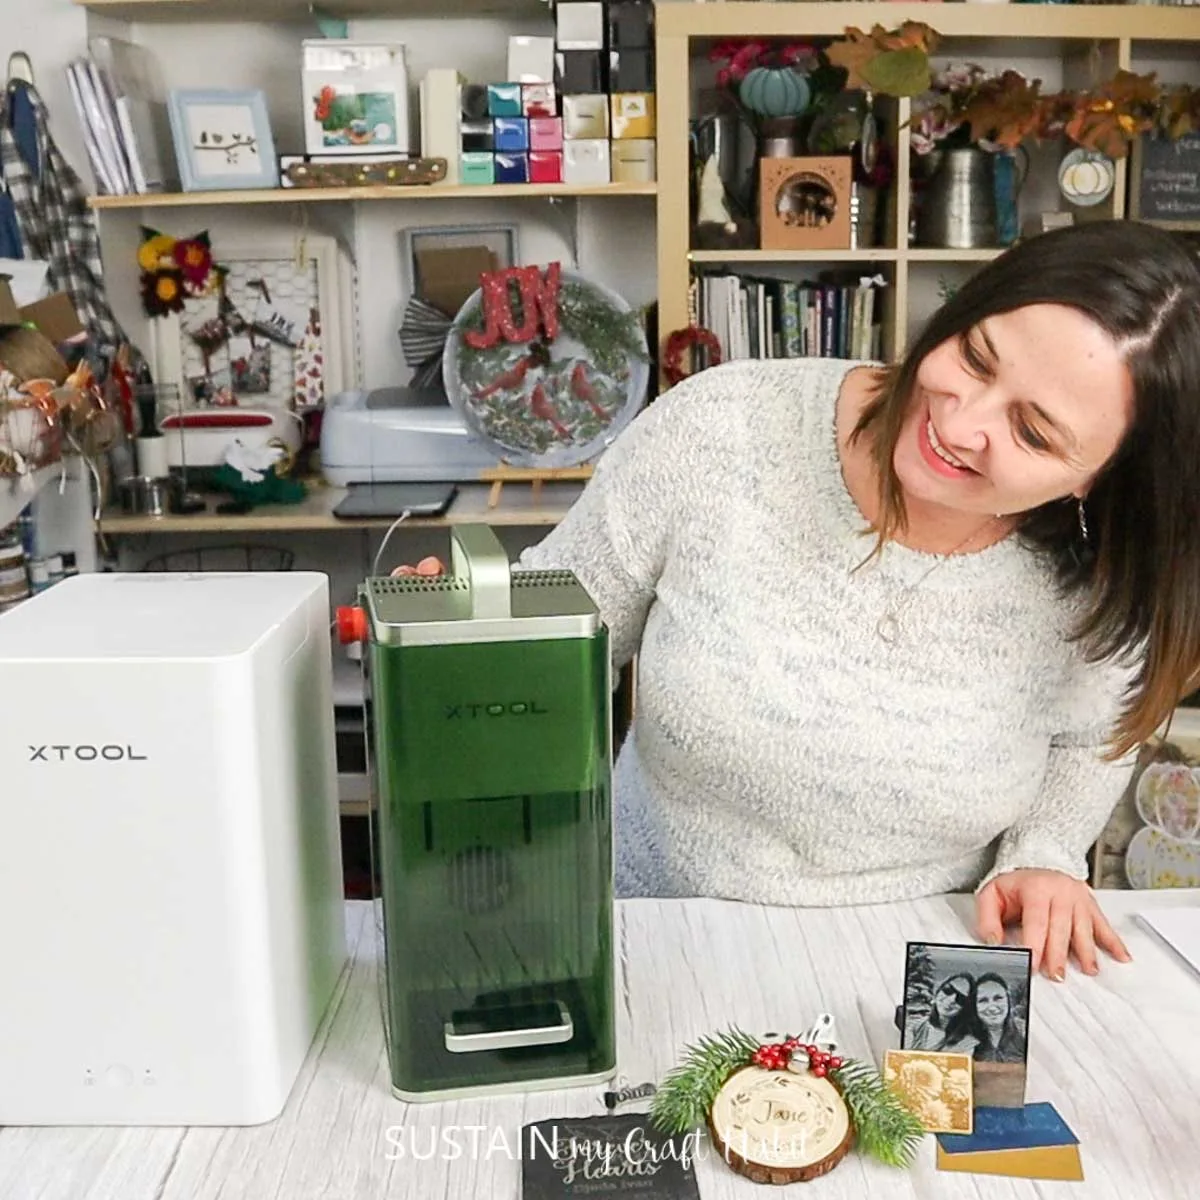
Be sure to have the instruction manual on hand which provides great step-by-step pictorial directions.
I then attached the other end to the smoke inlet at the back of the smoke purifier.
The vent hose pulls out the smoke and debris produced during the laser engraving and cutting process.

After I plugged in the two machines with the included AC adaptors, the set up was complete!
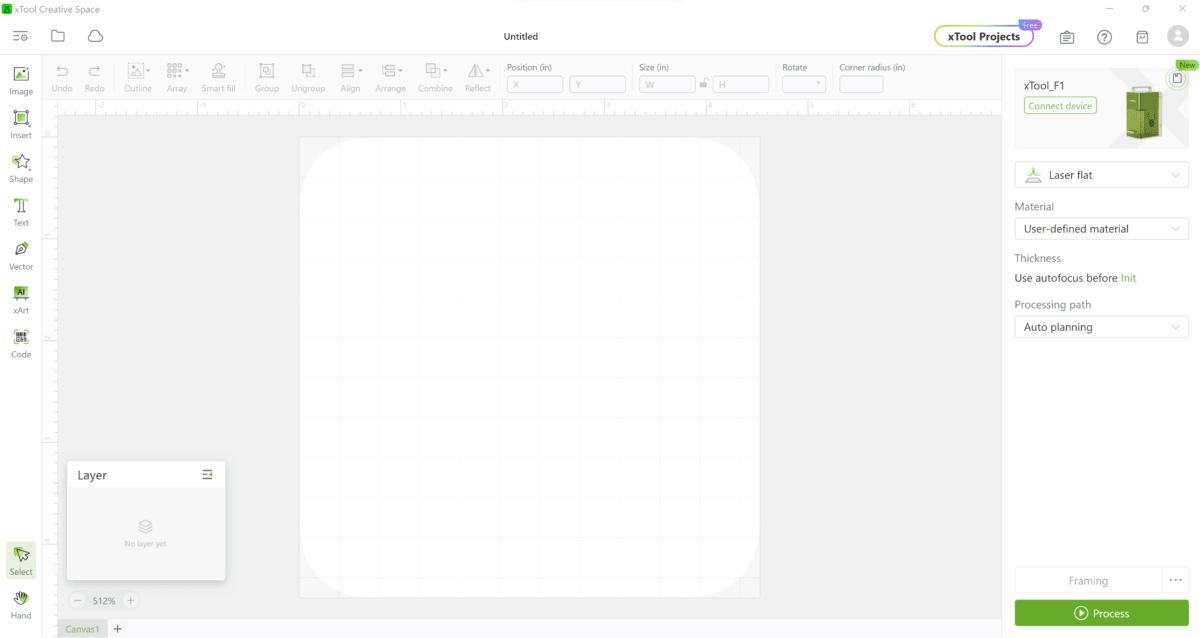
Youll then connect it to the machine with either the USB cable provided or via WIFI Connection.
Once installed you will open up the canvas which looks like this on the desktop computer…
This is the command center from where youll tell your machine what to do.
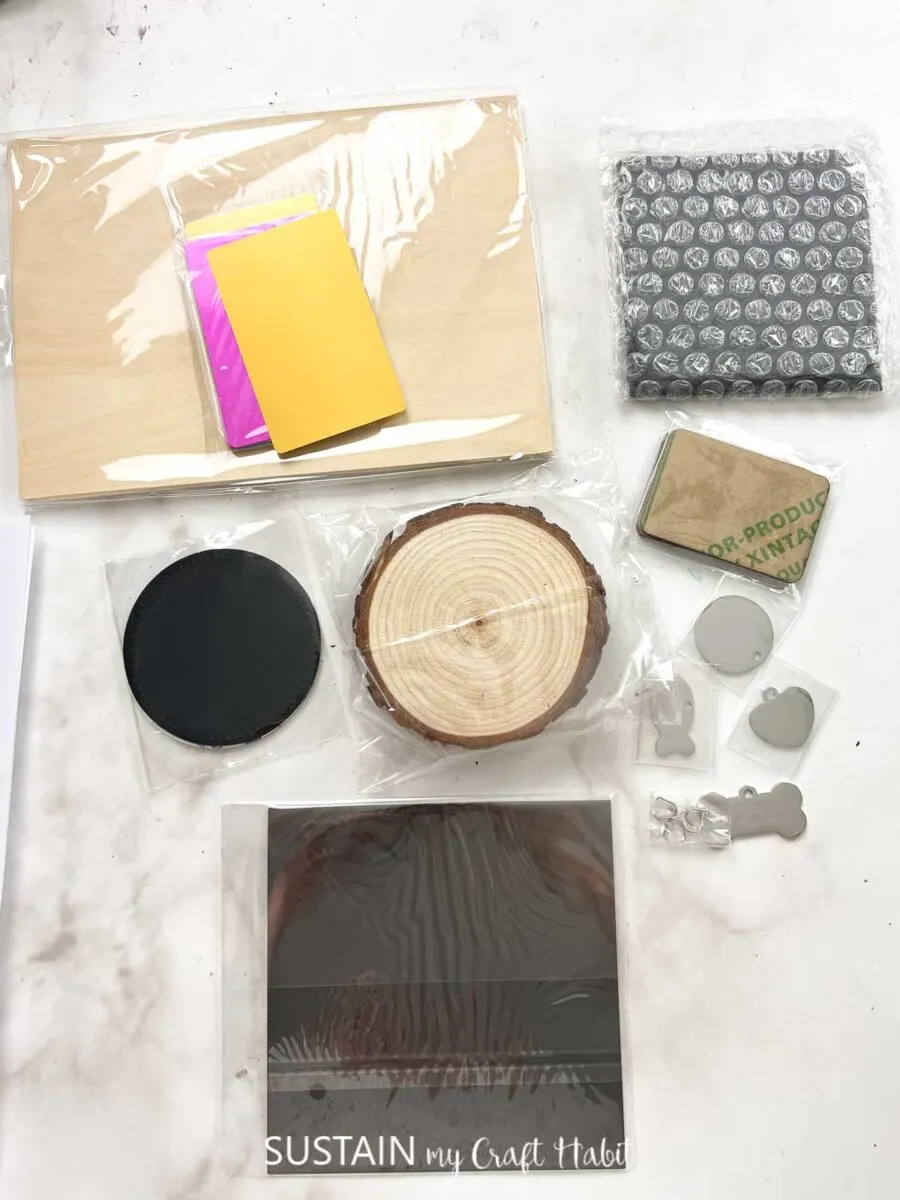
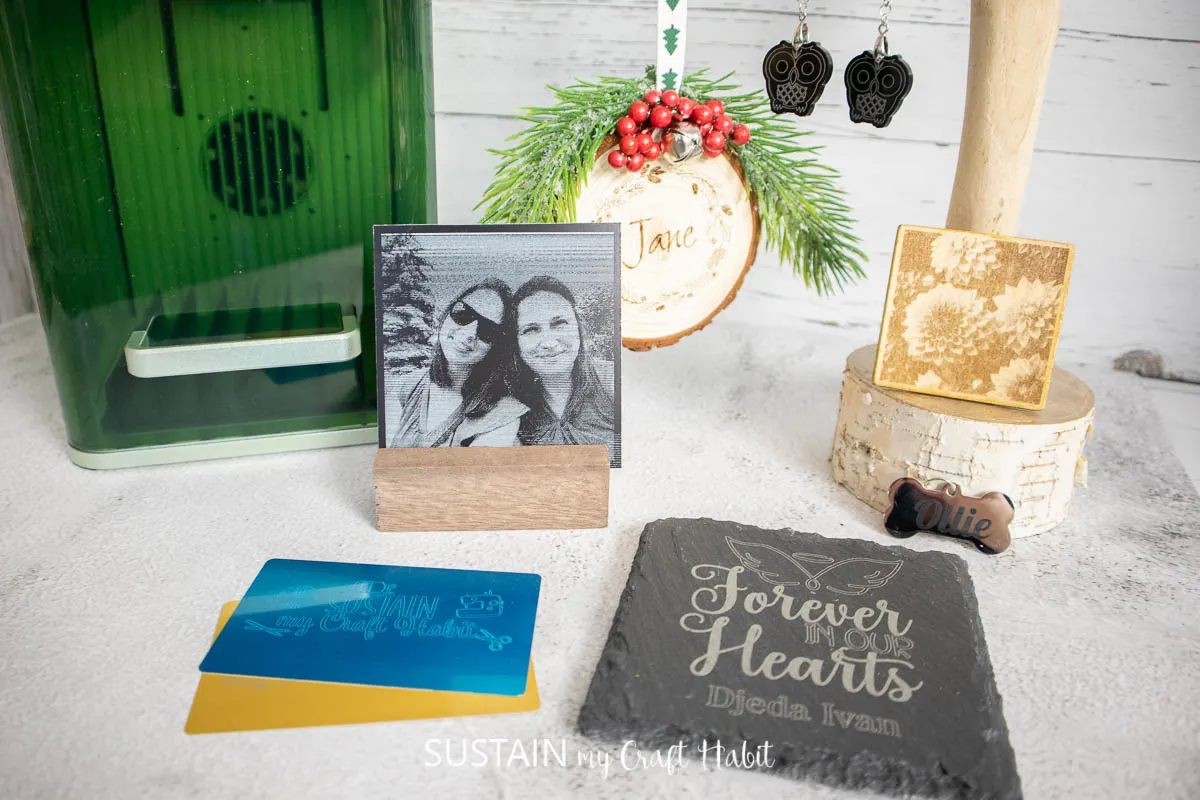
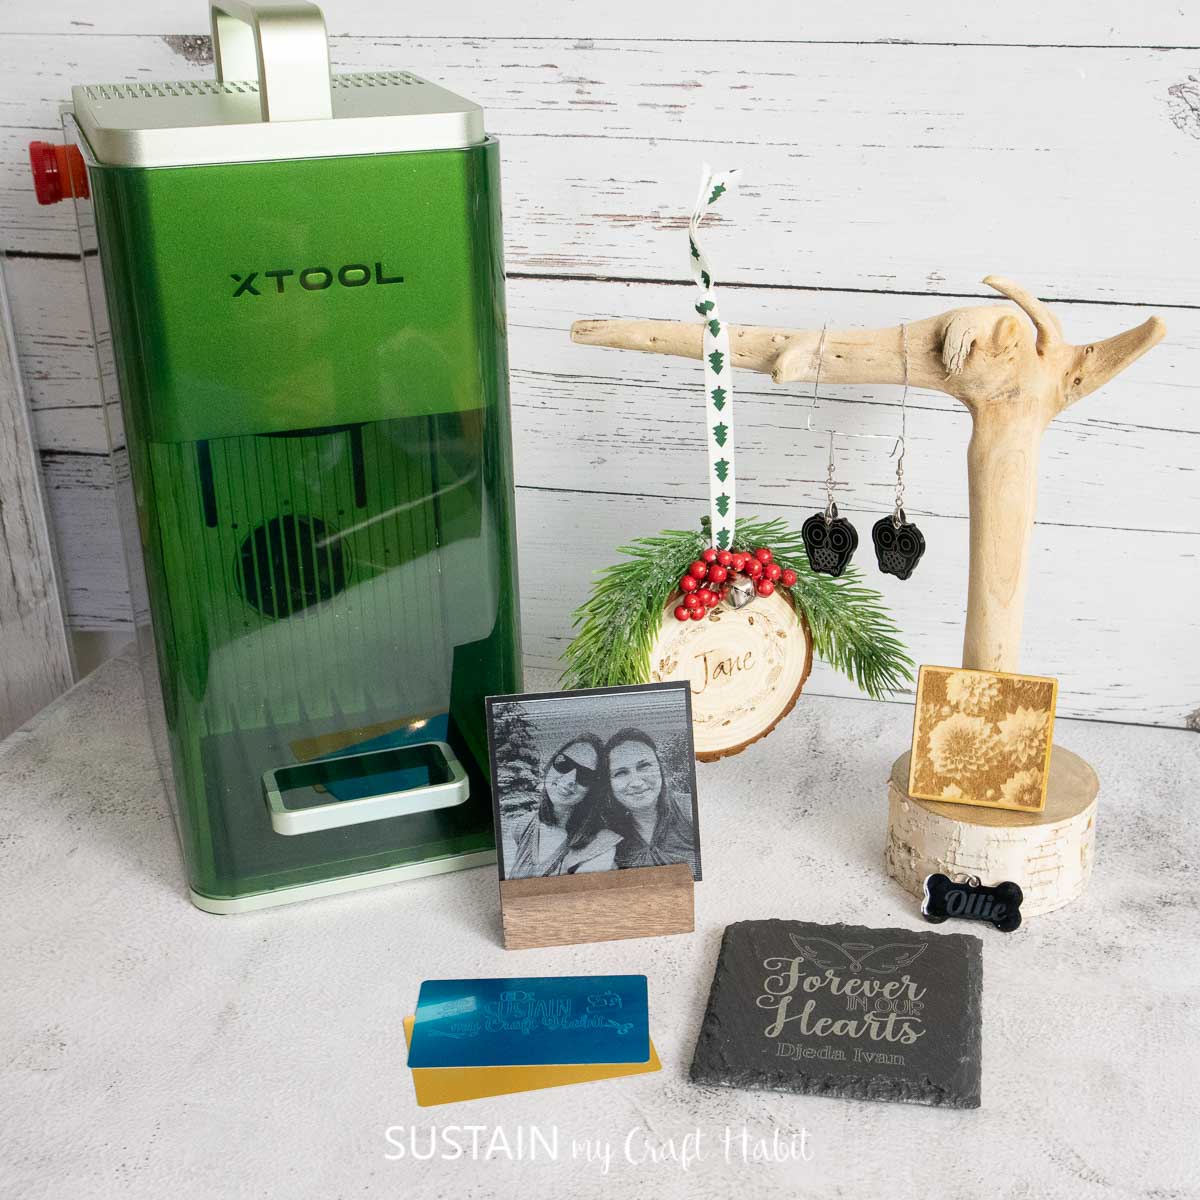
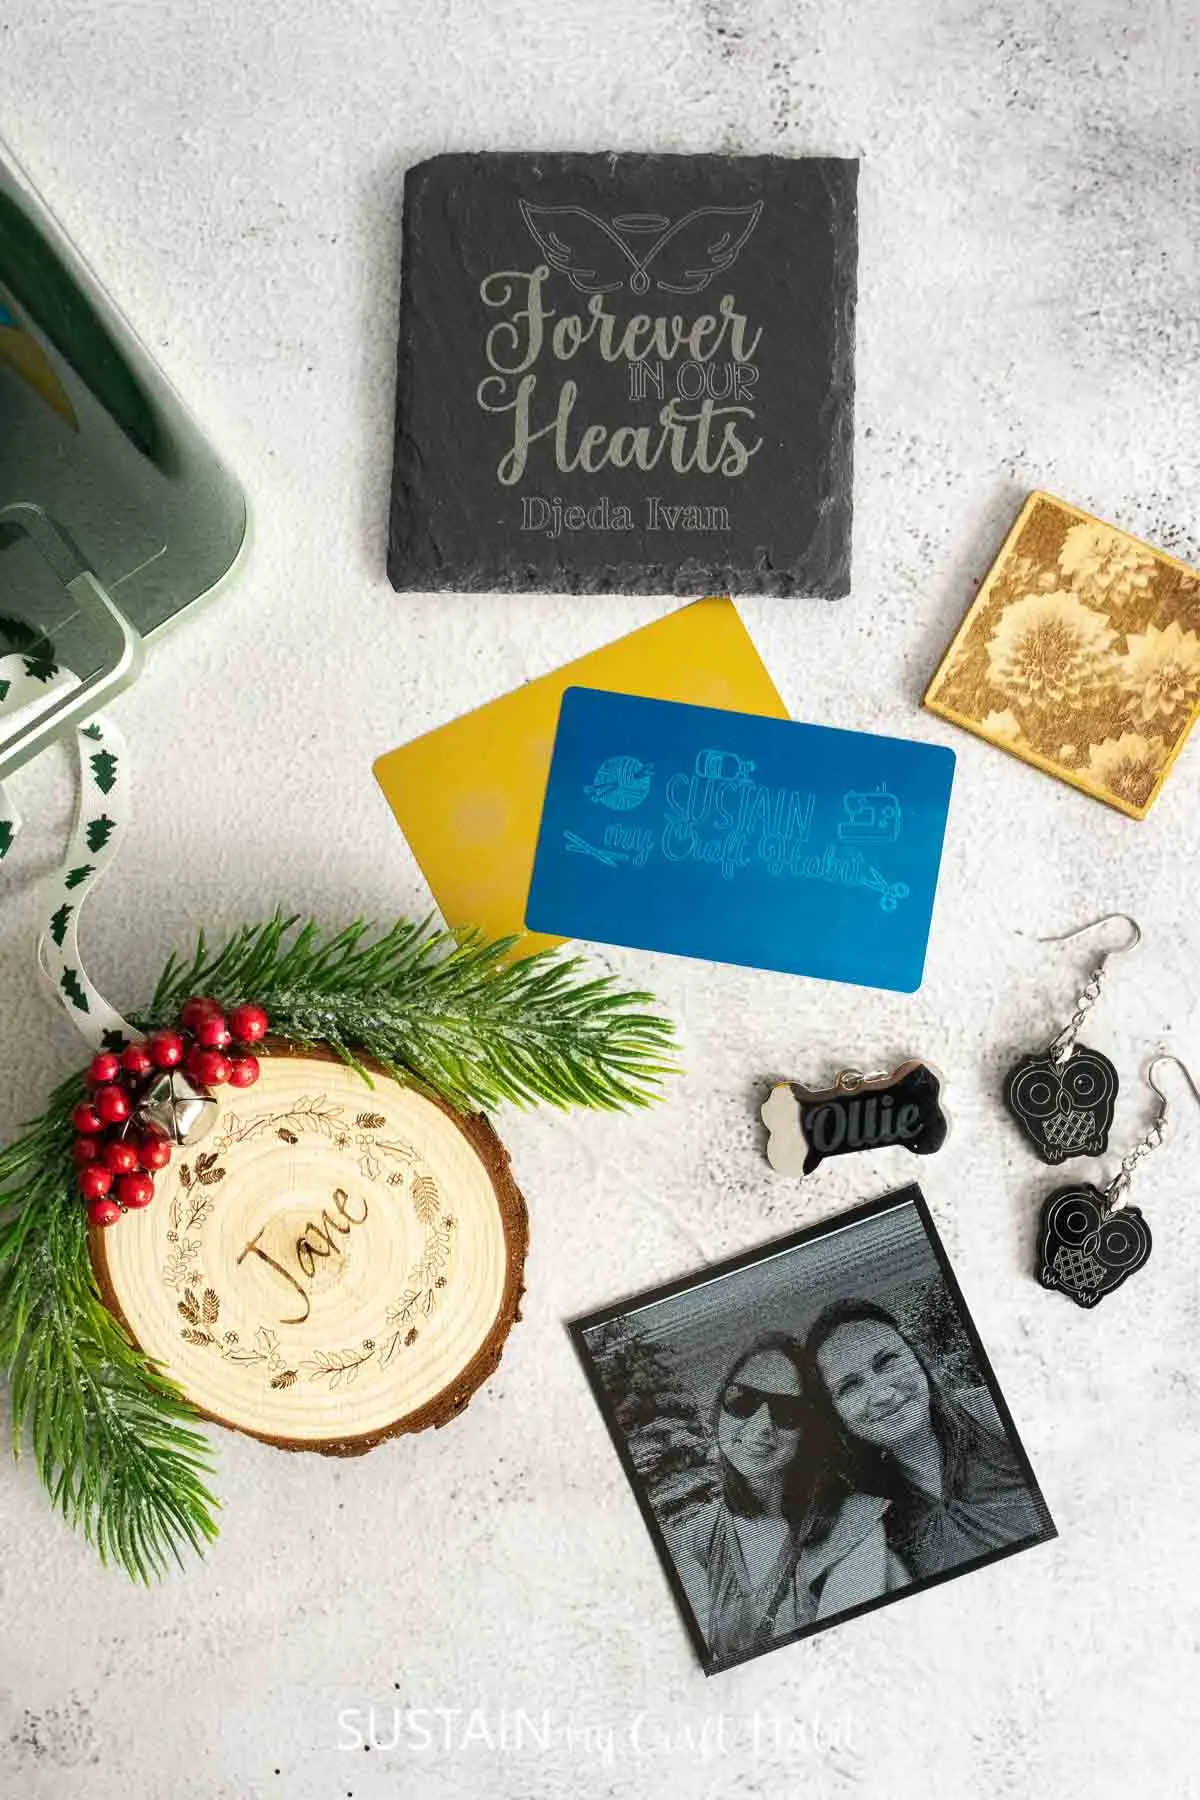
I made seven different projects to try out a variety of functions in xTool Creative Space.
Youre welcome to download ourxTool Creative Space fileto follow along.

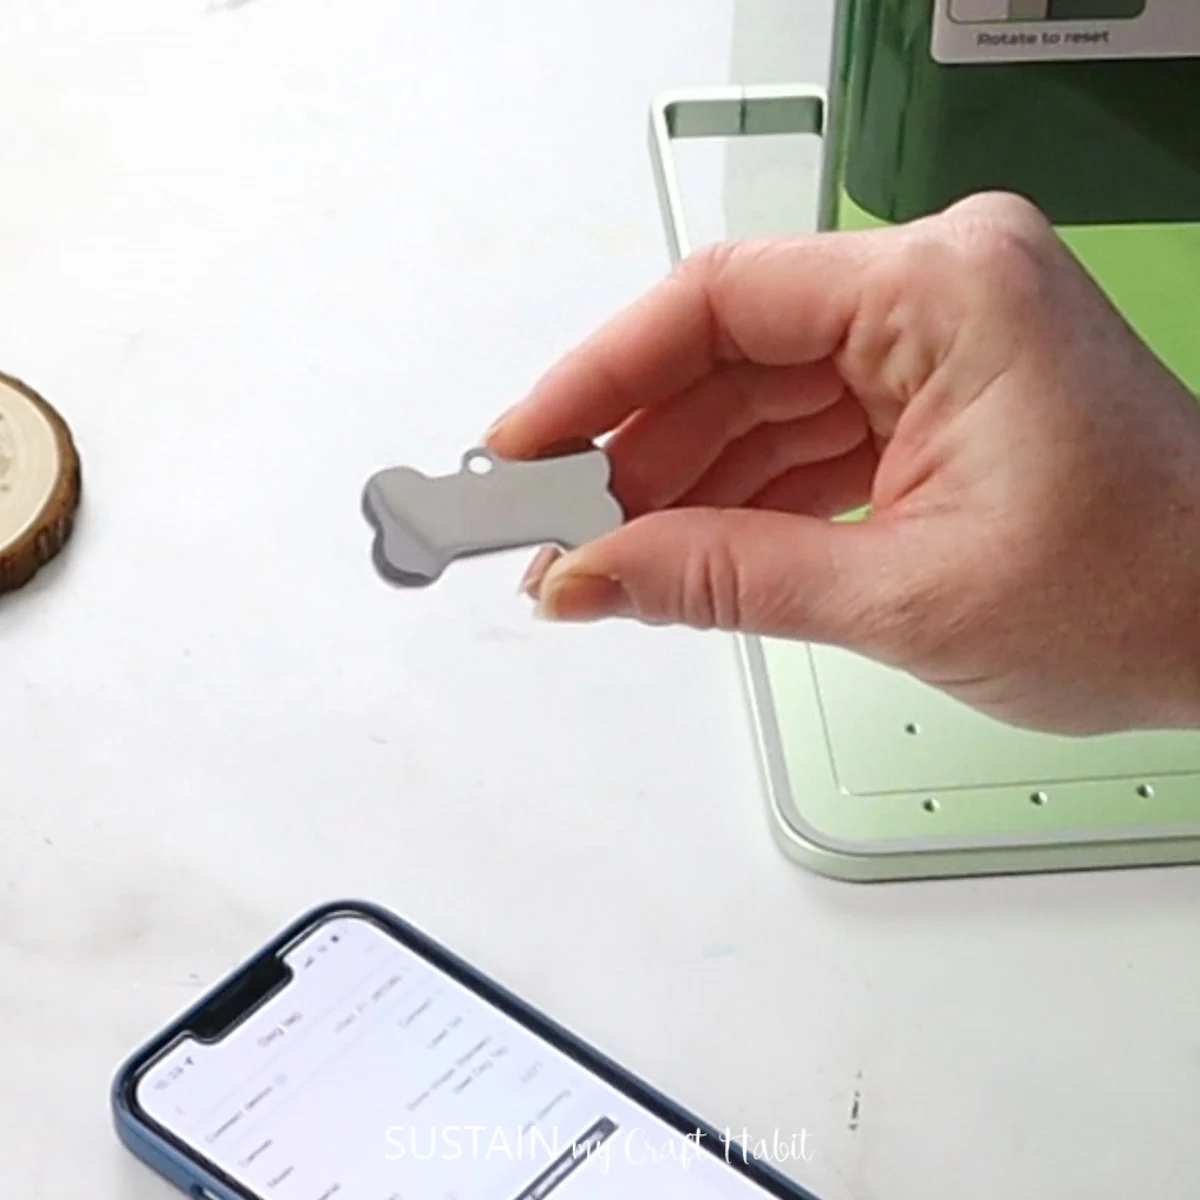
I started by measuring the height and width of the engraving area on the dog tag.
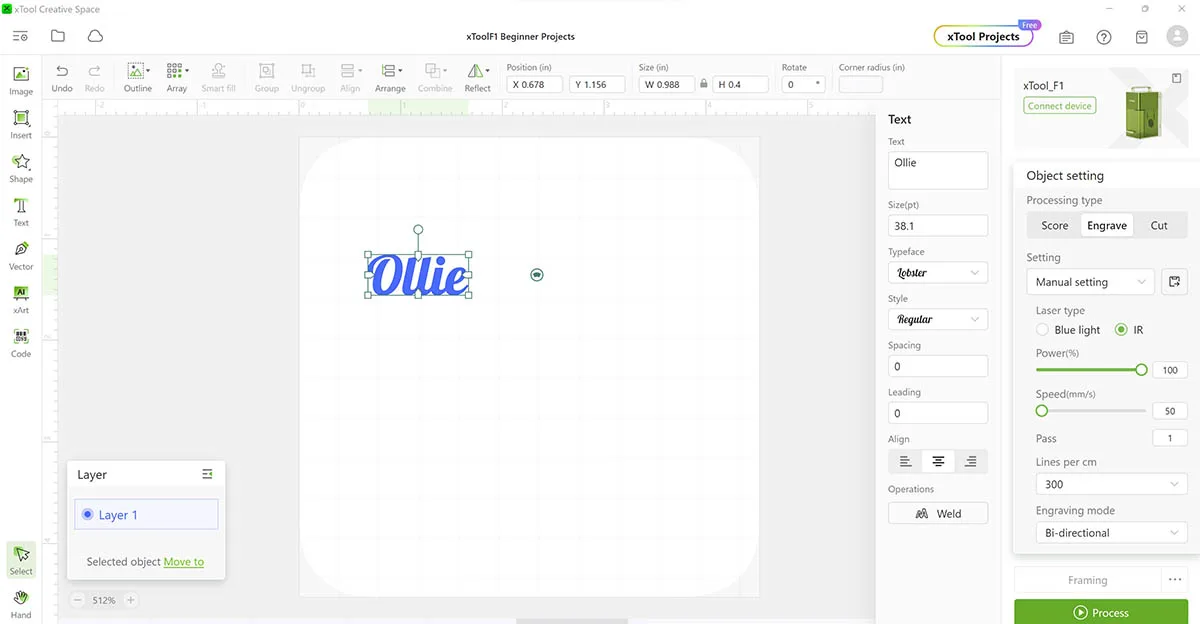
I opened a new canvas, clicked on the Text tool and typed Ollie.
Next it was time to set the processing prefs.

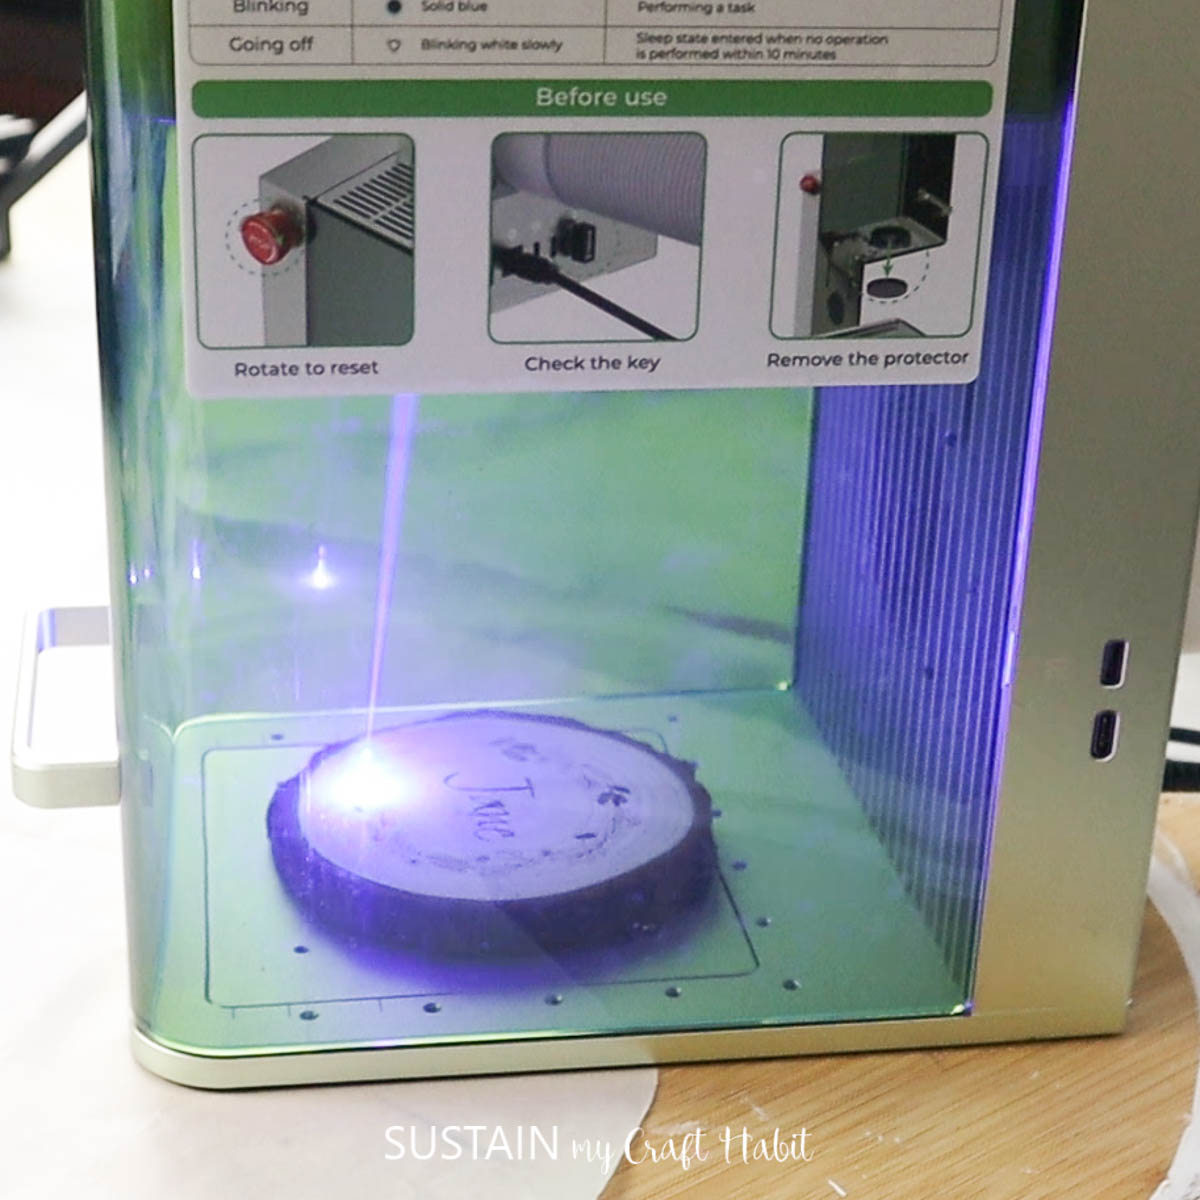
After pressing Process and Start, the machine did the work.
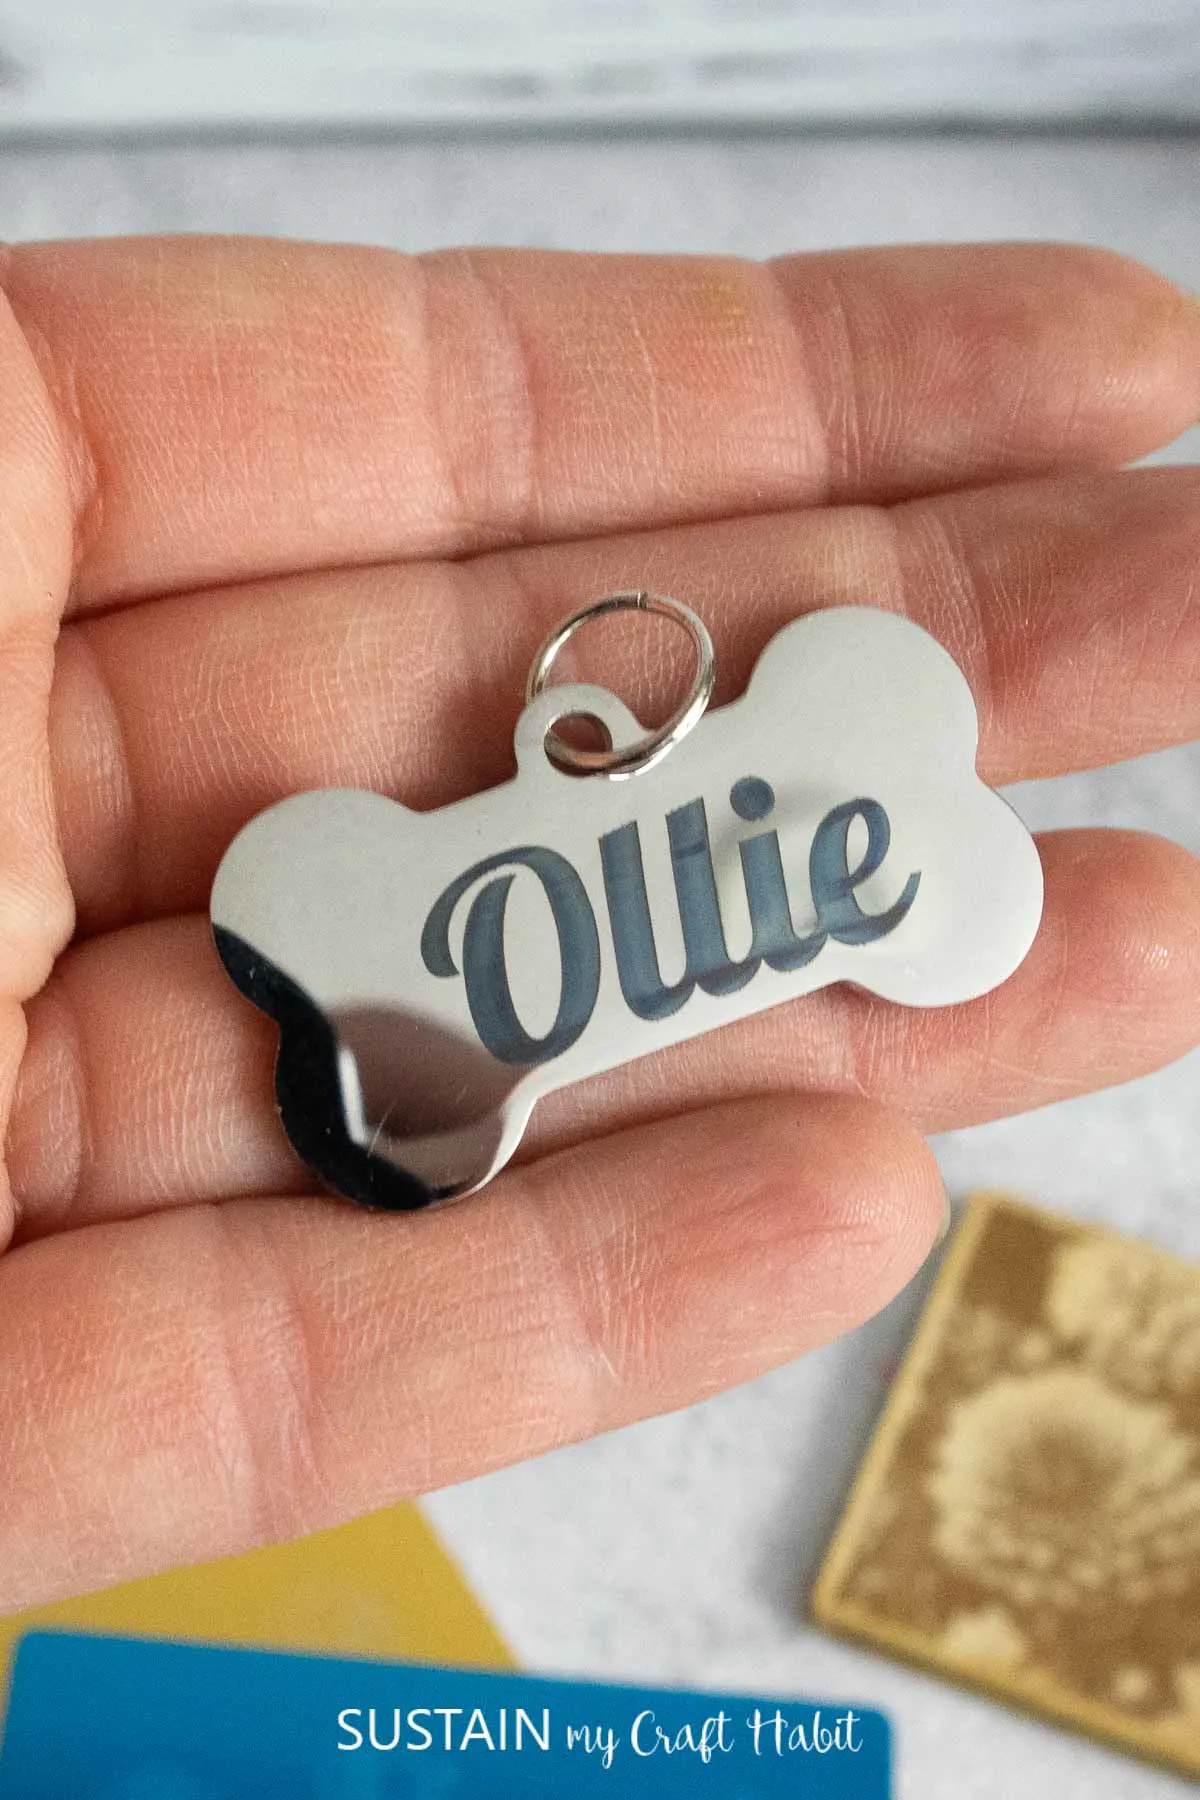
After less than two minutes, I had adorable personalized tag for Ollie!
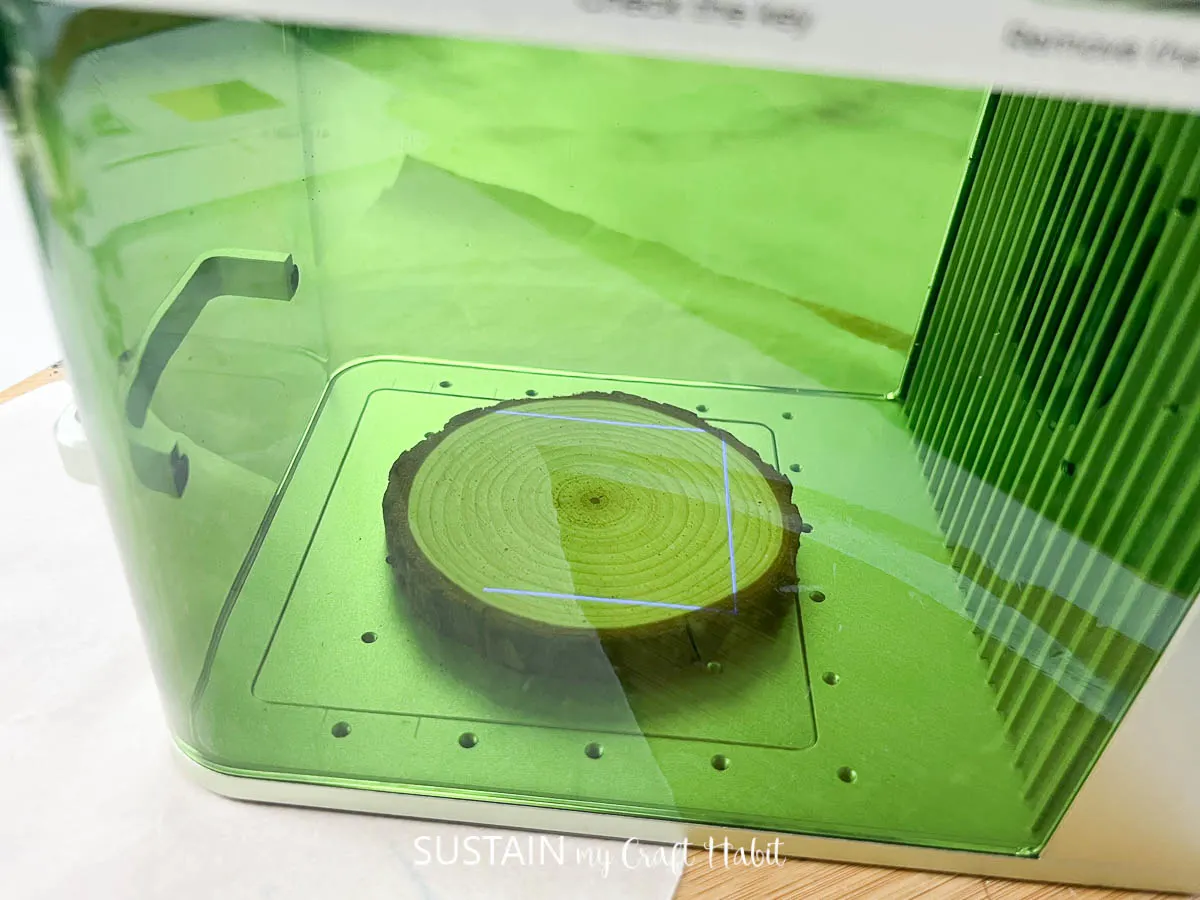
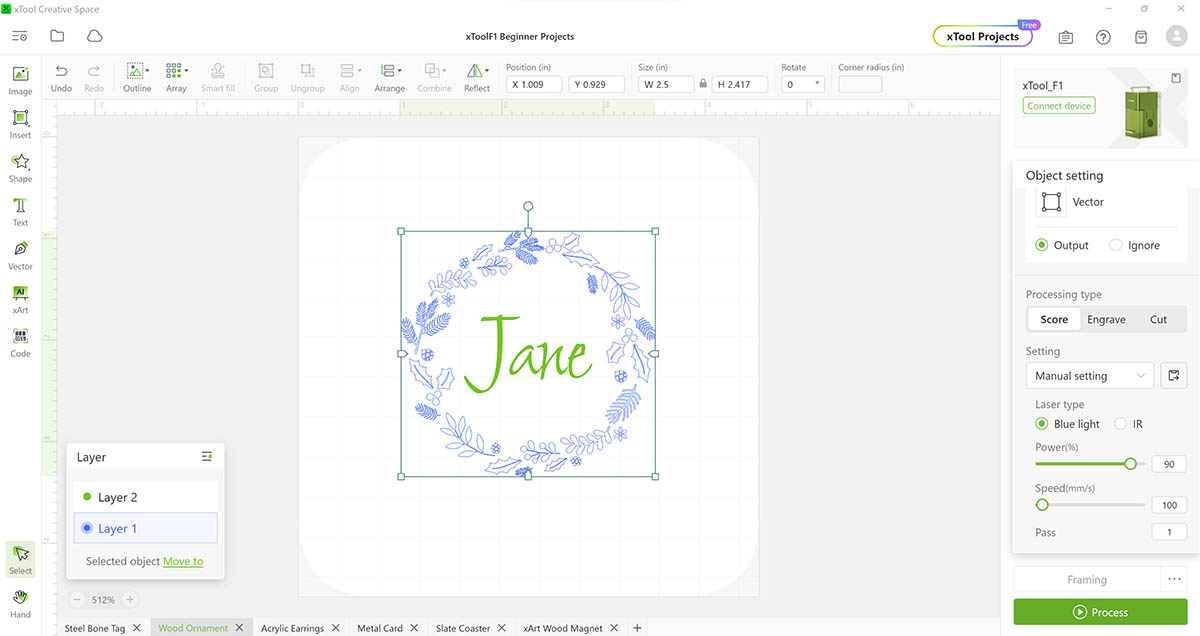
Next, I added my name with the Text tool, changed the font to Shalimar at 76pt size.

The position looked good so I went ahead and started the scoring/engraving.
The function completed so quickly (less than 2 minutes!).
Well have the tutorials for the other laser engraving craft ideas with the xTool F1 soon.
Now everywhere I look I see something that can be engraved!
Im looking forward to mastering the photo engraving function and doing some curved objects such as tumblers and rocks.
A few quick impressions:
Thank you to xTool for the opportunity to review the F1 portable laser engraver.

Were looking forward to using it for all sorts of upcoming projects and sharing them with you all.
Pin it for later!