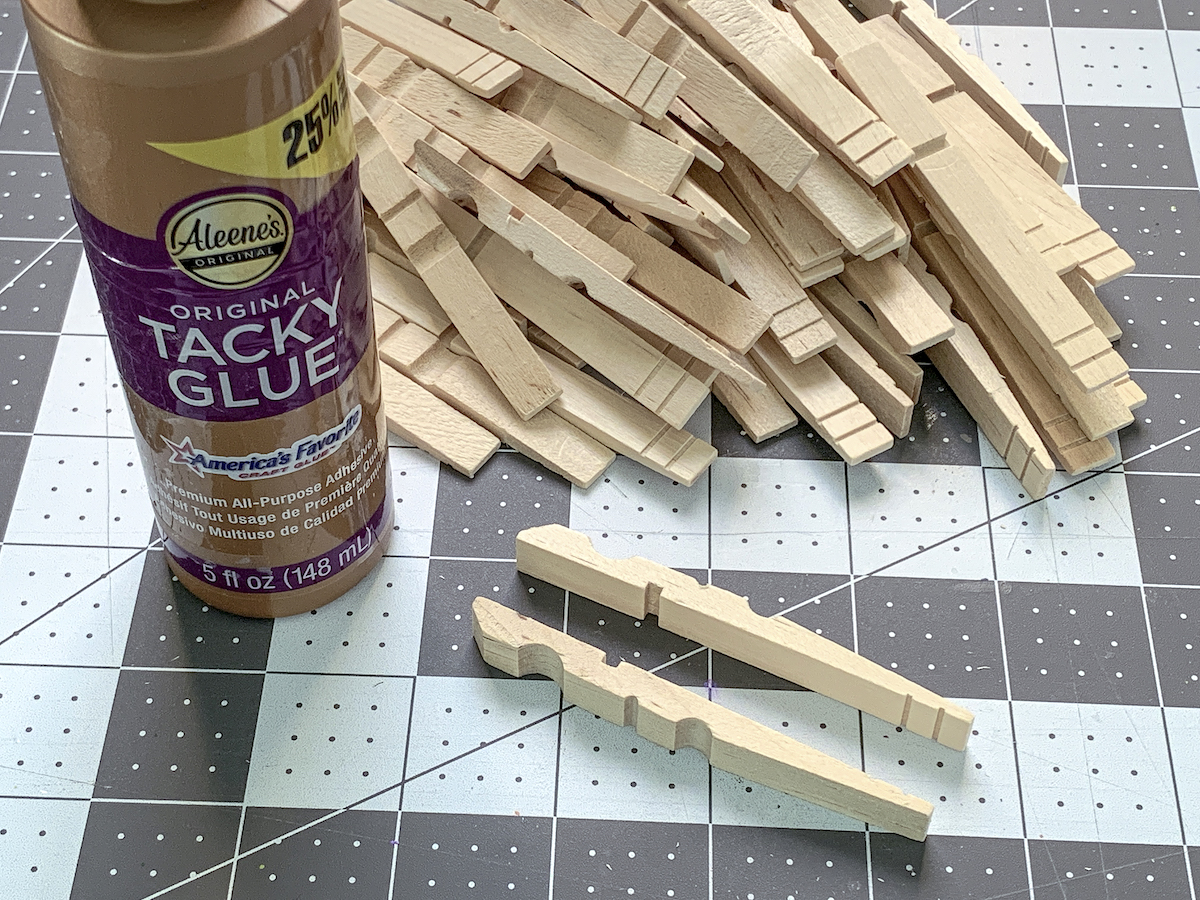
Learn how to make clothespin trivets with a few simple supplies!
These are easy and high heat resistant so you could use them with hot pots.
Skills Required: None.Even if youve never crafted before, you might easily make these with glue.

They are definitely a perfect craft idea for a beginner.
Im so excited to share this clothespin trivet DIY with you today!
Because we did a lot of testing on this particularkitchen craftto ensure that it could withstandhigh heat temperatures.
And Im excited to share my results with you!
If this is your firstclothespin craft, get excited its really fun making things with clothespins.
At first I made theseclothespin butterfliesand then had enough pins leftover to make thisclothespin napkin holder.

Once you start crafting with these fun wood pins, youre not going to stop.
Anyway, our first iteration of clothespin trivets was a flop.
Im going to show you how to do it below!
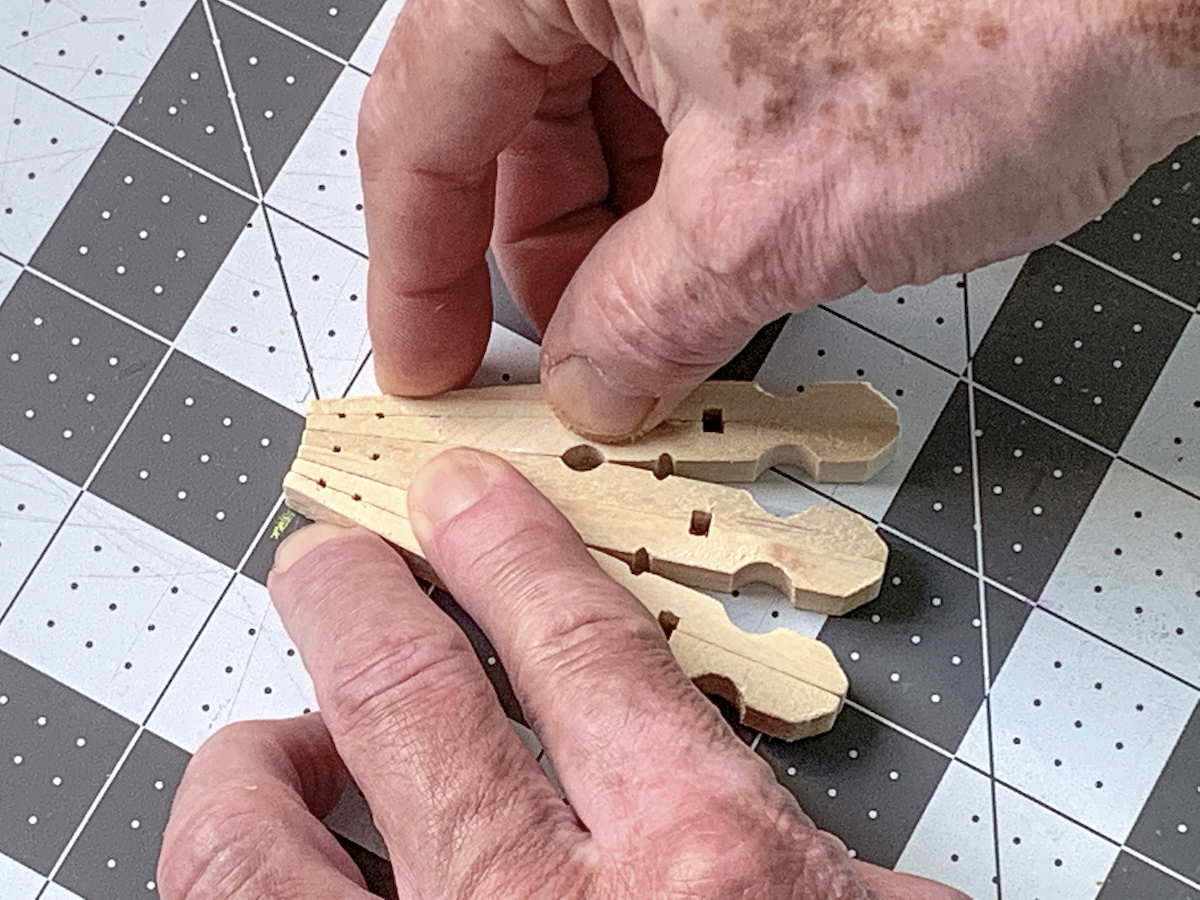
Begin by twisting the two half of the clothespin and removing one side.
Then youll easily be able to remove the clip from the other half.
Do this with 32 clothespins.
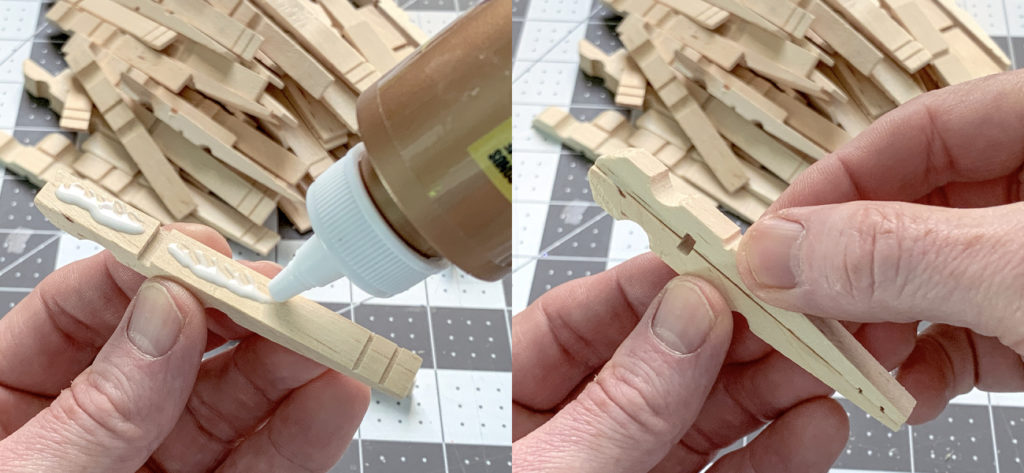
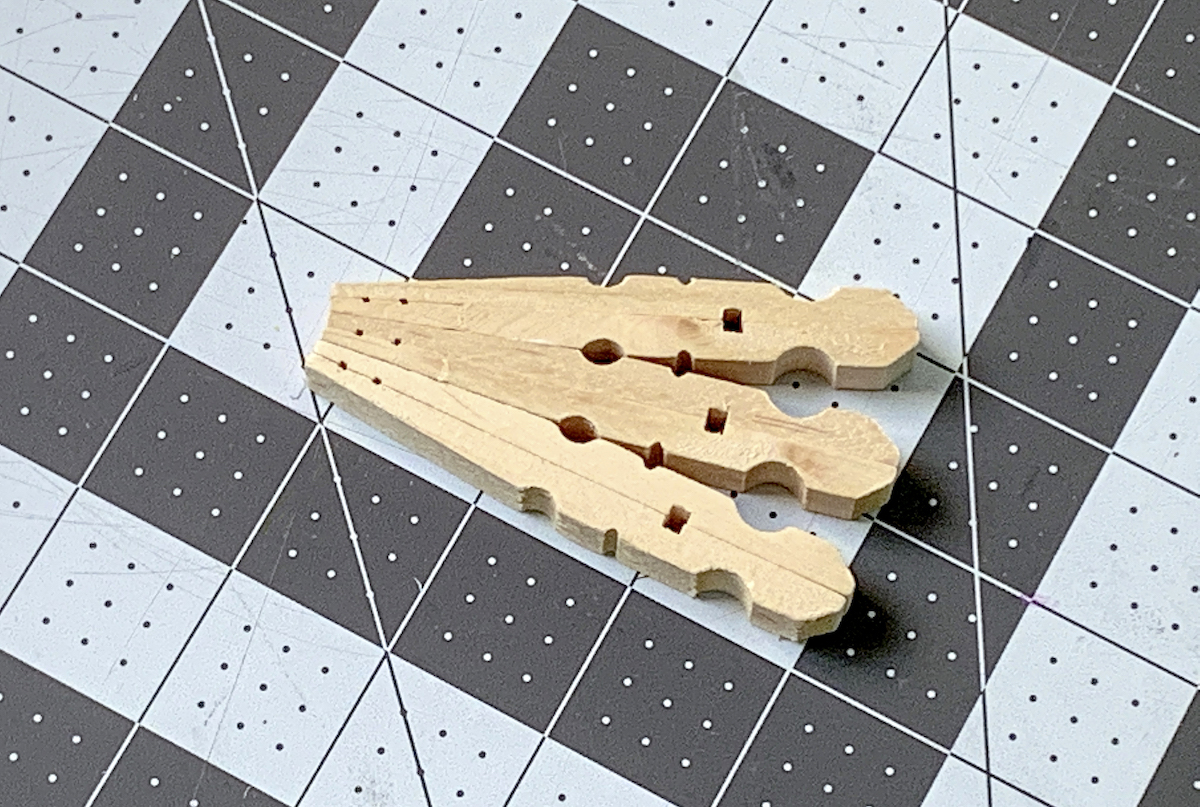
Youll start by gluing the flat sides of clothespins.
Youll need 32 of these pairs, which are 32 clothespin halves.
Hold and let dry.
Repeat with the other clothespins and let them all dry.
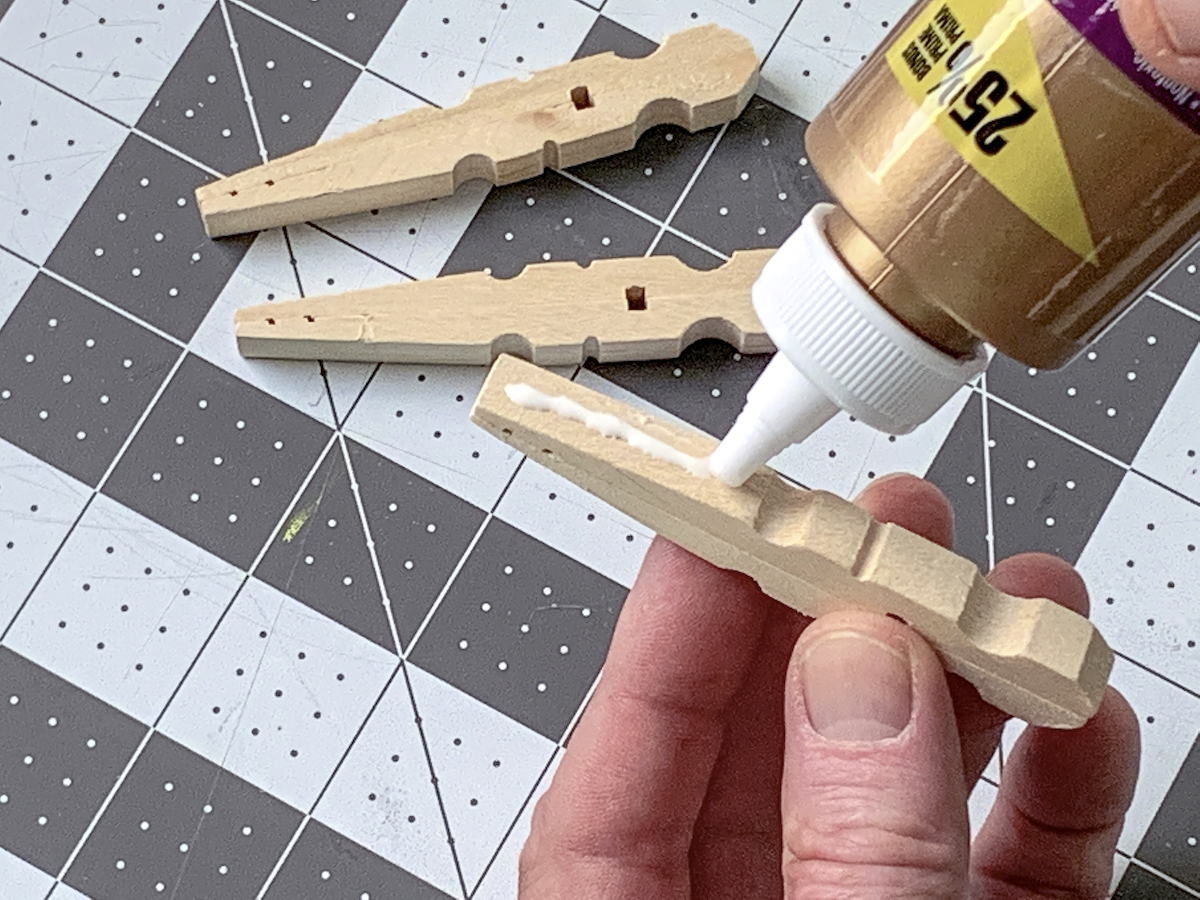
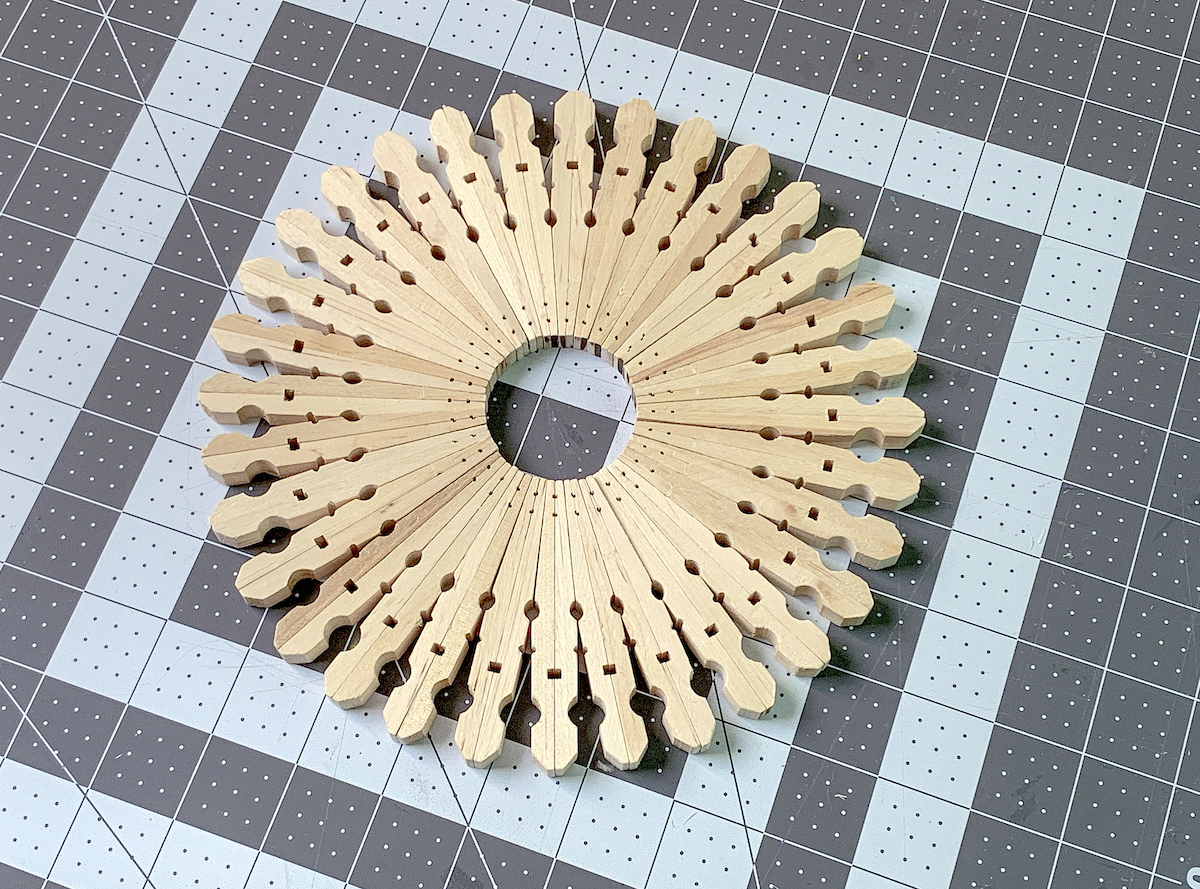
Create Your Design
Now youre going to create the design.
Place glue on the side of a clothespin, and then sandwich another clothespin to it .
then hold then together to let them set.
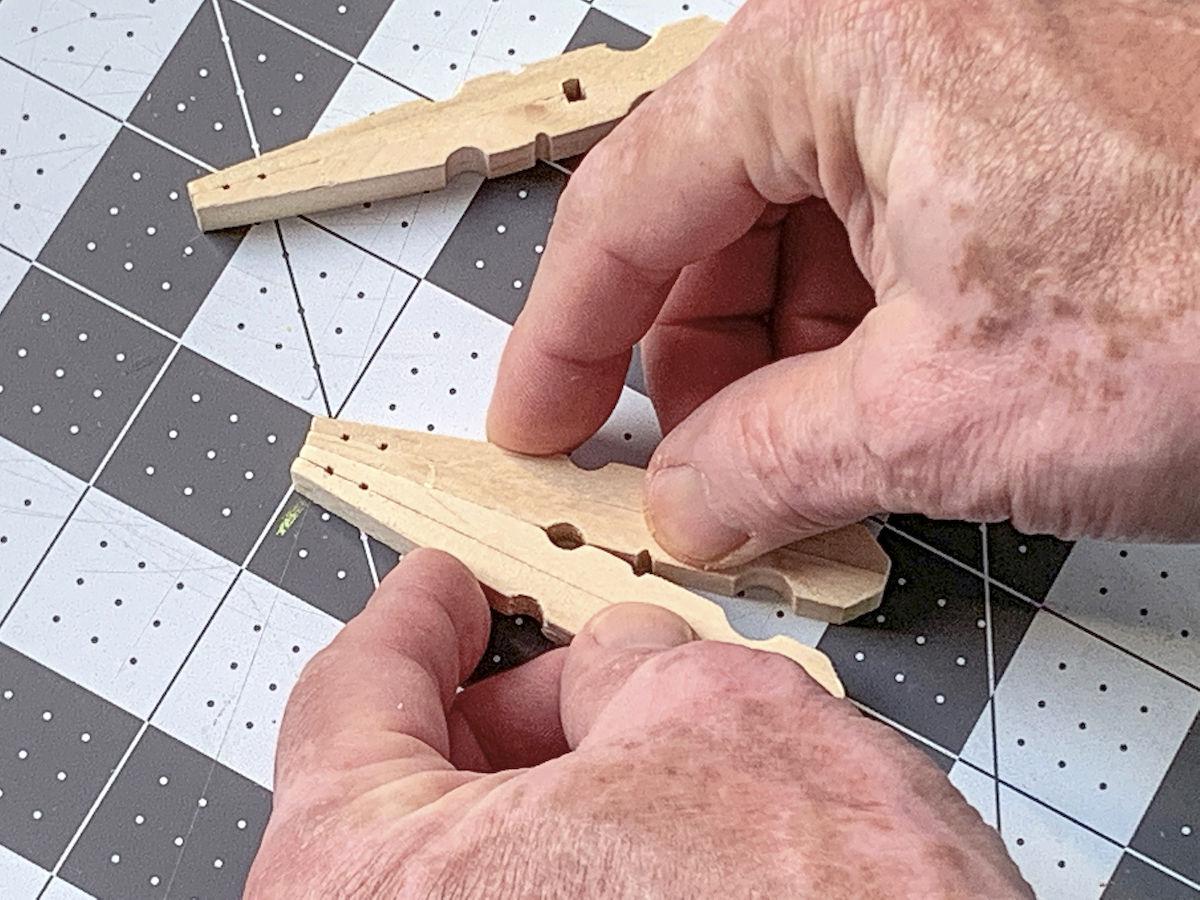
Continue working your way around the circle, gluing clothespins together and holding.
Youre going to continue working around the imaginary circle in the middle, gluing clothespins to make your trivet.
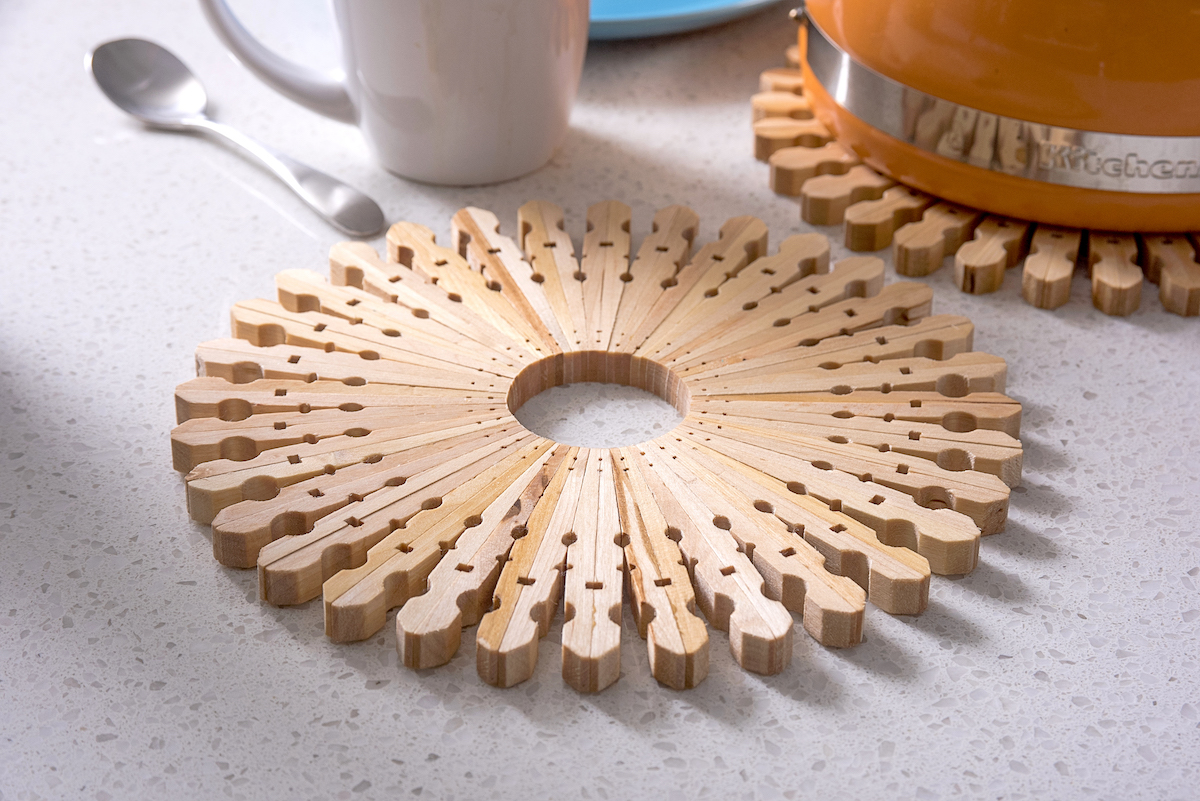
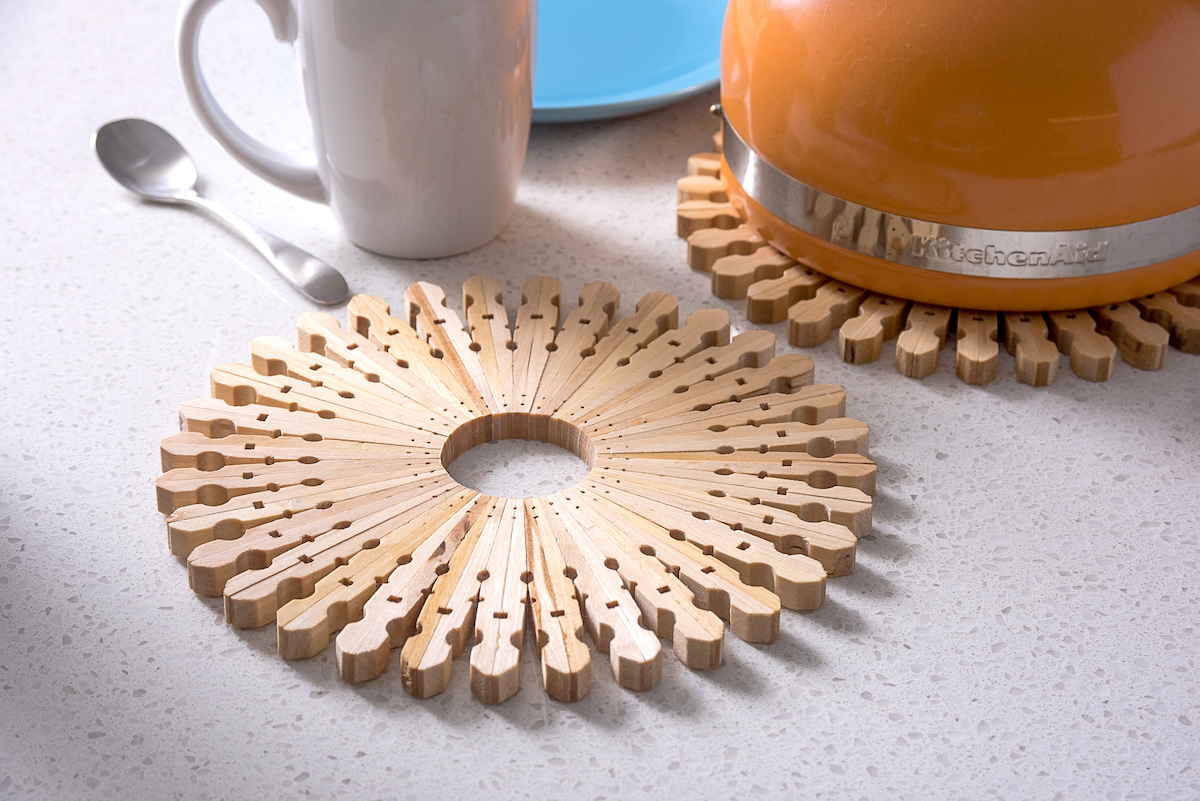
Once you finish, your trivet should look like this, and you should let it dry completely.
I actually made two of these bad boys!
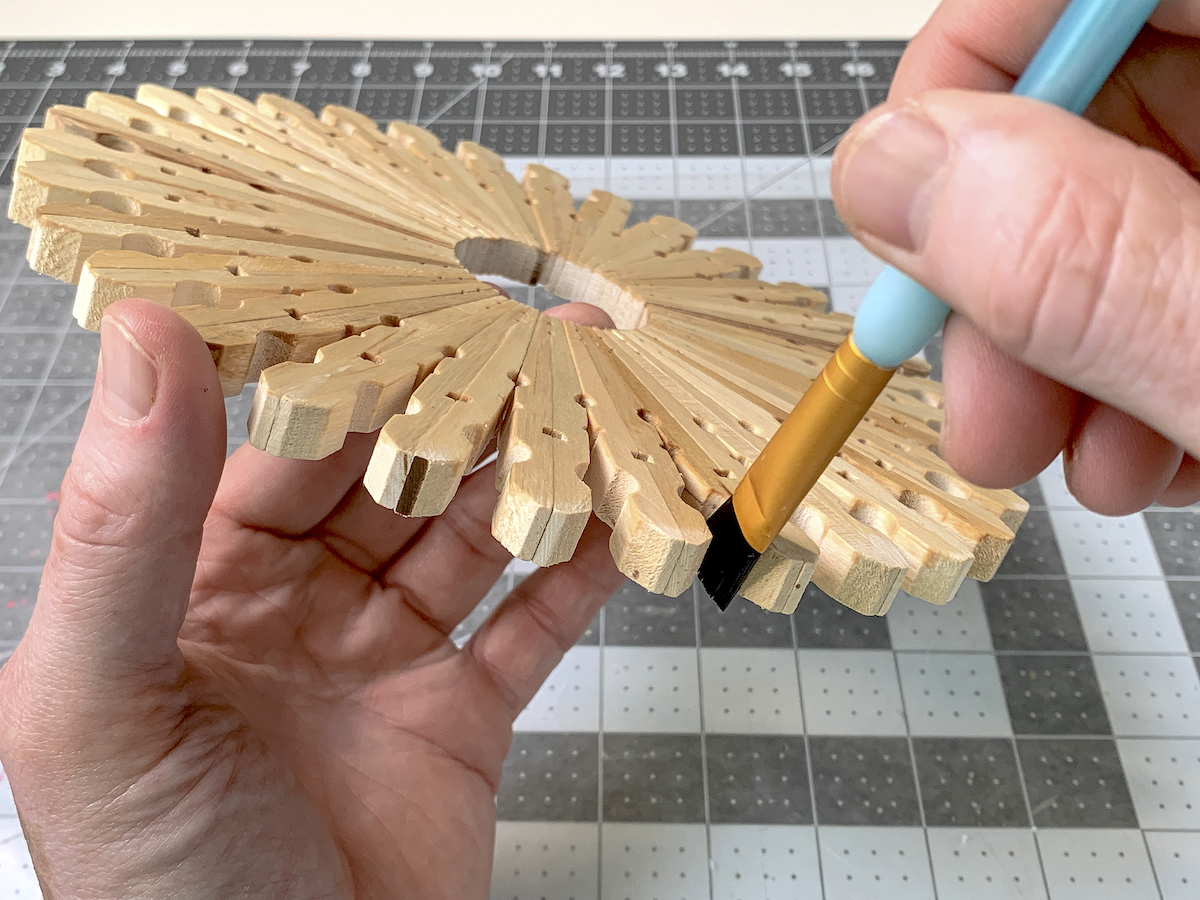
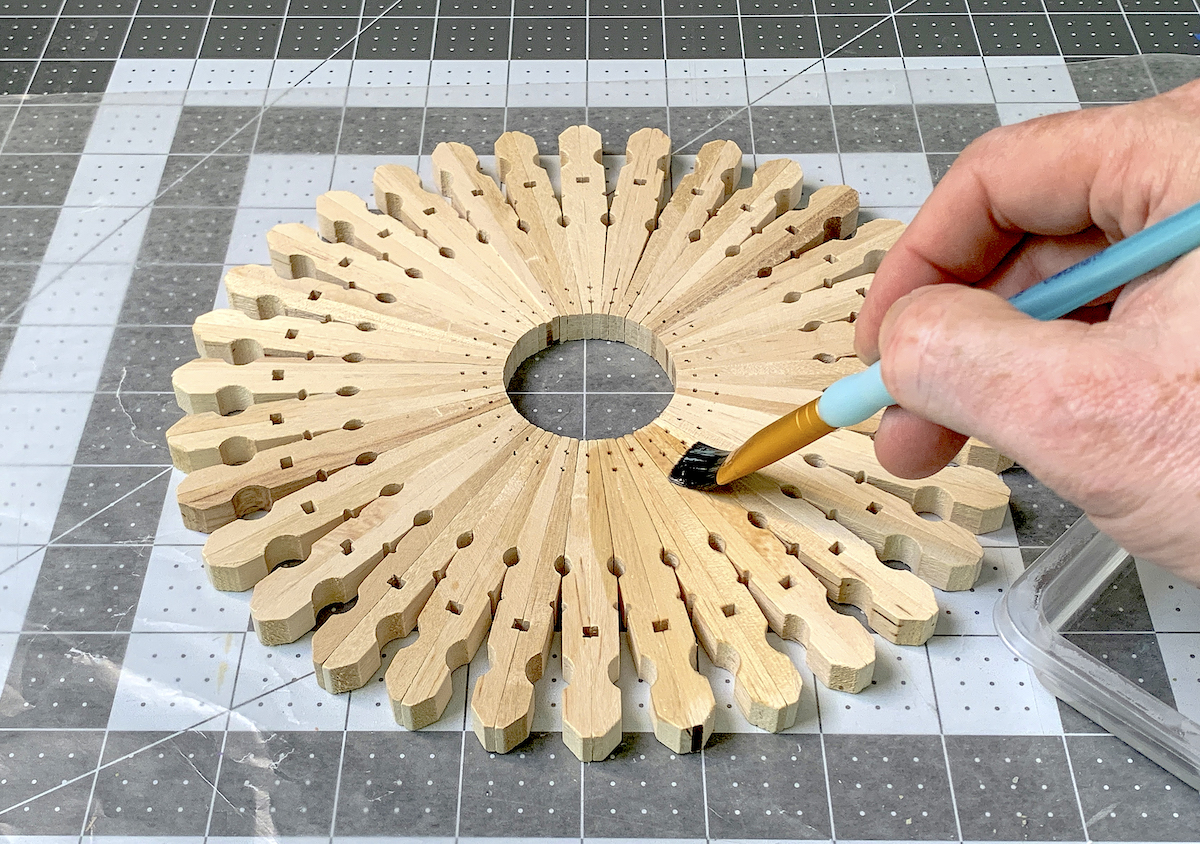
Sealing the Trivet
Now heres the part thats fun and easy.
Youre going to seal your trivet with some cutting board oil!
This will keep it from cracking when hot temperatures are constantly applied.
Add the oil to a small container, then use a paintbrush to apply over the entire top surface.
Get in the nooks and crannies with a paintbrush a smaller paintbrush makes it easier.
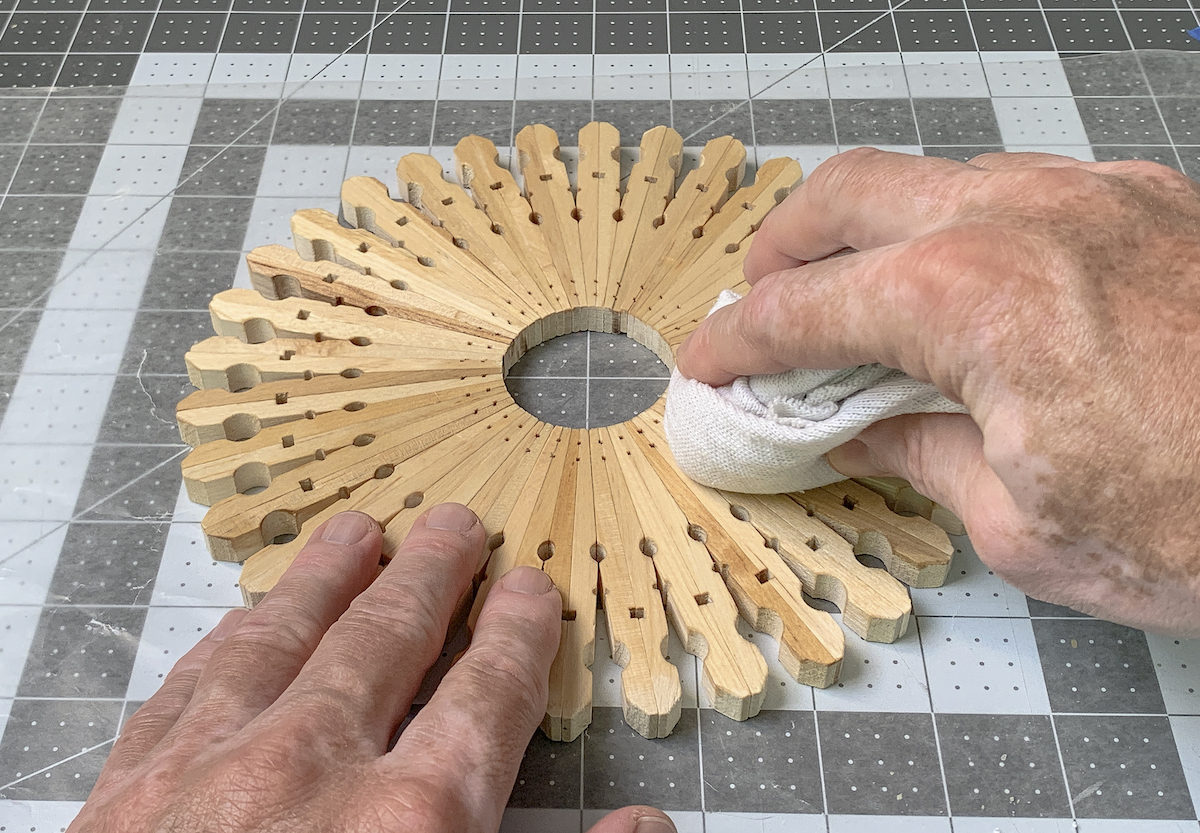
Repeat two more times for a total of three coats of cutting board oil on your DIY trivet.
Let it soak for a couple hours, remove excess and let it dry for a couple DAYS!

No need to re-coat a second time; its protected.
Guess what, my friends?
Your trivet(s) are ready to accept hot dishes!
Just like a tile trivet.
Plus the natural wood looks so nice, especially when accented with the oil.
Id also love for you to take a peek at these other awesome ideas: