Today were joining in a fun new monthly challenge which inspires us to make crafts using our Cricut machine.
This months theme is FLOWERS!
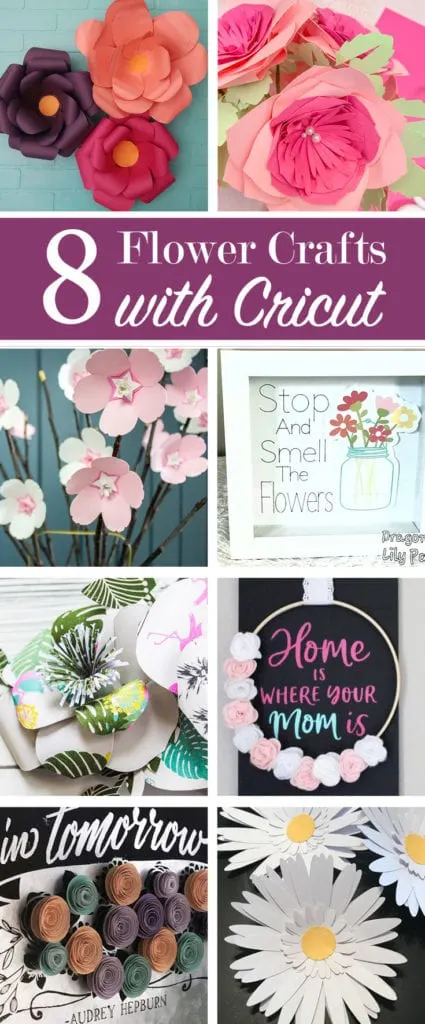
Be sure to check out7 additional flower crafts using Cricutat the end of this post.

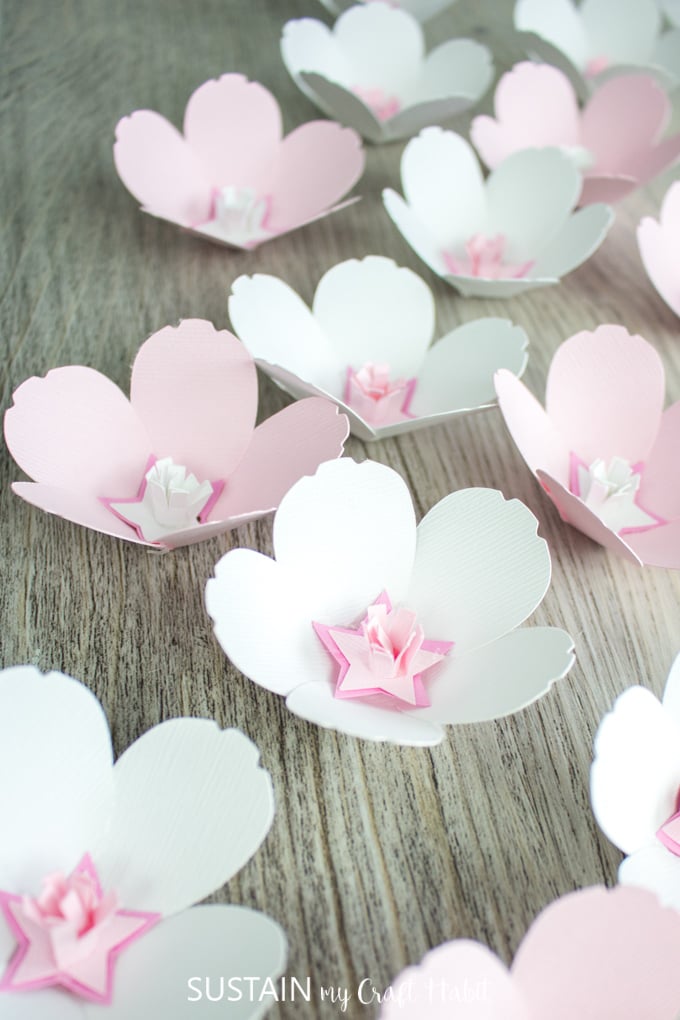
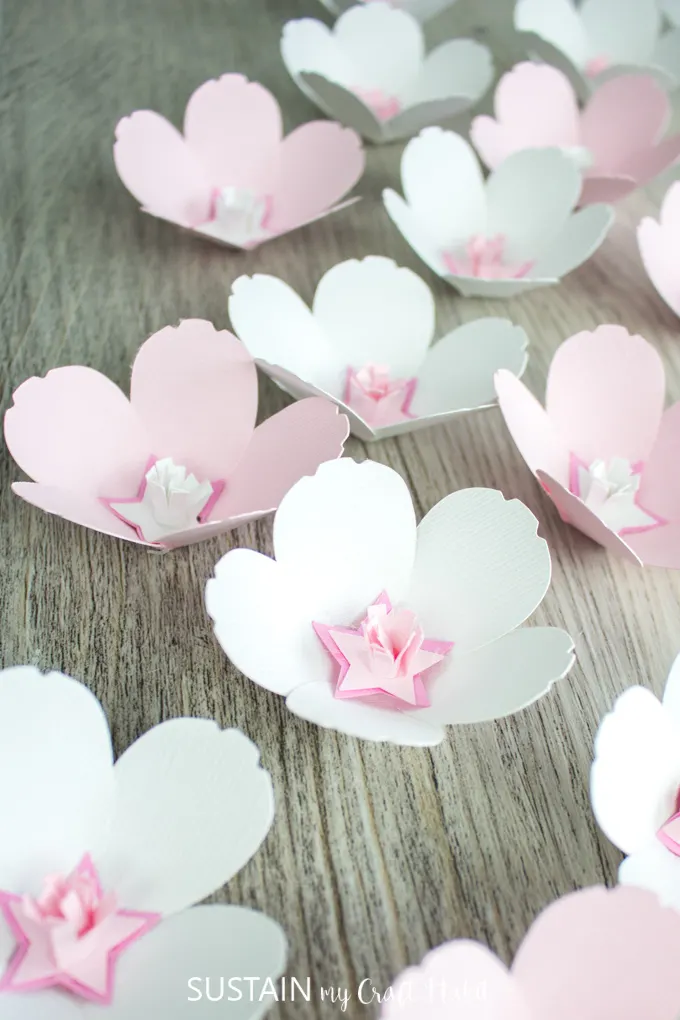
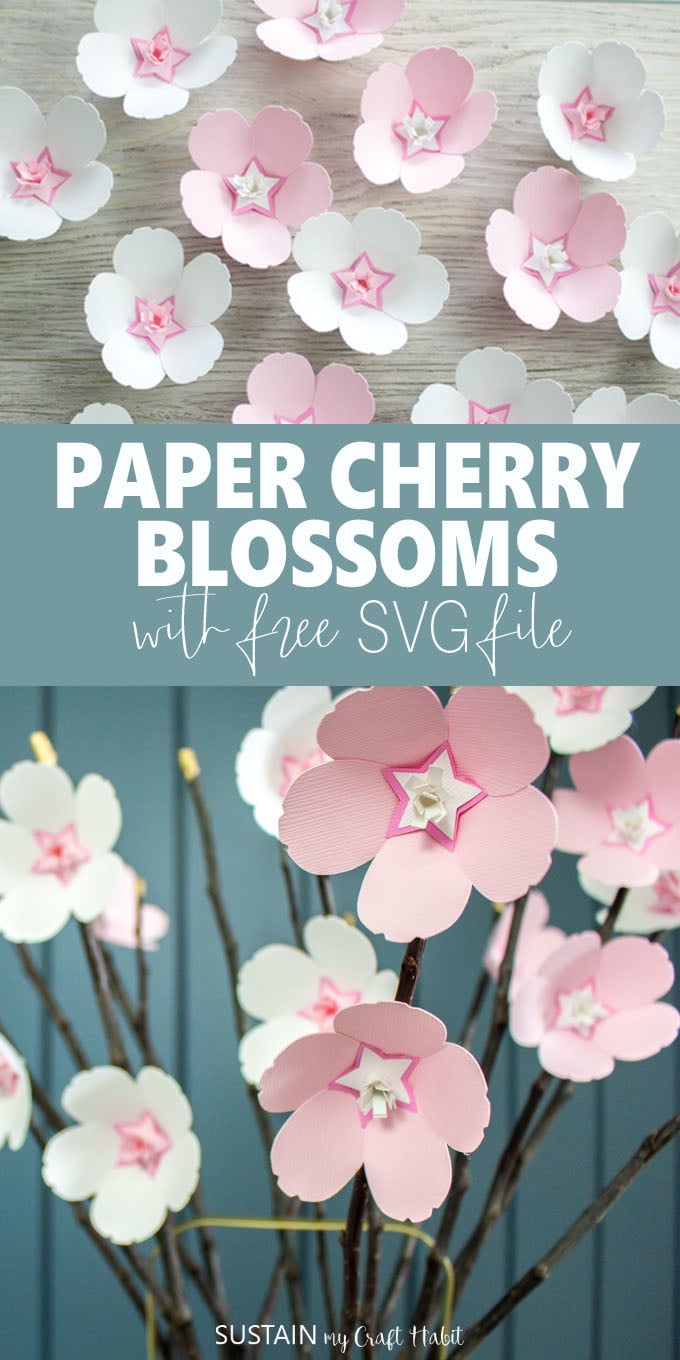
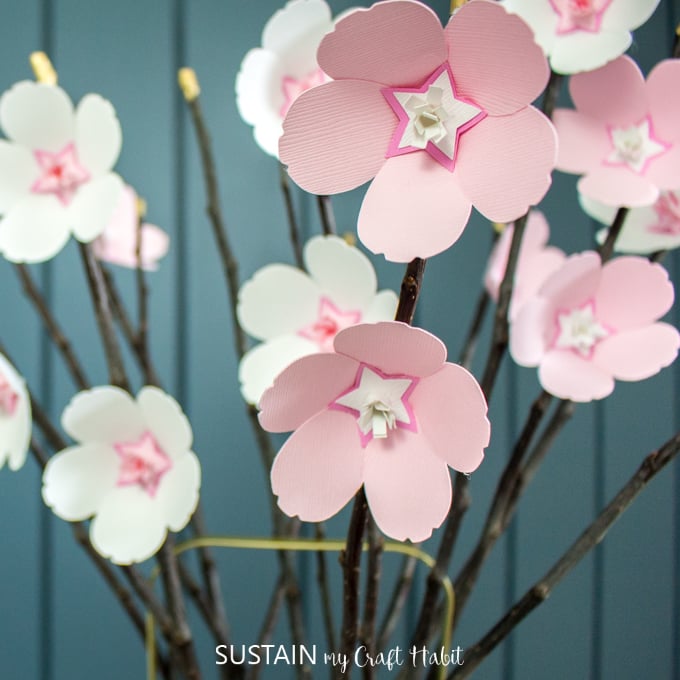
Cricut cut cherry blossom flowers
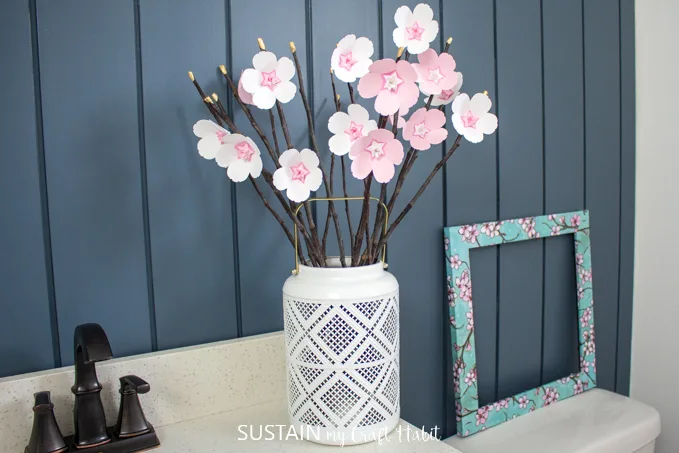
A Sweet Cherry Blossom Paper Flower Centerpiece
Cherry blossoms are one of our favorite signs of Spring.
We even made this cherry blossompainted mug!
The peacefulness and beauty of those blooms lined up along a serene walking trail makes the effort all worthwhile.
We also have theseawesome paper crafts for teensto explore!
Whether large or small, paper flowers seem to be everywhere!
We even madethese paper daffodilsand created a bunch ofgorgeous giant paper flowersfor a party we hosted last week.
Also, this post contains affiliate links for your shopping convenience.
you’re able to readour full disclosure statement here.
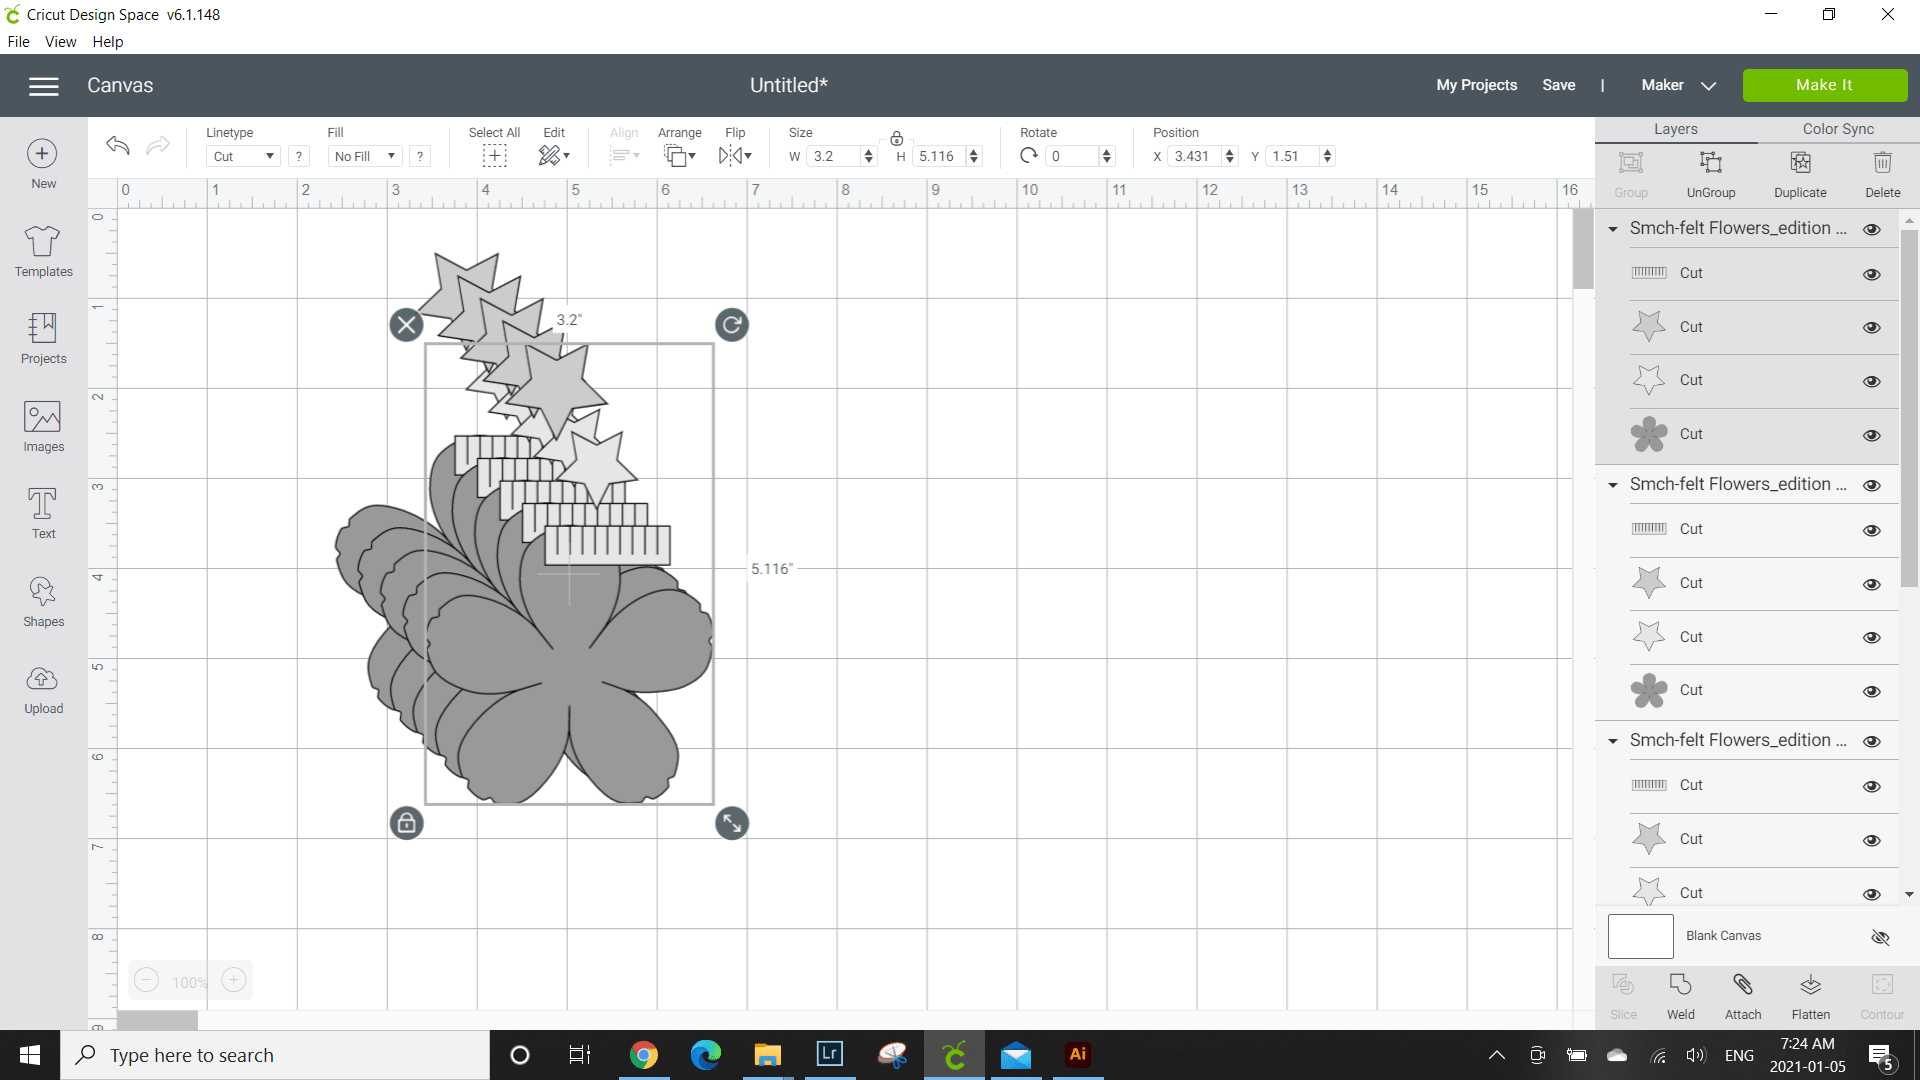
Decide on the number of cherry blossom blooms you want to make andduplicatethe pattern accordingly.

tap on the grouped pattern pieces and selectungroupto separate each pattern piece.
Change the colors of the cherry blossom pieces to match your paper color if desired.
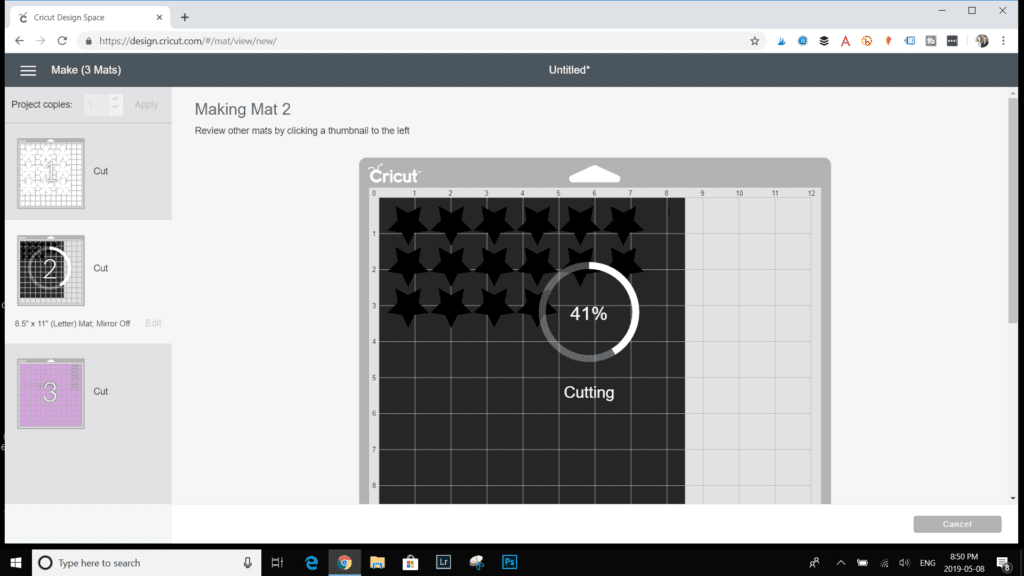
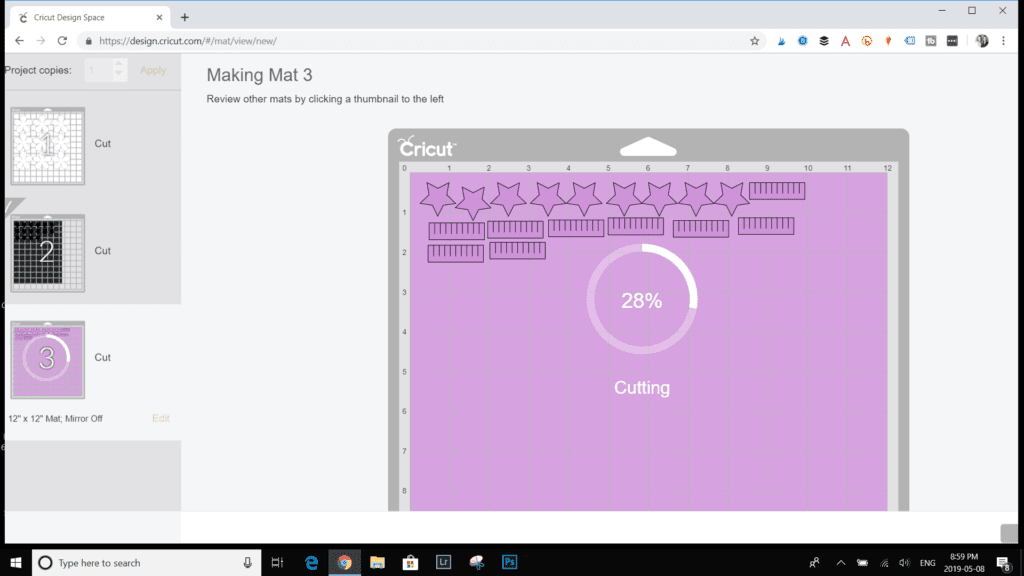
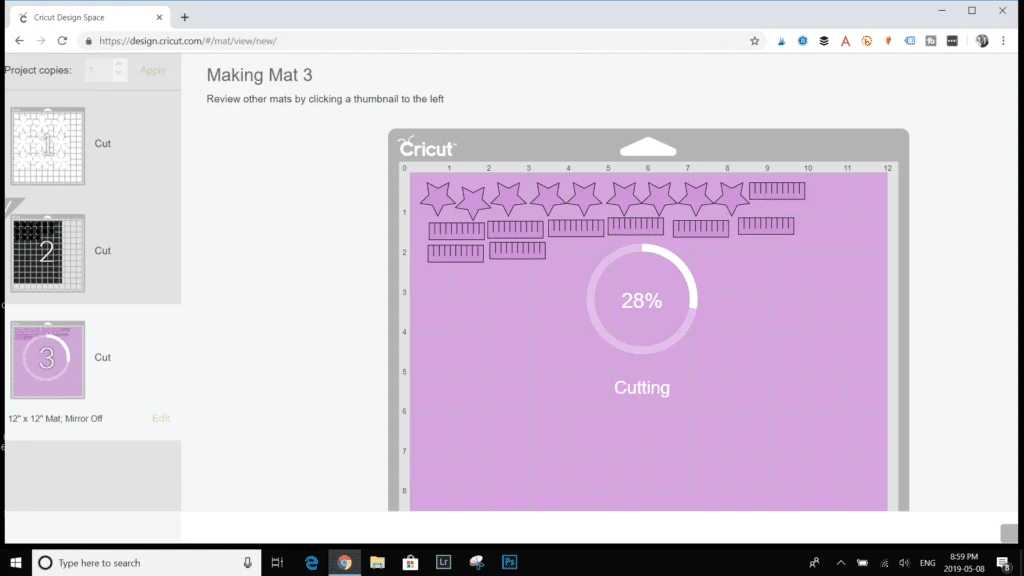
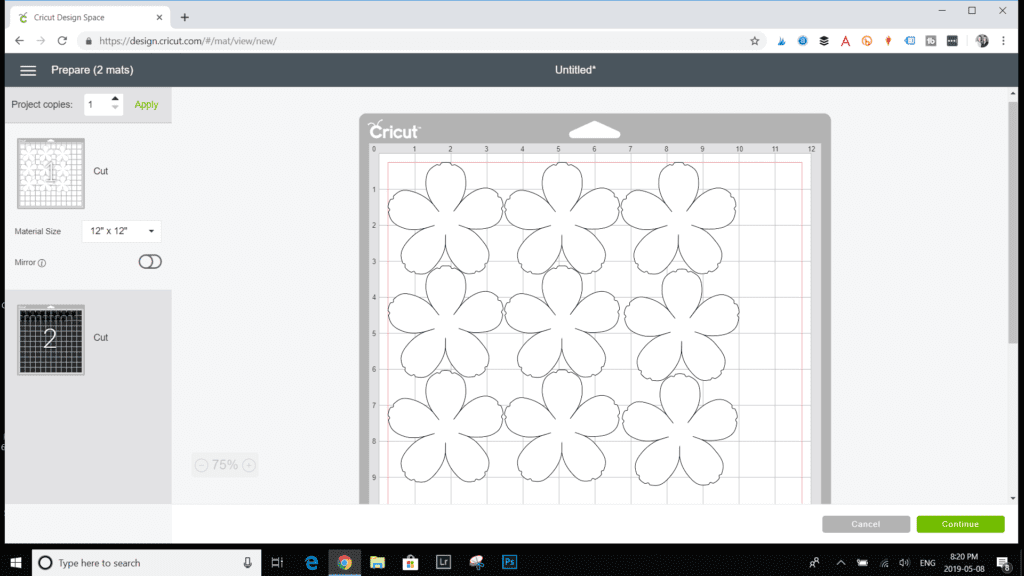
This takes you to an image of the cutting mat with the placed pattern pieces.
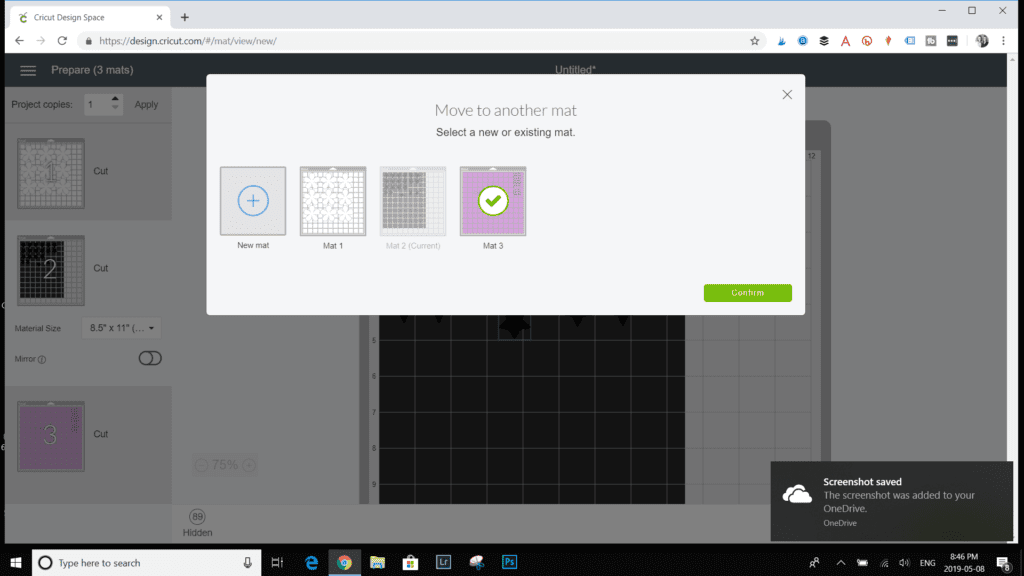
Each mat represents the cardstock paper color you plan to cut the pattern out on.
Rearrange the pieces so that the petal pieces are on mat 1 (color A).
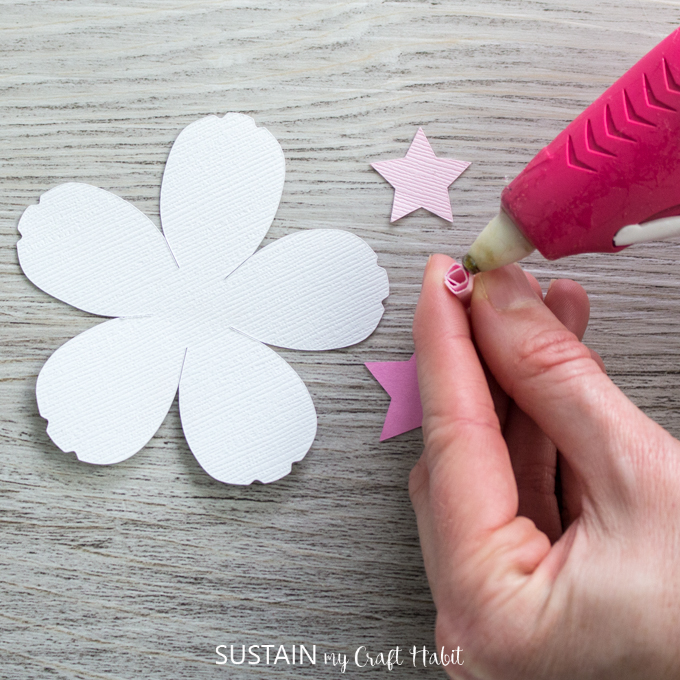
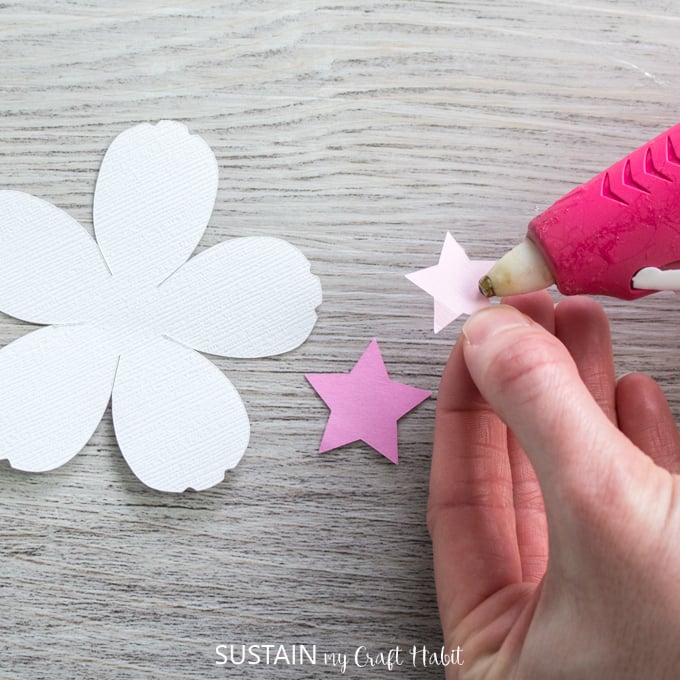
Keep the larger star pieces are on mat 2 (color B).

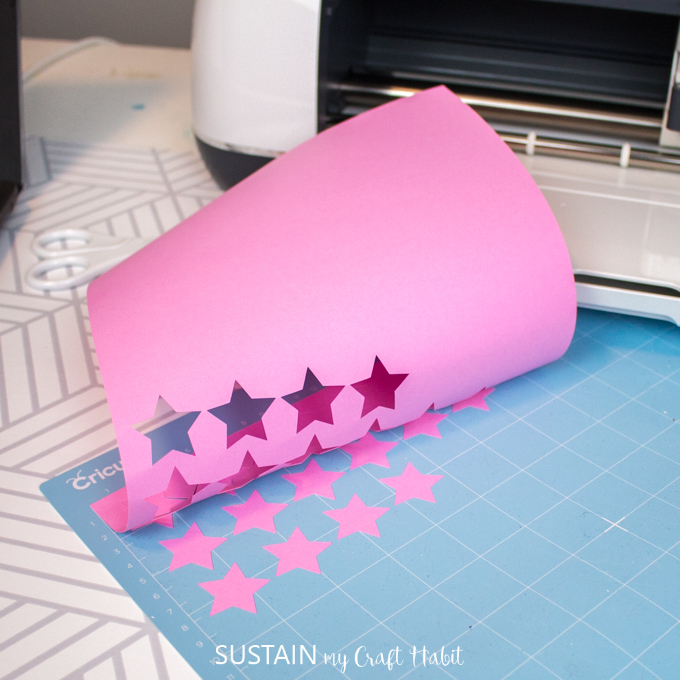
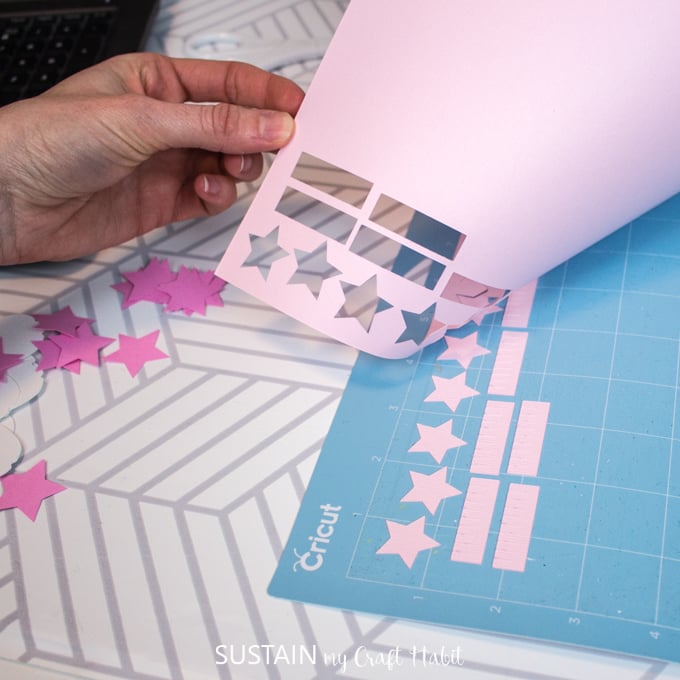
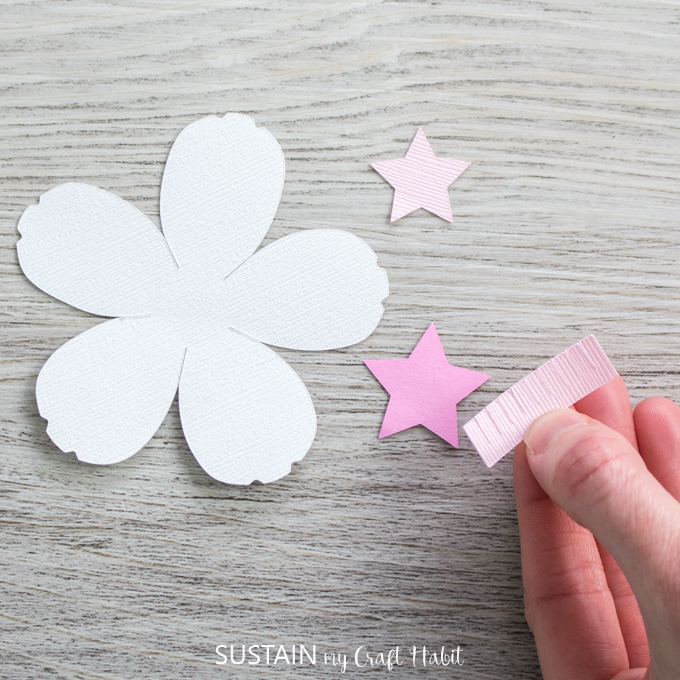
And lastly, move the smaller star and rectangular pieces to mat 3 (color C).
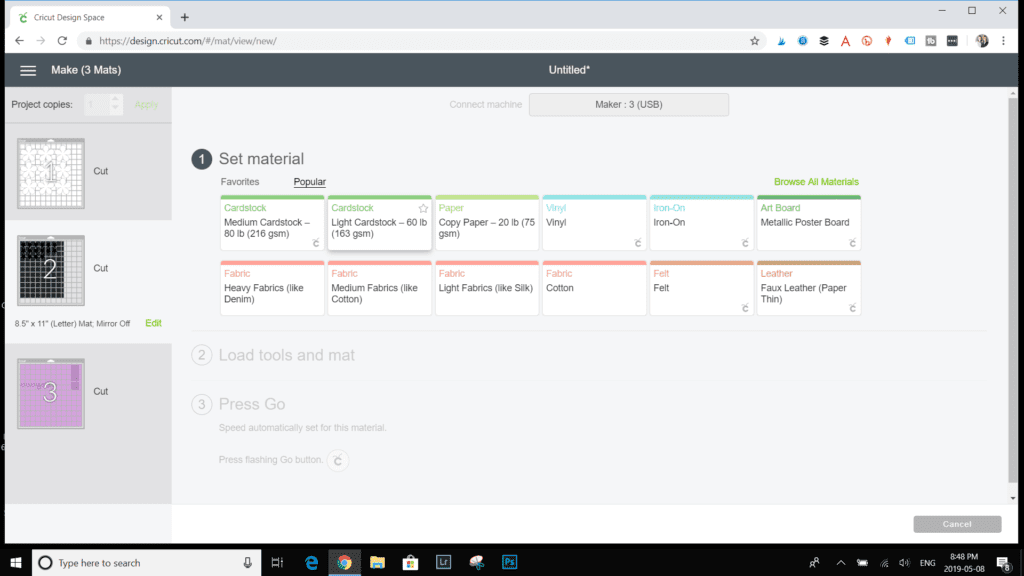
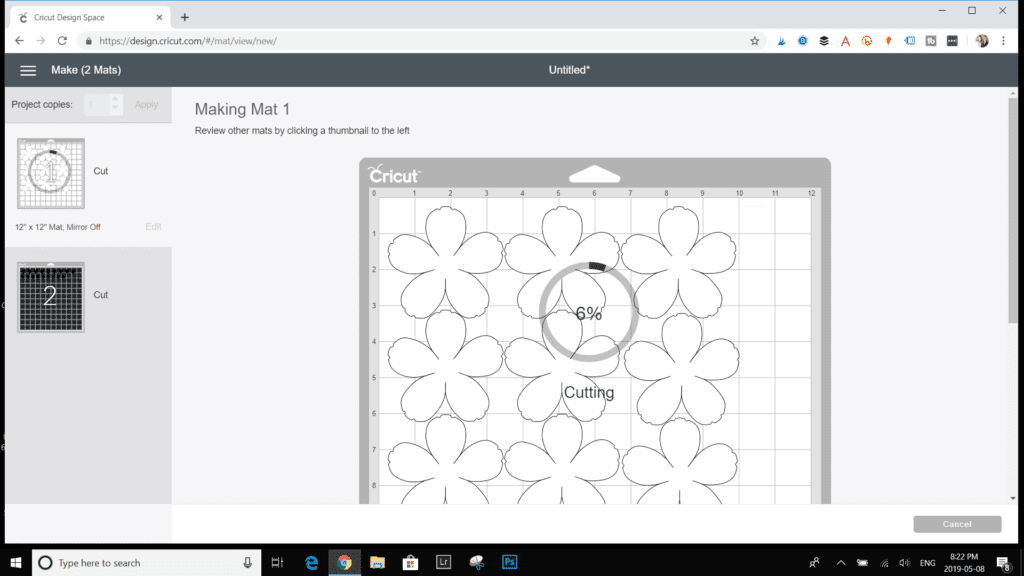
The Cricut will quickly and precisely out all the pieces on the mat.
When its down, it will prompt you to unload mat.

Remove the paper from the cutting mat avoiding contact with the surface of the mat.
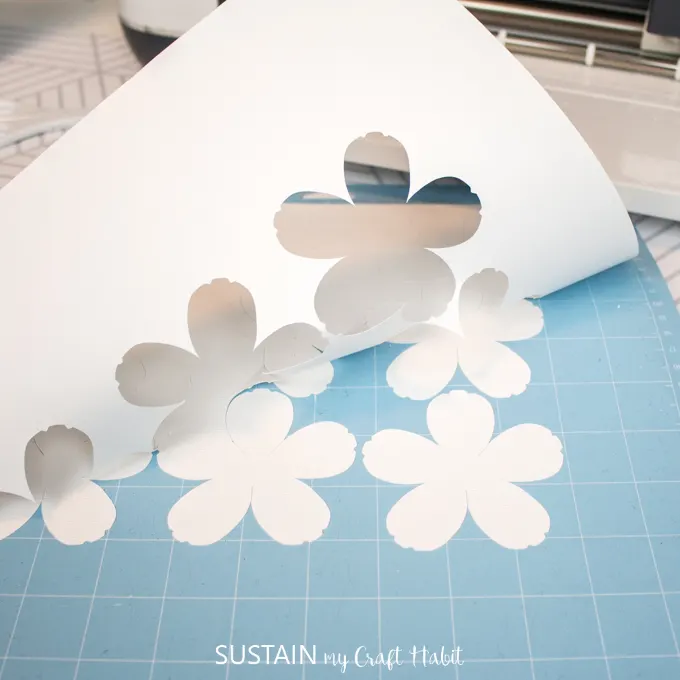
Put all the cut petals aside.
Remove the paper and cut pieces from the mat.

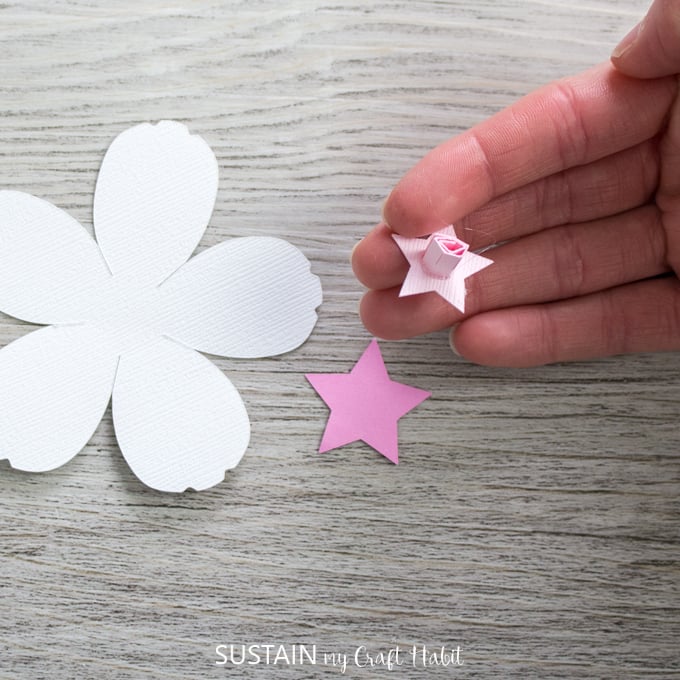
Put the star shapes aside.
Repeat with the third and final mat.
Remove the cut pieces from the mat to complete all your cherry blossom flower pieces.

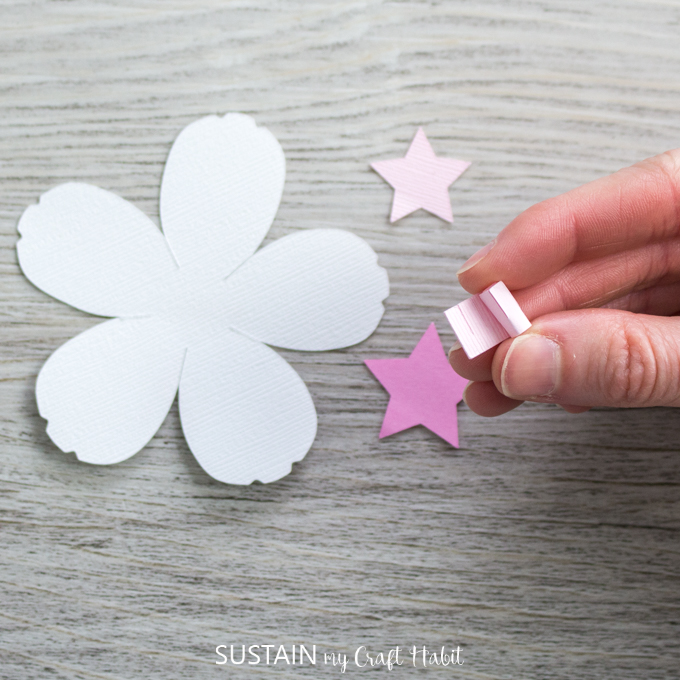
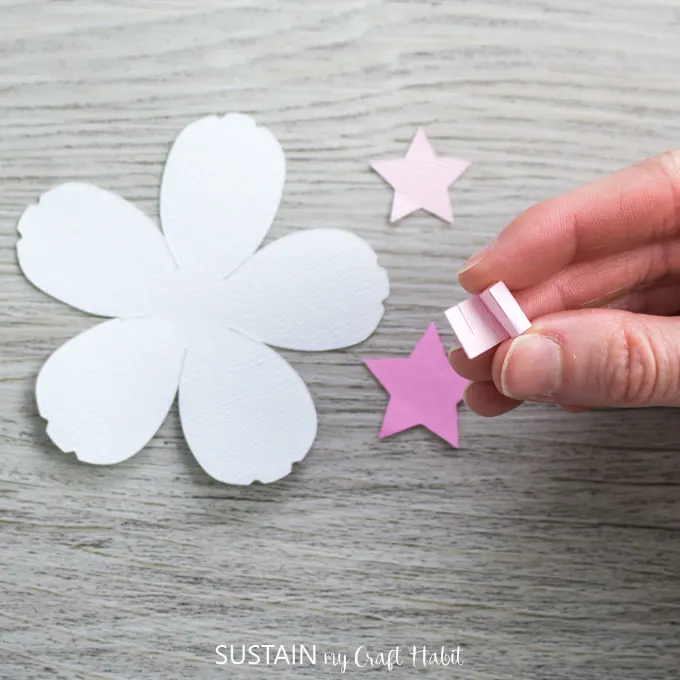
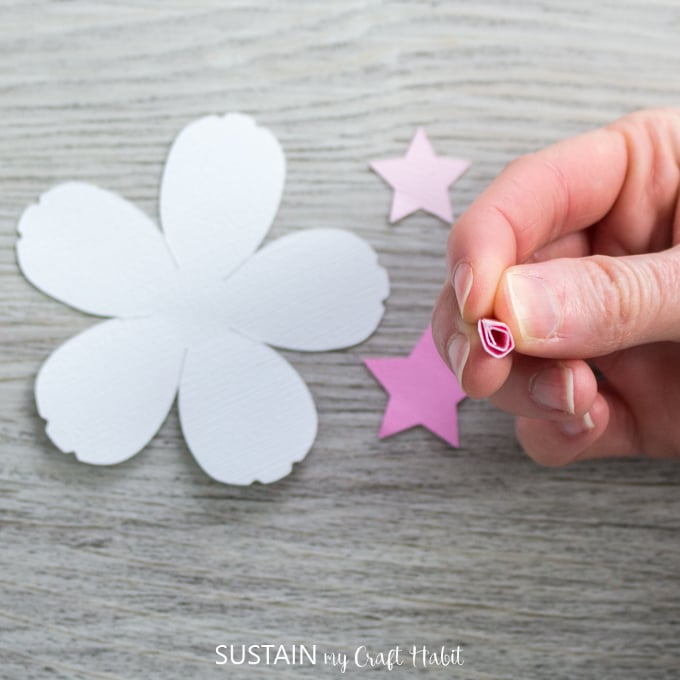
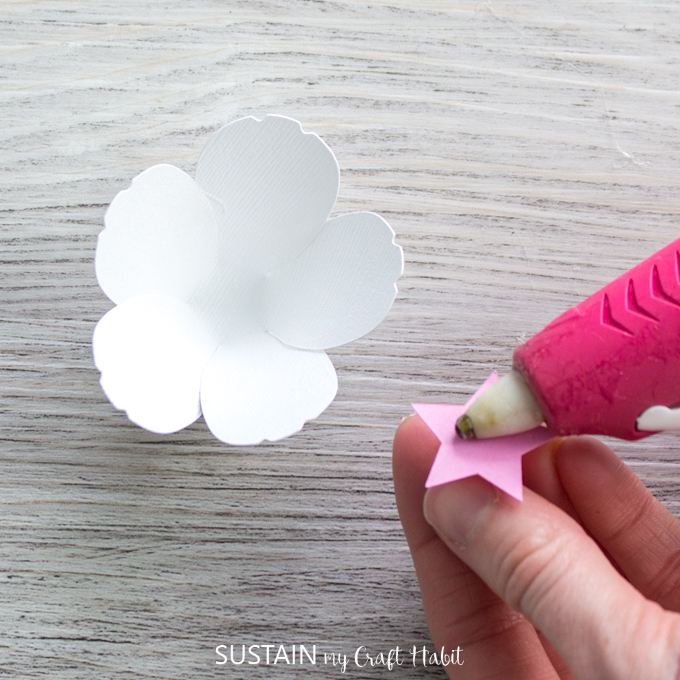
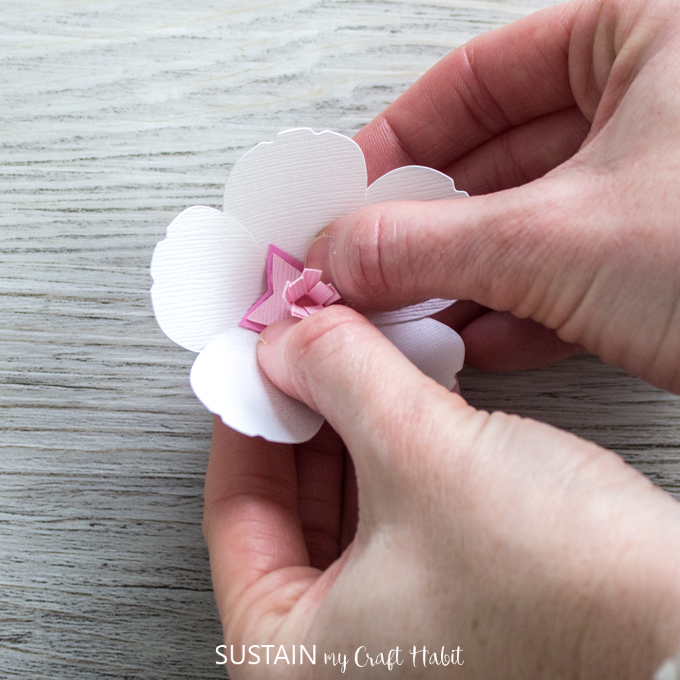
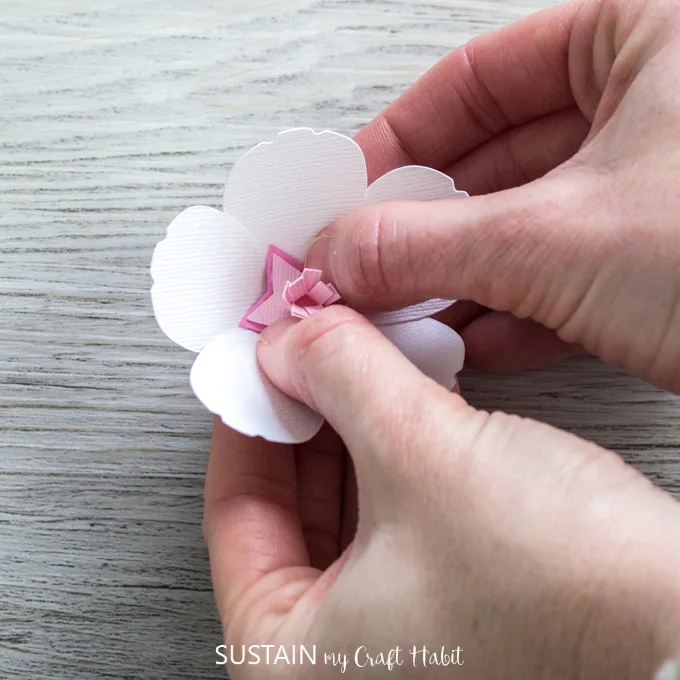
Take the cut rectangular piece and roll it crosswise until you have a small rolled up tube.
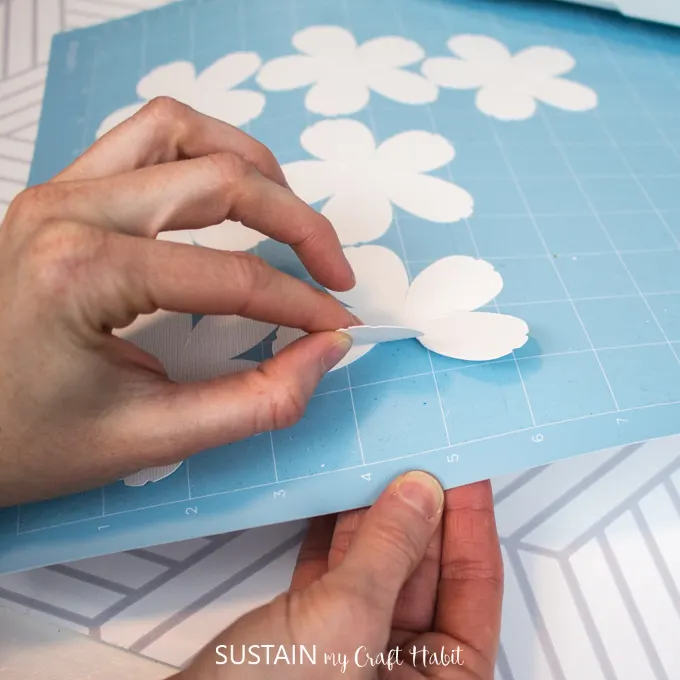
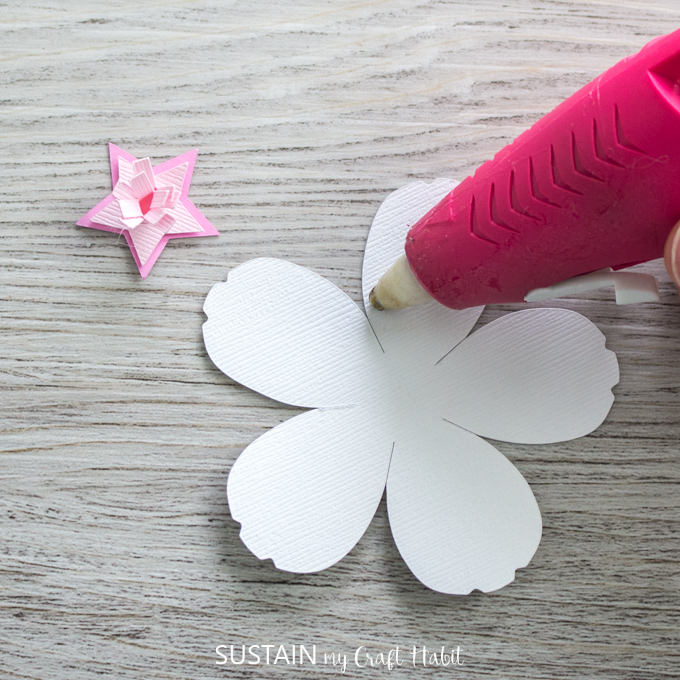
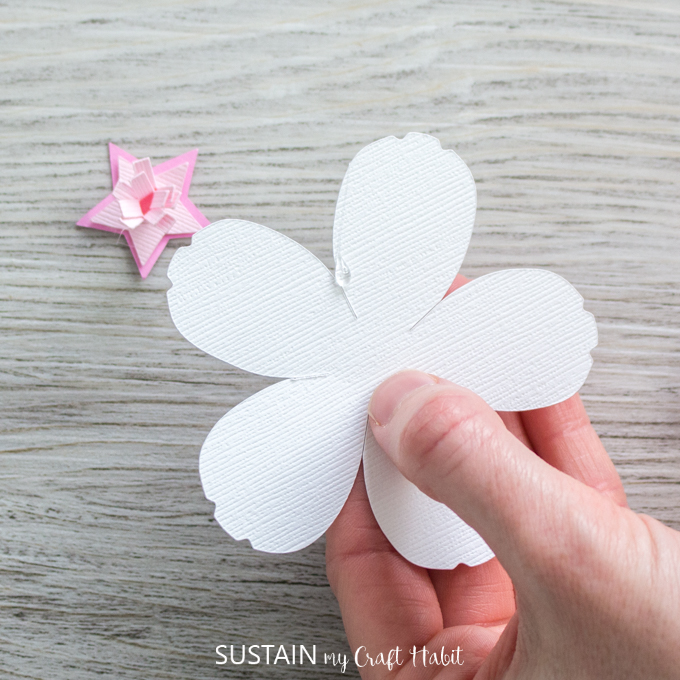
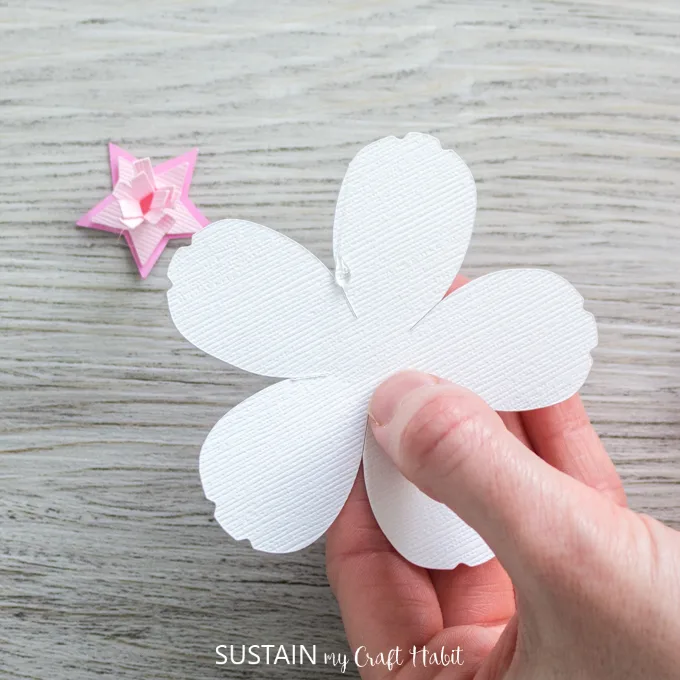
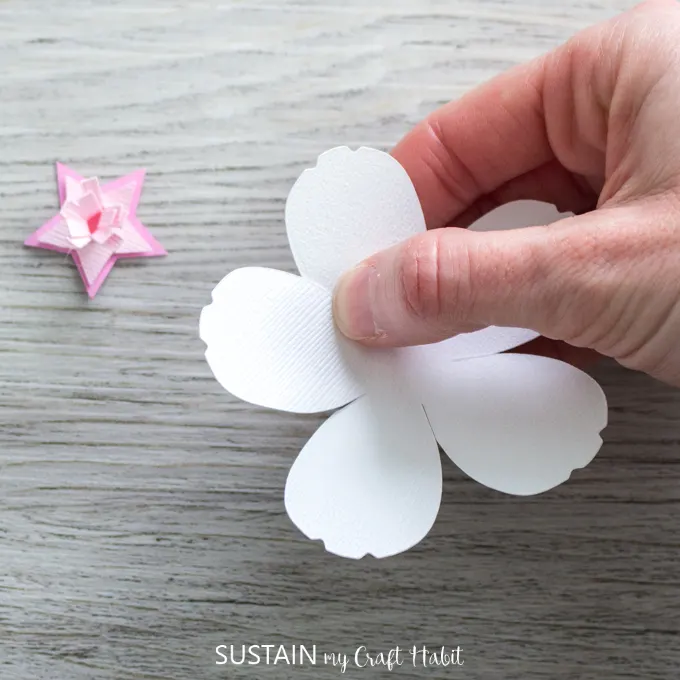
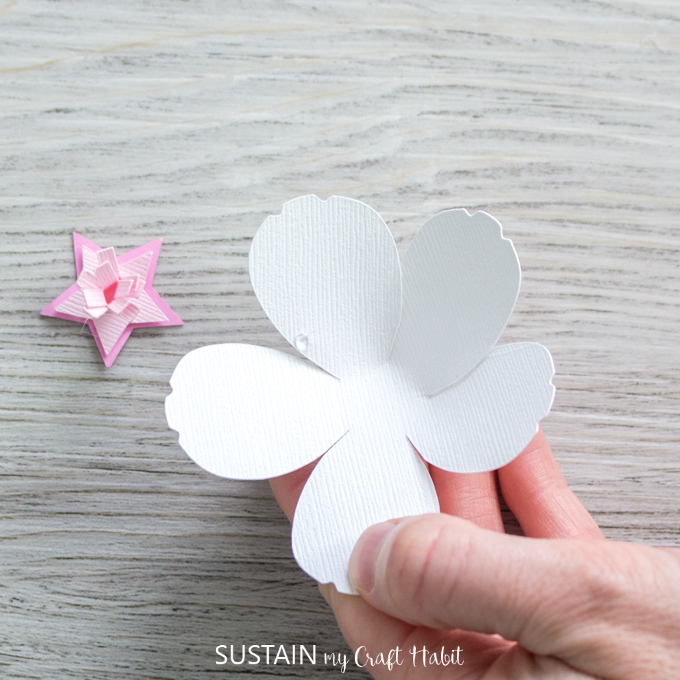
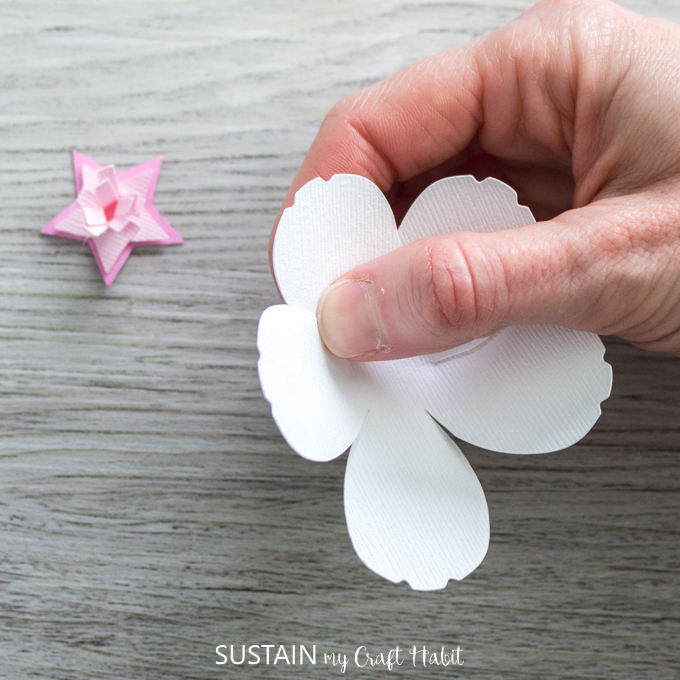
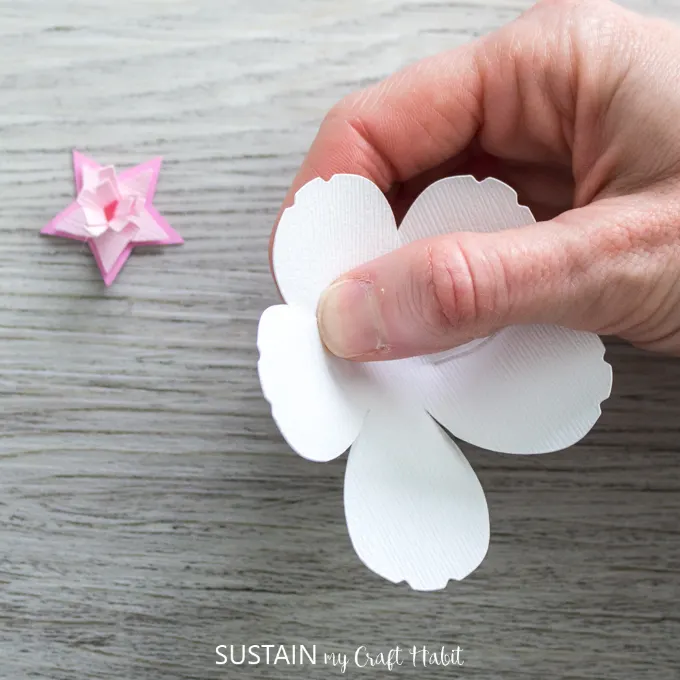
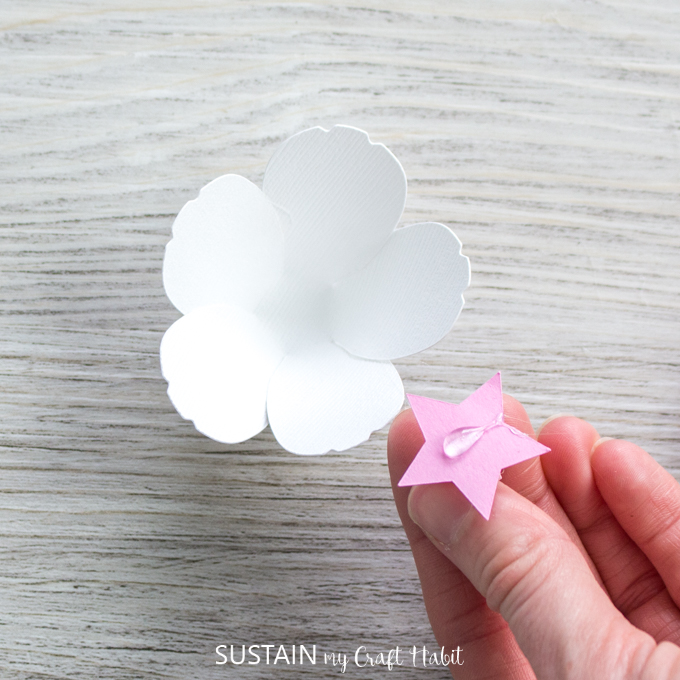
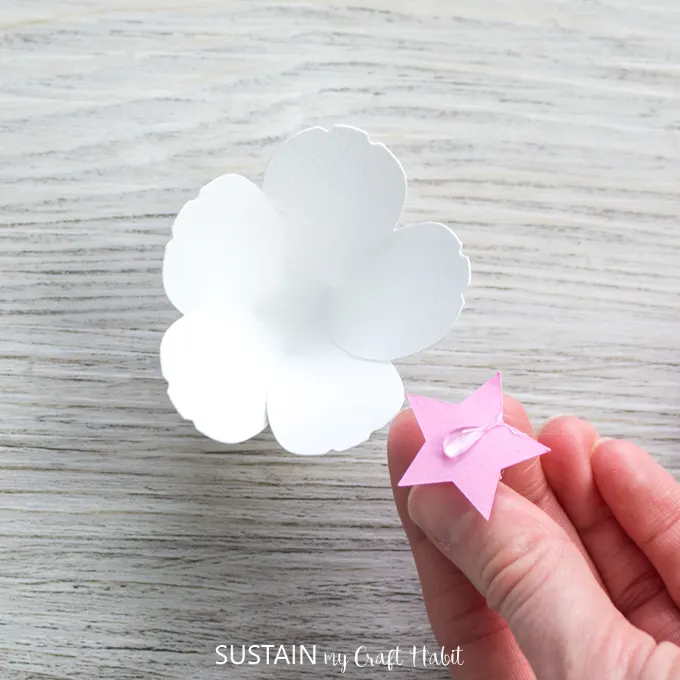
Take the flower petal piece and begin gluing the petals together.
Continue this method all the way around until all petals are glued in place.
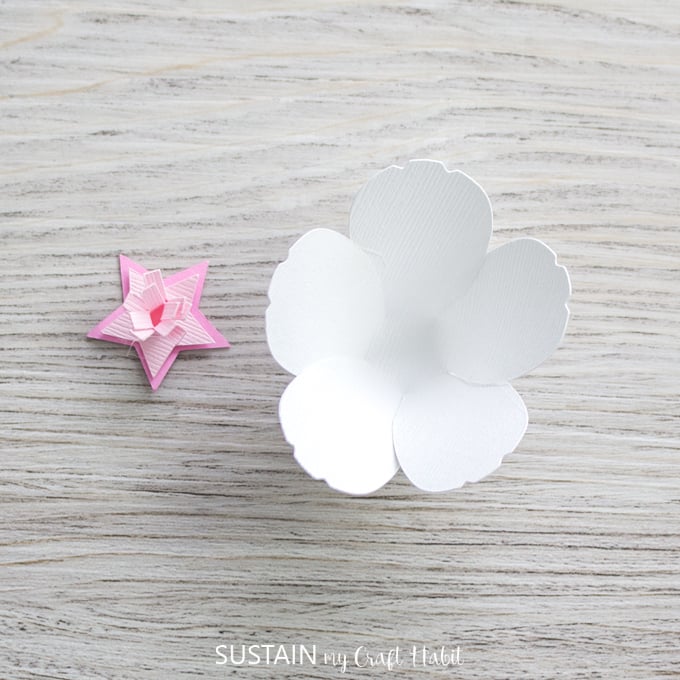
When finished the piece will form a small bowl shape.
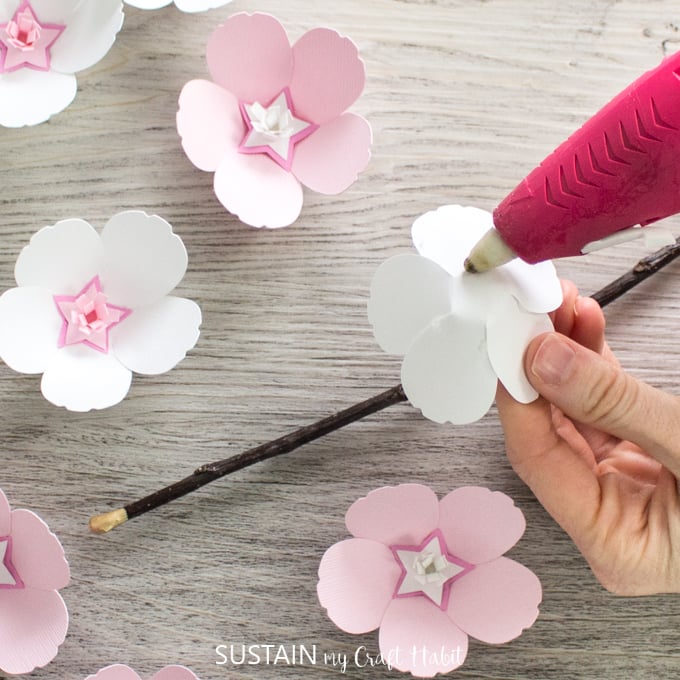
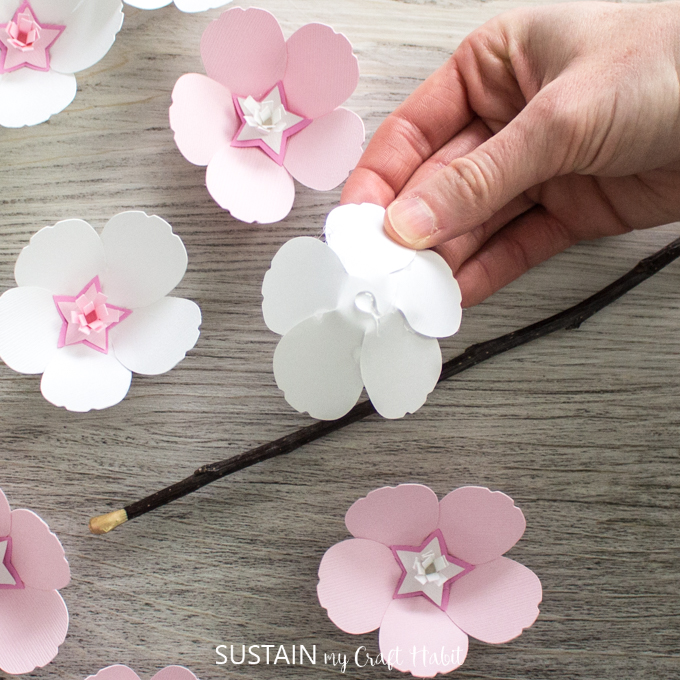
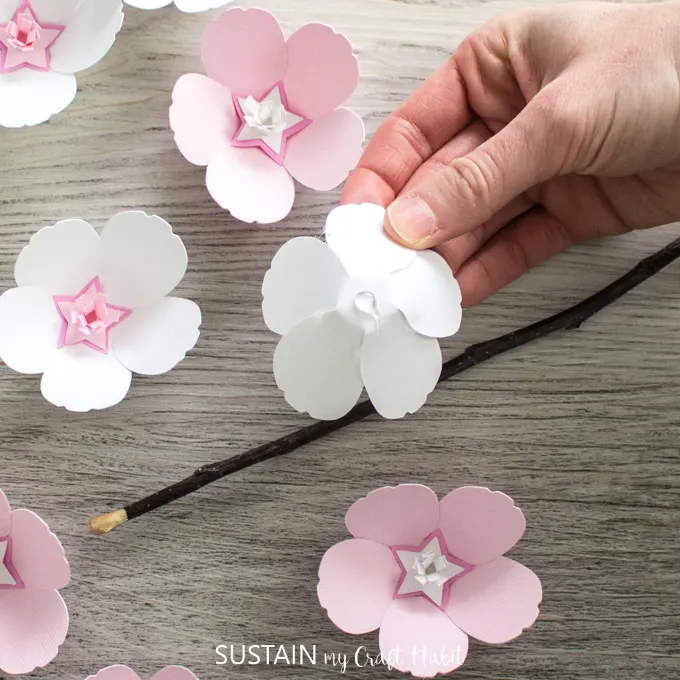
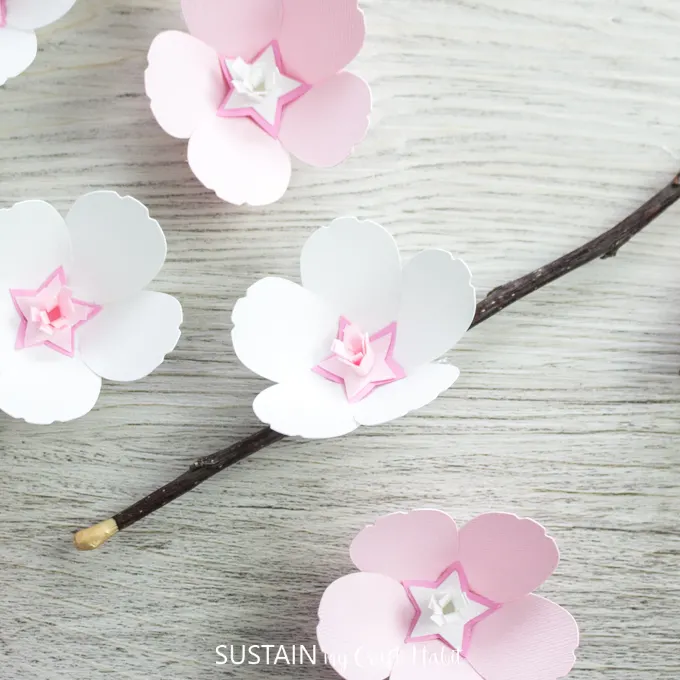
Continue with the other cut cherry blossoms until you have as many as you want.
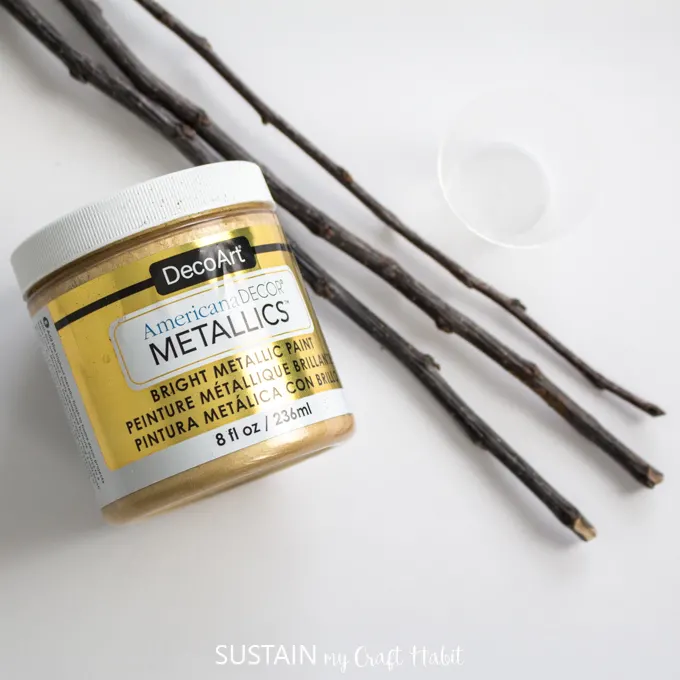
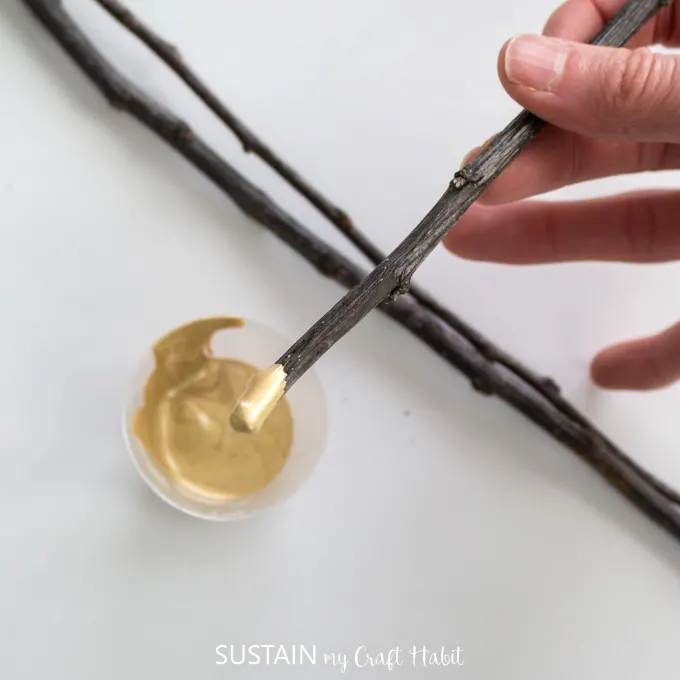
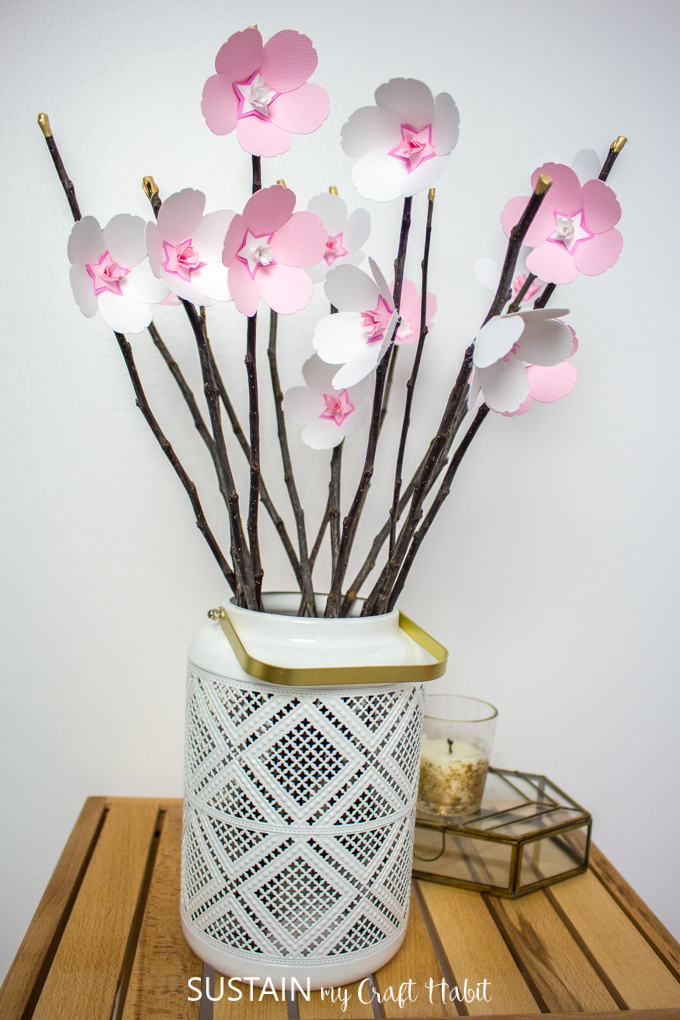
Dip the top ends of the branch or twig in a bit of gold paint.
Add hot glue to the back side of each cherry blossom and press on to the prepared twig.
Arrange in a large vase and enjoy!
I love how this bouquet looks against the blue wall in my new bathroom.
you might find the entirecontemporary bathroom reveal here.
We hope you enjoyed all these flower ideas!
Stay tuned for next month when well all be making something with a Patriotic theme!
Pin it for later!


Cricut cut cherry blossom flowers