HomeDIY
This post may contain affiliate links:full affiliate disclosure.
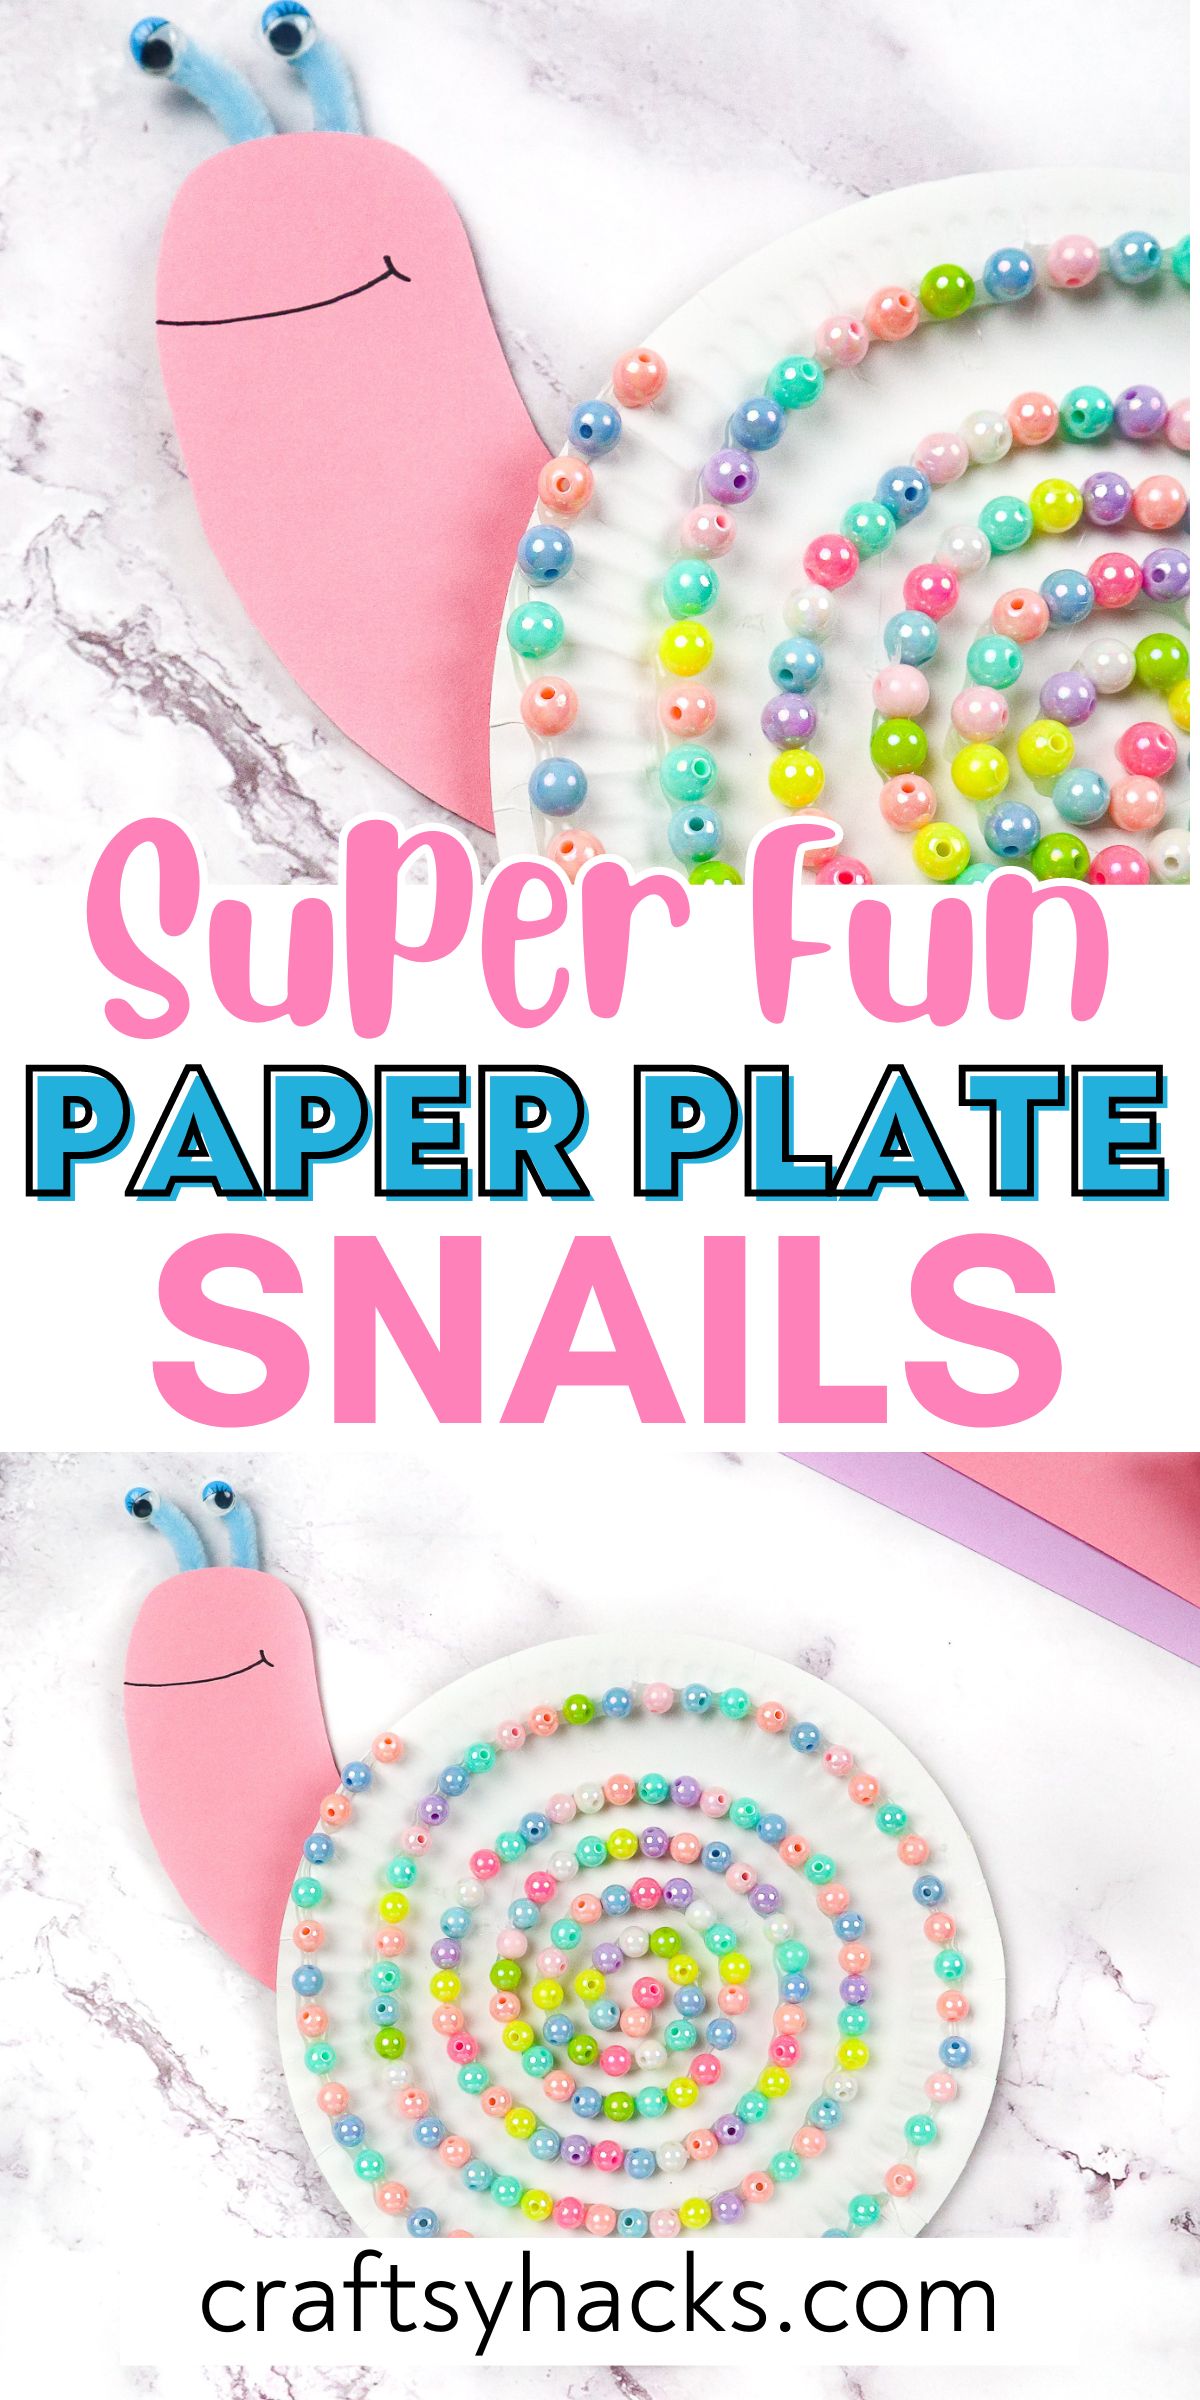
Thesepaper plate snailsare no different!
Paper plate snails are a wonderful option to craft just for fun or to teach lessons.
With all of that said, lets move on to the post!
I hope that you enjoy these darling snails as much as I do!
Take the marker and draw a snail-shaped body.
Step 2.After cutting out your snails body, well attach the two small pipe cleaners.
A hot glue gun works best for this activity.
it’s possible for you to use other glues if needed.
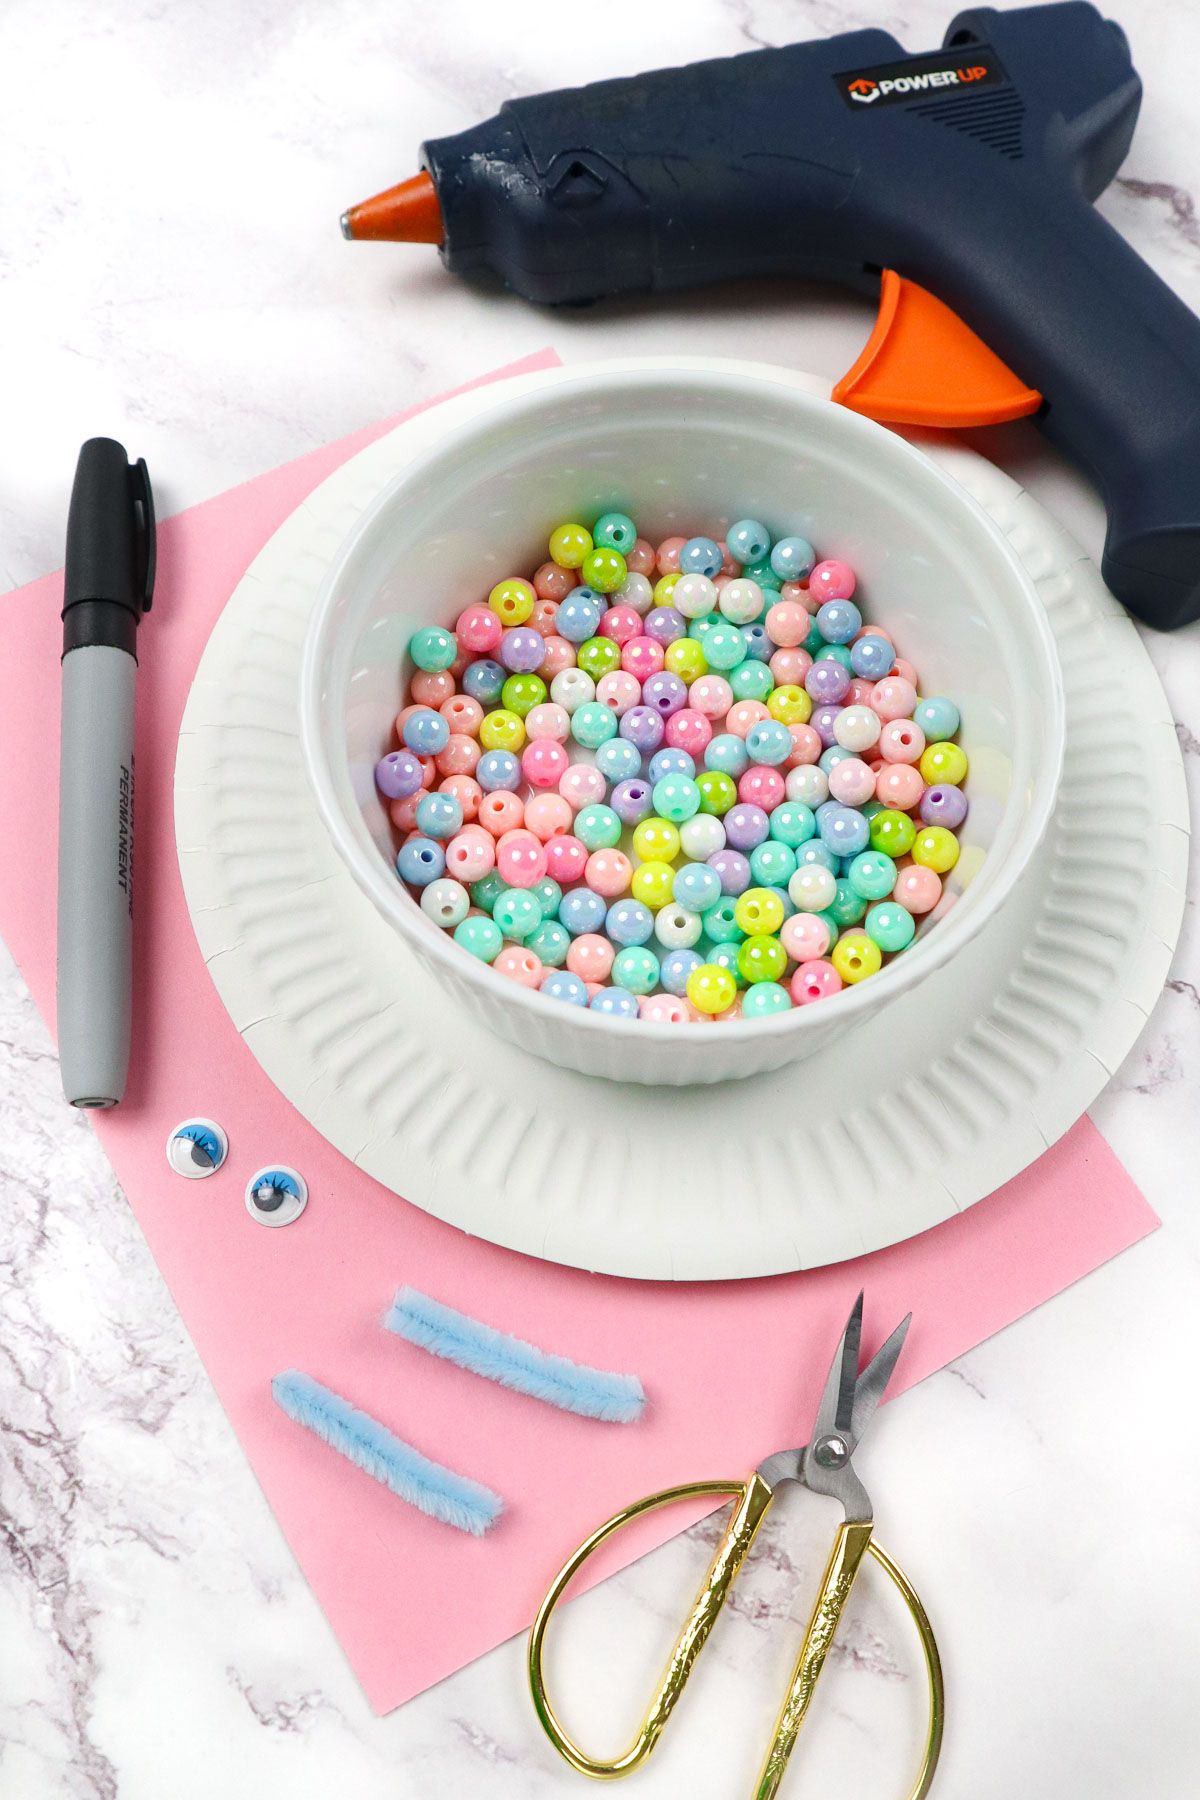
Step 3.Right after the initial body construction, well attach two googly eyes with hot glue.
After the eyes are on, add the snails smile with the black marker.
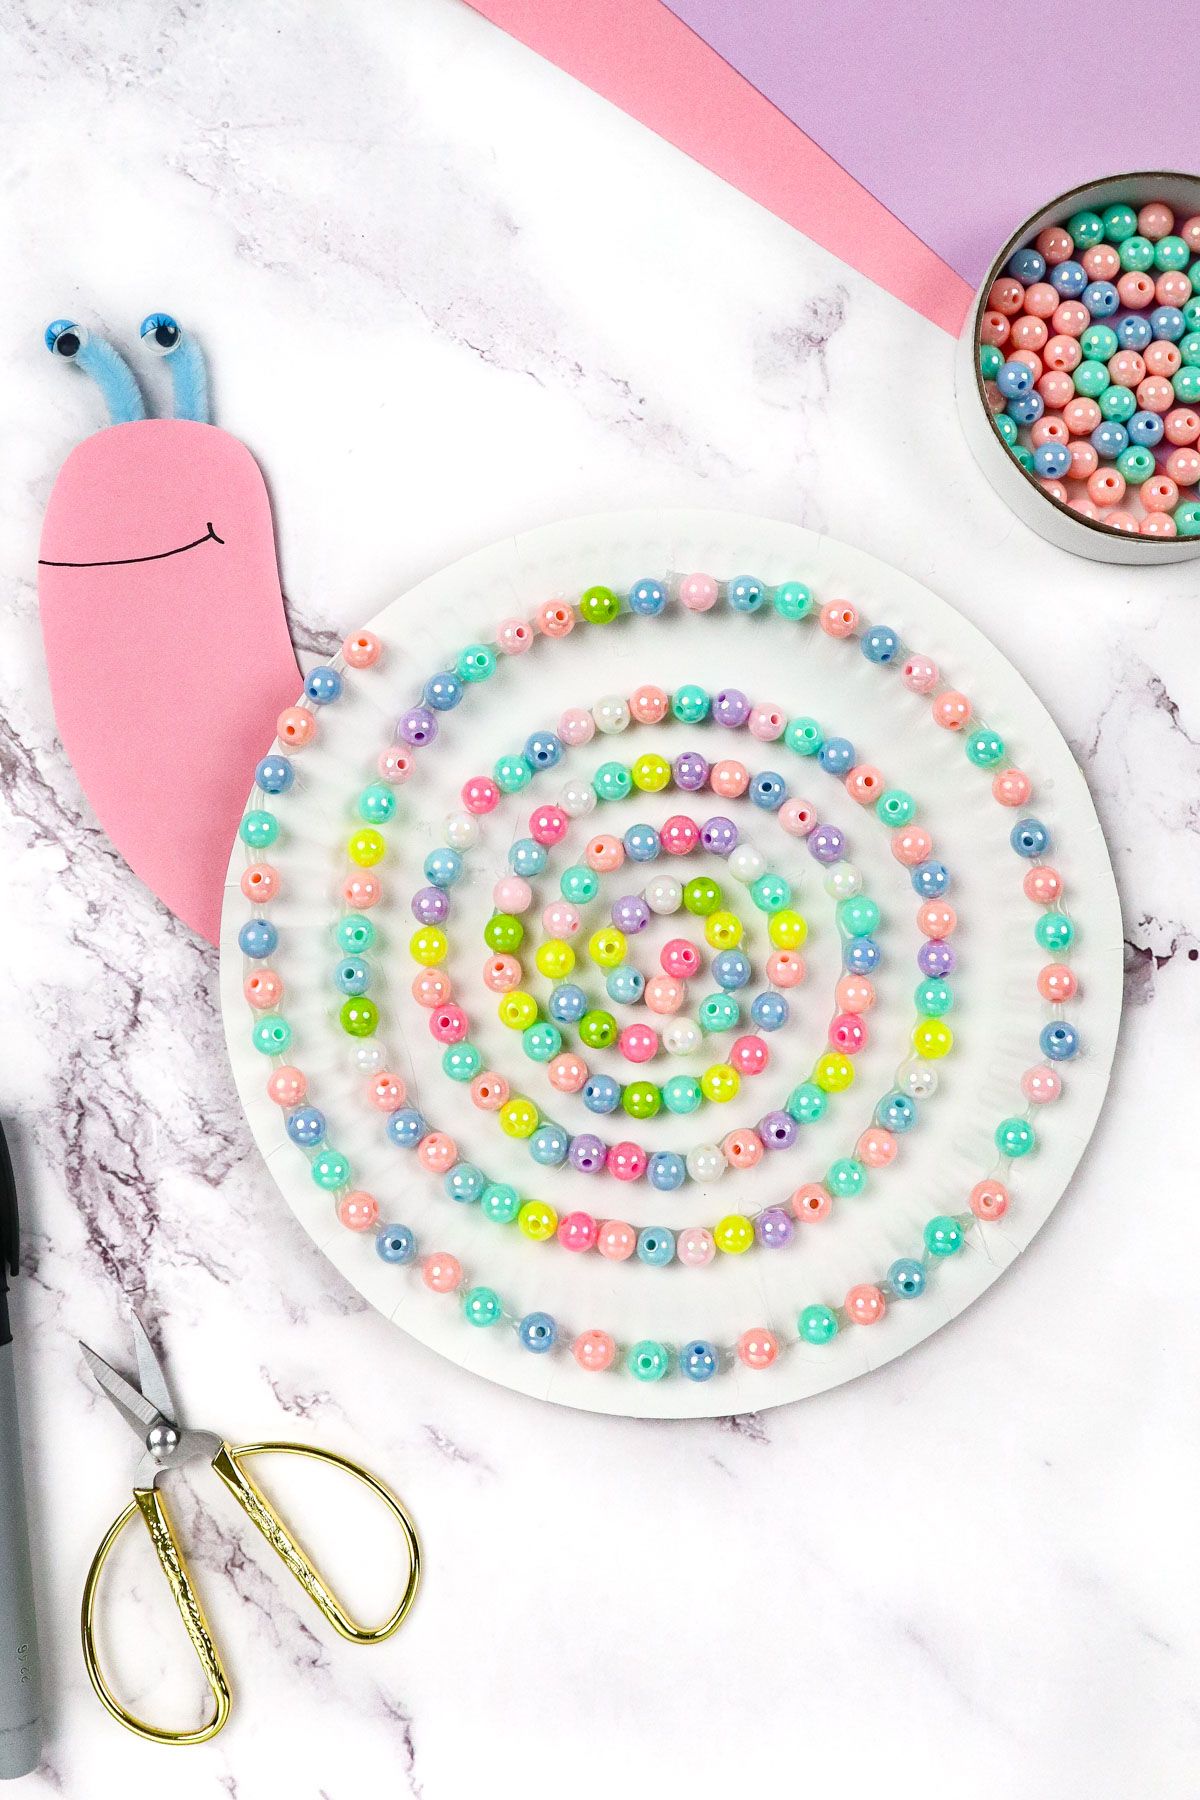
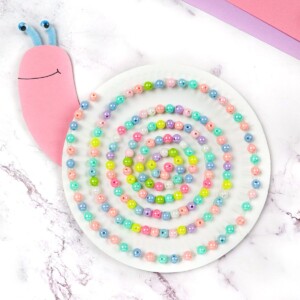
Step 4.Once the body is finished, well move on to its shell.

Start in the center and move outward in a spiral shape.
As the hot glue gets added to the page, immediately follow with the beads.
Pattern and even color recognition can be a great mini-lesson within the craft, too!
Step 6.The farther you get along in the spiral, the more space between each line should be wider.
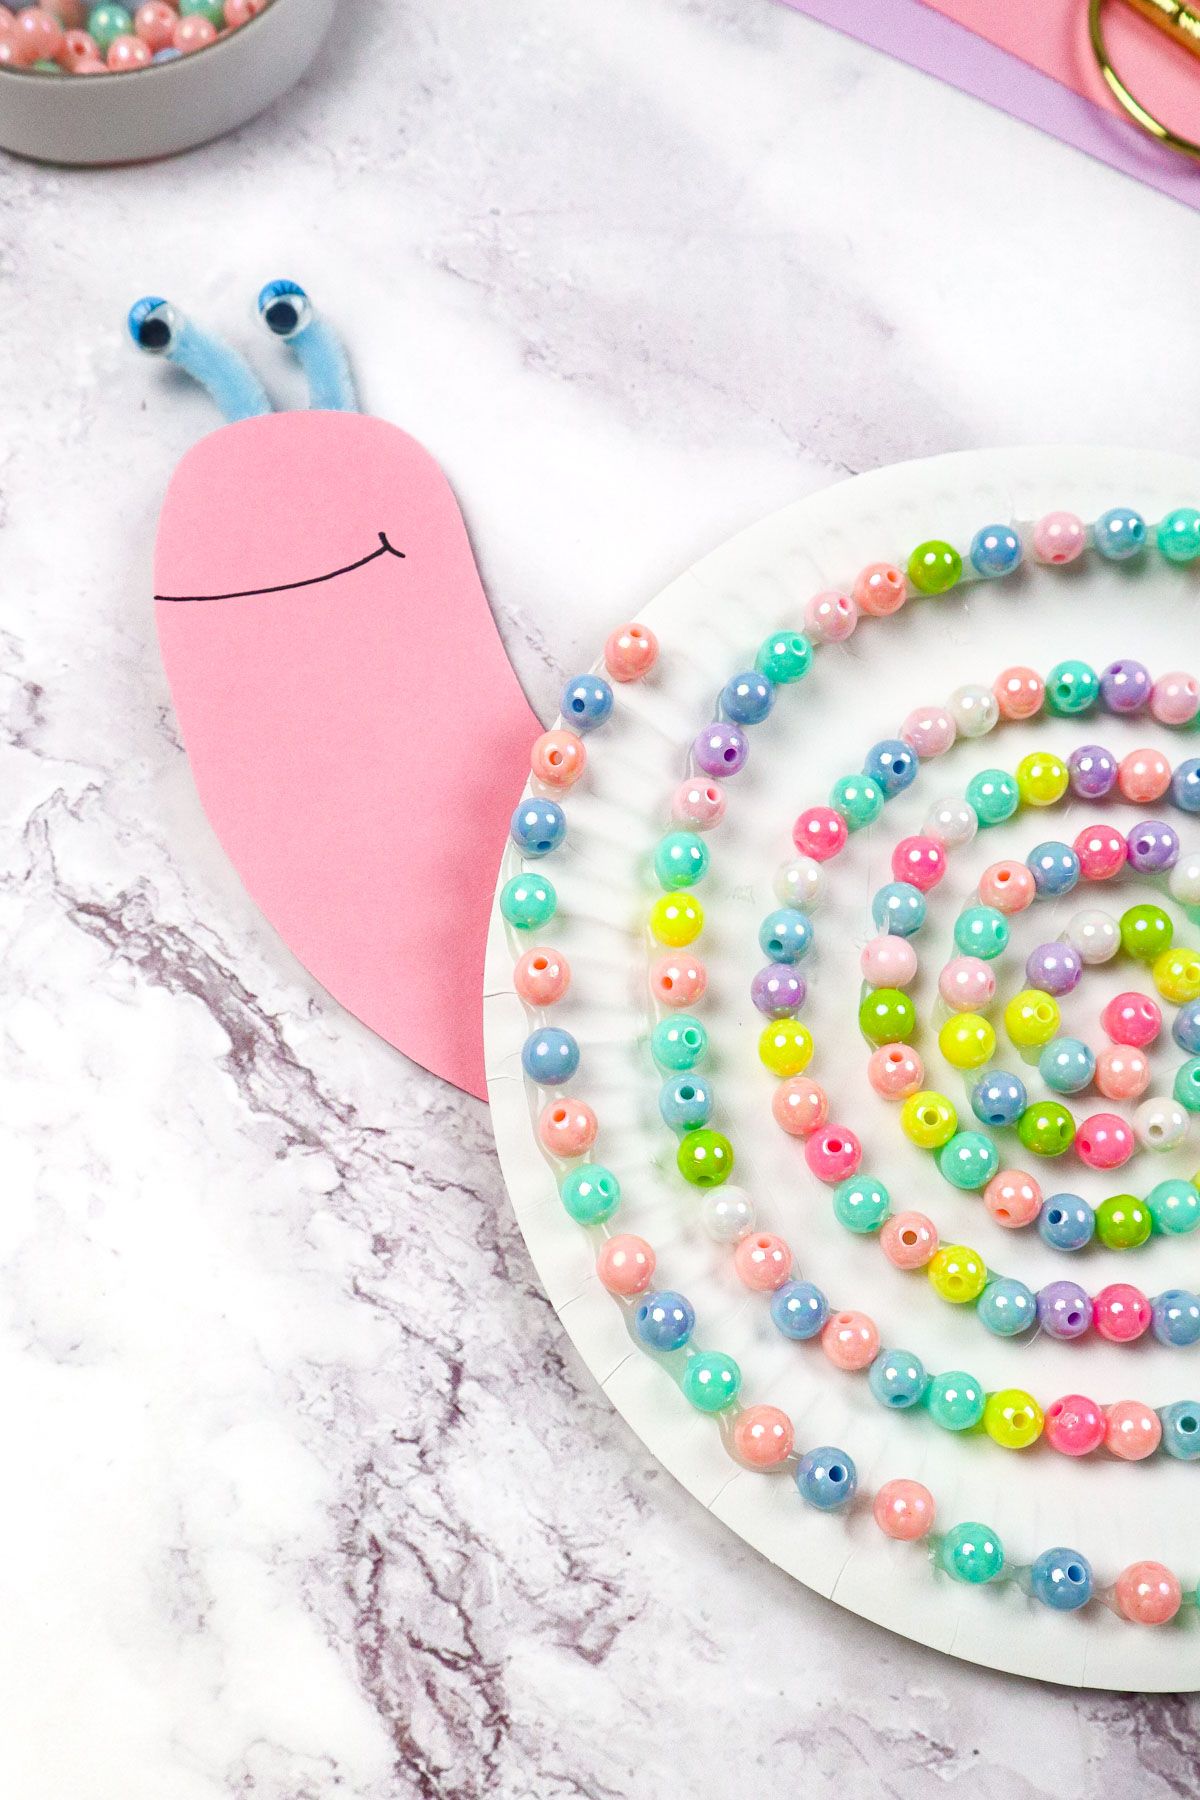
Step 7.After all the beads are on, we will attach the body.
Add just enough body to attach to the paper plate securely.
Again, hot glue generally is what works best for this craftlet the snails sit if needed.
Step 8.Once all parts are dry, your paper plate snail is finished!
They are adorable on display anywhere within your home or as gifts to a loved one.
The snails are sure to make a statement wherever they make trails.
