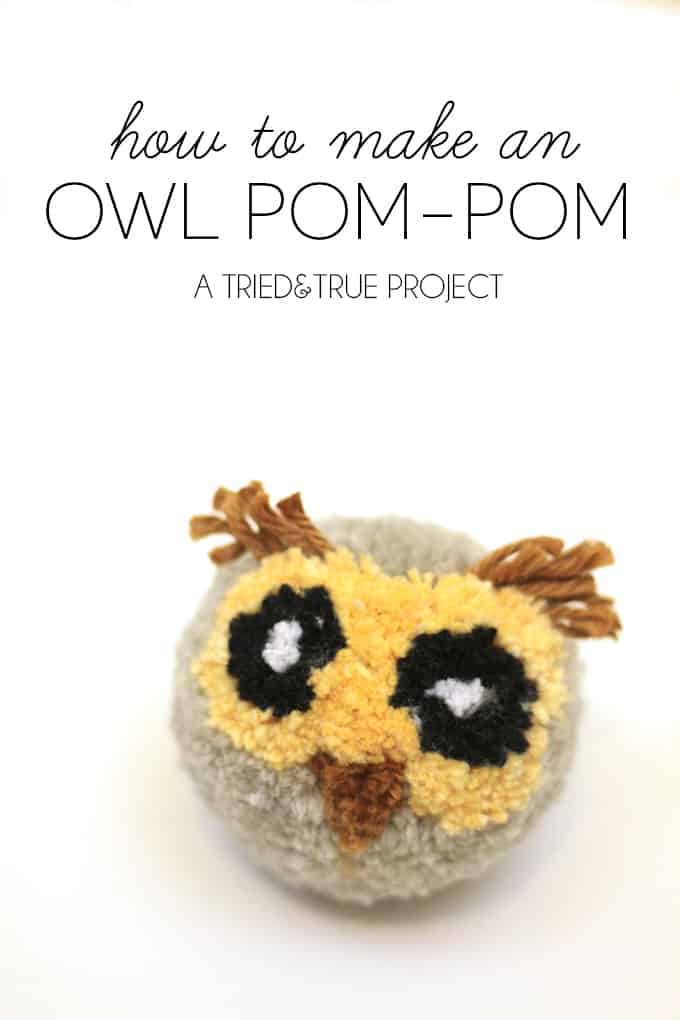
Create an adorable owl pom pom with yarn and a pom pom maker!
This easy fall craft is perfect for all ages and offers endless creative possibilities.
That way when you do the owl youll know what to expect from the tool.
The possibilities are endless, so lets get started on this fun and easyfall craft!
You will only create this design on ONE side of the pom pom maker.
Make the First Eye
Step 1. pop launch the tool.
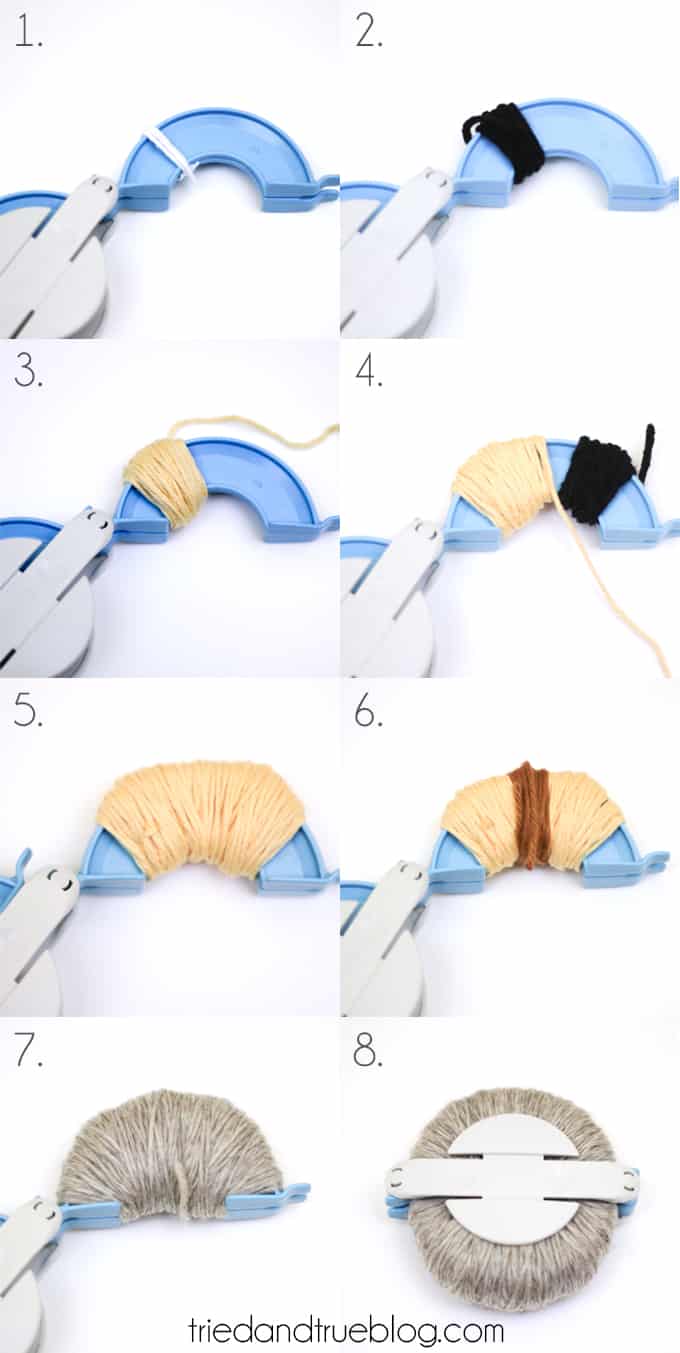
Knot and tie off.
Wrap the black yarn several times around the white yarn you just wrapped.
This should be thicker than the white yarn.
Knot and tie off.
Dont knot and tie off just set aside.
You are going to wrap this tan yarn around the second eye.
Make the Second Eye
Step 4.
Repeat steps 1 and 2 on the right side of the U shape of the tool.
Fill in the Face
Step 5.
Wrap back and forth a bit to thicken the pom pom.
Create the Beak
Step 6.
Wrap some brown yarn around the center of the U shape as shown.
This is going to be not only the beak, but the hair coming out the top.
Fill in the Rest of the Head
Step 7.
Use the tan yarn to fill in the remainder of the tool.
Then close that U and initiate the other one.
Wrap the entire second U shape with the tan yarn to finish.
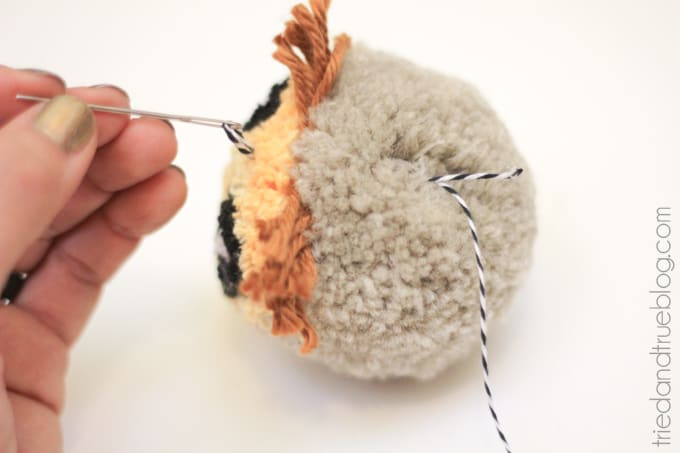
usually you tie off the pom in the center off the tool, then cut along the grooves.
initiate the tool and remove.
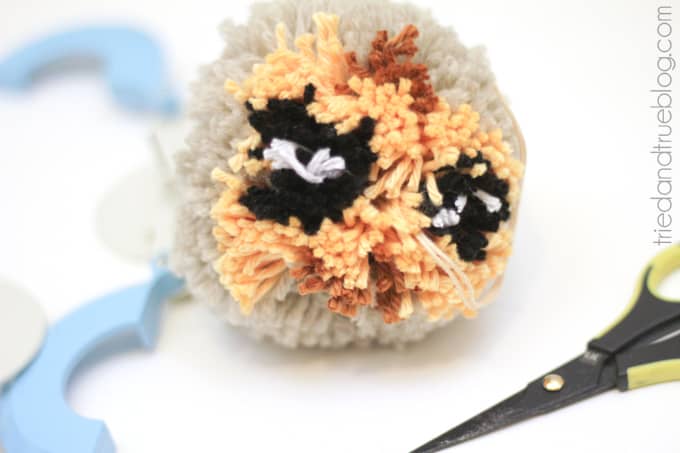
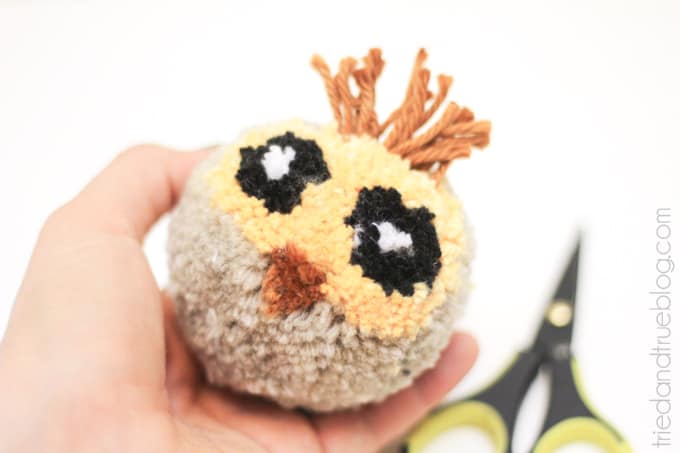
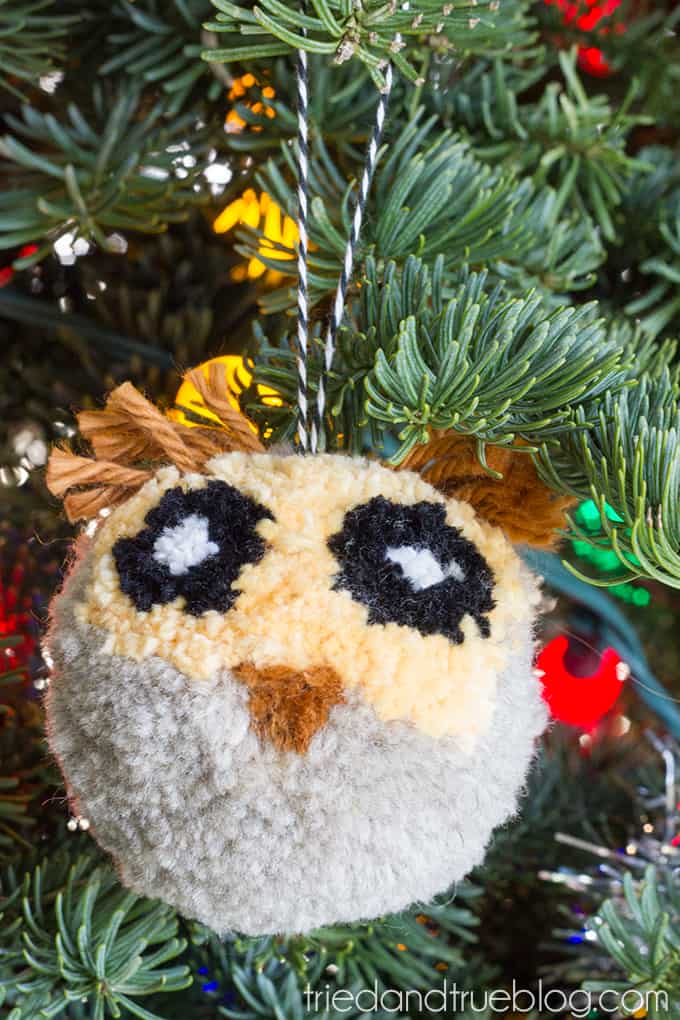
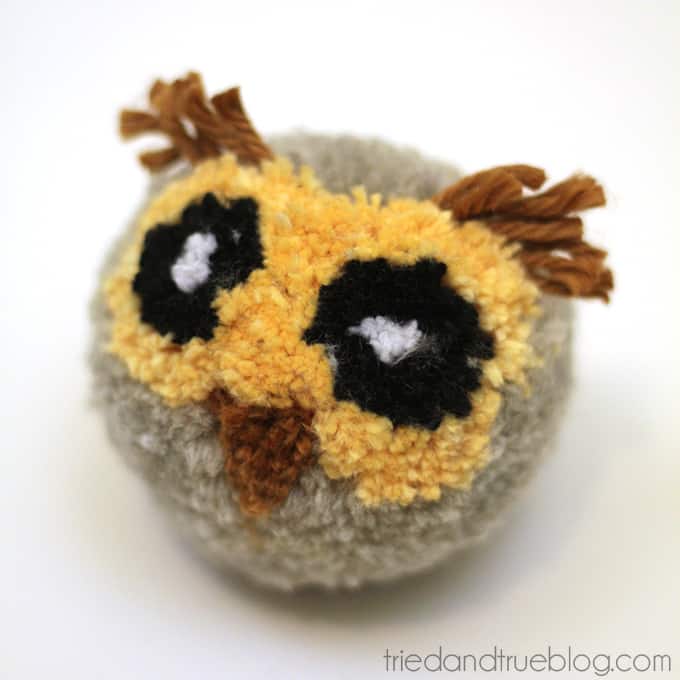
Continue trimming until youre happy with the way it looks.
I left the brown yarn on top a bit longer to resemble the eyebrow hair some owls have.
I think it adds some personality to this little guy!
I hope you enjoy making this cute owl with your kids.
It takes a bit of practice to get everything symmetrical and straight.
Stop by Tried & True to check out some of my other holiday crafts!
Id also love for you to check out these other pom pom ideas and posts:
Christmas GarlandGarlandWall HangingWreath
