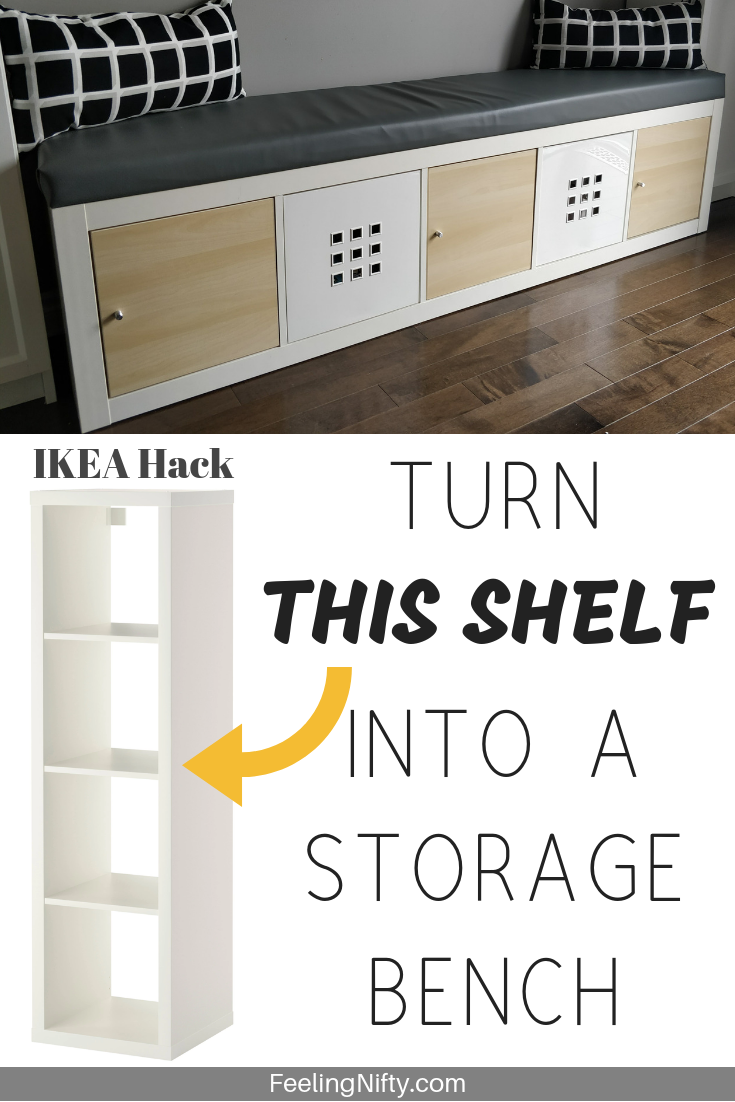
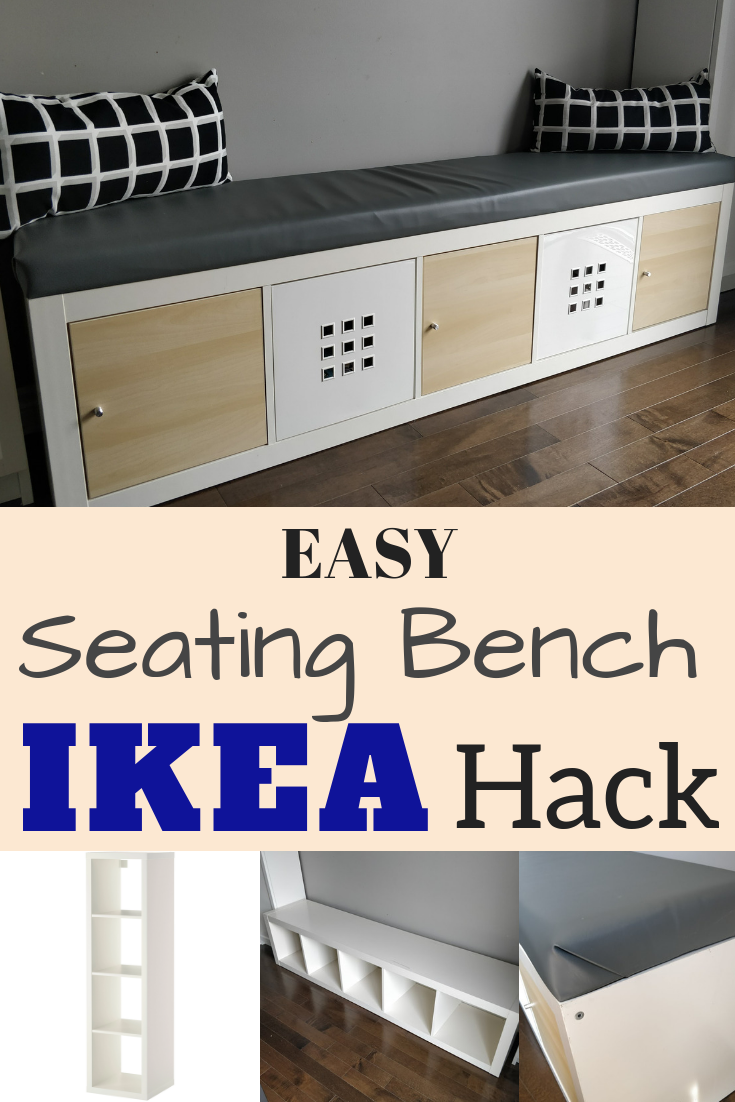
Turn this popular bookshelf into a functional and stylish Ikea seating bench with storage.
This Ikea kallax hack is a super easy project for anyone- even if its your first one.
you could use this bench in akitchen, mudroom, entrywayor any other space that could use extra seating.
The best part is youll be super proud that you put it together YOURSELF!
No fancy tools or carpenters required.
Youve probably seen banquette seating benches on social media or Pinterest.

They look great, but they cost a fortune to hire someone to make a built in version.
You dont even need to sew anything!
In the tutorial below I will show you,step-by-step, how to recreate this Ikea Kallax Hack.

The possibilities are endless.
You want to double-check the bench will fit before you buy it.
Now back to the Kallax hack.

Ikea no longer sells the Expedit, but the Kallax is the exact same except its shorter.
This post contains affiliate links.
Amazon sells asimilar version of the Kallax for a similar price!
I know this defeats the purpose of an IKEA hack, but its an alternative option.
Especially if your looking to save time and want more convenience.
Another option, if youre not in a rush, is tolook for one used.
Kijiji or even Facebook Marketplace are great places to find the Kallax shelf, often at a bargain price!
A bonus to getting one used: it will come pre-assembled.
Some more time + money saved!
Ikea doesnt mention the weight limit when using the shelf horizontally though, for example as a bench.
So that is at the discretion of the user.
The benefit of save searches is they will notify you right away when your Ikea shelf becomes available.

It was also super relieving it fit between by 2 pantries, I was a bit nervous!
I think I had less than an inch on either side.
Talk about cutting it close, phewf!
The good news is that it looks more like a built in bench.
If you have kids or pets then anice vinyl materialwill be easy to wipe clean.
I chose the vinyl since I have kids.
Im super glad I chose the vinyl!
The only downside is that most vinyl materials come is solid colors.
Let me know if there is!
If you want to see your material before you buy, can check out your local material/textiles store.
Ikea has Textiles!
If youre already heading out to Ikea to buy your Kallax, you might checkout their Ikea textiles section.
I was impressed with their selection and even more with their quality of fabric!
Loved the colorful and whimsical patterns in their textile selection!
UPDATE:I wish I had used a vinyl fabric for this craft bench too.
Ill explain how in a bit.
And dont worryyou wont have to sew anything together.
No needles or thread involved.
To make the plushy soft seating cushionyoull need some bang out of high density foam.
And if youve ever searched for high density foam in your typical craft boutique, it isnt cheap.
Its very high quality, for sure, but it also comes at a high price!
The hack is to use camping foam sleeping pads!
you might find them at your local outdoor store, Walmart or even on the web.
I found mine at a Canadian Tire store in Canada for a decent price.
If I find anything cheaper in the future I will update this post.
Foam Thickness Matters!
Youll also notice foam comes in different thicknesses.

From0.5 inches thick to 3 or 4 inches thick.
Basically the higher the thickness the more expensive it will be.
BUT not by very much.

The minimum I would go is 2 inches thick.
The one I chose in this Ikea hack is 3 inches.
If you buy your MDF from Lowes or Home Depot, they provide the first 3 cuts for FREE!

Just ask a sales rep and they will guide you to the place they make the cuts.
Thats one of the best tips Ive learned in my Ikea Hacking experiences.
Makes this project so much more do-able for anyone.
I hope youre now armed with all the tips to make this awesome functional Ikea seating bench hack.
Heres thestep-by-step instructions on how to put it all together.
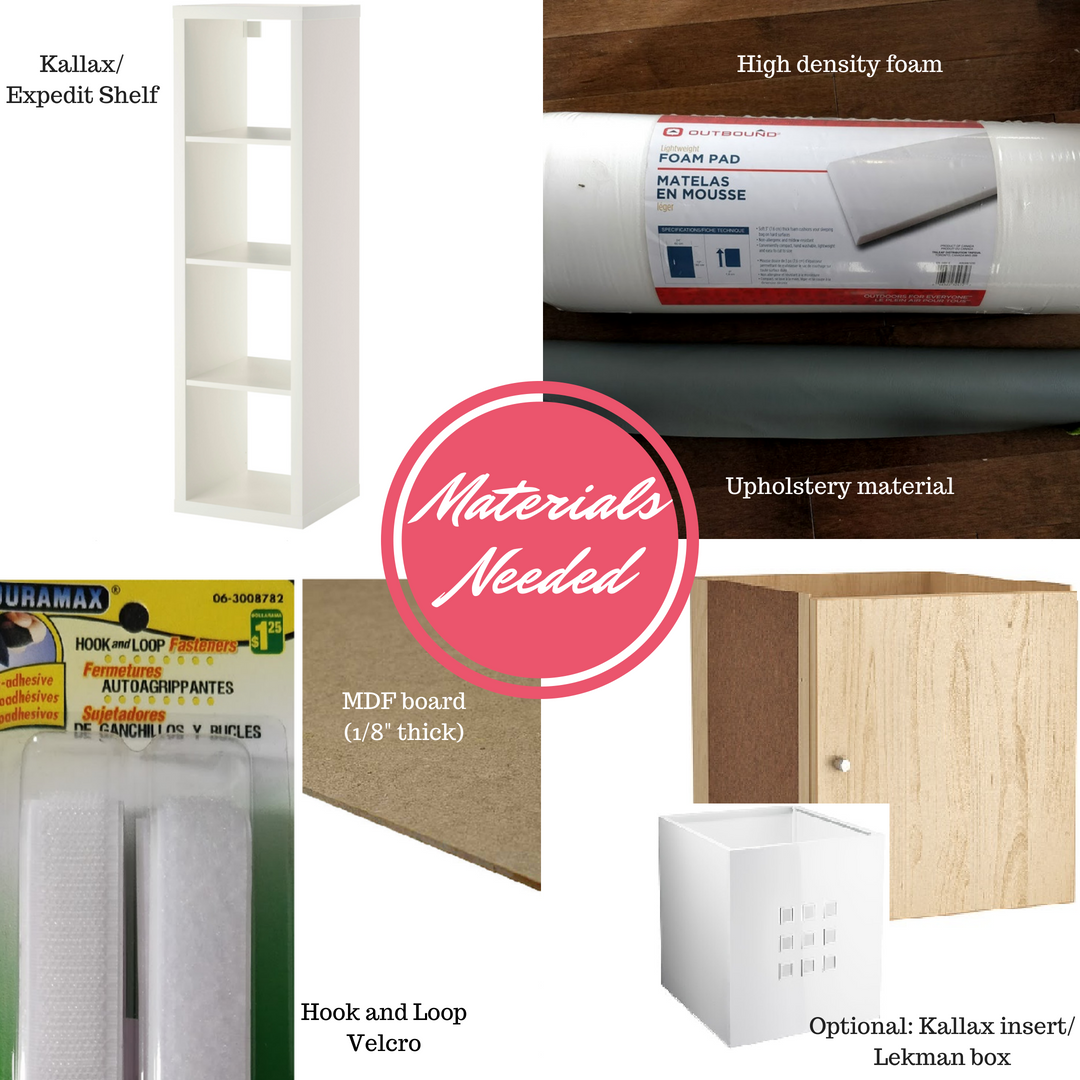
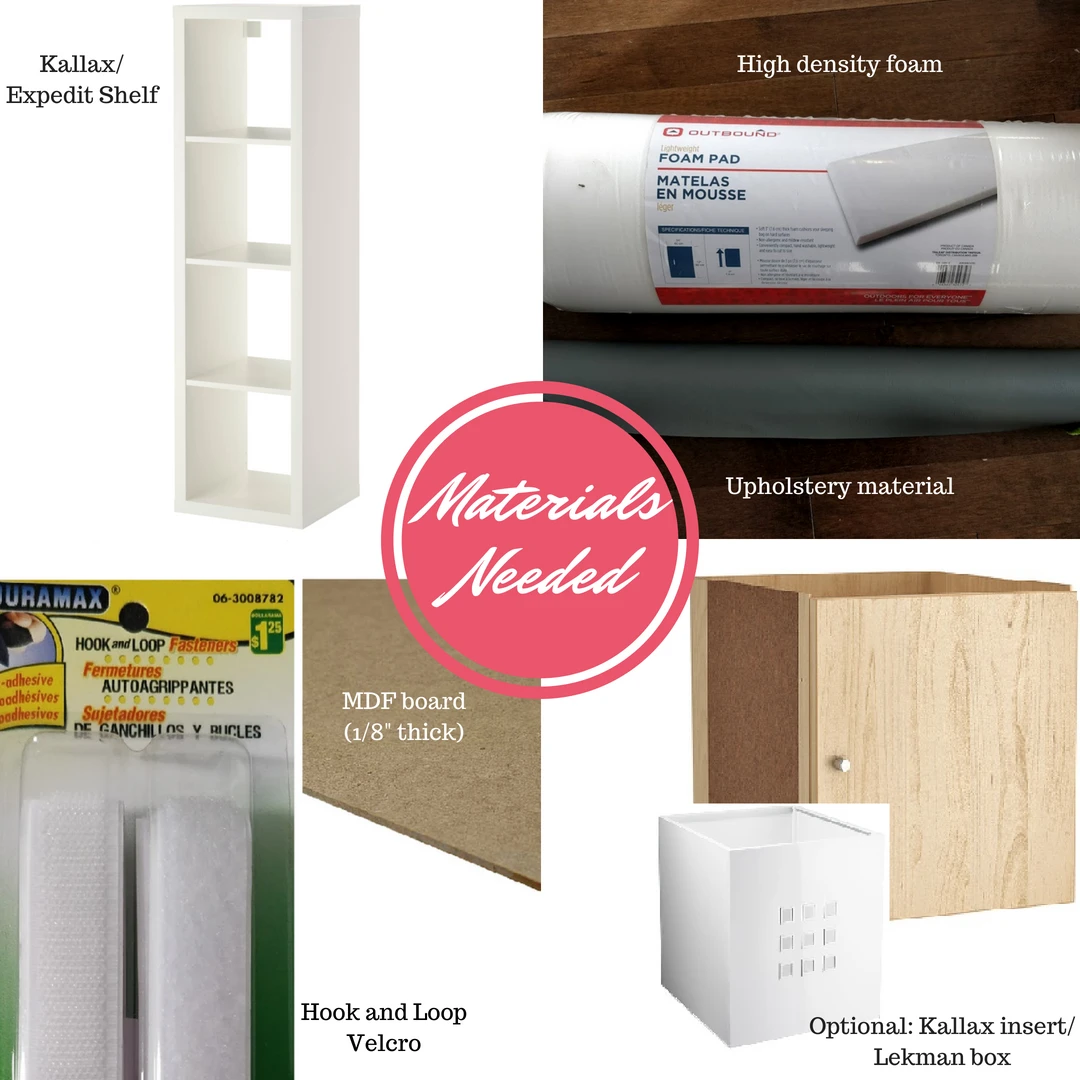
Materials
Using a spray adhesive, glue the MDF board to the foam.

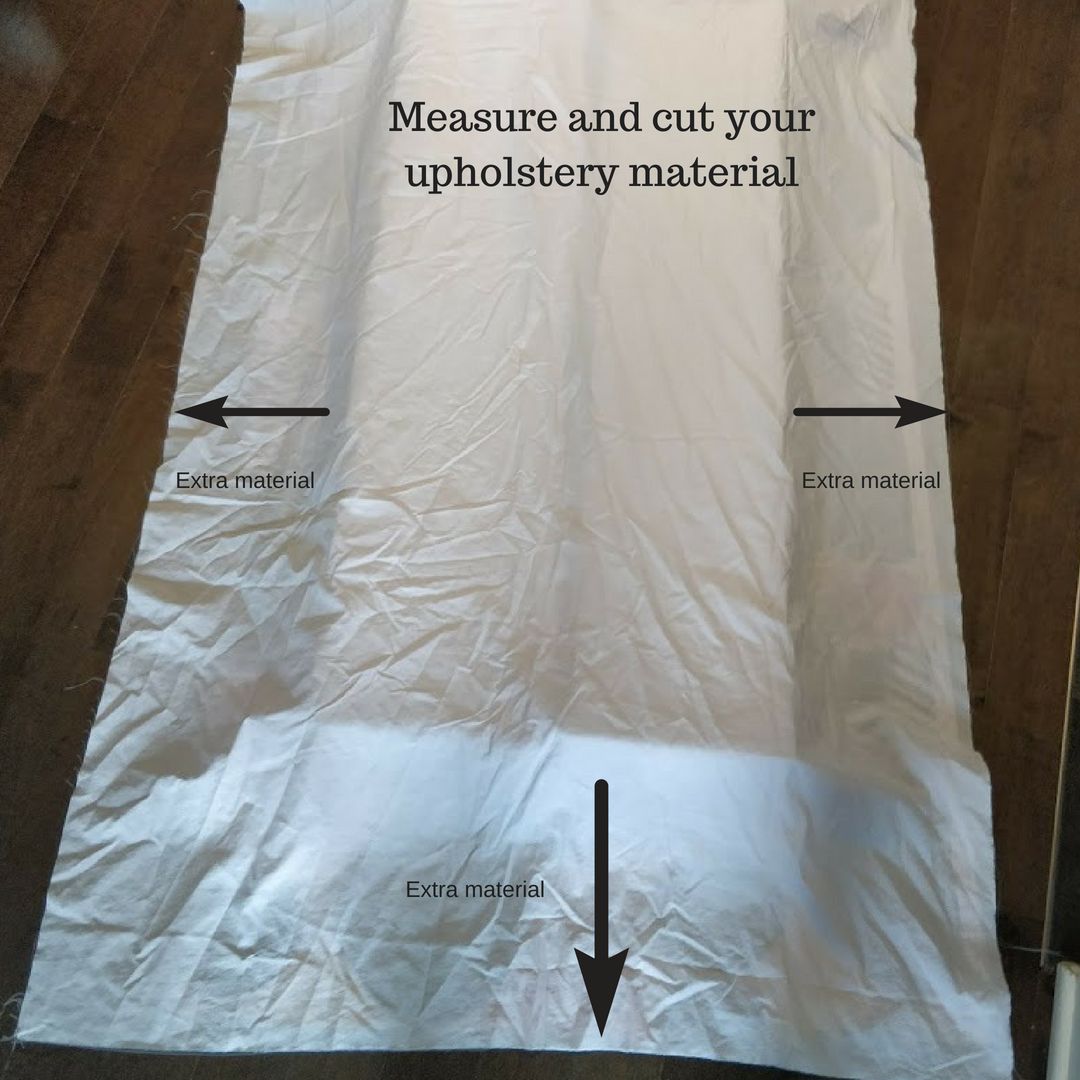
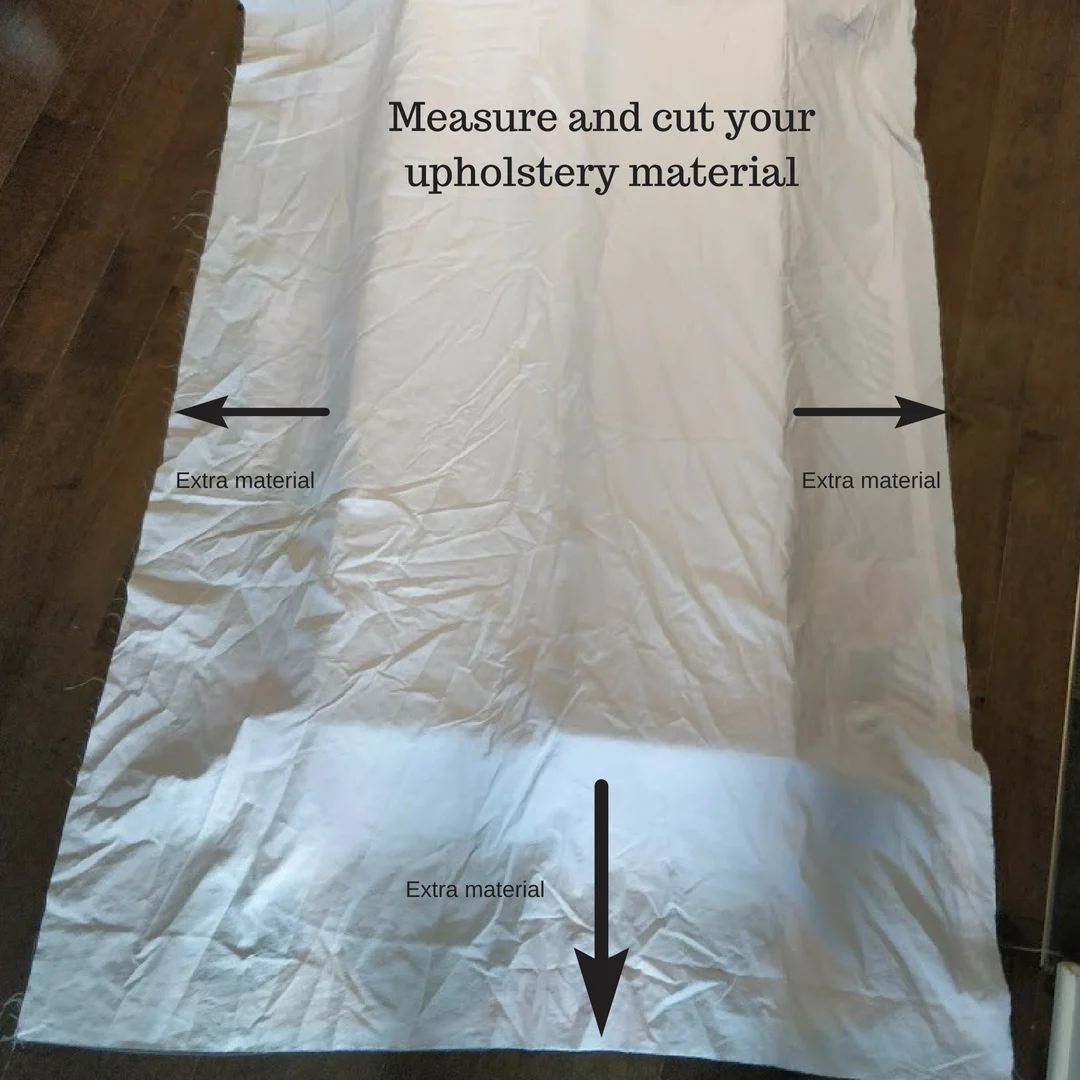
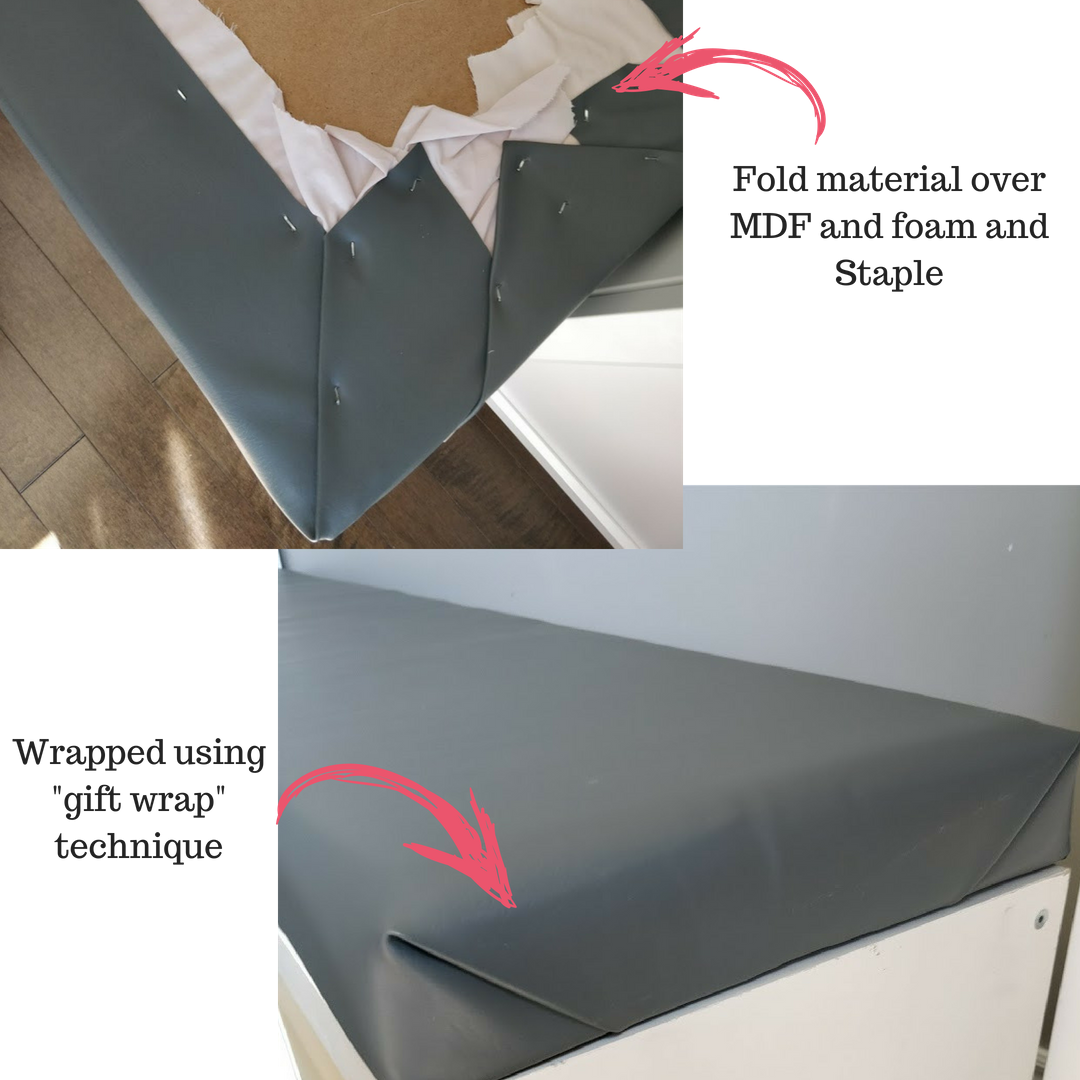
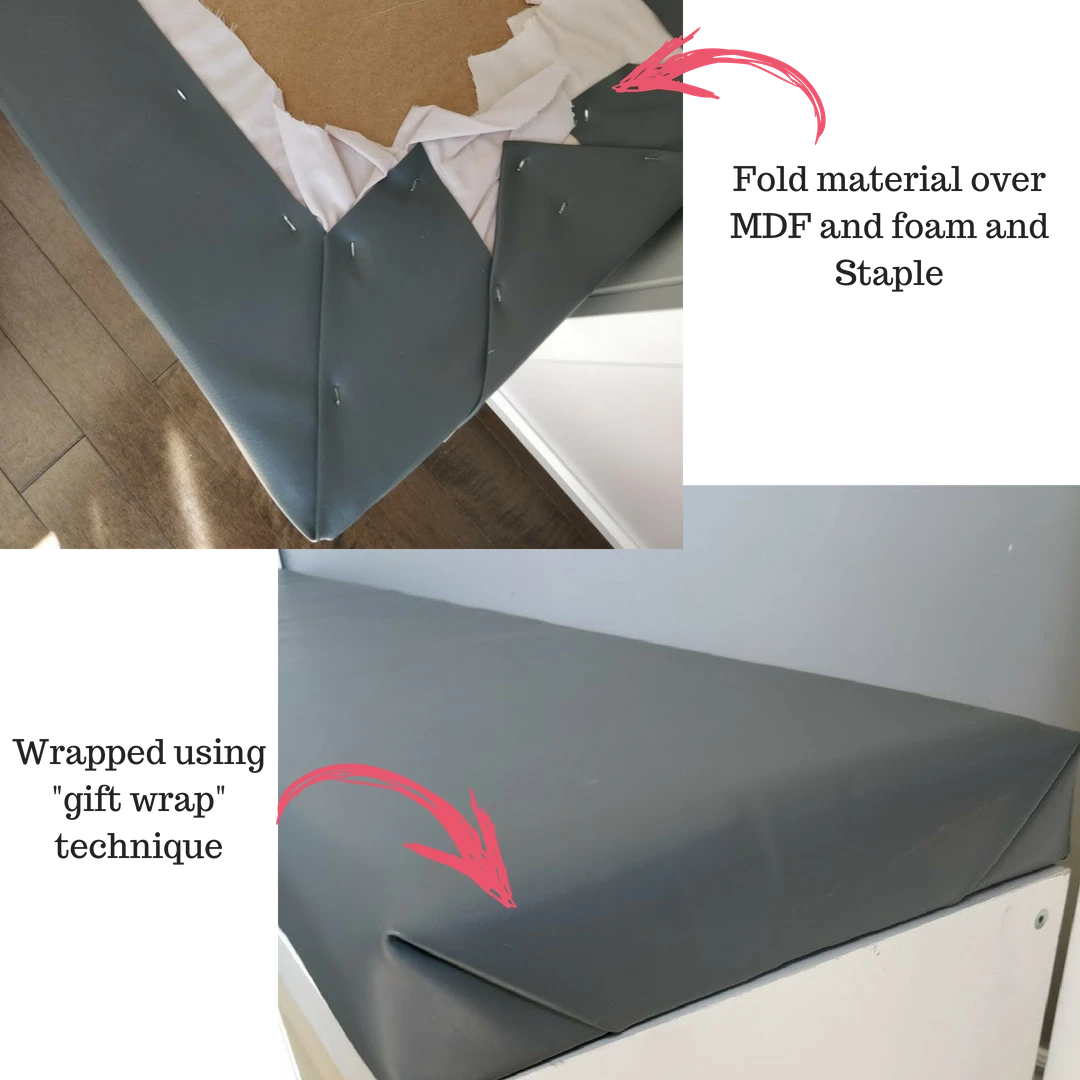
Measure and cut your upholstery material.
Pick a technique to wrap your upholstery material.
The technique I used was in the same way you would wrap a gift.
I find this gives smoother lines and looks less bunched up.
when you’ve got the folds ready you might start stapling.
This part usually requires 2 people.

One person to hold the material tight and taught and the other person does the stapling.
As you could see it doesnt have to look perfect.
The staples will be hidden when placed on the shelf in a later step.

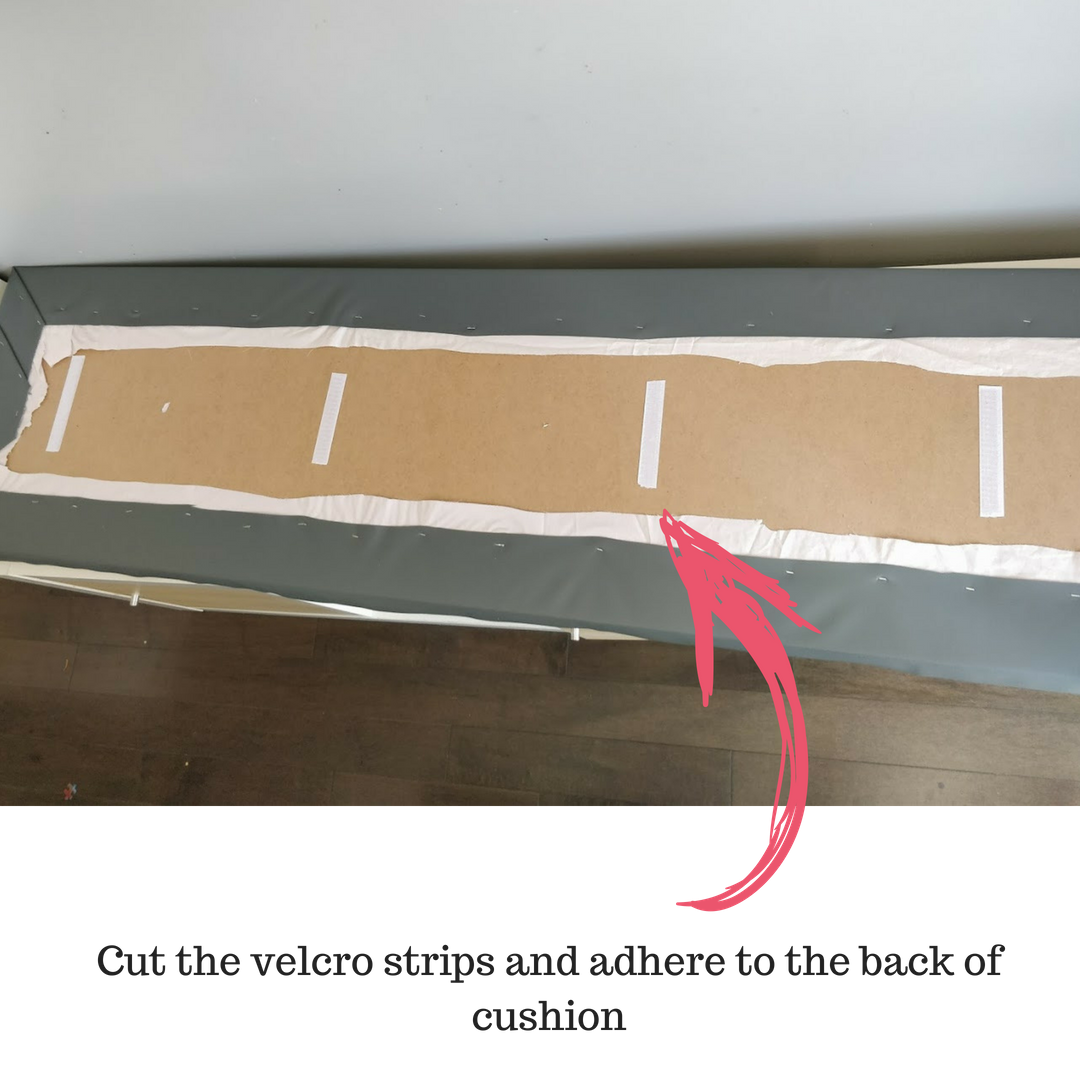
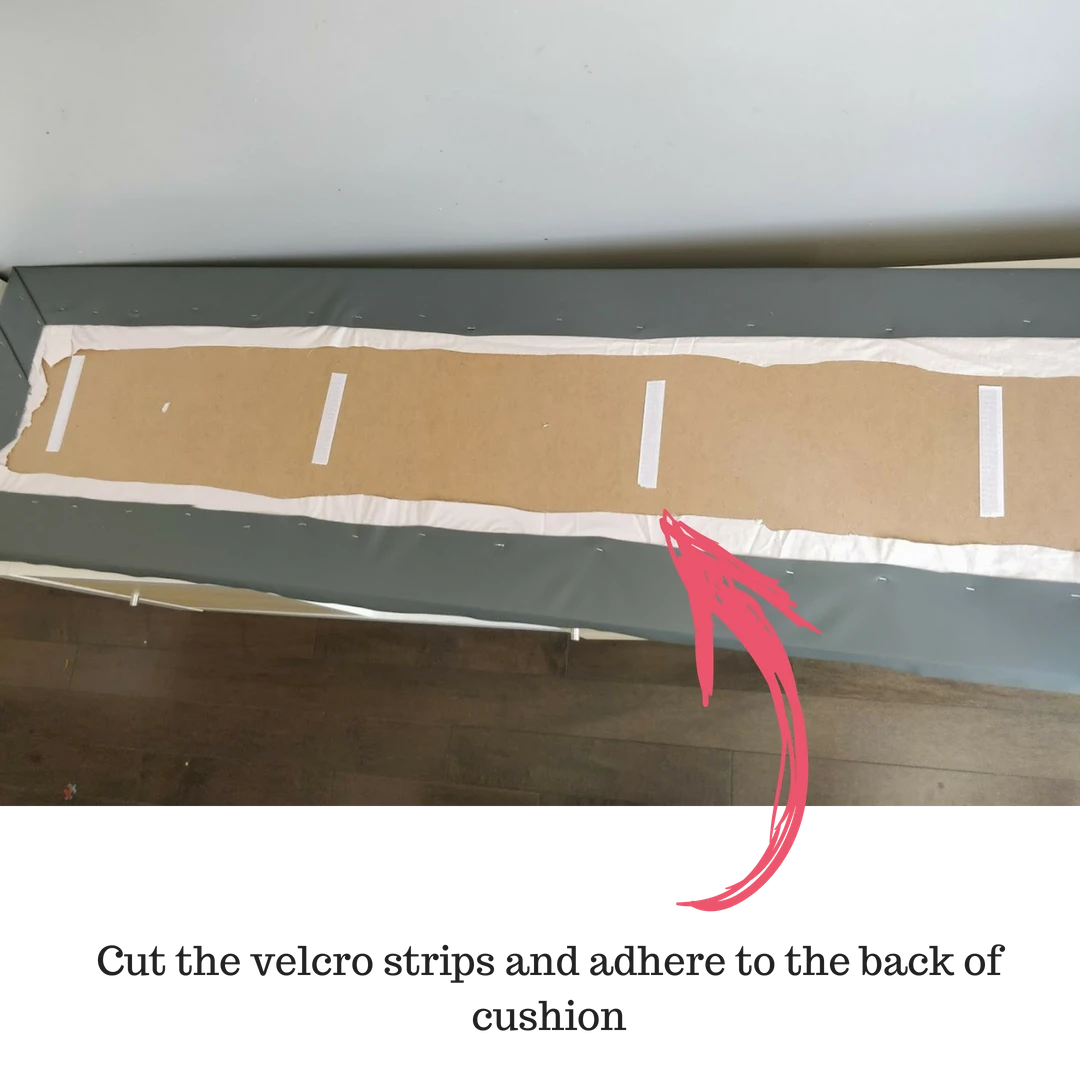
I chose a less permanent solution, which still prevents the cushion from sliding.
I used hook and loop velcro strips.
And voila, a DIY Ikea storage bench you’re able to make YOURSELF- and be proud of.
And most importantly, I hope you feel empowered to make one yourself.
You wont regret it it might even unleash the Ikea Hack beast in you- it totally did for me!
31+ Clever IKEA Kallax Hacks to Organize your Entire Home