This blog post will guide you through the process and help you get started with this exciting craft.
Wood prints also offer durability, lasting longer than traditional paper photos.
Additionally, the natural grain of the wood adds an artistic touch, giving character to your images.

with sealer
Finally, the xTool M1 Ultra makes the process accessible to beginners, ensuring a user-friendly experience.
Getaccess to our resource libraryfilled with cut files and other xTool craft ideas!
Once dry, we followed the same printing steps outlined below.
Materials Needed
Disclosure: This post contains affiliate links for your shopping convenience.
you’re able to readour full disclosure policy here.
Turn on xTool M1 Ultra and connect the machine to your setup with the usb cable.

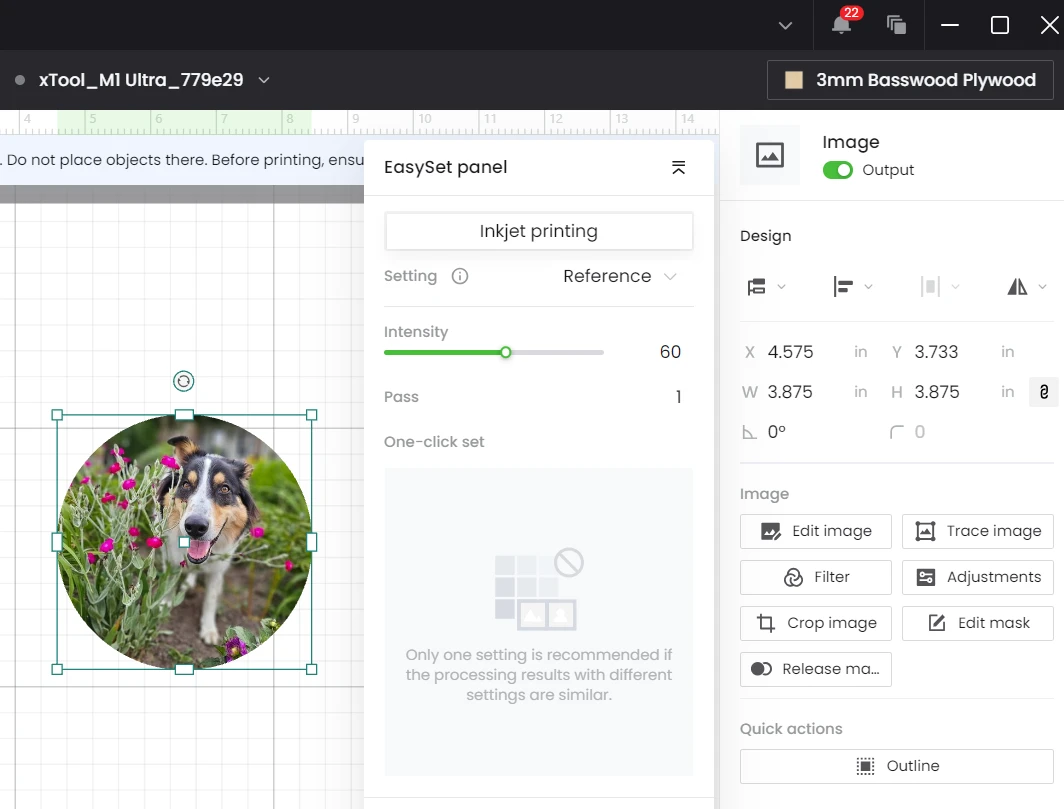
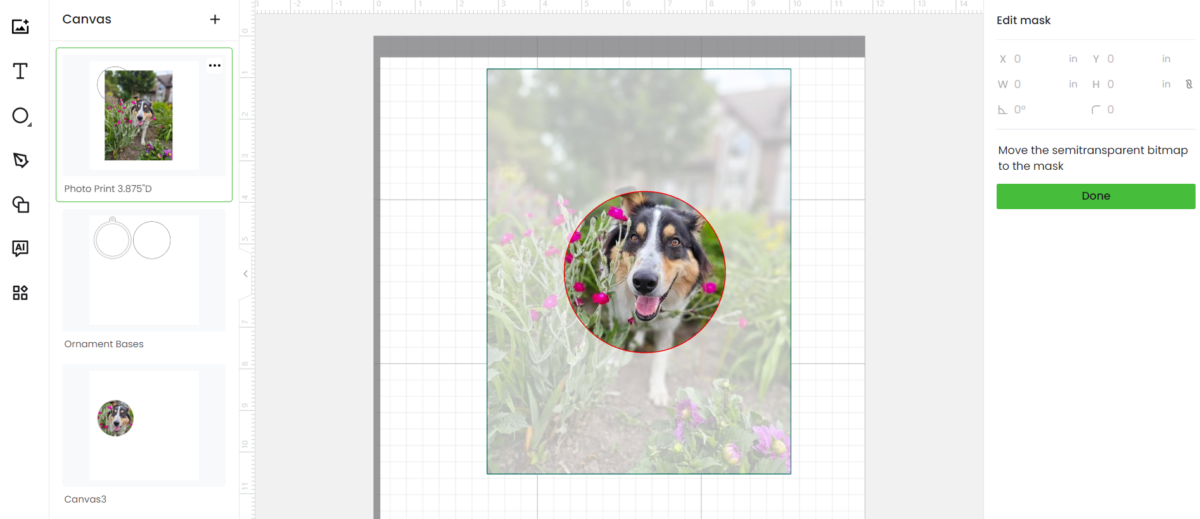
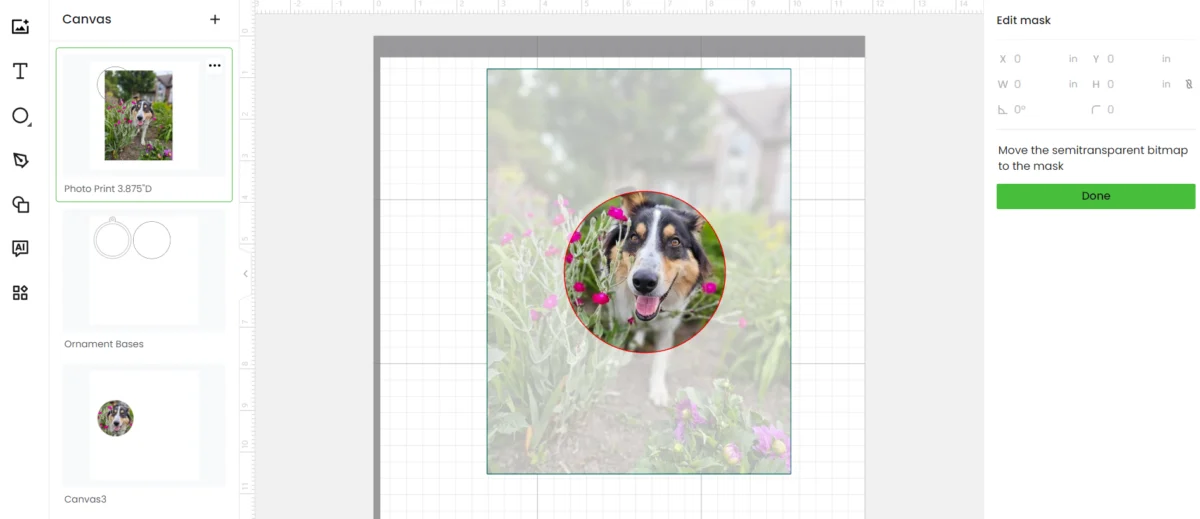
Connect the Creative Space app to the machine and import the photo you wish to print onto the canvas.
Add a circle shape to the canvas, sized 4 and snag the image together with the circle.
punch create mask to cut out the portion of the photo you dont want to print.

Adjust the size and placement within the circle.
When happy with the placement, select done.
Adjust the masked image size to 3.875 wide x 3.875 high or smaller.

Ornaments tend to range in size from 3 to 4 across.
Use painters tape to secure the sides of the sheet to the base plate.
Otherwise, the sheet will shift during printing.
Remove the laser module and insert the ink cartridge instead.
Mark the area to be printed following the steps on the screen.
Auto measure the distance to the surface of the sheet.

with sealer
Double check framing to ensure the area to be printed is where you want it to be.
Select proceed and continue on to printing using the default parameters.
When printing is complete, lift the lid and remove the printed wood sheet.

Import the simple ornament base shape onto a new canvas.
Change the module to the laser module.
Add the slats on to the base plate for laser cutting.

without sealer
Position the printed wood sheet back in the machine on top of the slats.
Mark the area to be cut by selecting the circle shape and choose points surrounding the printed picture.
When done, move the 4 circle over top of the printed part and within the marked circular area.

Set to cutting using desired options.
In our case, we used the default power and time controls.
Proceed with laser cutting out the photo and remove when complete.

Also, mark the area to be cut and place the shape within the marked area.
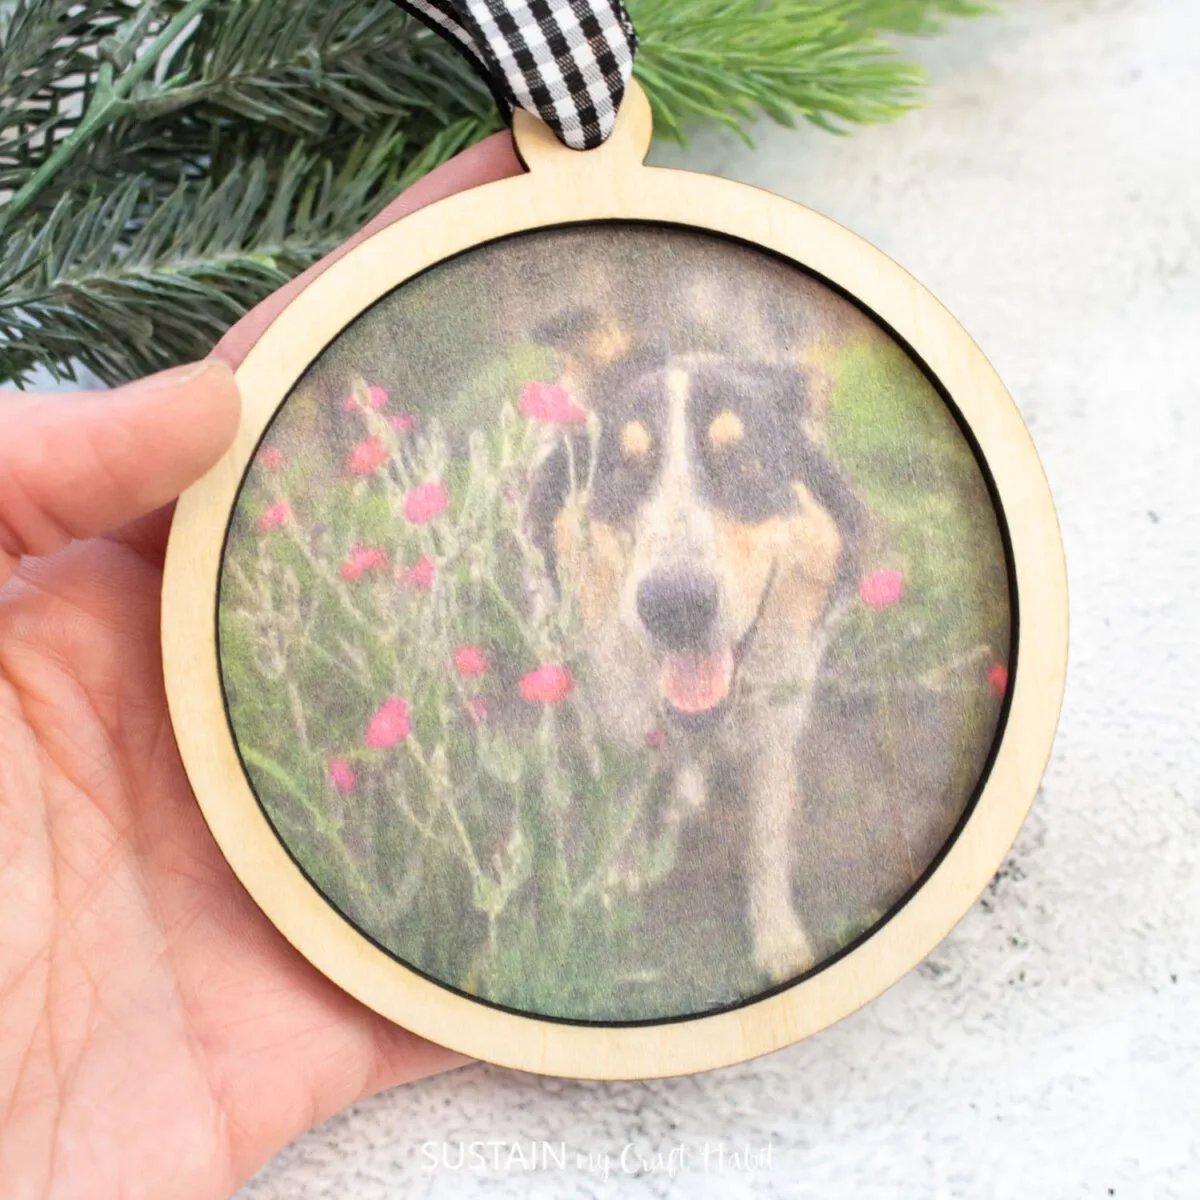
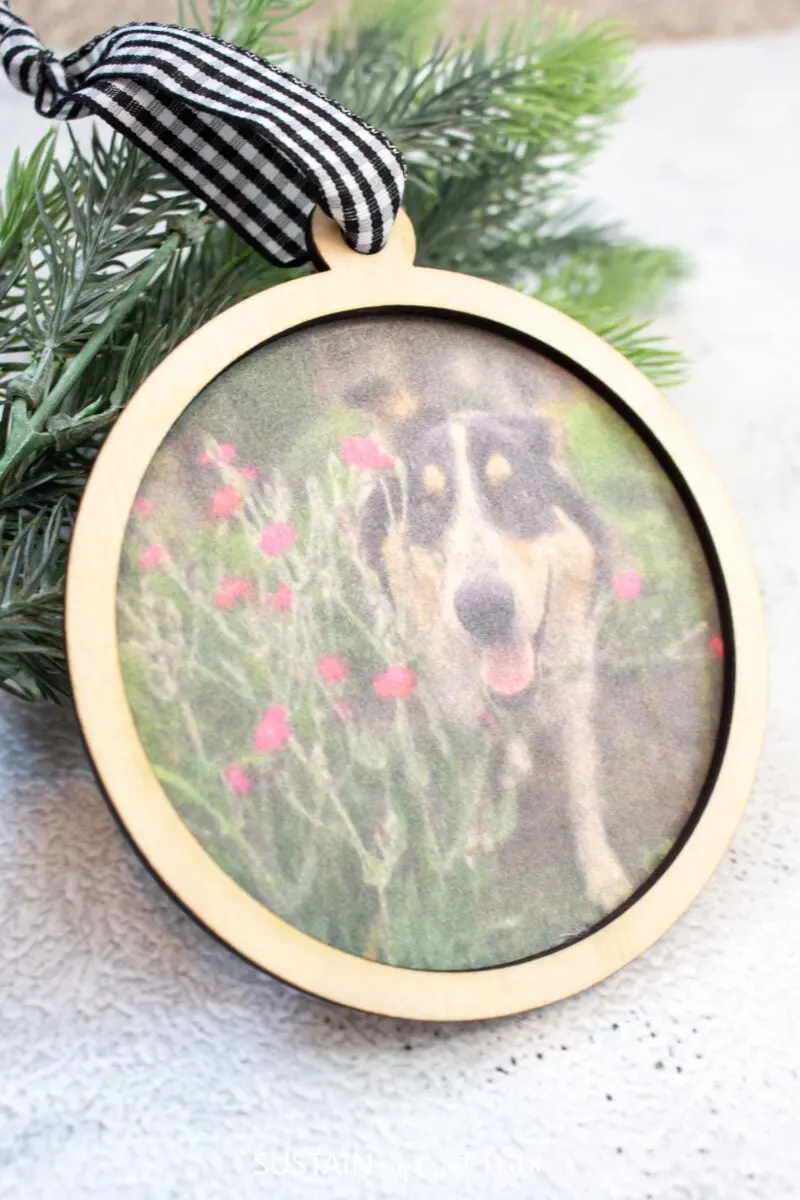
Place the frame piece on top of the printed piece and glue together.
Add a ribbon loop for hanging to complete the ornament.

Adding embellishments to your wood-printed photos can elevate your project and make it truly unique.
There are numerous ways to enhance your creation after using the xTool M1 Ultra.
For a rustic look, try distressing the edges of the wood or adding a weathered finish.
Metallic accents using gold or silver leaf can add a touch of elegance.
Whether youre making gifts or decorating your own space, this craft offers endless possibilities for creativity and personalization.
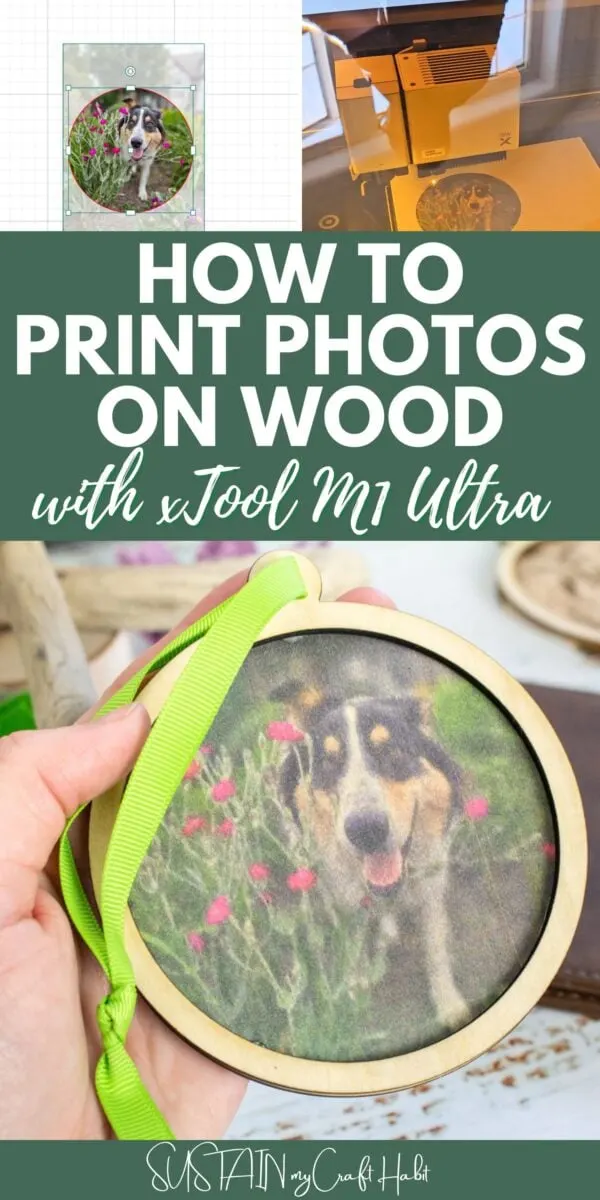
Pin it for later!
Materials
Instructions