This monarch butterfly drawing tutorial with simple steps was created in conjunction with myhow to paint a butterflystep-by-step tutorial.
you could even draw a butterfly in thisabstract butterfly painting.
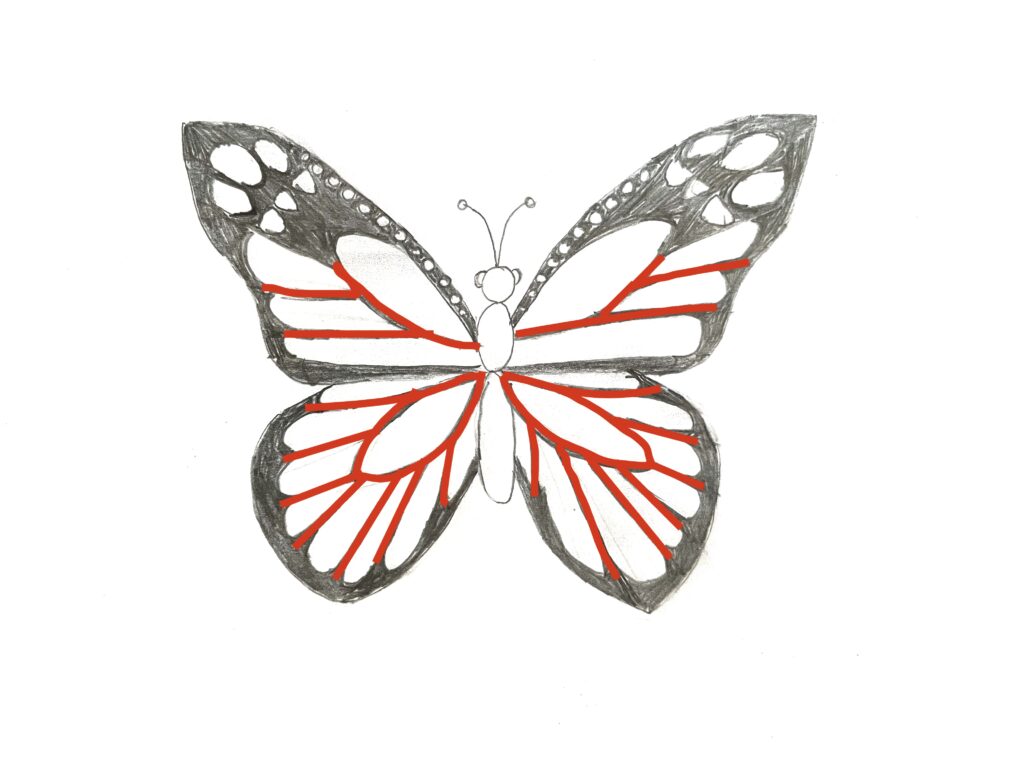
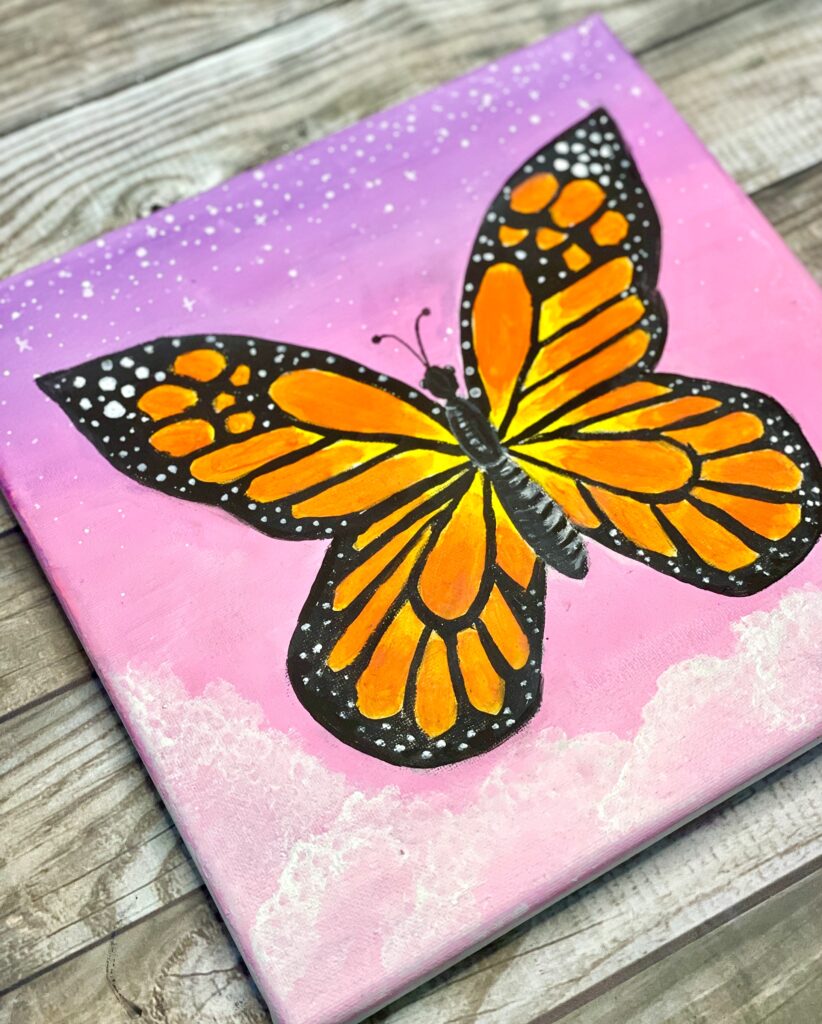
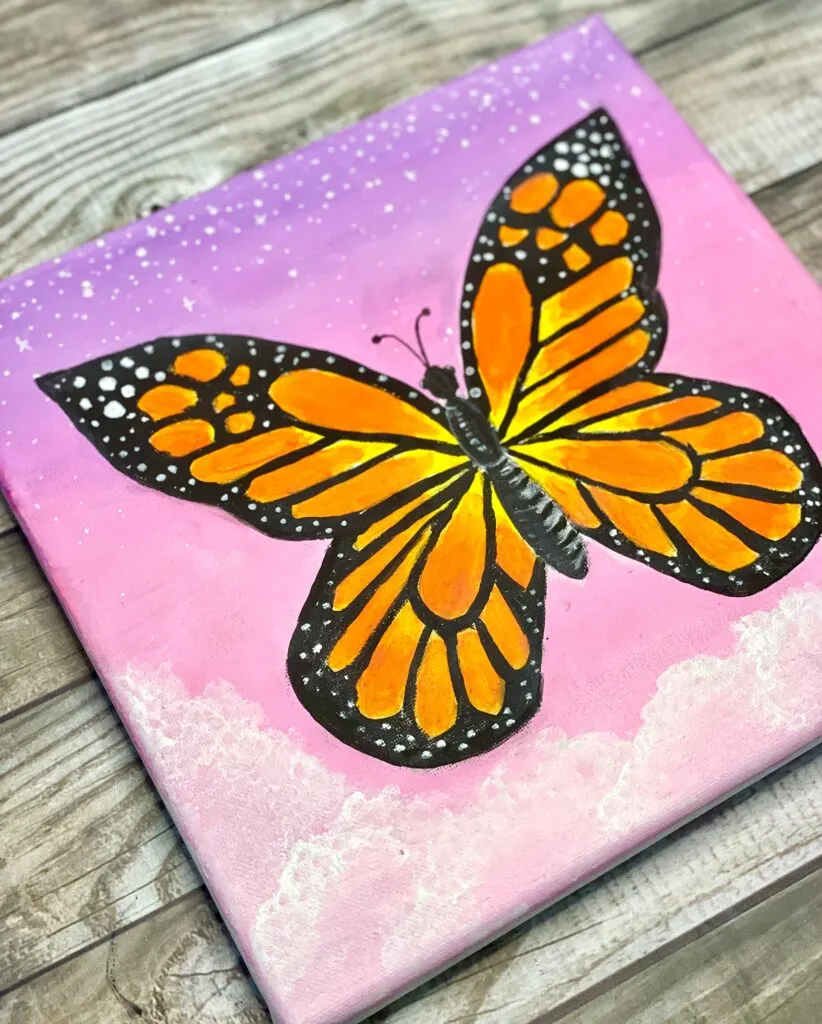
you’re free to get creative and both draw and color your butterfly with different colors and patterns!

To make it easier to eyeball the wings symmetry were going to draw both wings together in unison.
Its much easier that way.
Lets get to it and draw a beautiful butterfly!

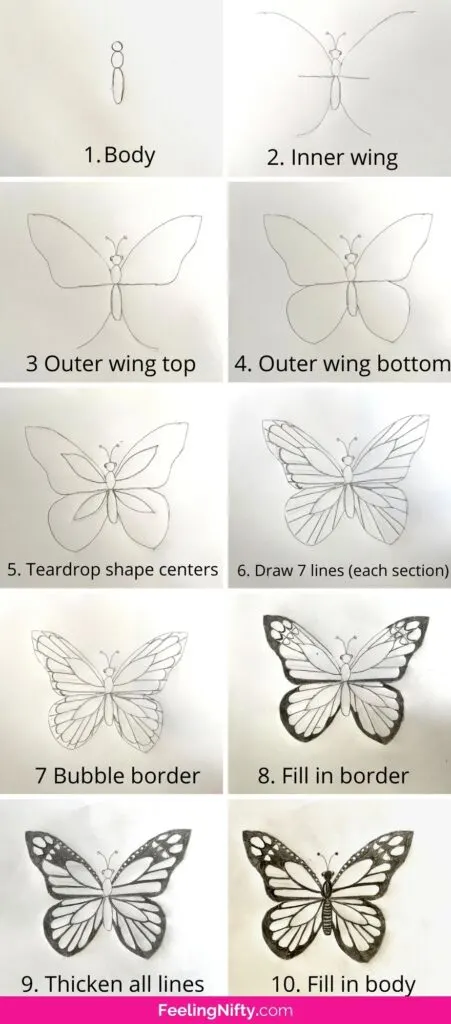
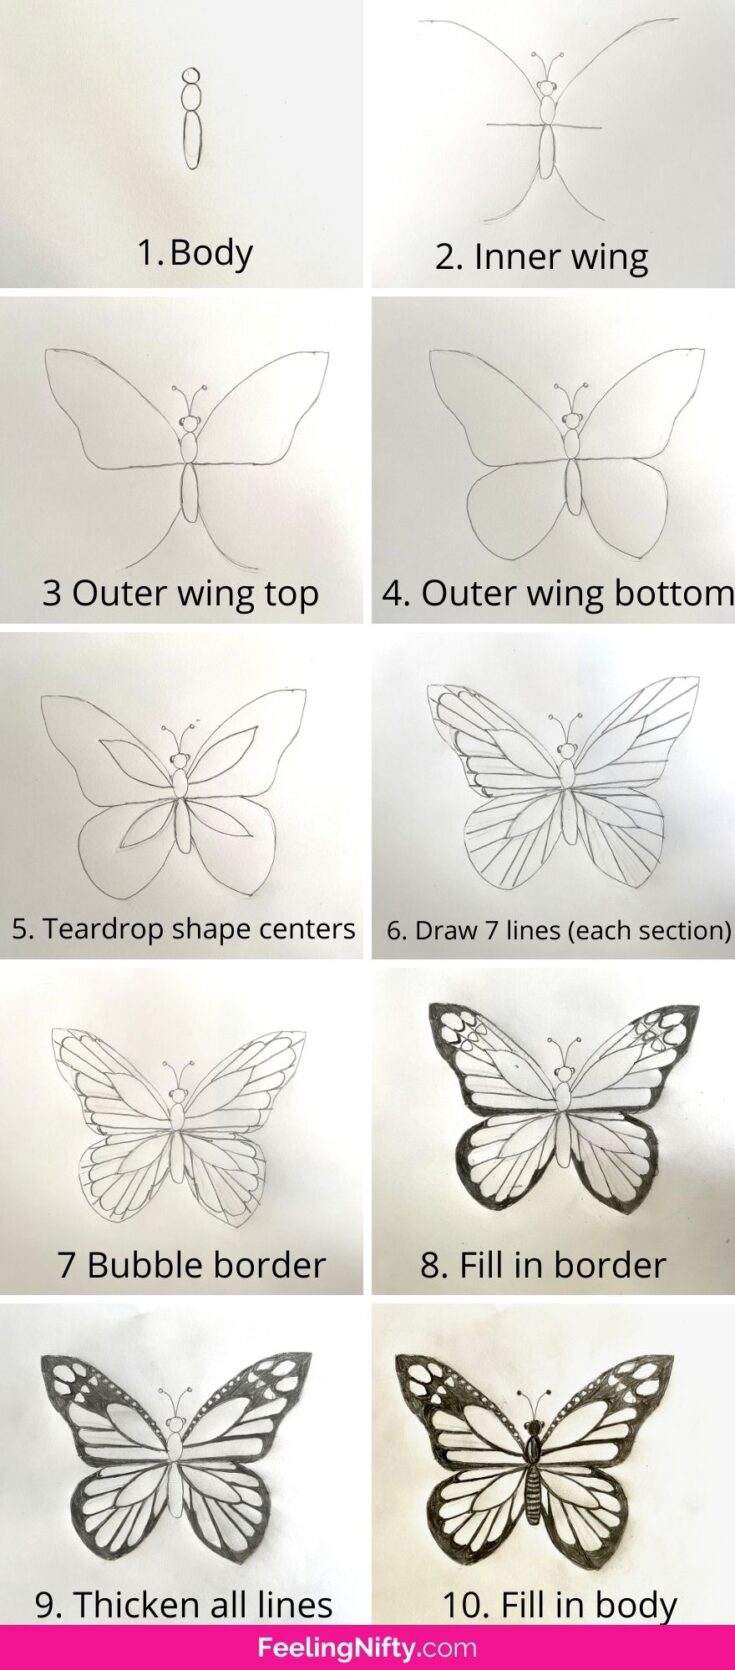
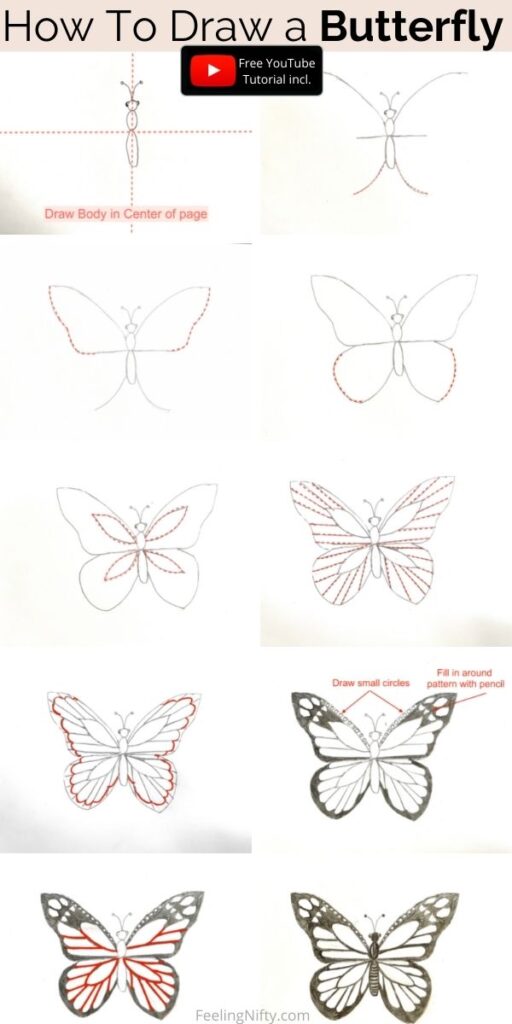
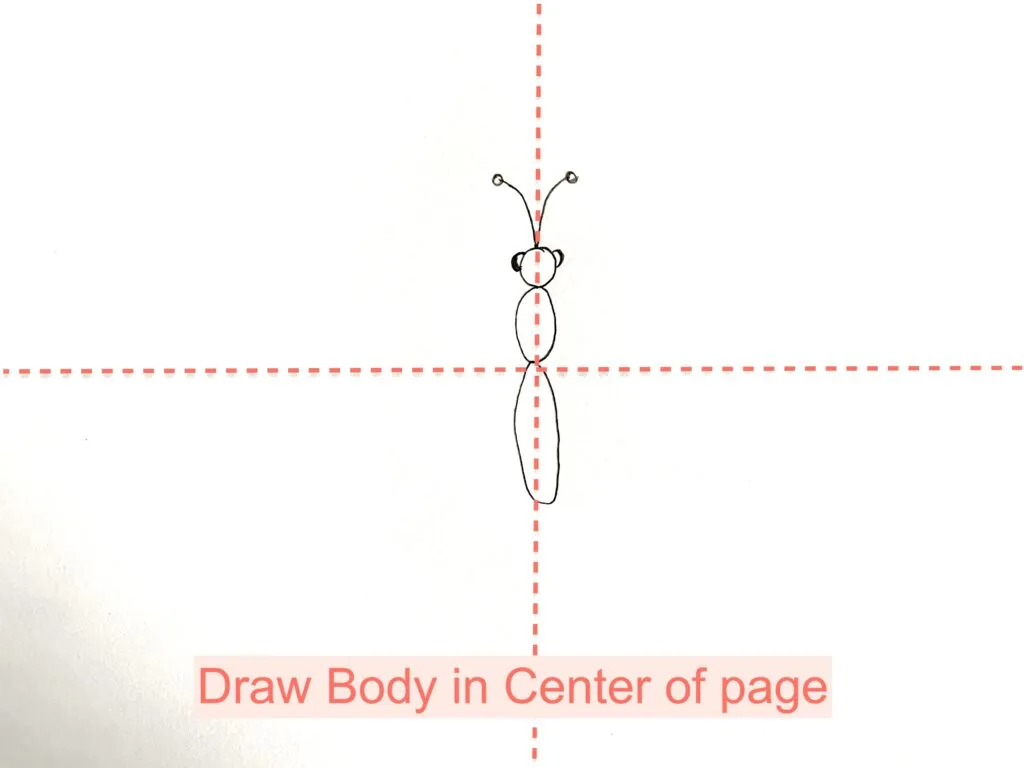
Step 1
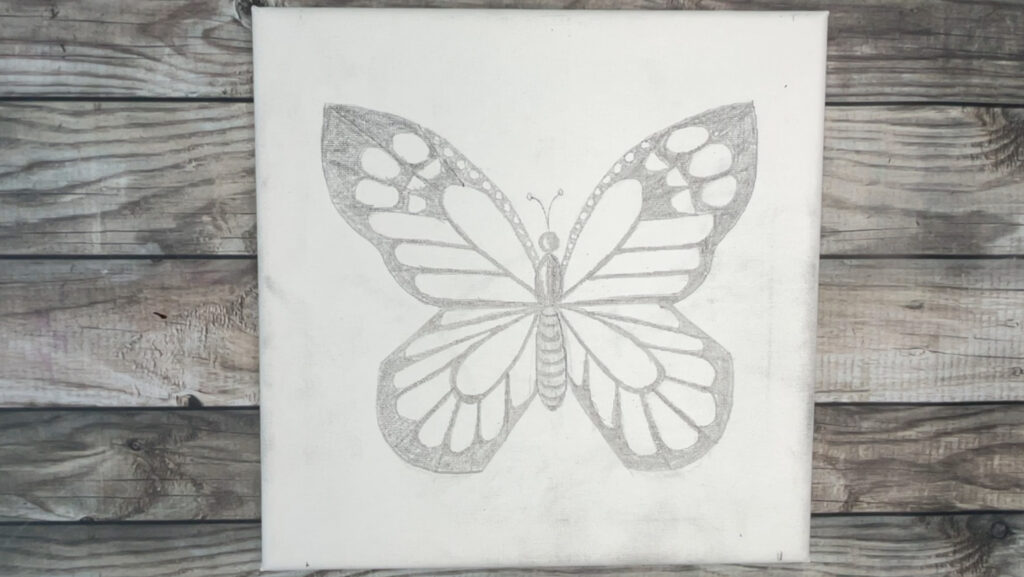
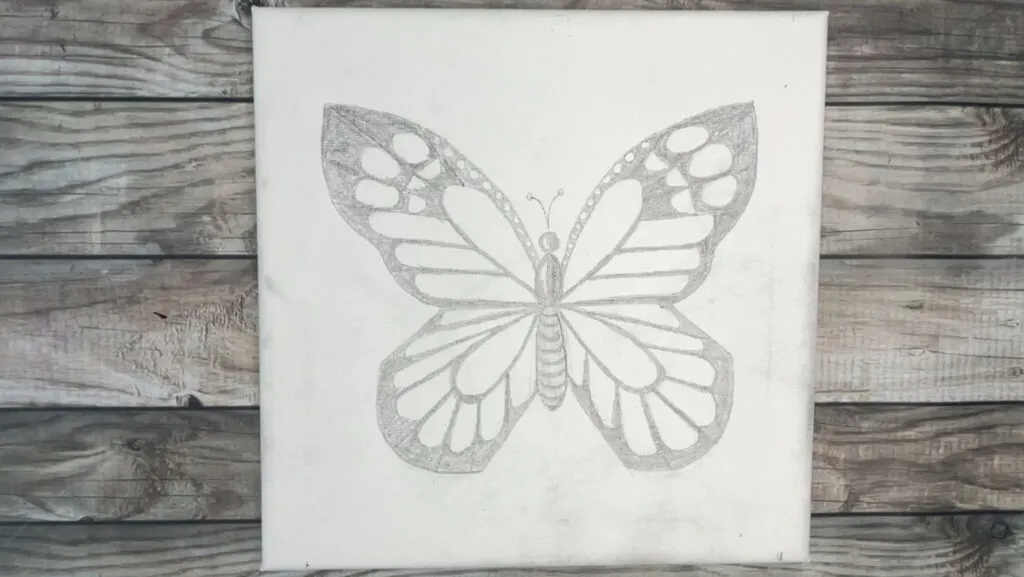
Draw the butterflys head thorax and abdomen.
This trick will centre the butterfly in the middle of your paper.
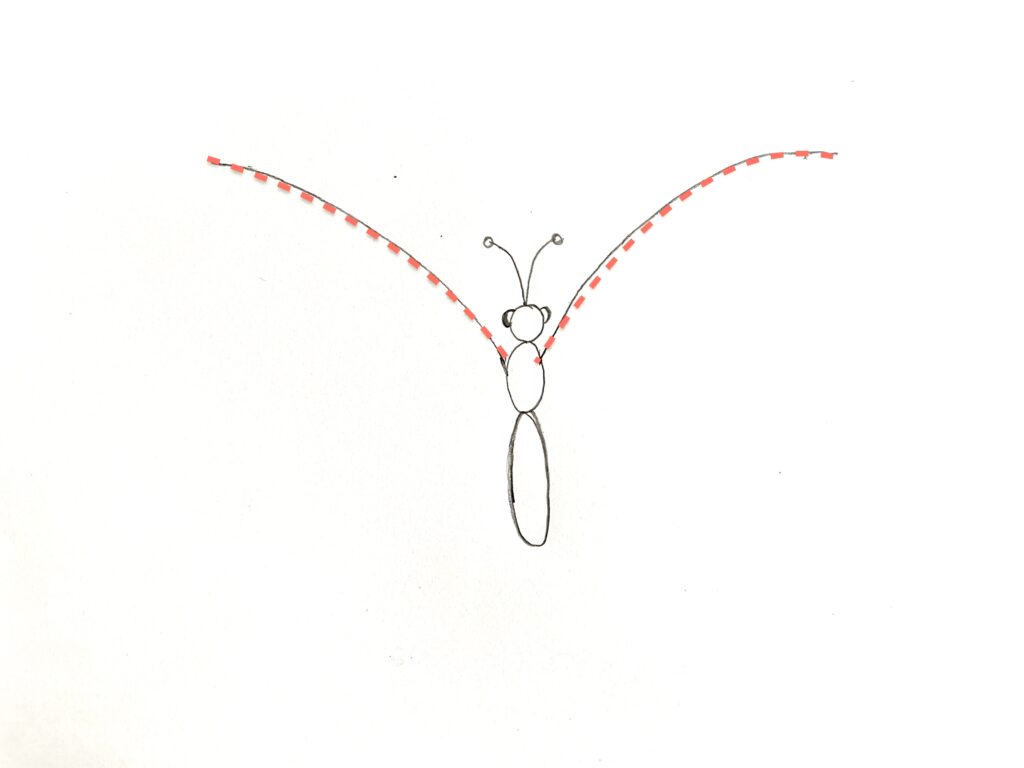
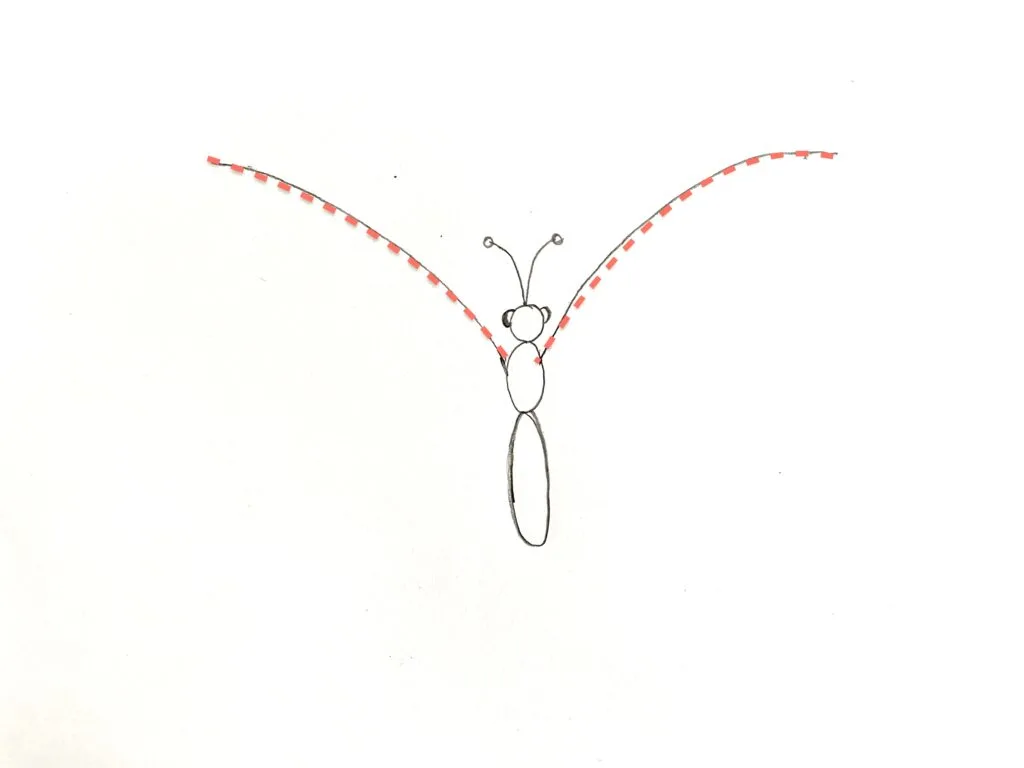
Fun Fact: some butterflies antennae are straight and some are curved, depending on the butterfly species.
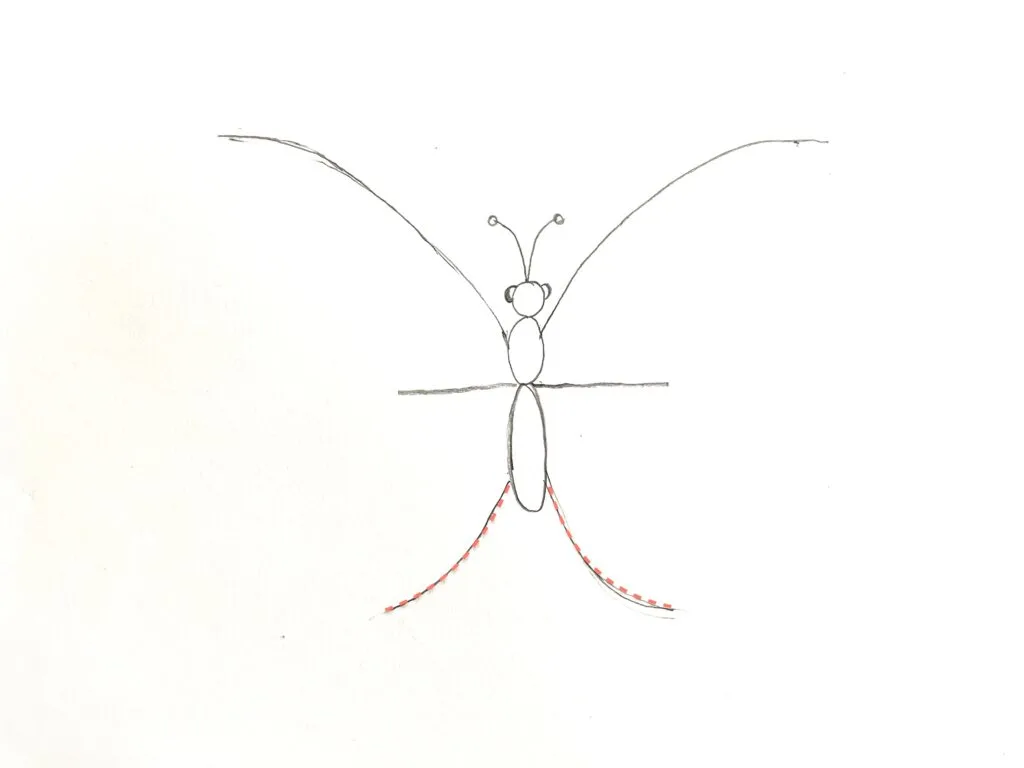
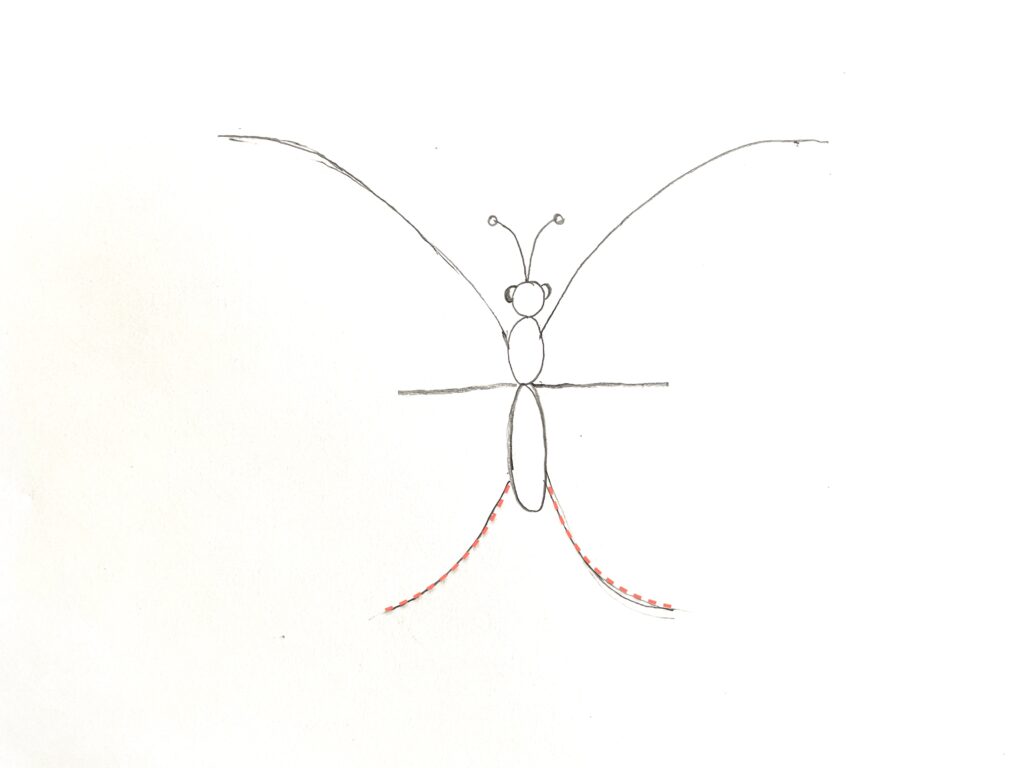
make a run at make these lines equal in length and arch.
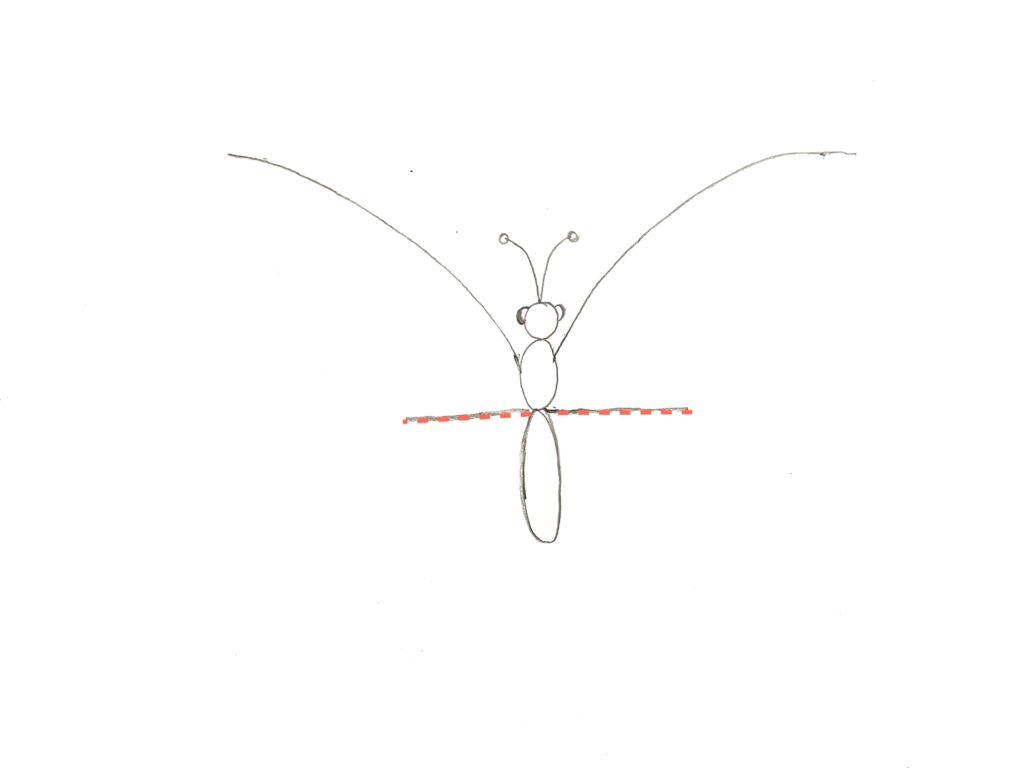
Step 3
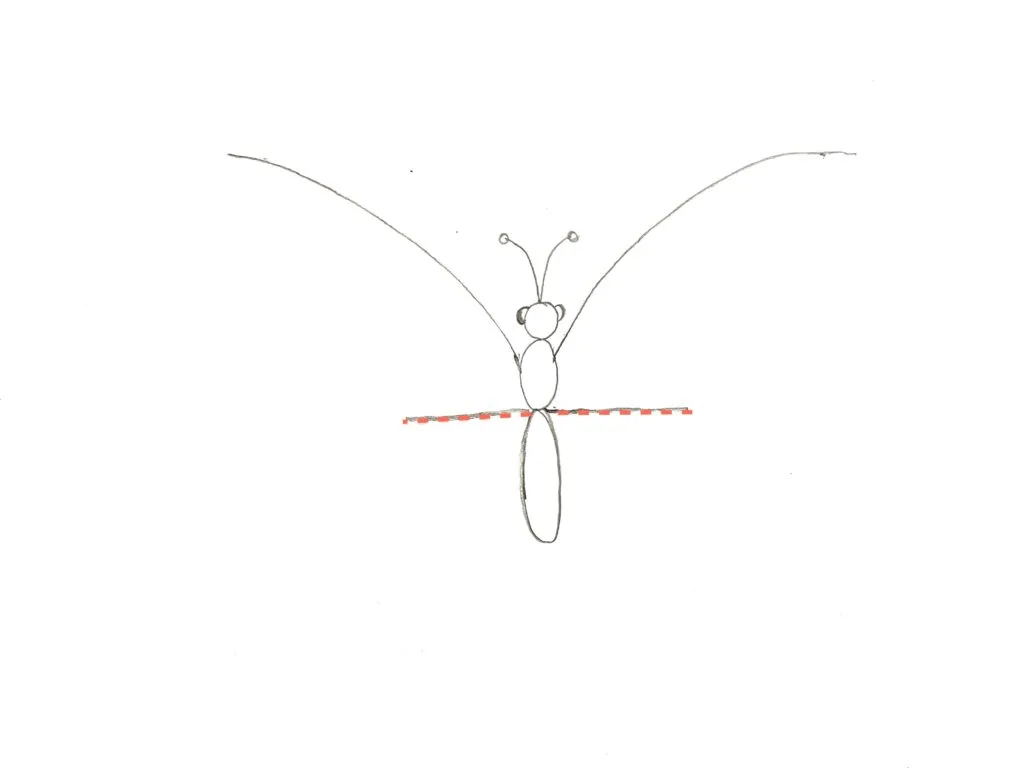
Draw 2 straight lines from the center of the body (on either side).
Make the lines equal in length.
Make lines both the same length and arch.
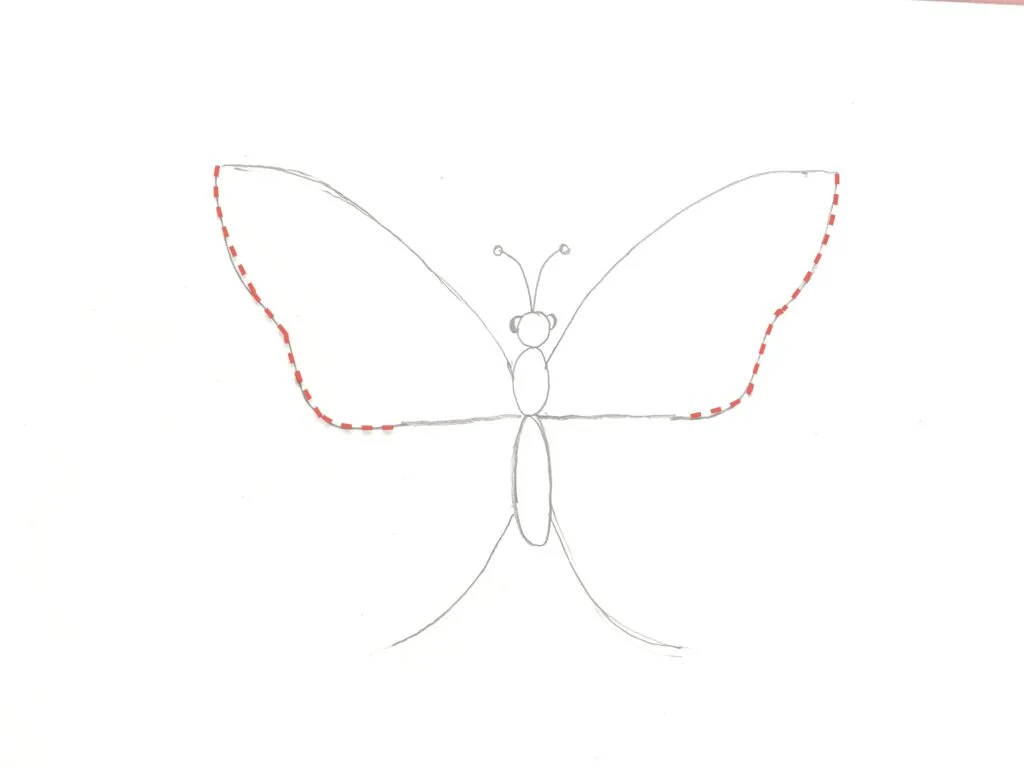
check that they are the same length.
Step 7
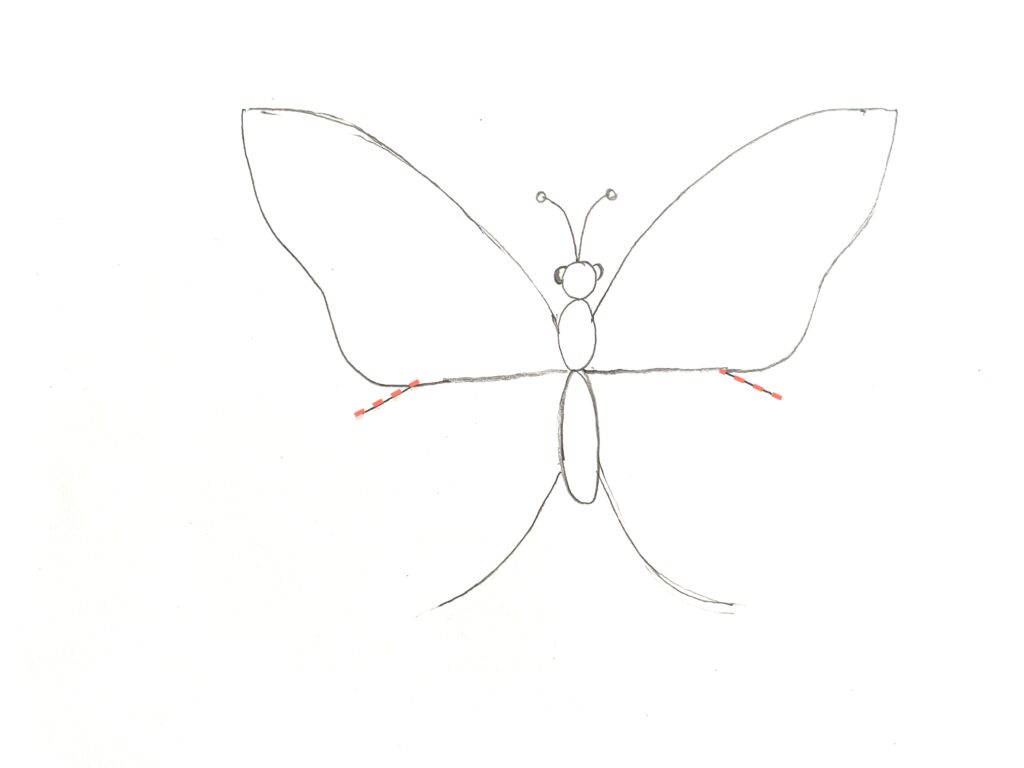
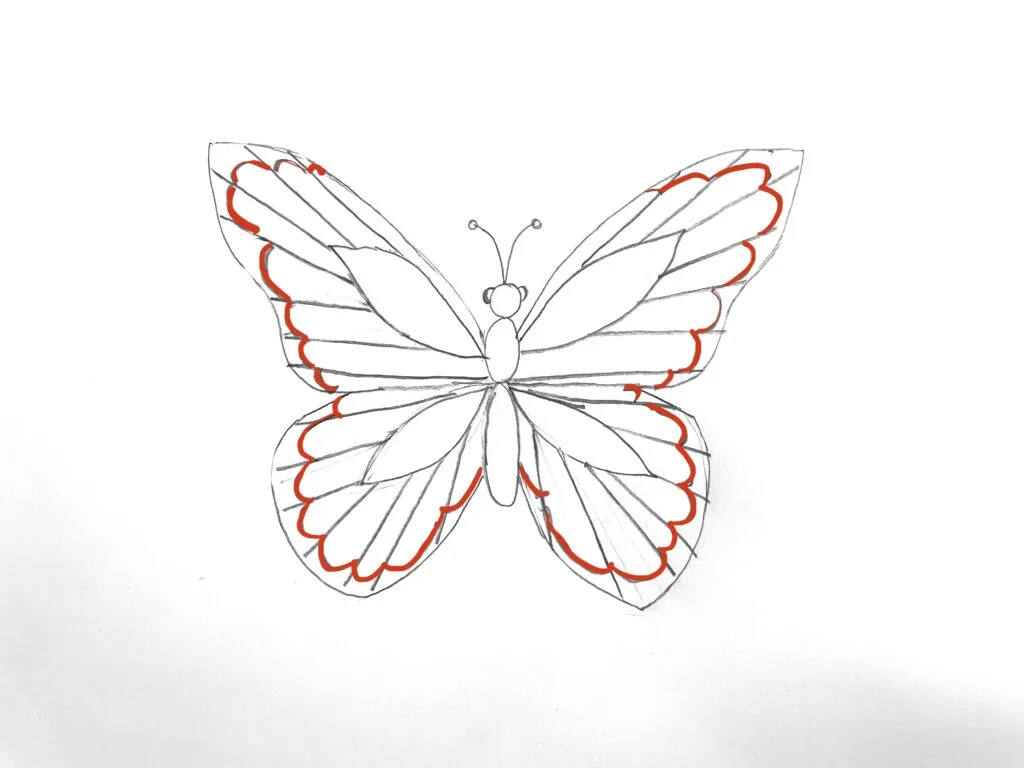
Draw 2 semi-circles connected the diagonal lines from last step and bottom arch lines.
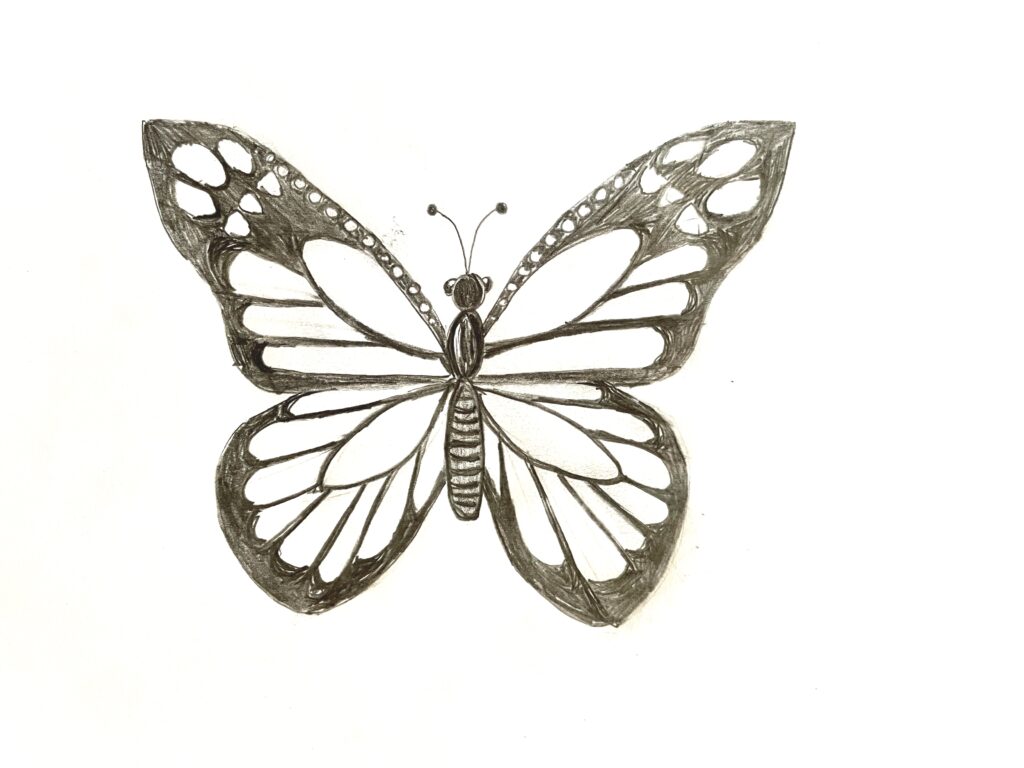
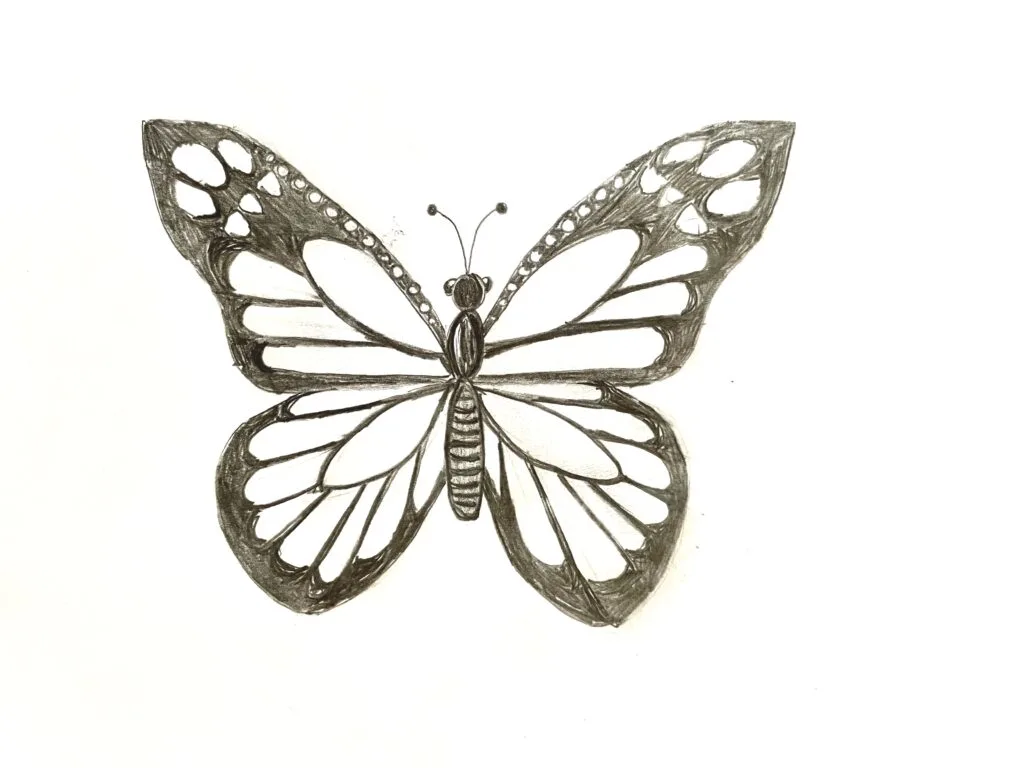
Your butterfly overall shape is now complete.
Take a step back and see to it both sides are looking roughly equal.
Take this chance to fix any areas that stick out.
TIP: It also helps to flip your picture upside down and take a look.
Flipping gives your eyes a fresh perspective and you could much easier see if your butterfly is looking symmetrical.
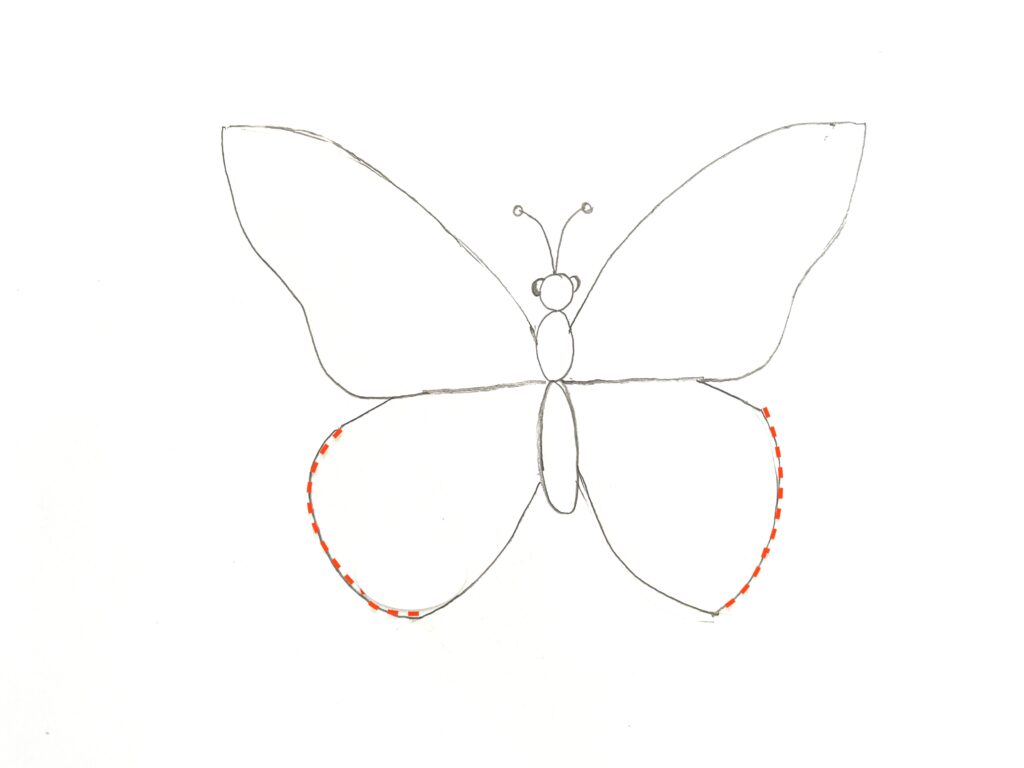
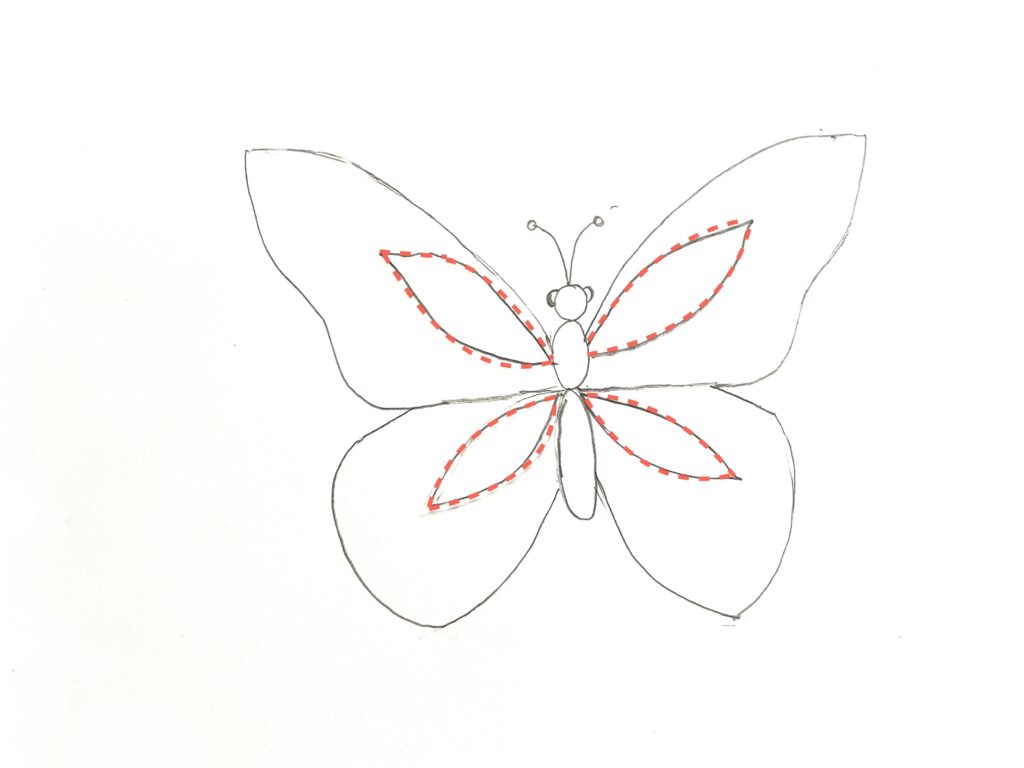
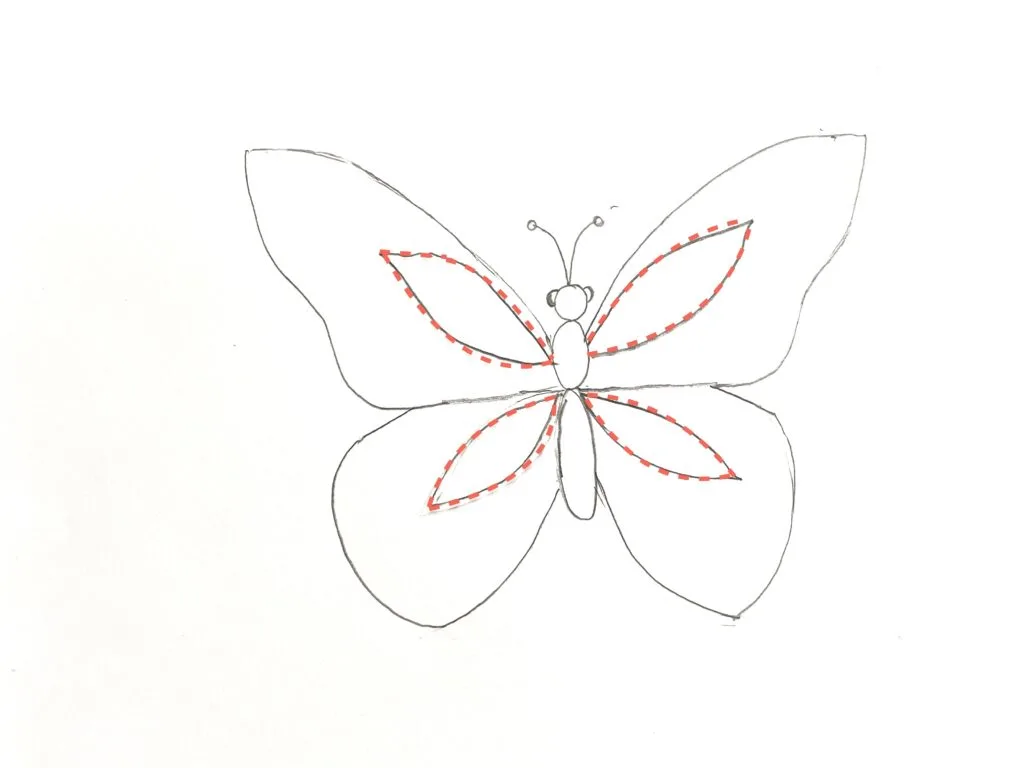
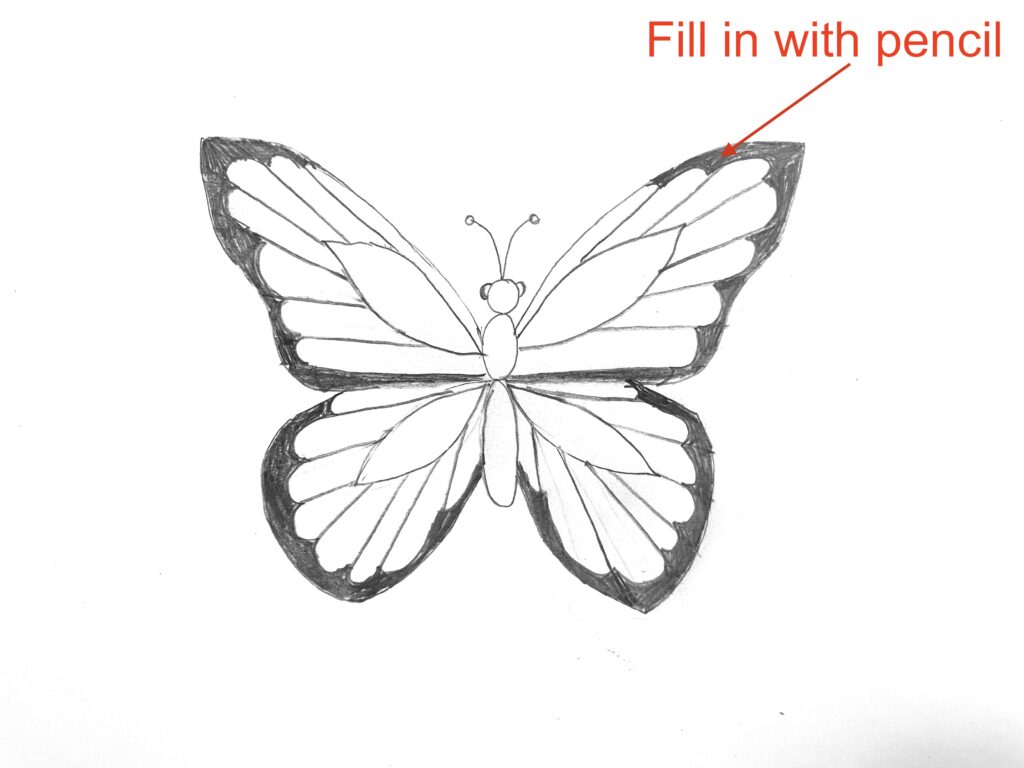
Step 8
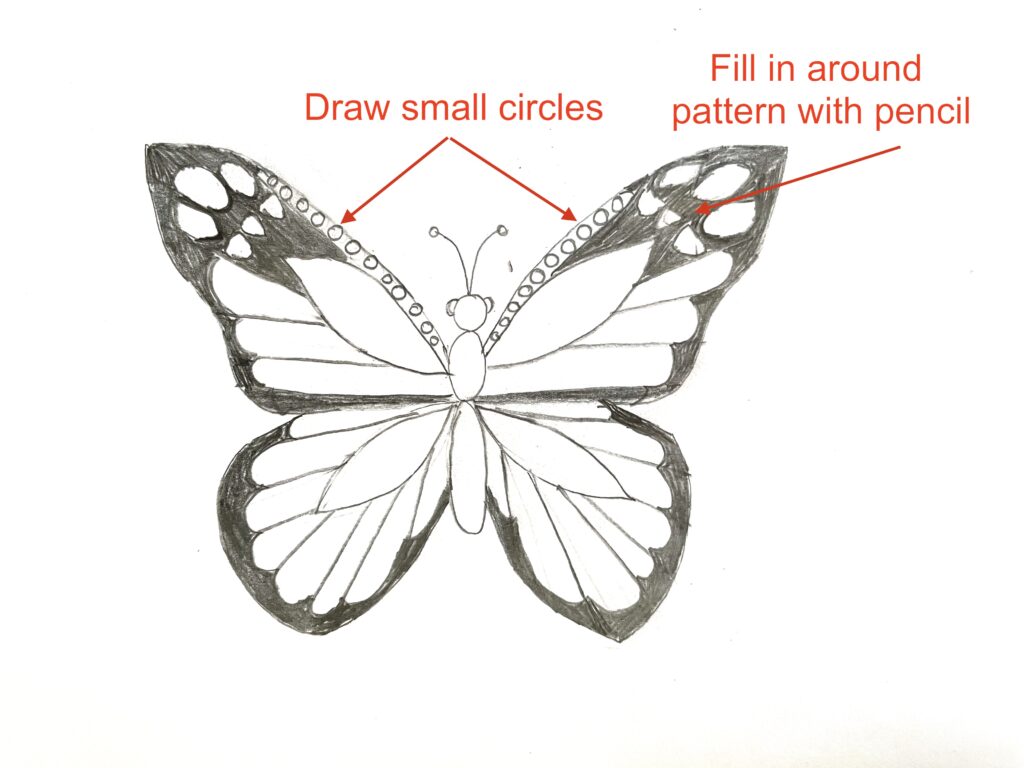
Draw 4 tear drop shapes inside each wing.
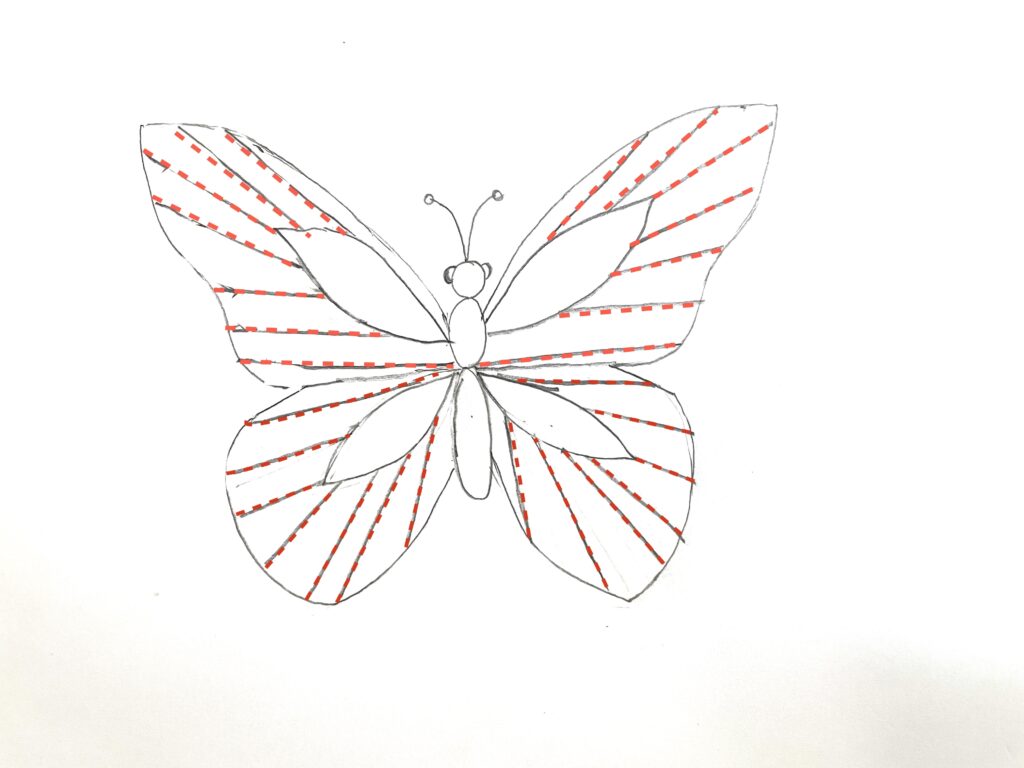
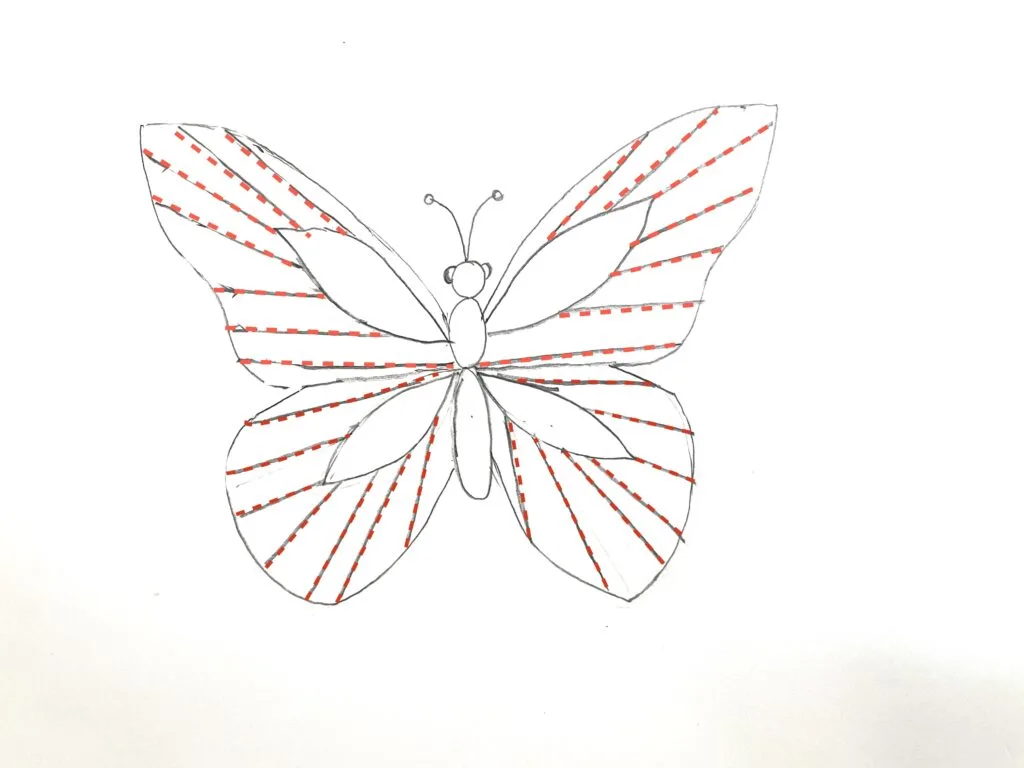
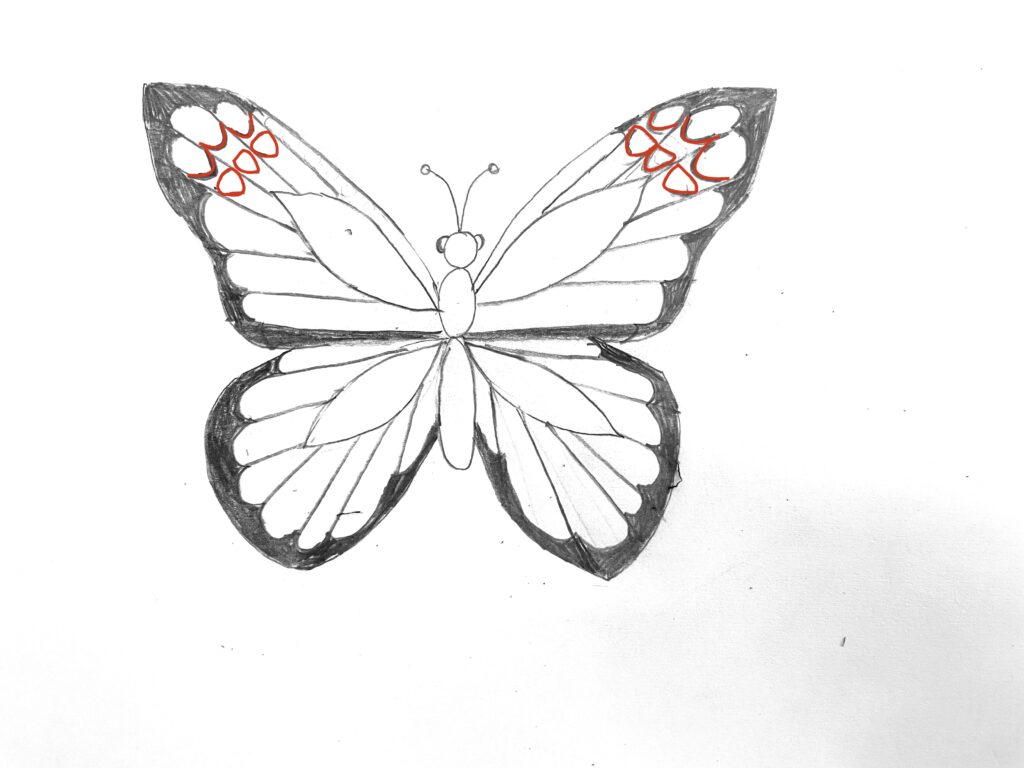
Fun fact: The markings and color on a butterflies wings are different per species.
The colors and patterns help the butterfly to camouflage, protect, attract mates and more.
If you want some inspiration for your butterfly artcheck out this websitewhich has pictures of 50+ species.
Materials
Instructions
Did you make this project?
More Drawing Tutorials
Looking for to practice your drawing skills with some more easy step-by-step drawing tutorials?
Ive got you covered:
If you like this tutorial c’mon pin it!