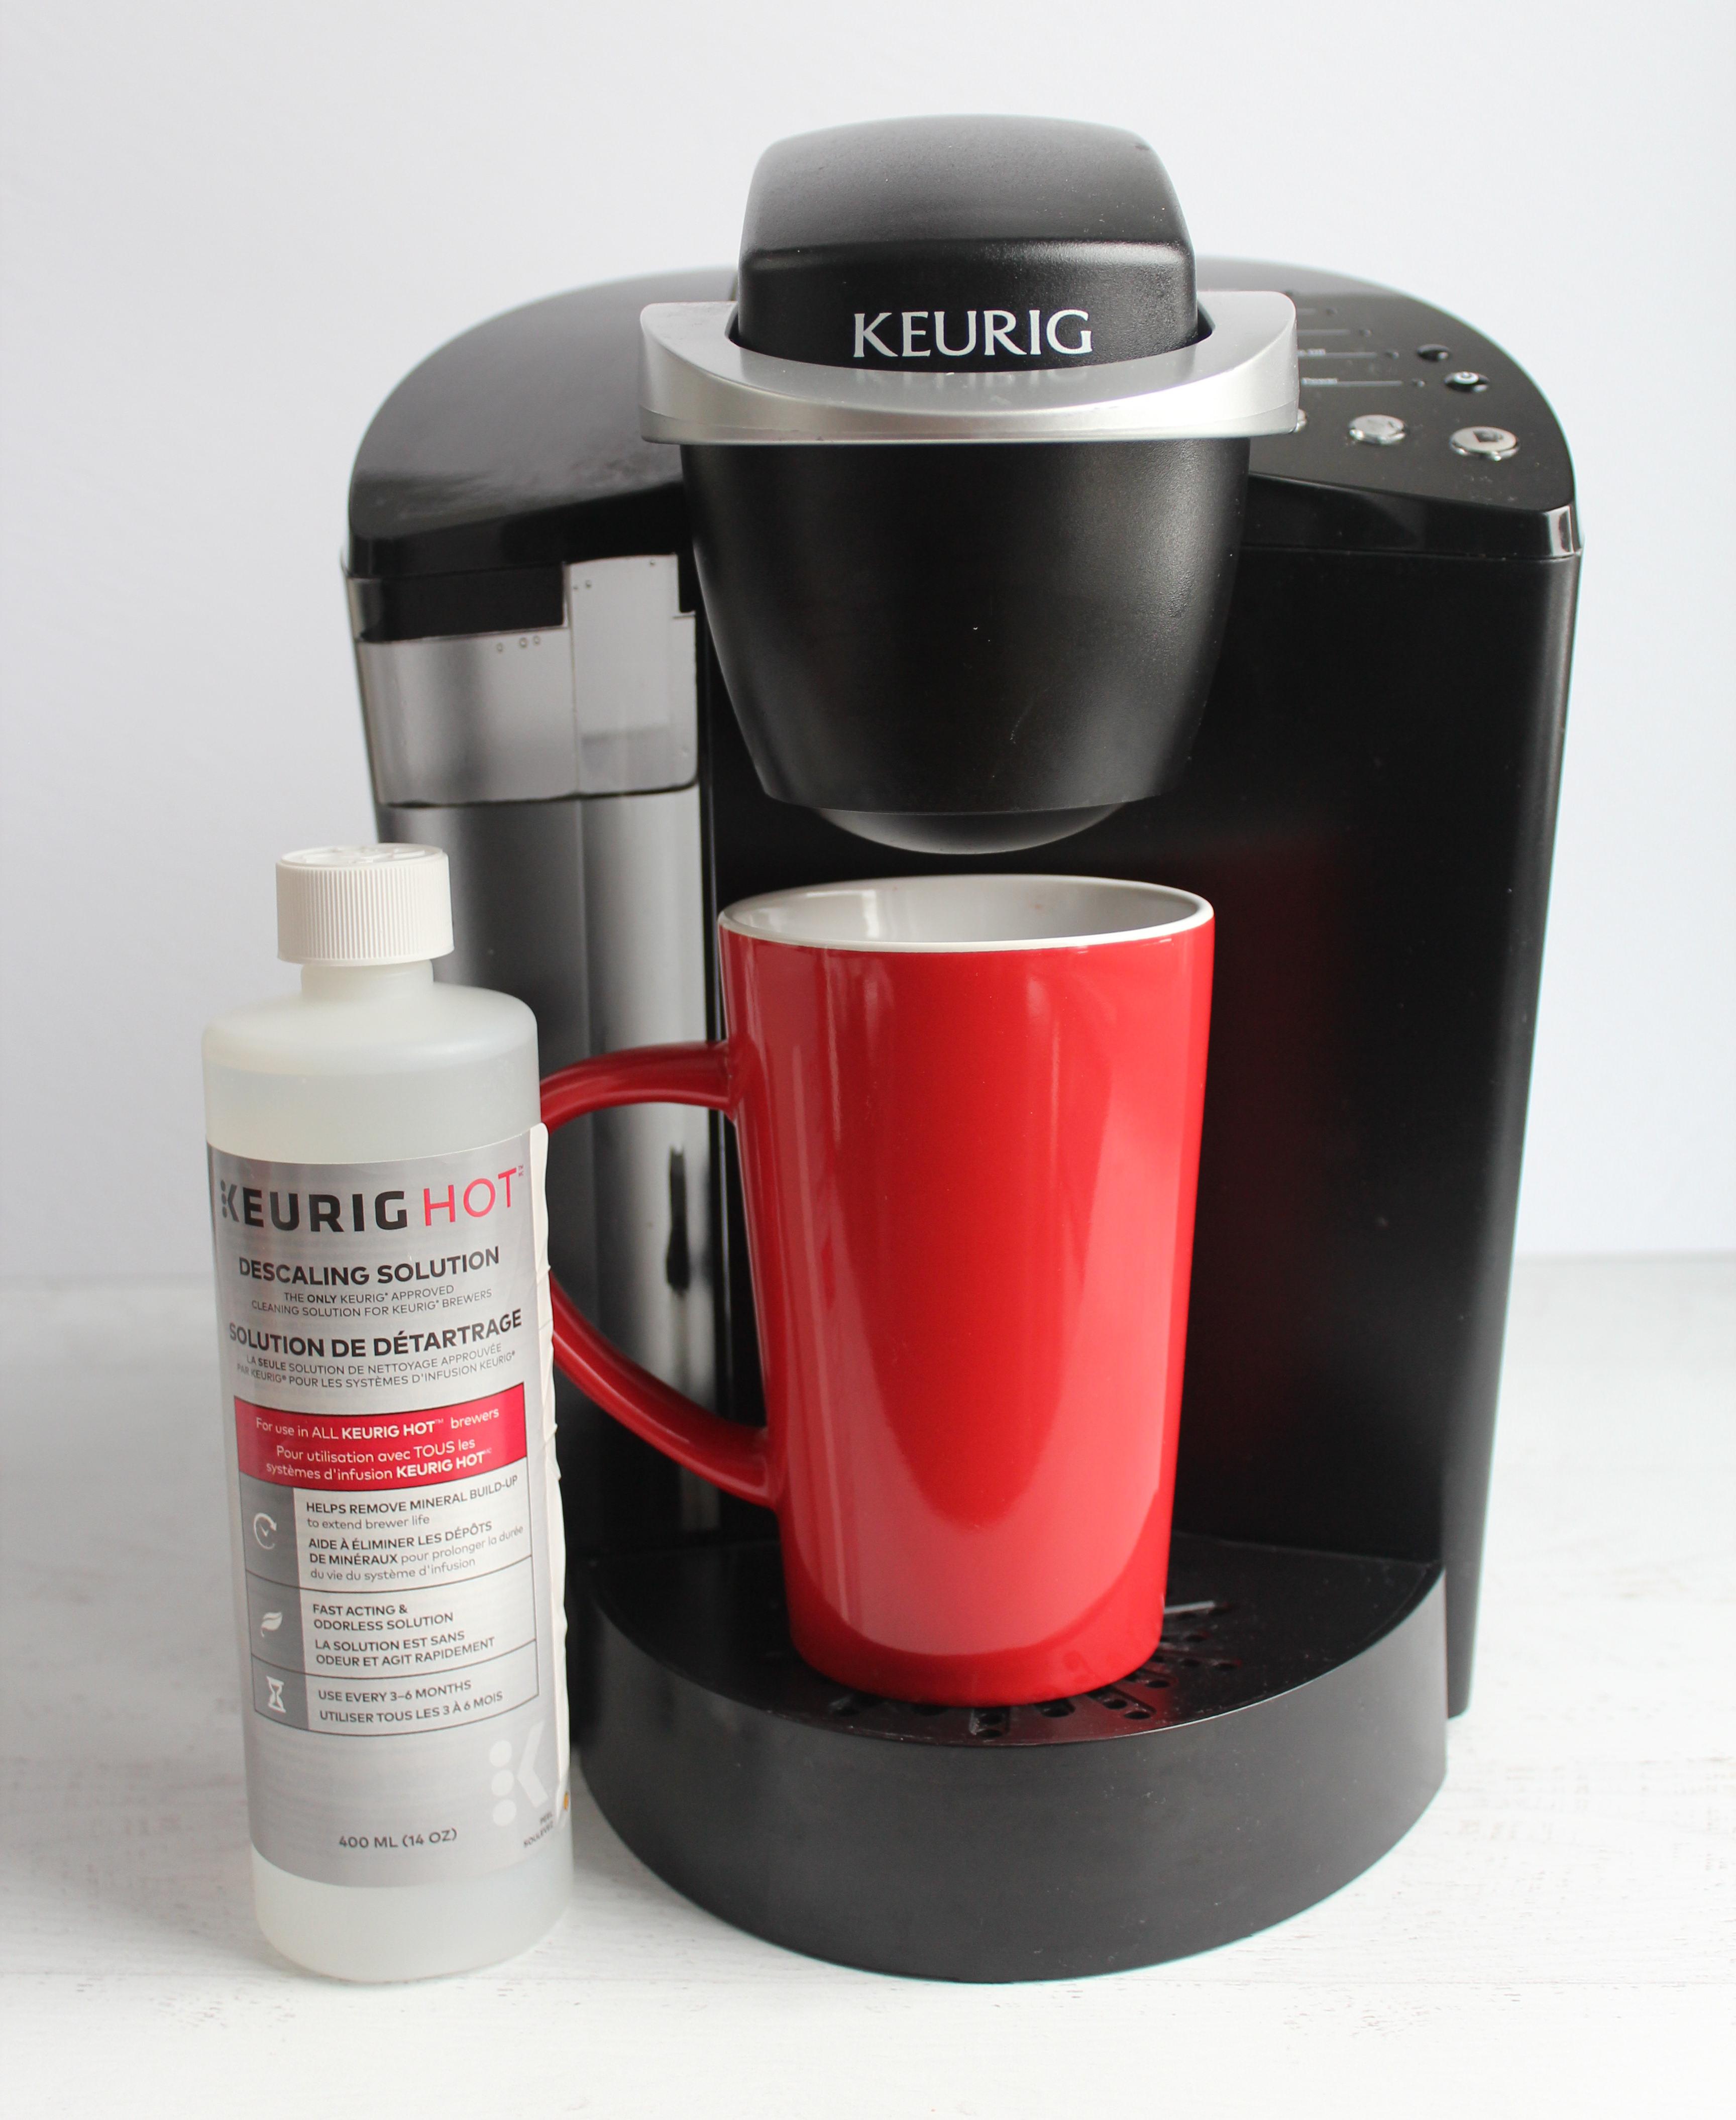
Get your creative juices flowing after an aromatic, energizing and CLEAN cup of coffee.
But did you know that you should be descaling your brewer every 3-6 months?
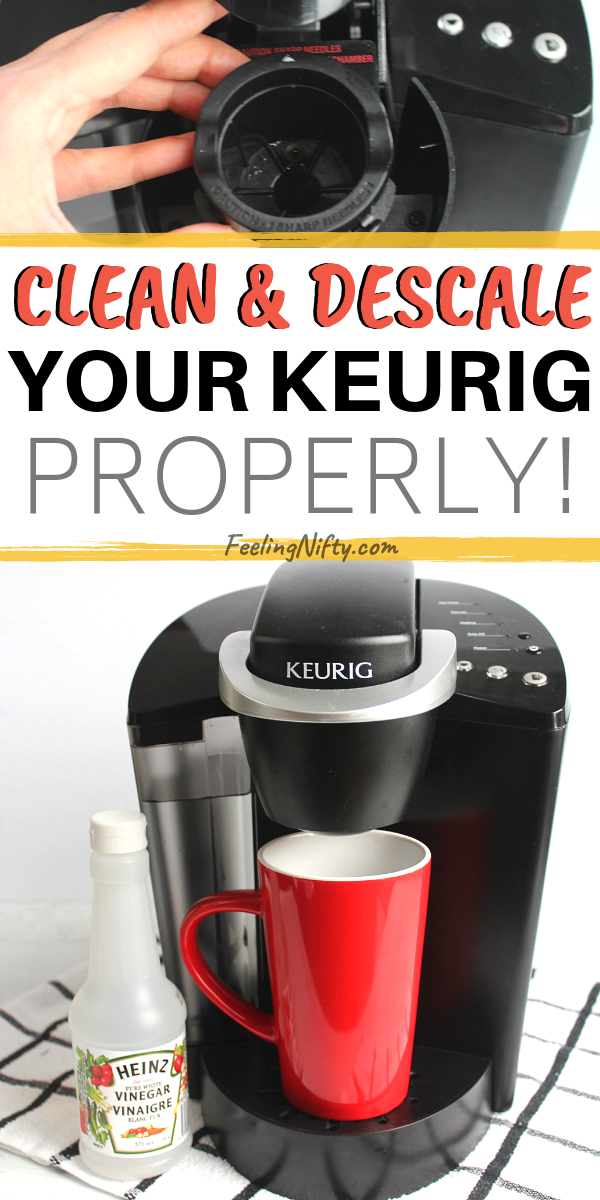
In this post youll learn 2 ways how to descale a Keurig.

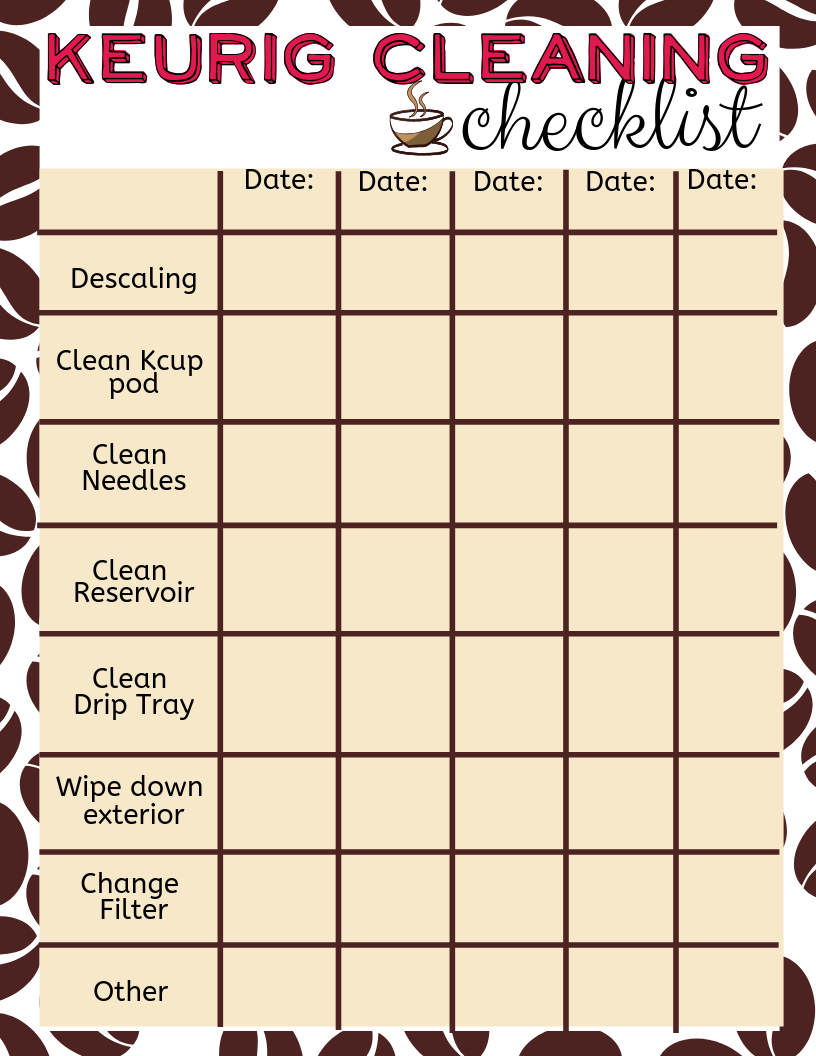
Since were on the topic on Keurig maintenance, Ive also included a top-to-bottom Keurig cleaning checklist.
This includes often missed areas.
Theres a FREE Printable checklist for you too.
The free printable is at the bottom of this post.
Alrighty, grab a cup of your favorite coffee and lets get cleaning!
Then theKeurig descale solutionis your best bet.
This is the method I used and it worked perfectly.
And there wasnt a weird aftertaste in the coffee a complaint many people have.
Its also much faster than the vinegar method.
Heres the steps we used to descale the Keurig without vinegar.
Empty the entire bottle of the Keurig descale solution into the reservoir
5.
Fill the empty bottle with cool fresh water and add that into the reservoir.

So the final solution in the reservoir is 1 part Keurig solution and 1 part water.
- fire up the Keurig where you add in your coffee pods.
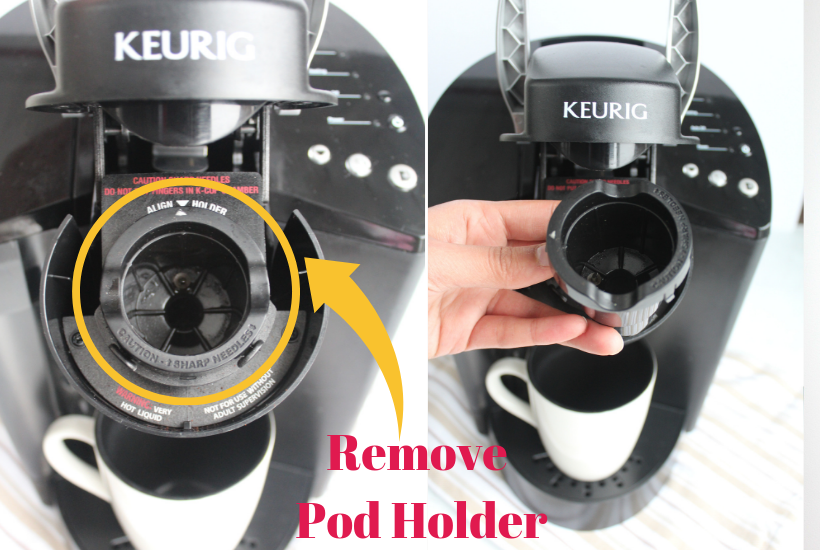
Remove the coffee pod holder from the Keurig.
Repeat steps 8 and 9 until the add water indicator turns on.
13.Fill the reservoir with fresh water up to themax fill line.Place it back onto your Keurig
14.
Run additional coffee cycles with the fresh water.

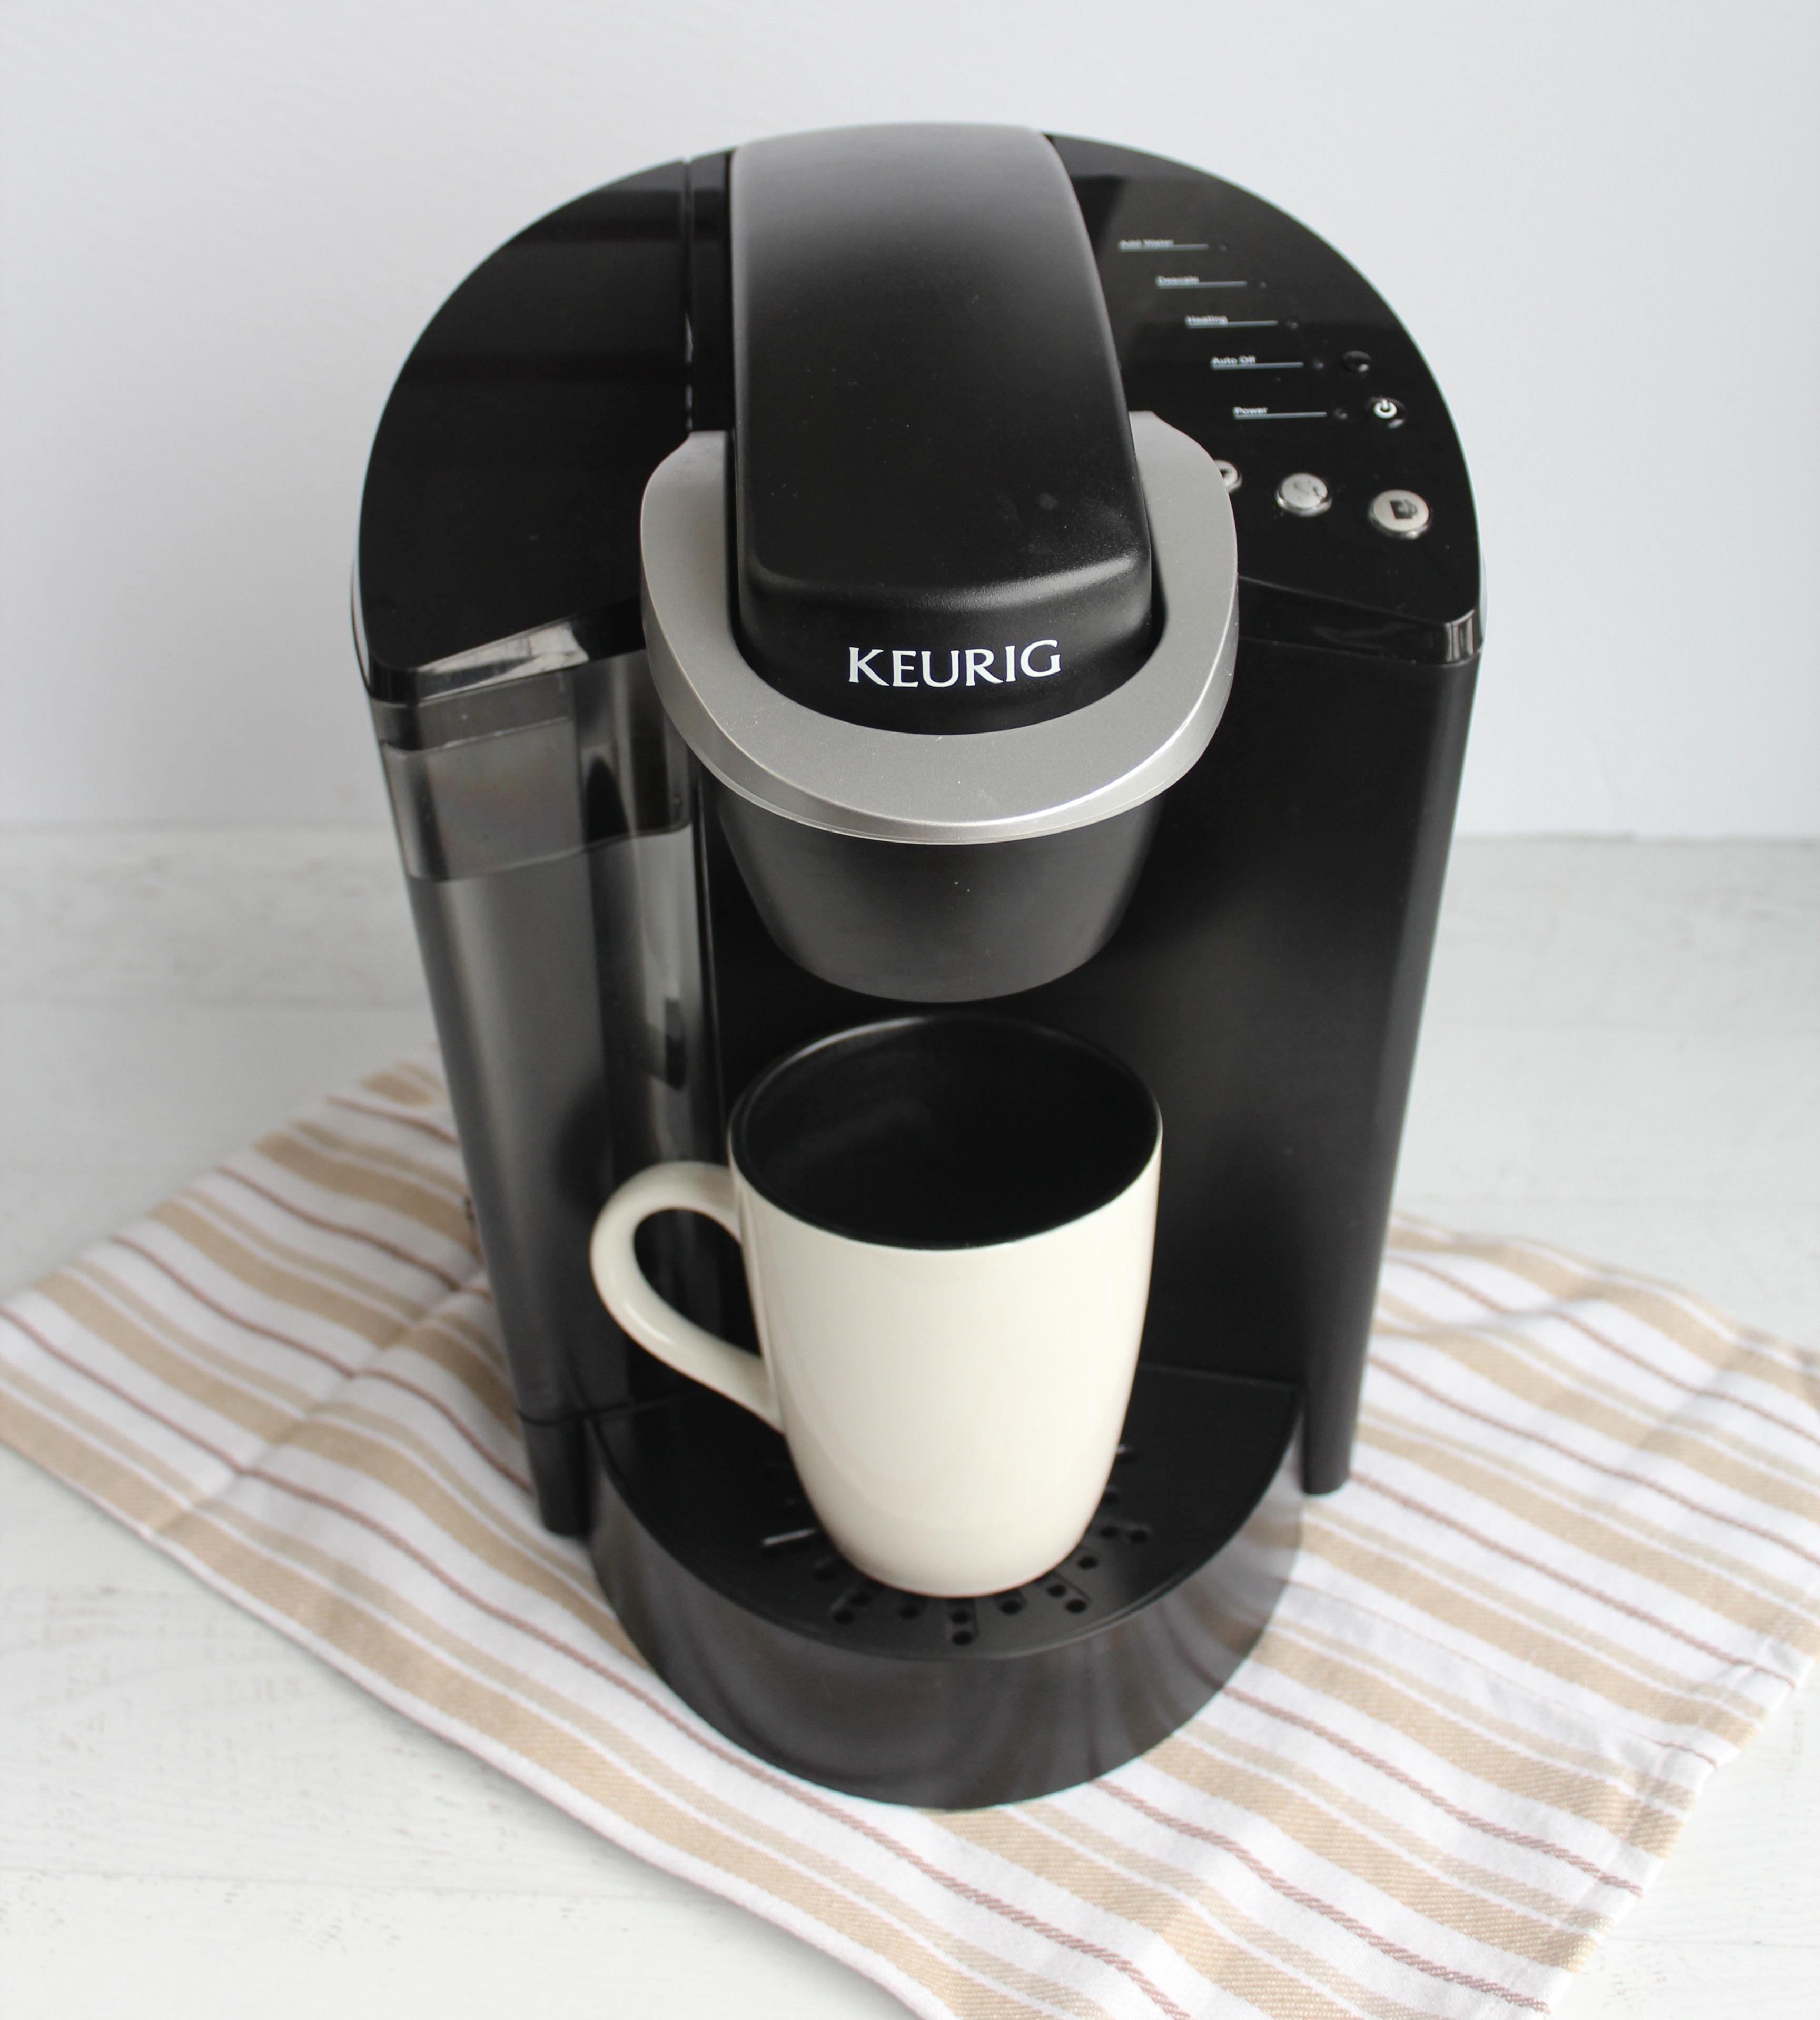
15.Congrats, you did it!
Now you’re free to enjoy your favorite Keurig Coffee with your newly cleaned Keurig Coffee Brewer.
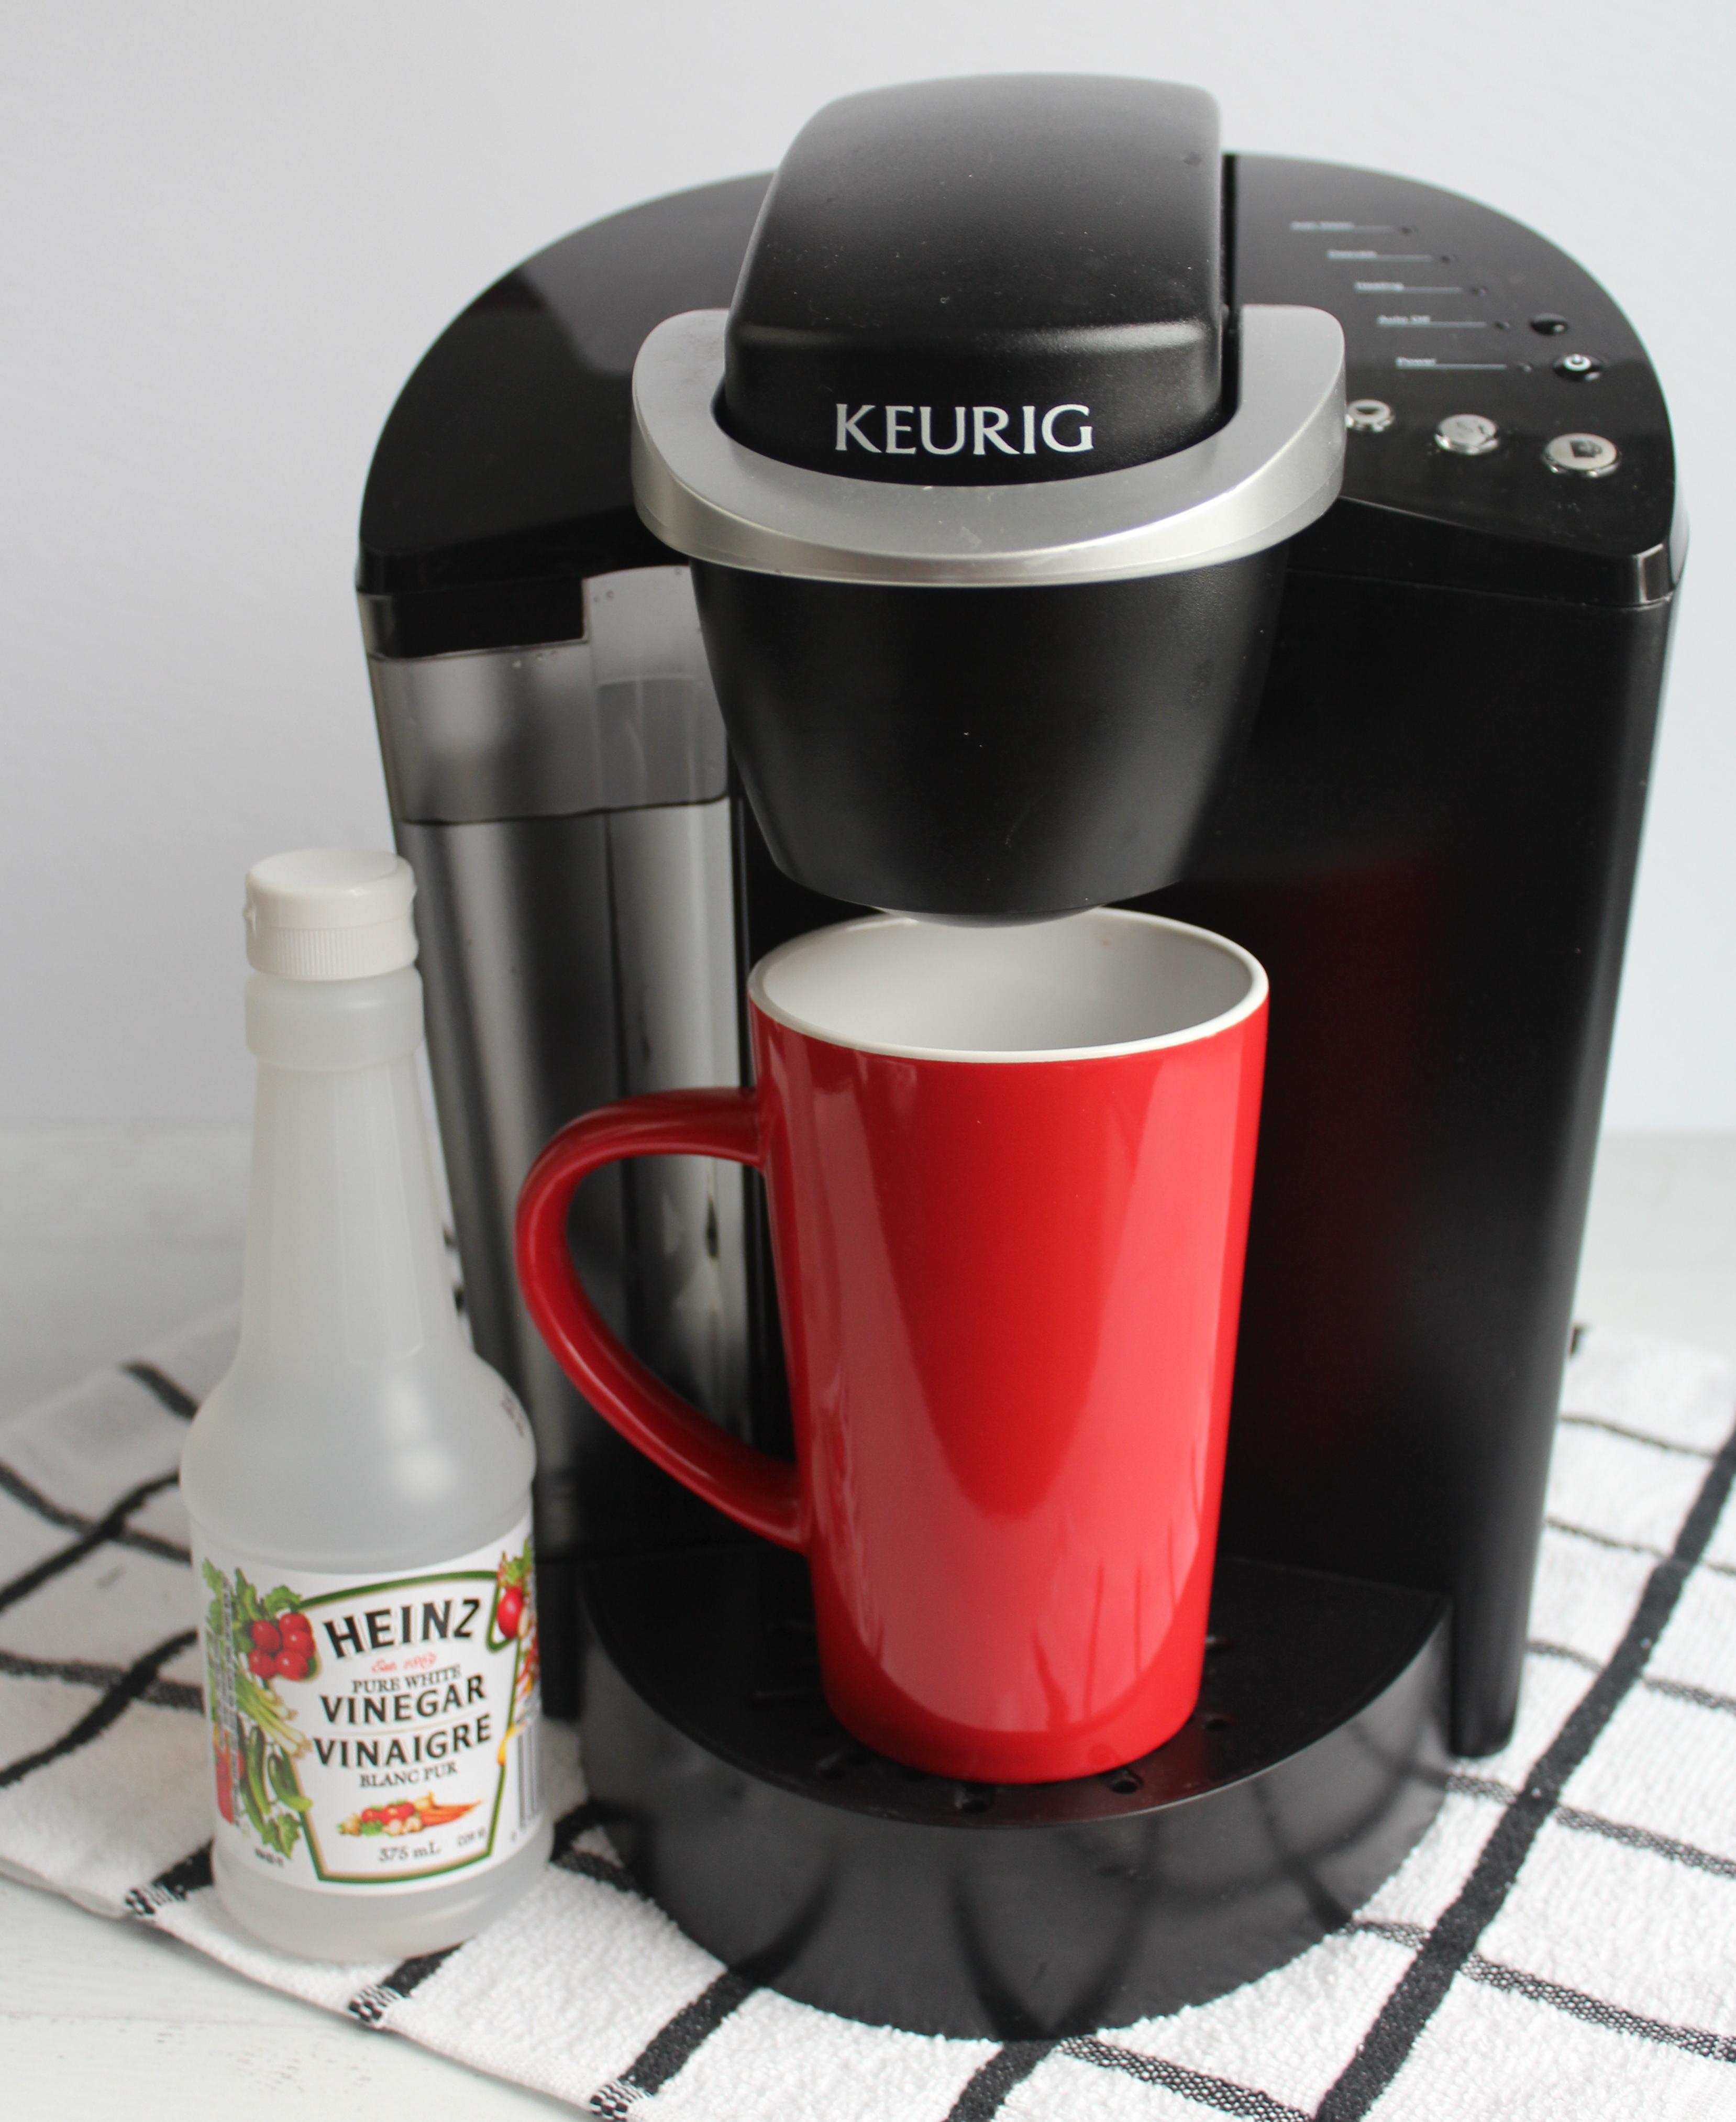
Using white vinegar is another great way to descale and clean your Keurig.
Its also another official Keurig cleaning method.
Also remember to only usepure white vinegar(Keurigs recommendations).
No apple cider vinegar or rice vinegar as people often ask.
Remove the water filter from the reservoir (if you have one)
2.
Dump out all the water from the reservoir
4.
Fill the reservoir with pure white vinegar up to theMax Fill Line.DO NOT dilute the vinegar with water.
5.Remove the coffee pod holder from the Keurig.
wrap up the compartment.
Turn the Keurig ON.
10.Let your brewer stand for4 hourswith the power left ON.
11.After 4 hours, dump out any remaining water/solution from the reservoir, and thoroughly rinse it with water.
Vinegar and coffee are not he best combo!
Run additional coffee cycles with fresh water.
The Keurig recomendation says run about 12 cycles (with largest cup size button).
This step gets rid of any residual vinegar from the Brewer.
Congrats, you did it!
Now pop in your favorite k-cup and enjoy a cup of hot (clean) coffee goodness.
TIP:If your coffee still has a vinegar aftertaste, repeat step 12-13 another time.
And there you go you now learned how to descale Keurig with vinegar and without vinegar.
They are both valid ways to descale a Keurig, its personal preference on the method you choose.
Besides descaling, there are other parts of your Keurig that need cleaning too.
Here youll learn how to clean your Keurig- from top to bottom.
It includes often forgot about parts that need a cleaning.
Also, if your Keurig isnt working properly you could follow the steps below.
This will confirm it isnt something as simple as cleaning it out.
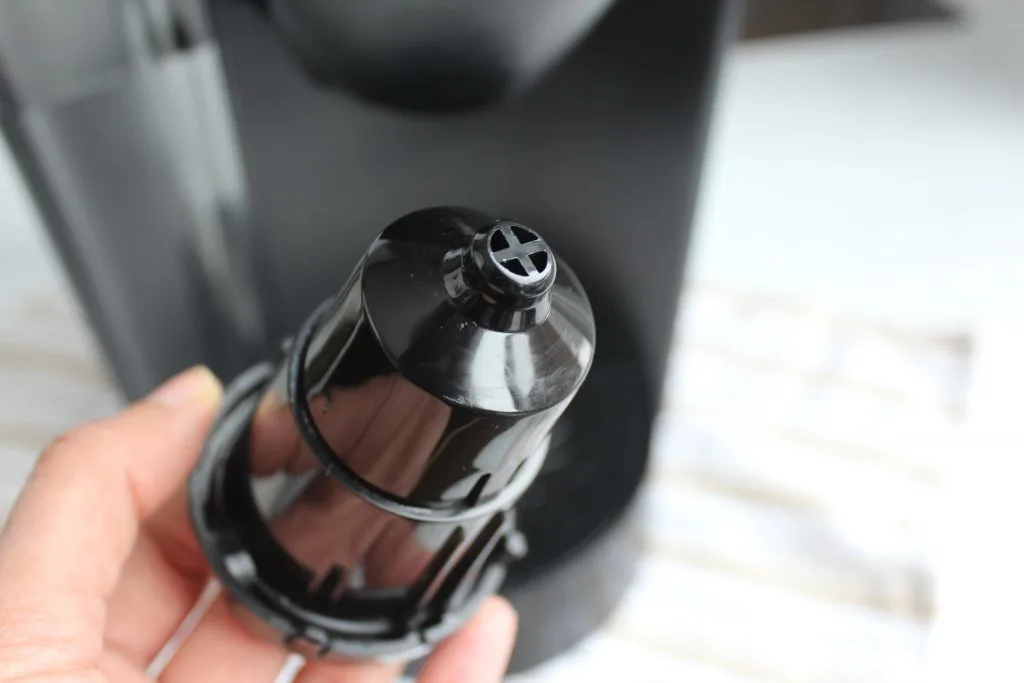
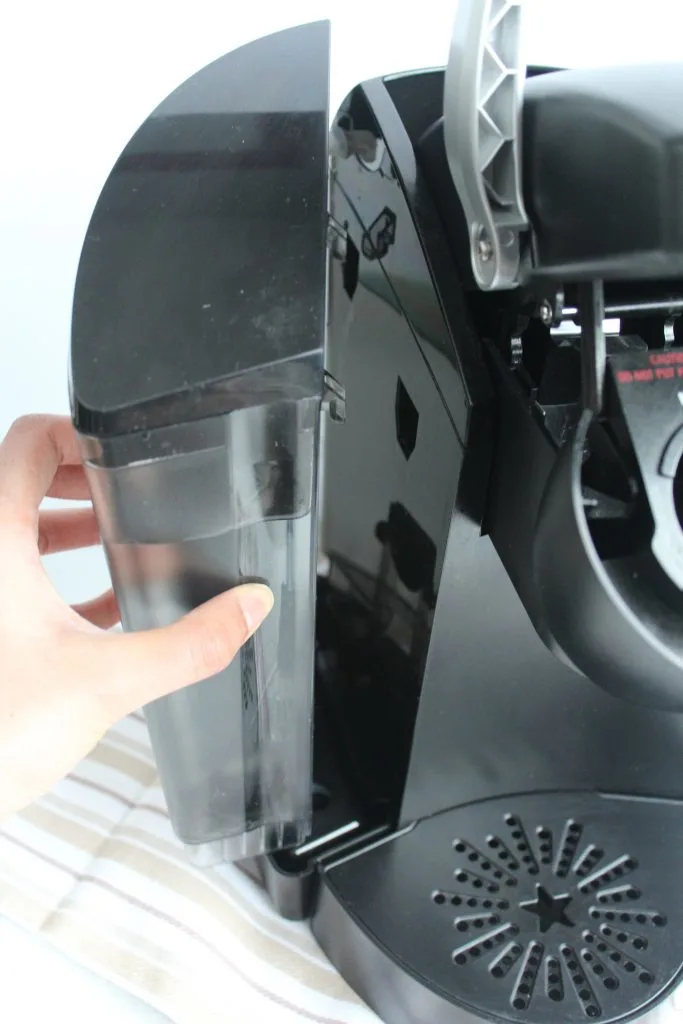
STEP 1: Keurig Pod holder cleaning
Take your pod holder out.
check that the 4 holes at the bottom are clean and clear of any obstruction.
If your looking for a faster / efficient way you might buy theKeurig pod cleaners.
The Keurig pod cleaner can also be used to clean the Keurig after hot chocolate or flavored coffees.
It cleans the pod so theres no flavor transfer into following brews.
This is the sharp parts that pierces the k-cups when you exit the pod holder.
Over time, a buildup of coffee grounds can accumulate in the crevices of the Keurig needles.
This accumulation should be cleaned out.
Often, you will have at a minimum 2 needles.
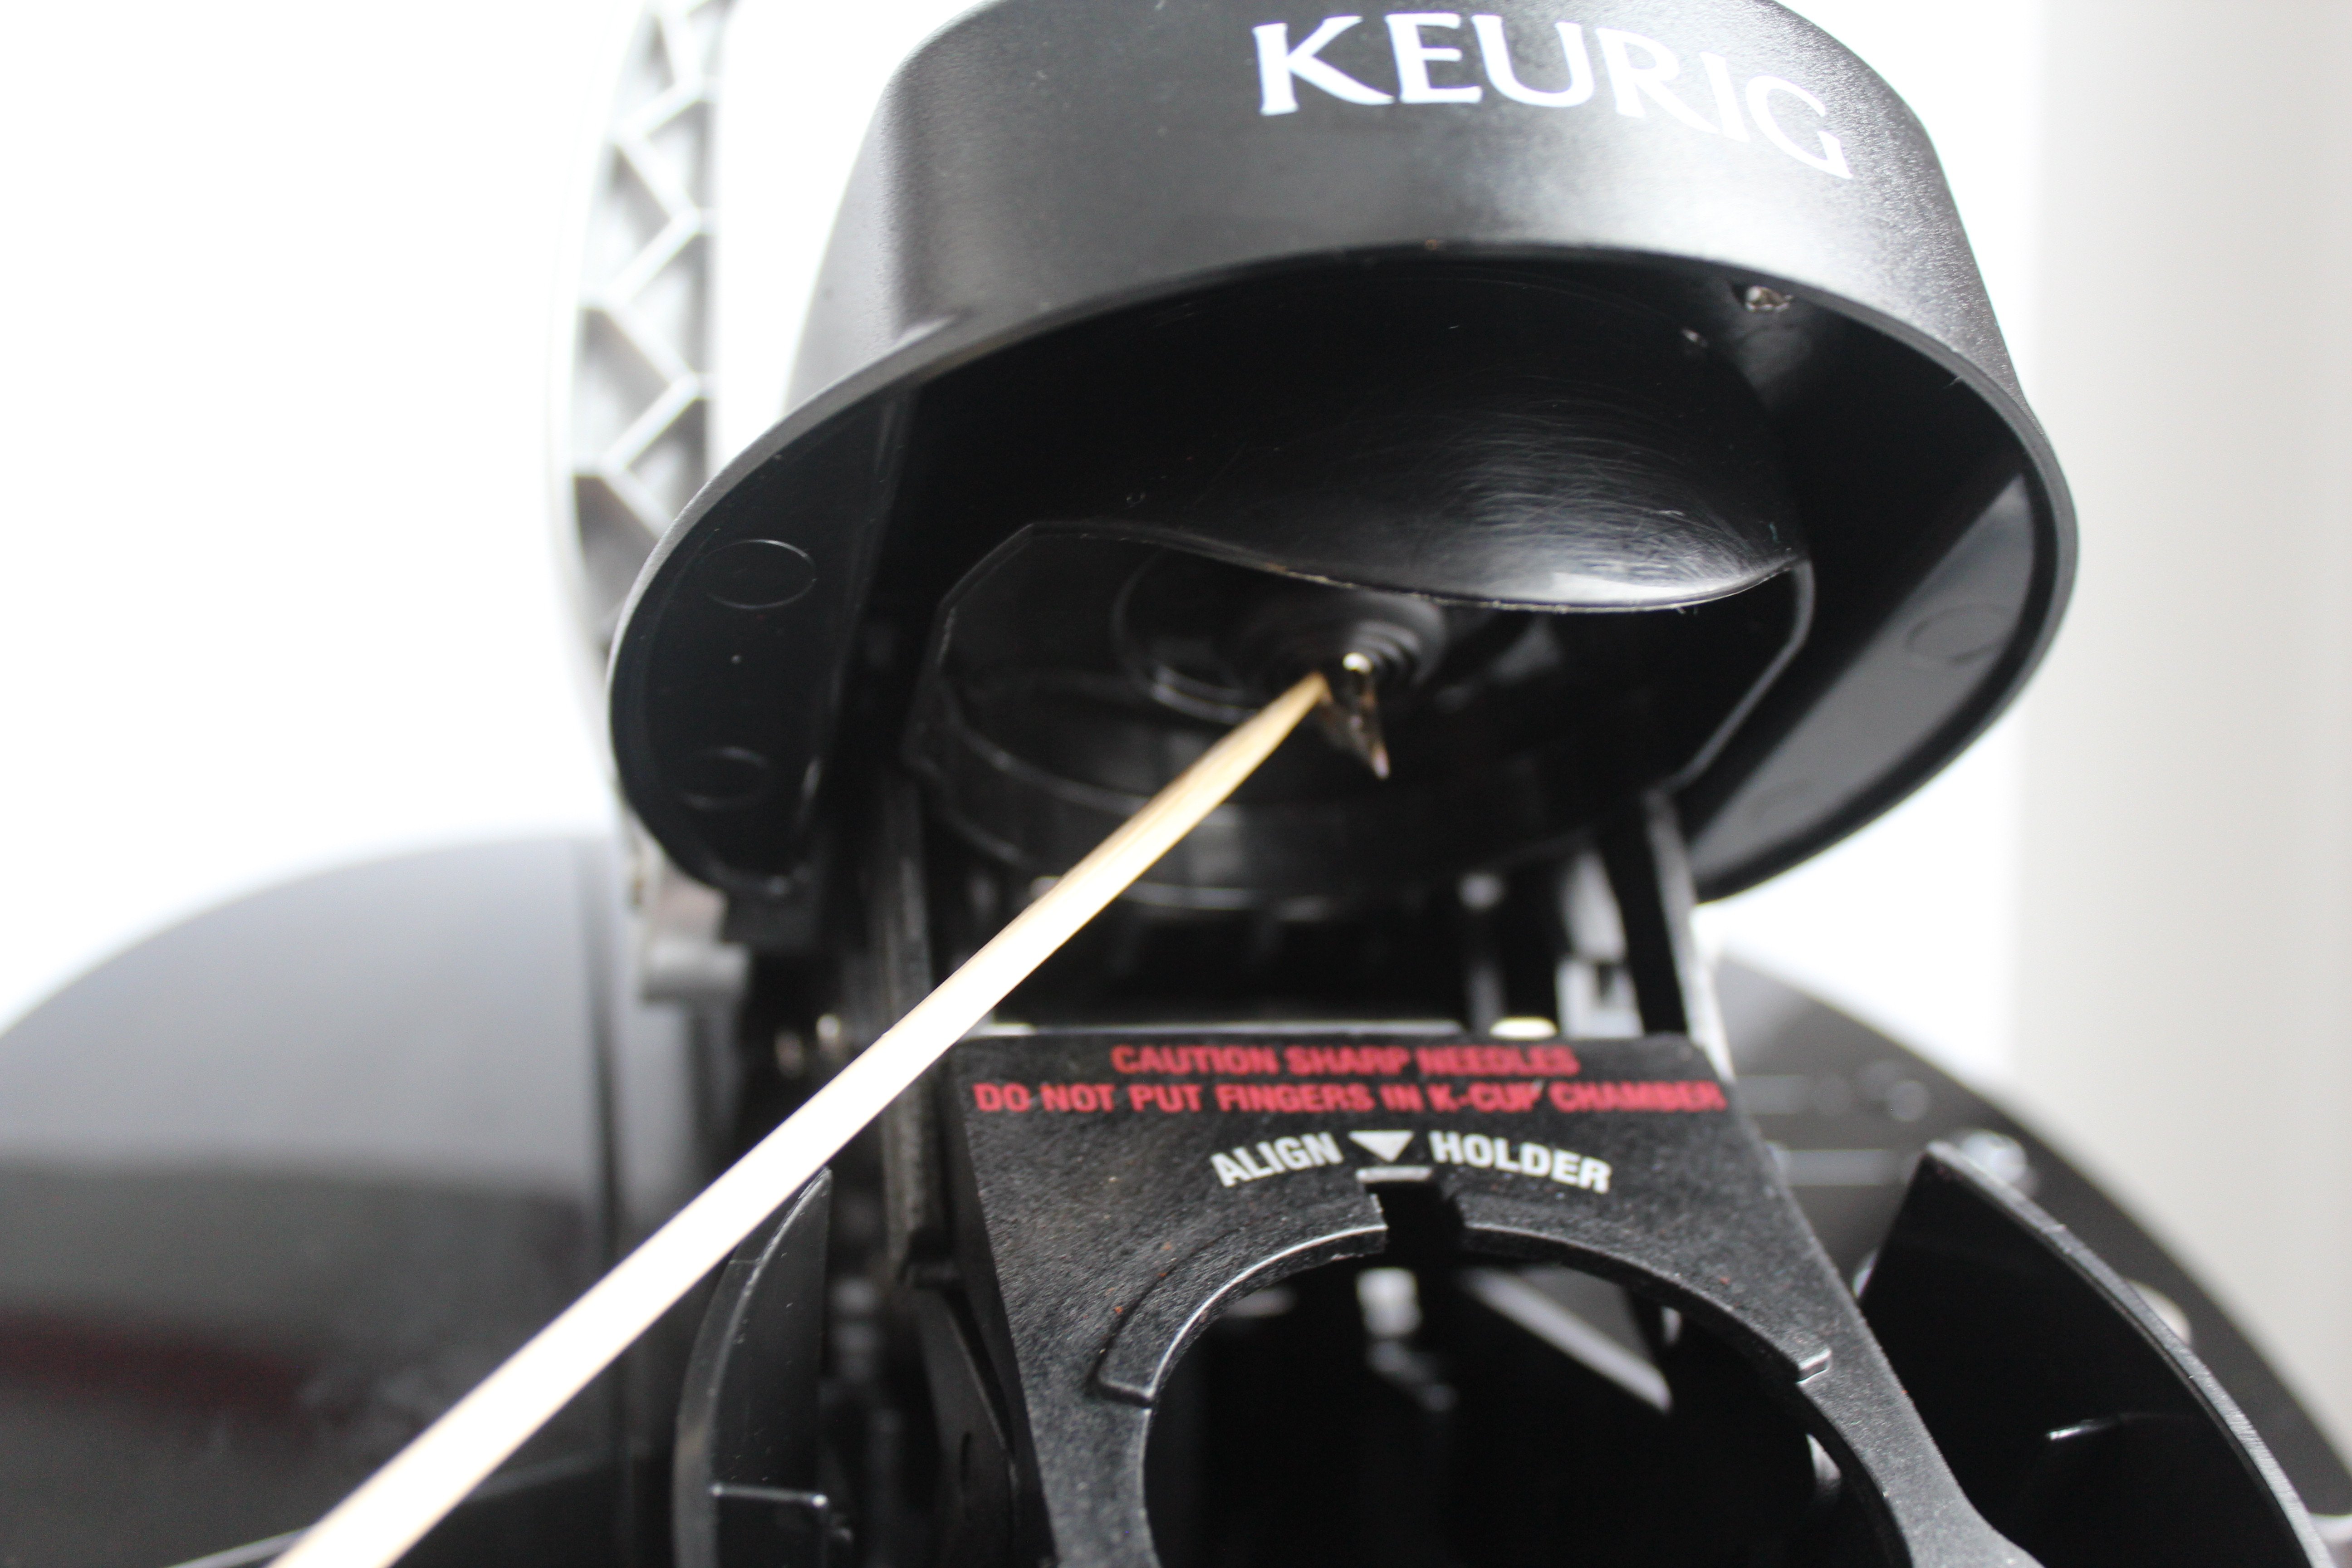
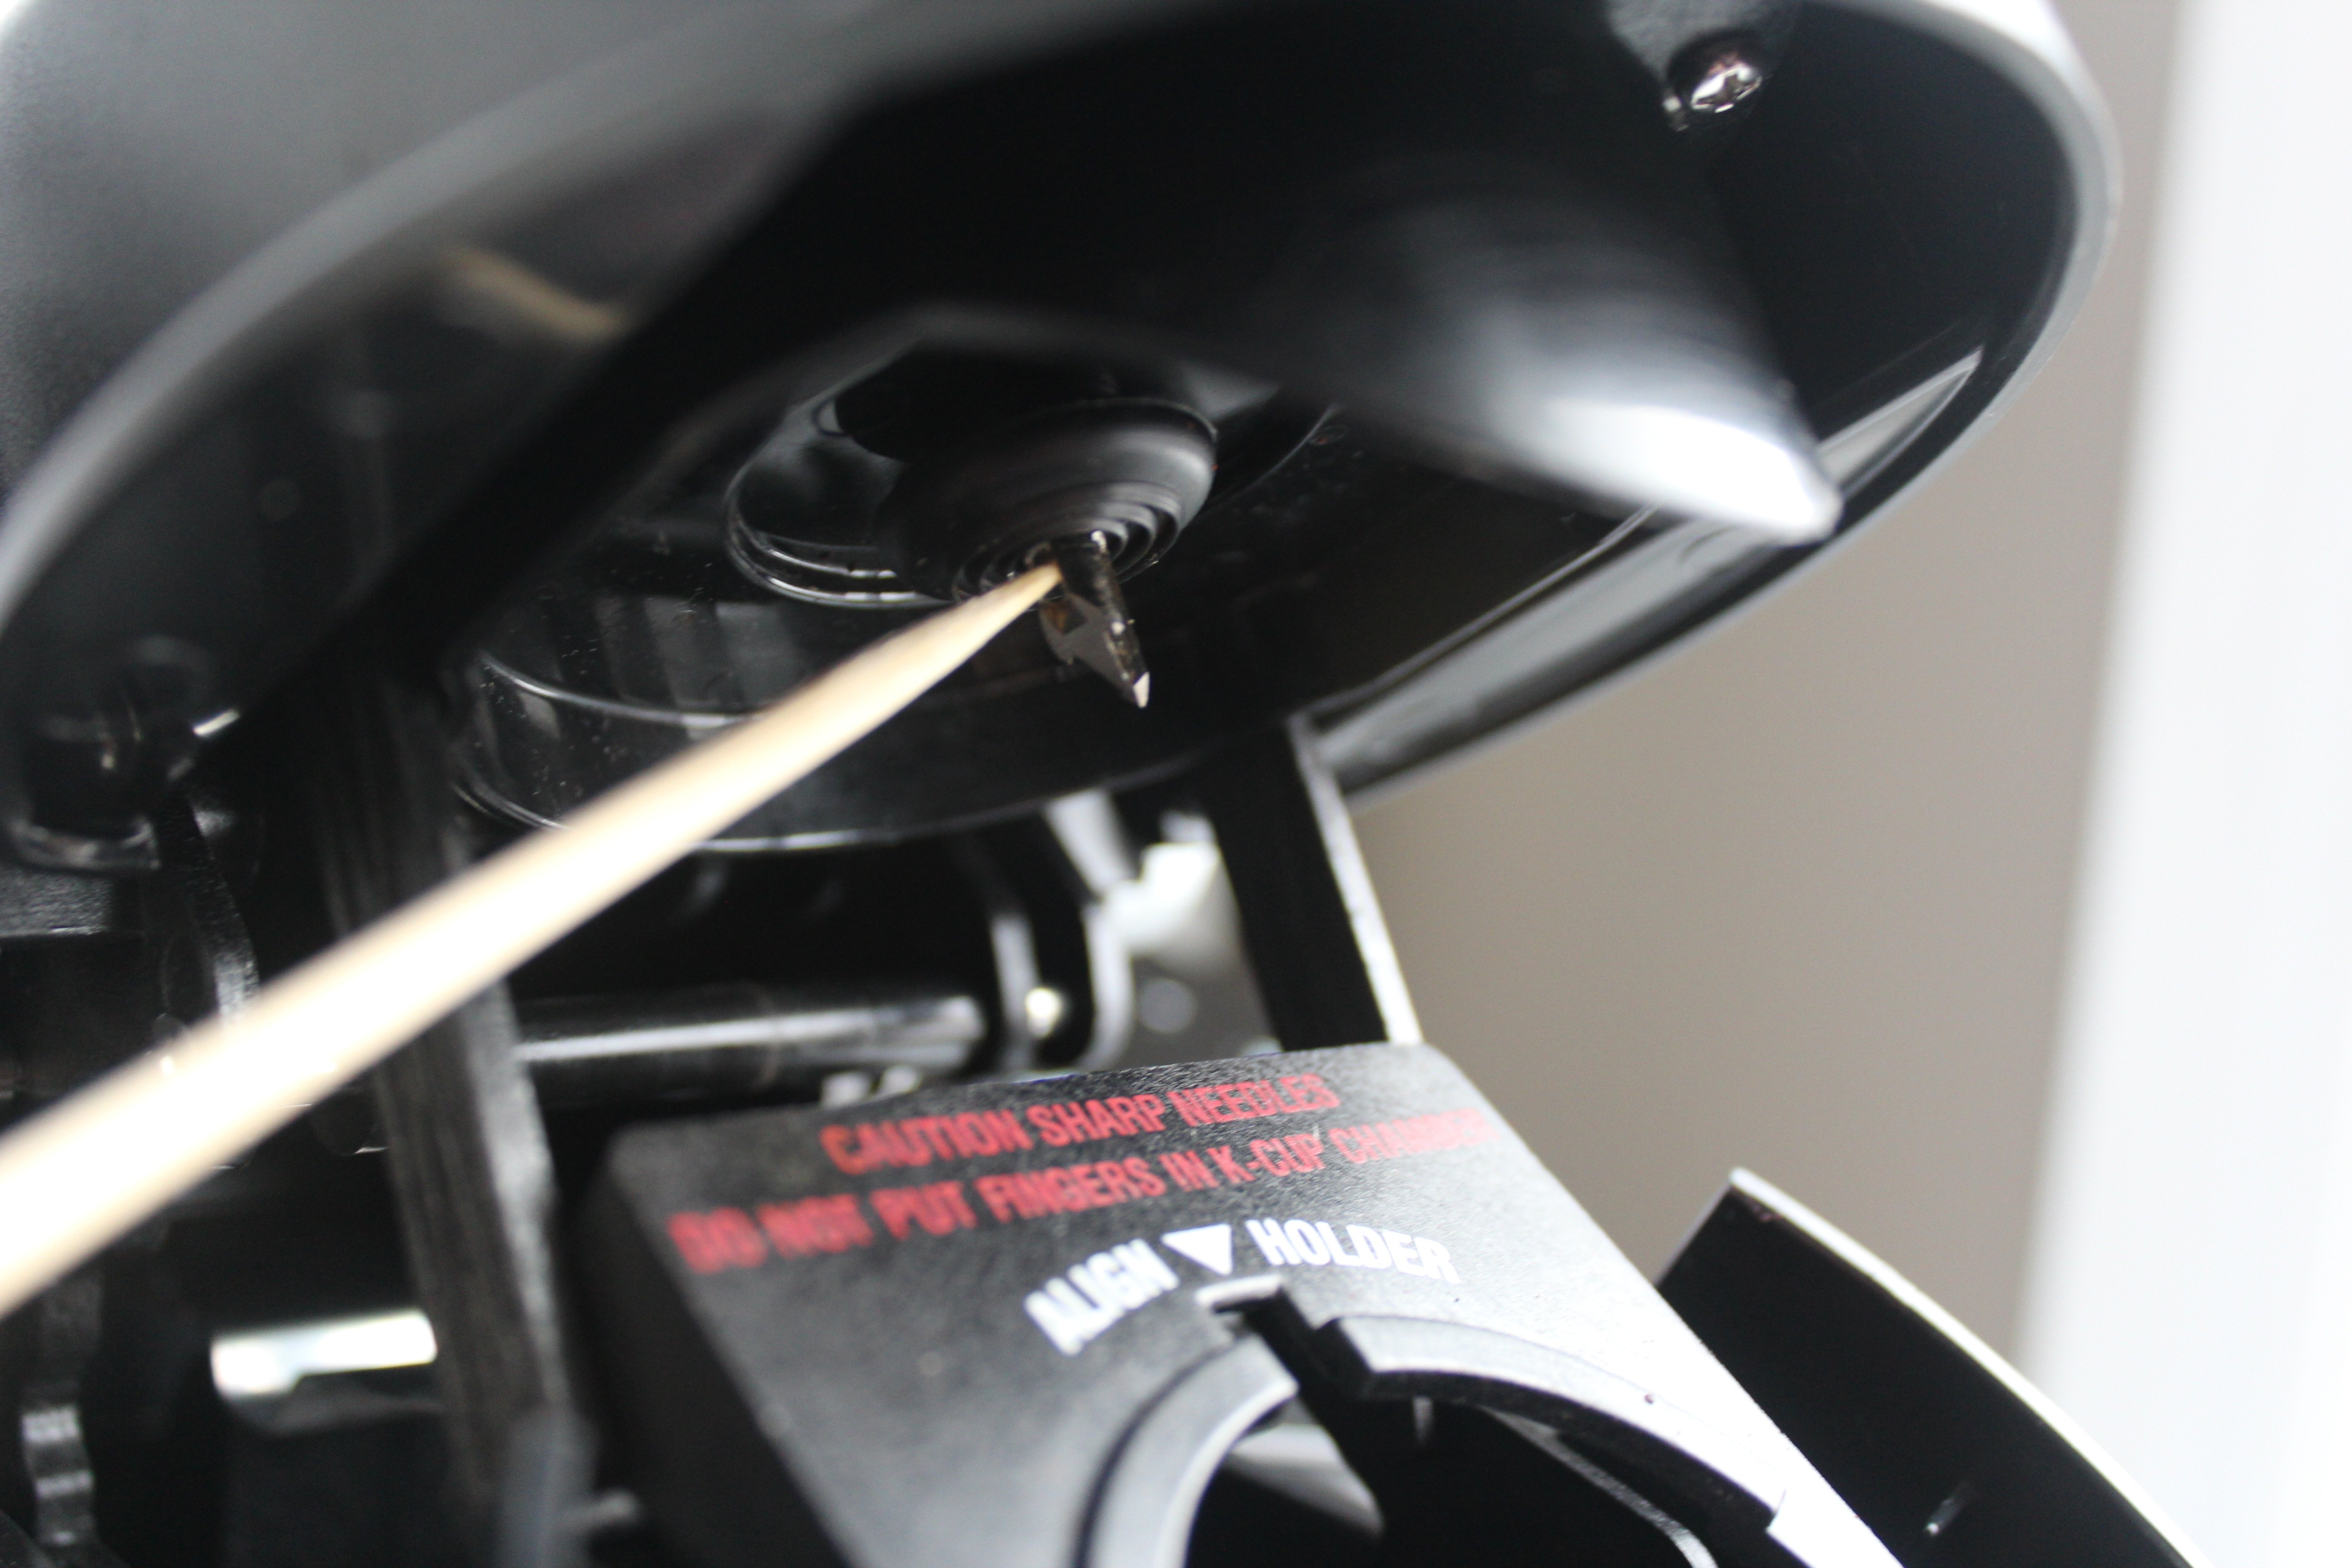
Needle Cleaning Hack:Heres a hack to clean Keurig needle without tool.
The pictures show cleaning the top needle, but this hack can also be done for the exit needle.
Using your chosen tool, gently clean in between the rubber rings around the needle.
There might be water thats stuck between the rings, which should be wiped dry.
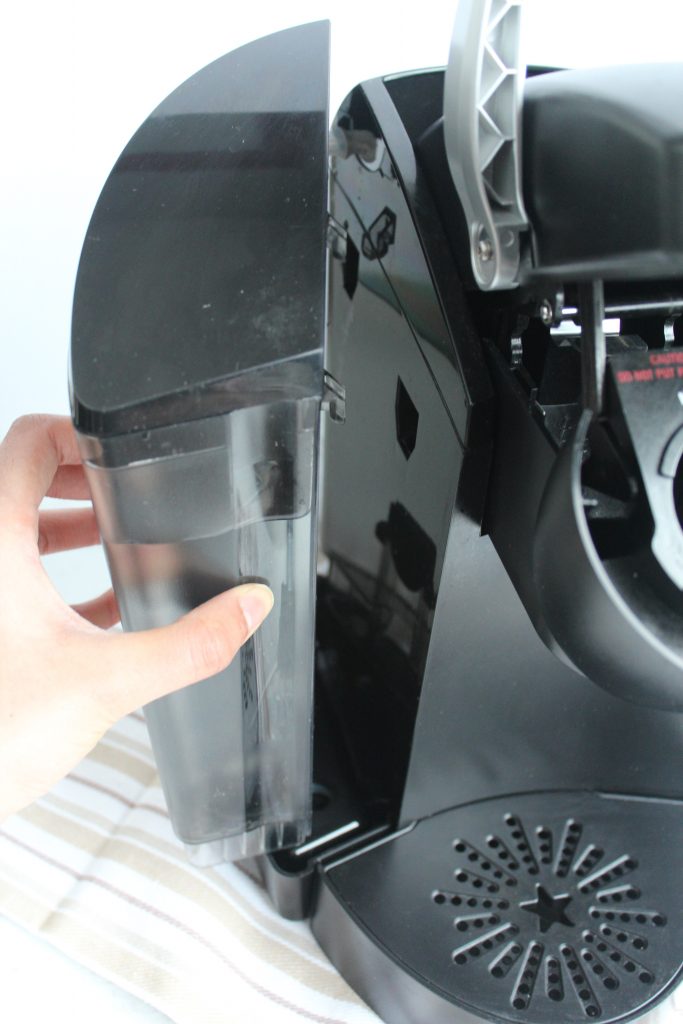
Using warm water and a mild detergent soap clean both the reservoir and the lid.
Wipe the reservoir and let air dry naturally (upside down).
If you have a Keurig 2.0 then you might also have water filters in the reservoir.
If you do usewater filtersin your reservoir, they should be changed/cleaned according to their usage limit.
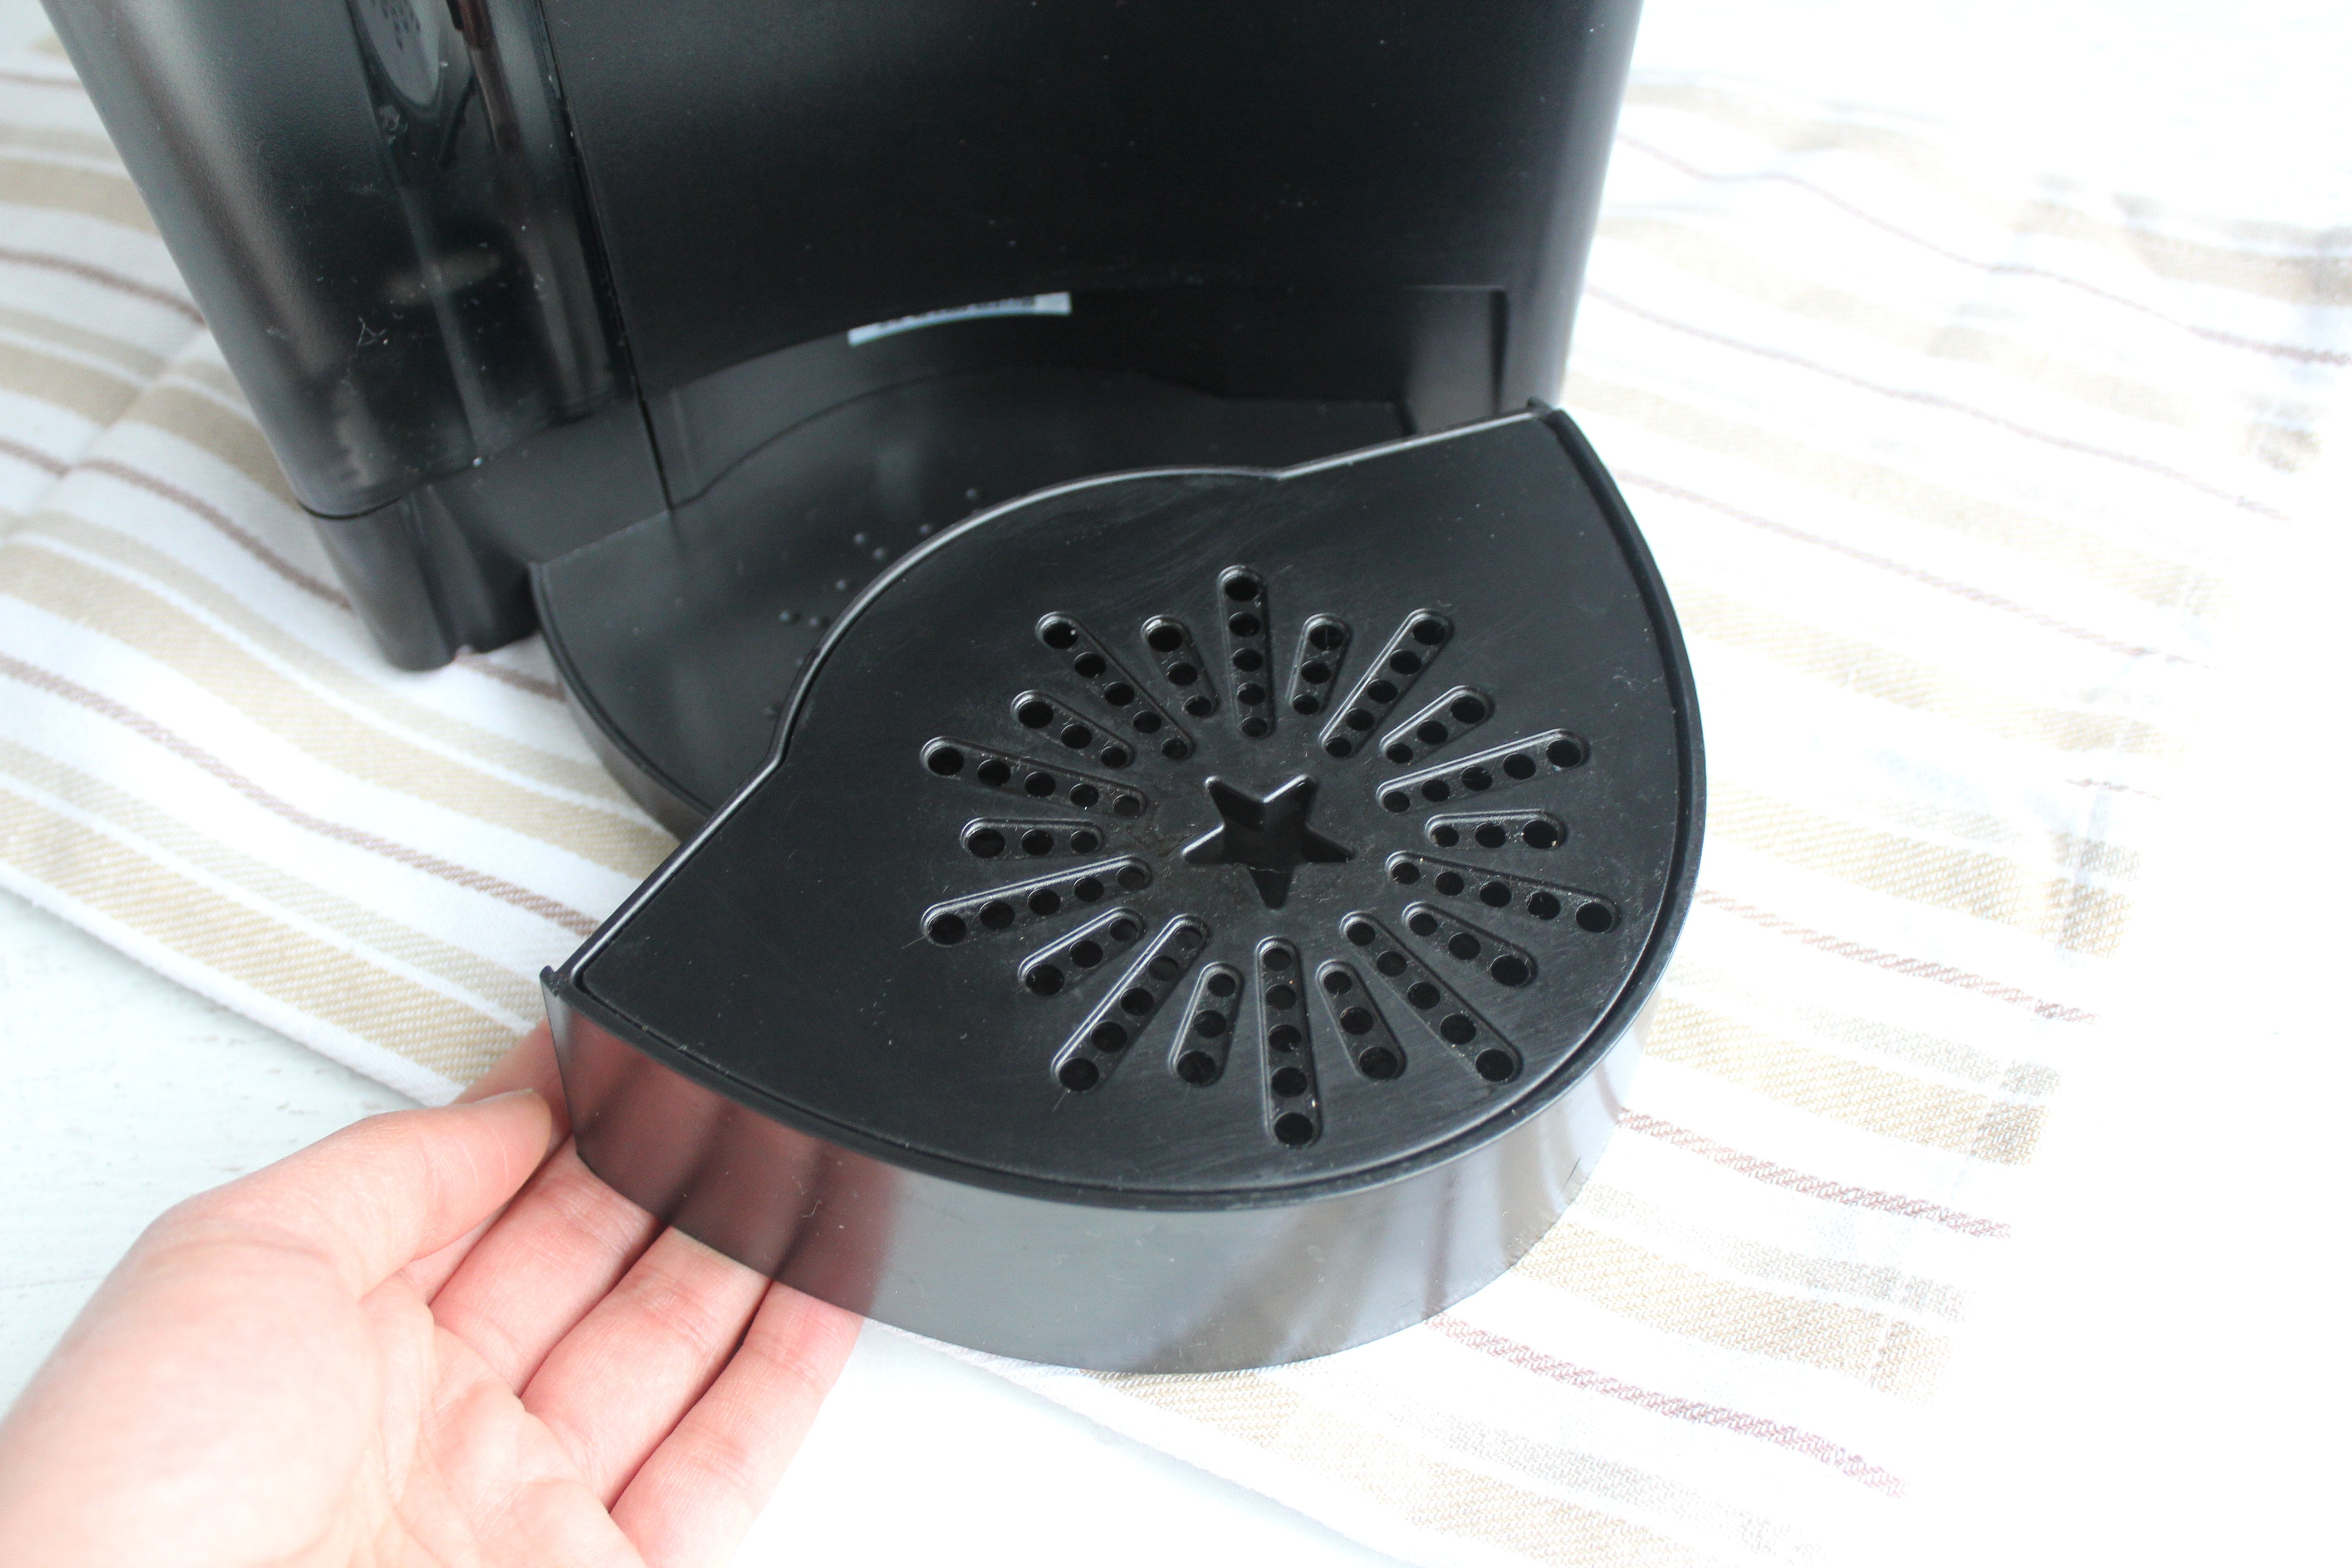
wipe exterior clean with a damn cloth.
Simply turn the whole drip tray upside down, and the top grate will come out.
it’s possible for you to clean the interior with soap and water.
It should be done every 3-6 months using either of the methods mentioned earlier in this post.
Also, I love designing these organizational printable for you it satisfies both my creative and organizational tendencies!
Instructions:choose the file, and save as .jpg or .png.
Print on standard printing paper.
And thats it folks!
I wish you happy cleaning and heres to a cup of clean and yummy coffee!
Its a nifty organized space thatll enjoy making your coffee in.
