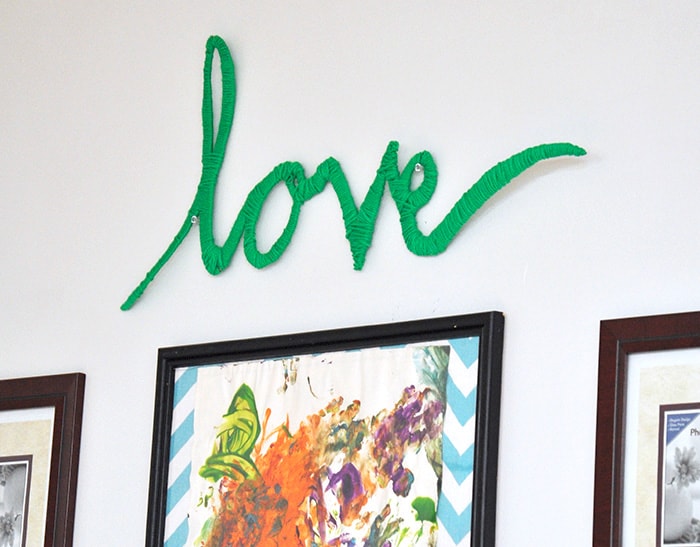
Make yarn wall art out of any word using cardboard and simple wrapping!
Skills Required: None.Even if youve never crafted before, you might do this project.
Youll be cutting and wrapping yarn.
So simple that kids can do it.
You just need about an hour and a few simple supplies.
Oh, and you dont need any craft skills.
ANYONE can do thiseasy craft project.
Wrapped Yarn Art
Im so excited to share thiswall hanging ideawith you because its so simple.
Theres avideo tutorial at the end of this postshowing you the process.

Scroll down to see it!
The design works anywhere from the living room to the bedroom.
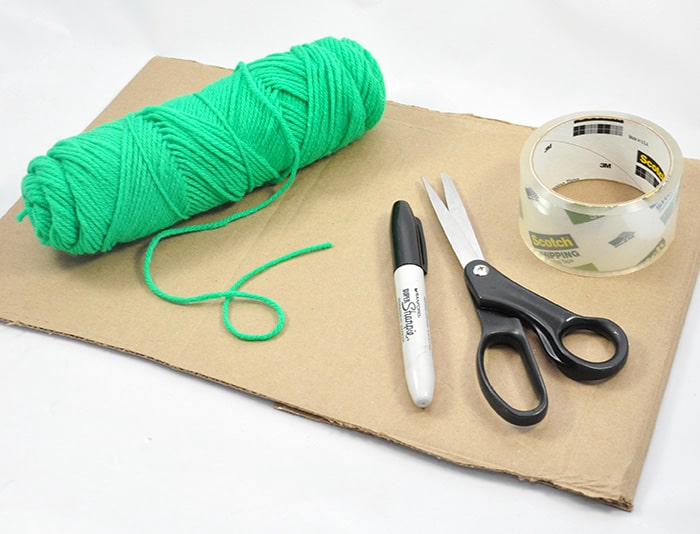
What Kind of Yarn Works Best?
Youll likely want to use a medium weight yarn at least for this project.
Anything too bulky will look strange, and if its too thin youll be wrapping forever.
The bang out of yarn (polyester, cotton, etc) doesnt matter.
Any kind will do, as long as you like the color and design!
Youre only going to need one skein for something 8 x 14 like this.
The stiff cardboard also ensures that your yarn art will be stable on the wall.
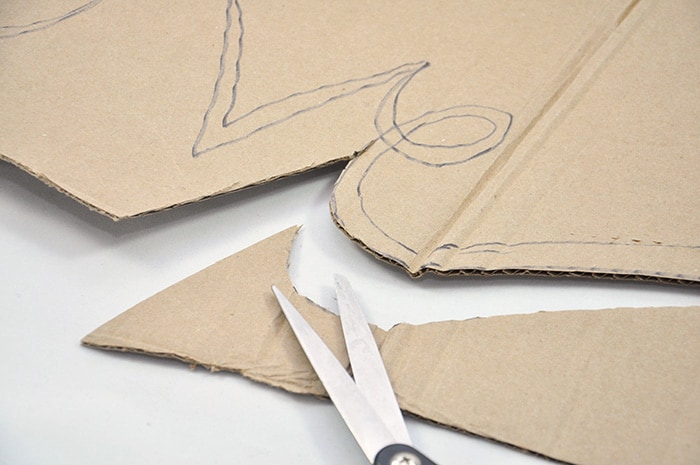
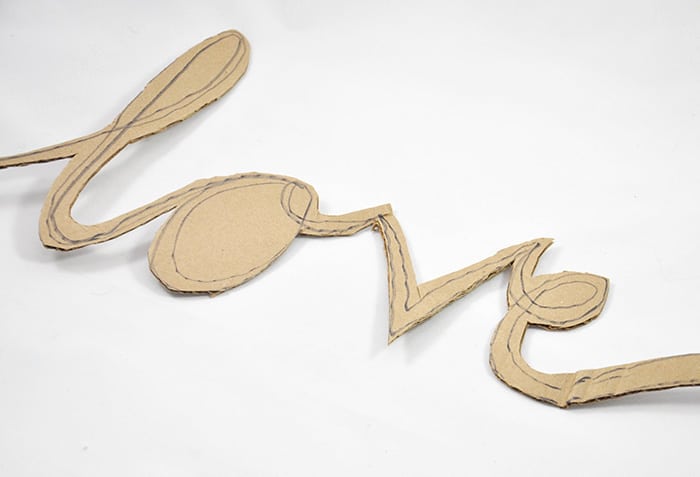
Heres how this wall art is made.
Then go back and thicken the letters by making a second line.
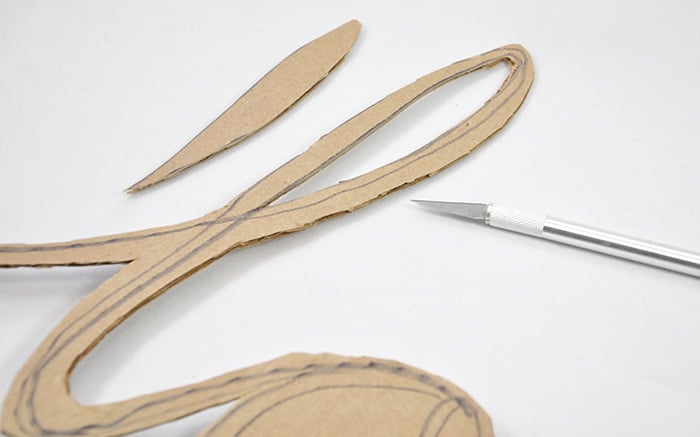
Cut out the word with scissors or a craft knife.

Use an X-Acto knife to cut out the middle spaces of any letters that have them.
Trust me try it!
Take the end of the yarn and tape it to one end of the word.
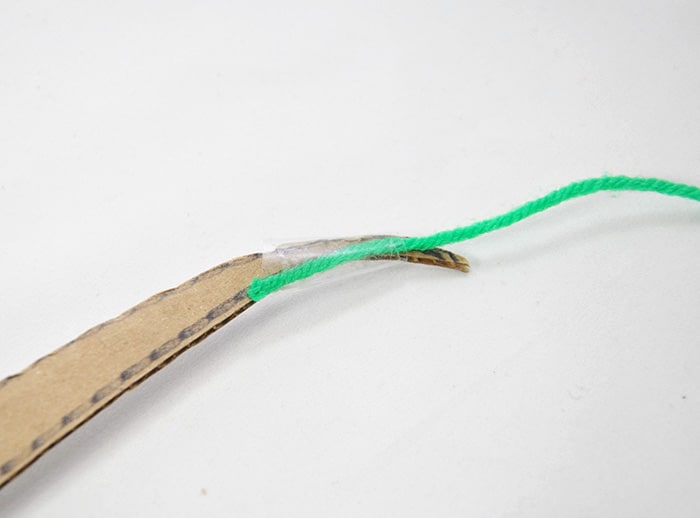
Start wrapping the yarn around the cardboard, covering the tape.
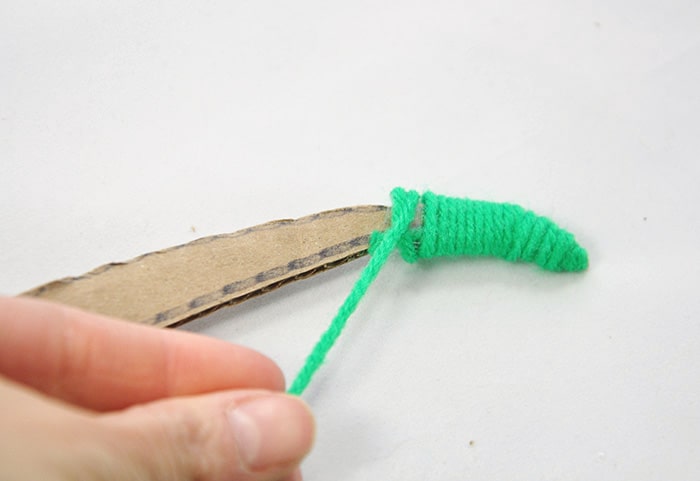
Wrap the yarn around the letters, covering the cardboard.
Depending on the word, this step might take a few minutes to about an hour.
Wouldnt this be great in a dorm room as well?
I know so many college kids that would love this!
How to Hang Your Yarn Art
All youll need are some thumbtacks or finishing nails.
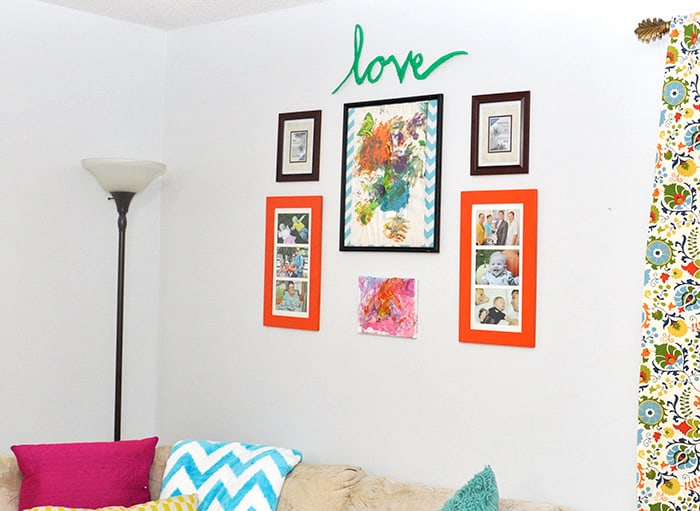
Just spread the yarn apart in one area and hammer into the wall!
Youll only need 2 3, so there will only be a few small holes in the wall.
Of course if you dont want holes in the wall, use Velcro Command strips.

This art is so lightweight!
Plus here are some other ideas with yarn you’re free to try:
