HomeDIY
This post may contain affiliate links:full affiliate disclosure.
Are you looking for a cute, fun, and easy Fall craft?
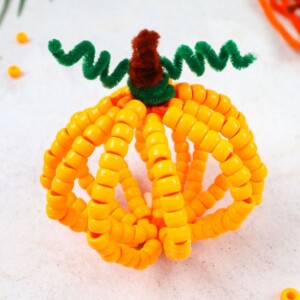
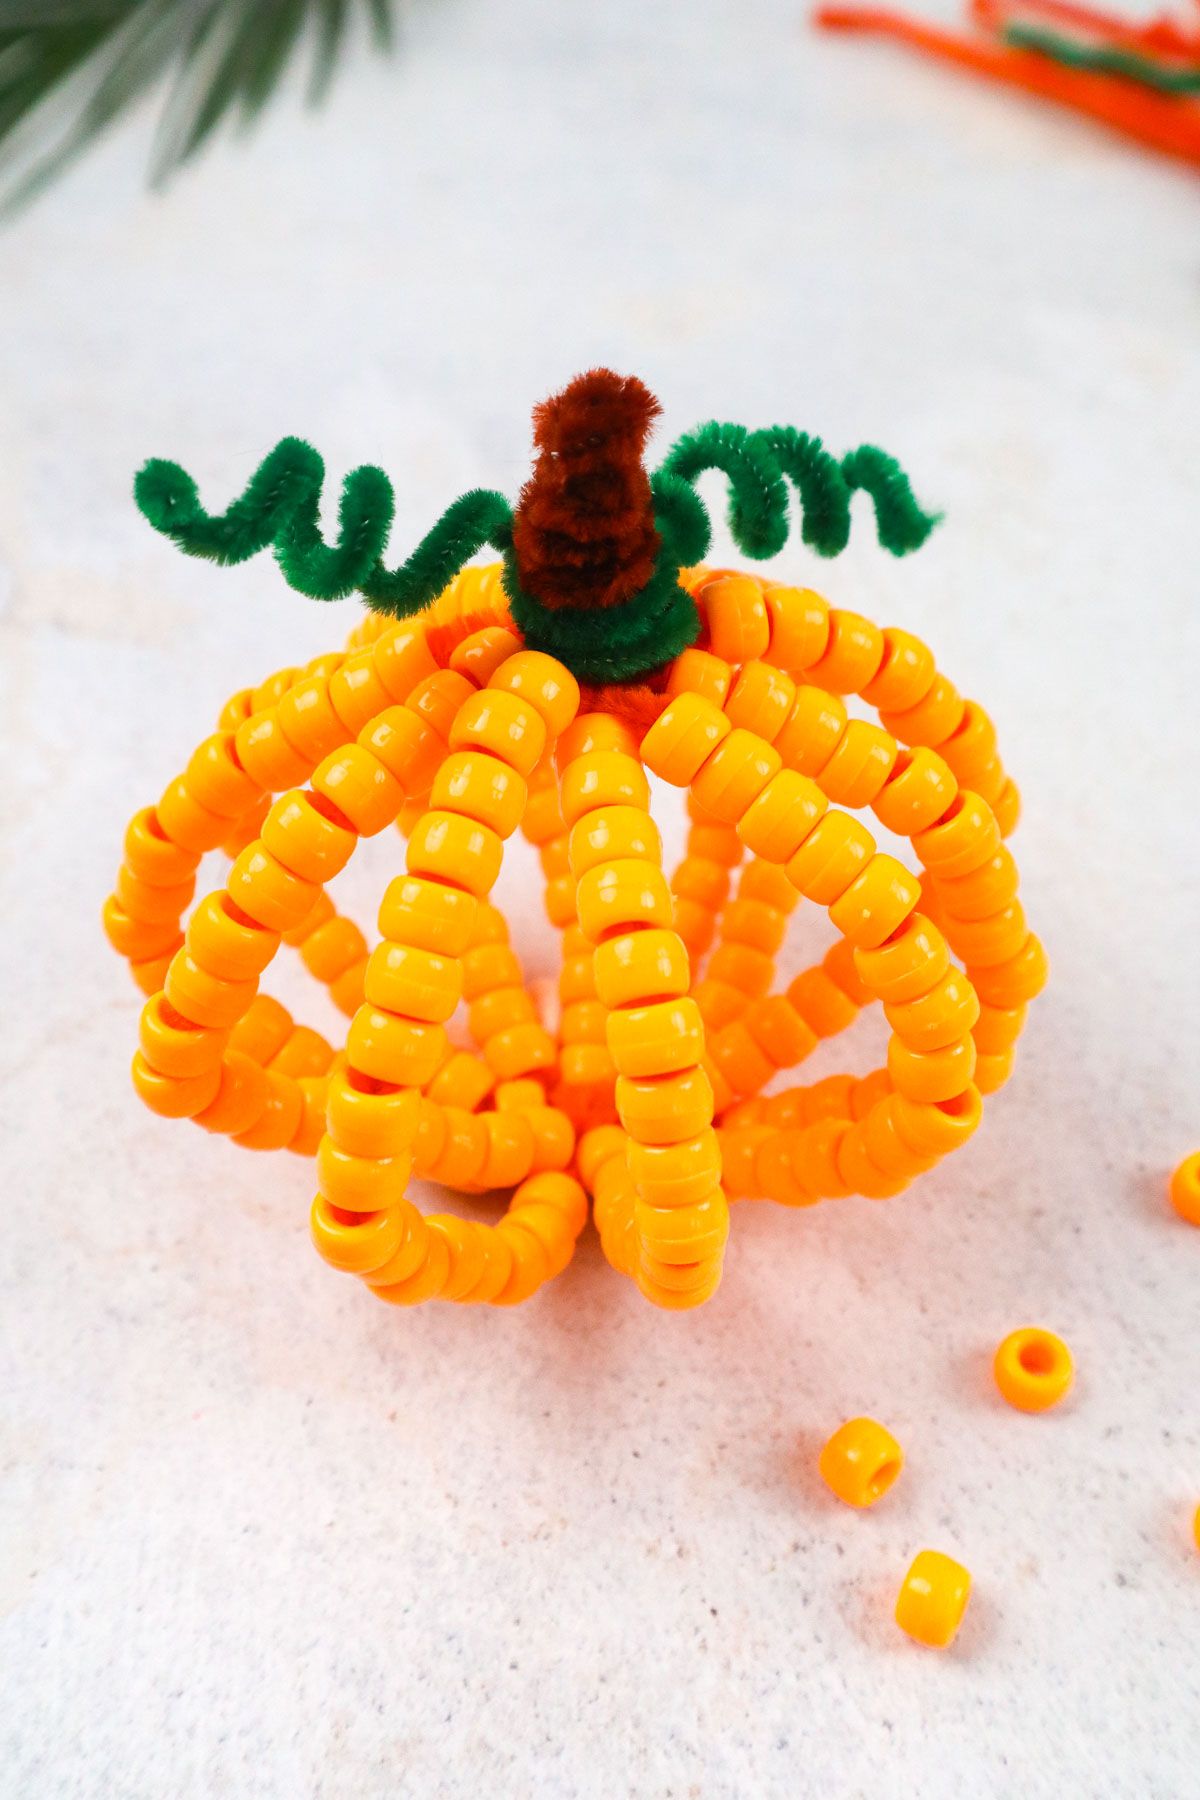
You will love this beadedDIY pipe cleaner pumpkin.
Pipe cleaner crafts are also great for kids.
This pumpkin is easy to make and turns out super cute.
It is adorable and would be a great homemade addition to your fall decor.
Lets get started on this sweet little pumpkin!
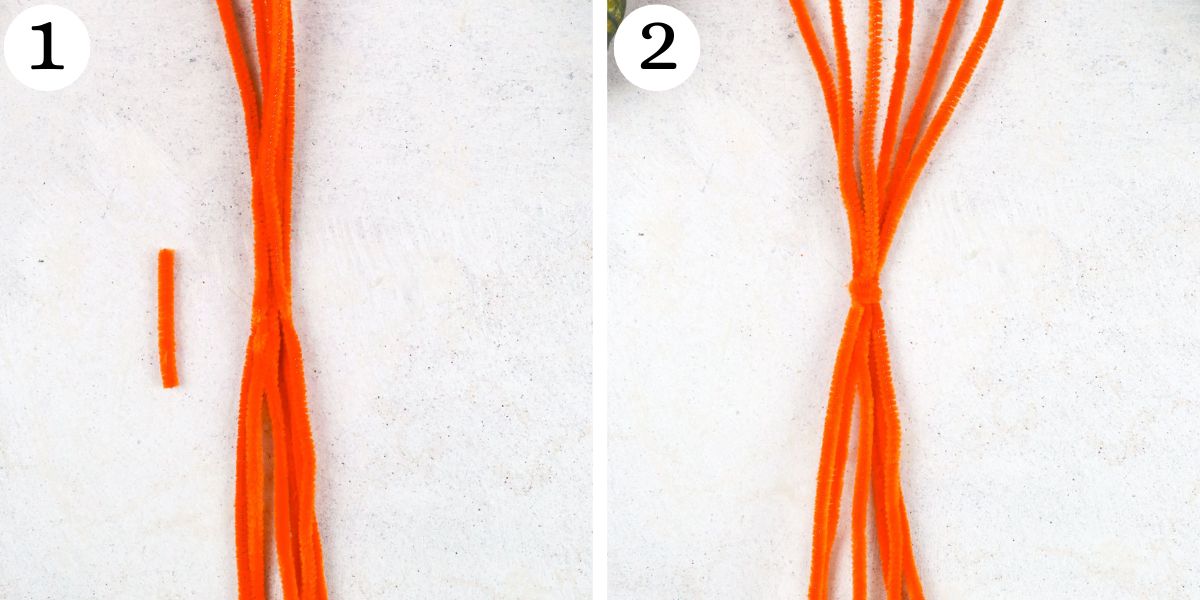
confirm that all the ends of the pipe cleaners are even with each other.
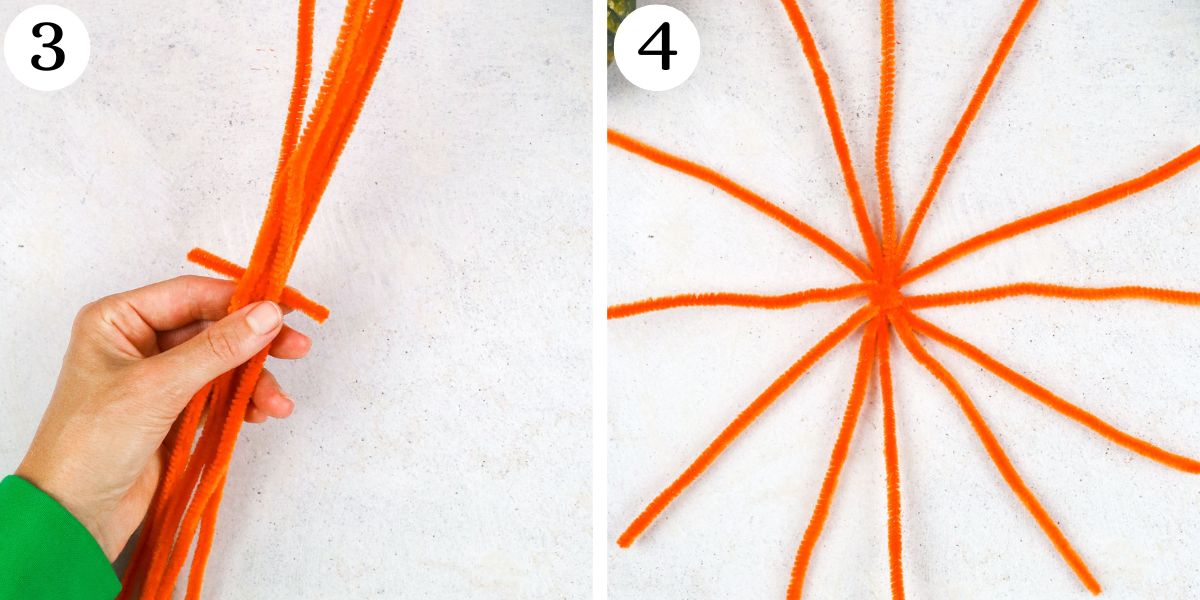
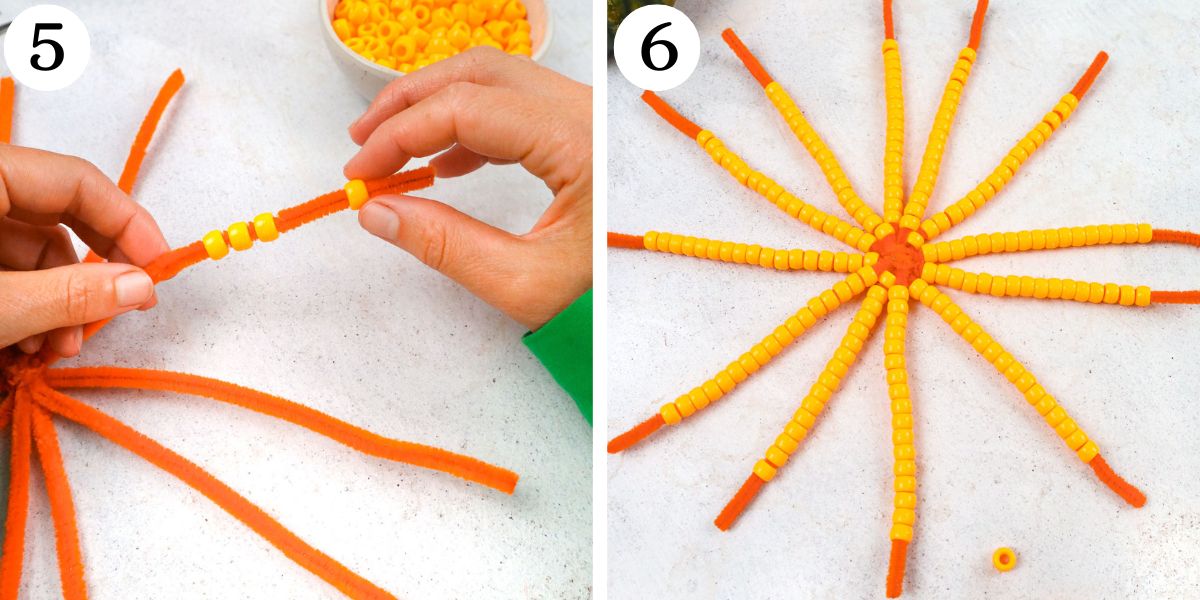
Step 4.Now, fan out your pipe cleaner ends so that they form a star-like shape.
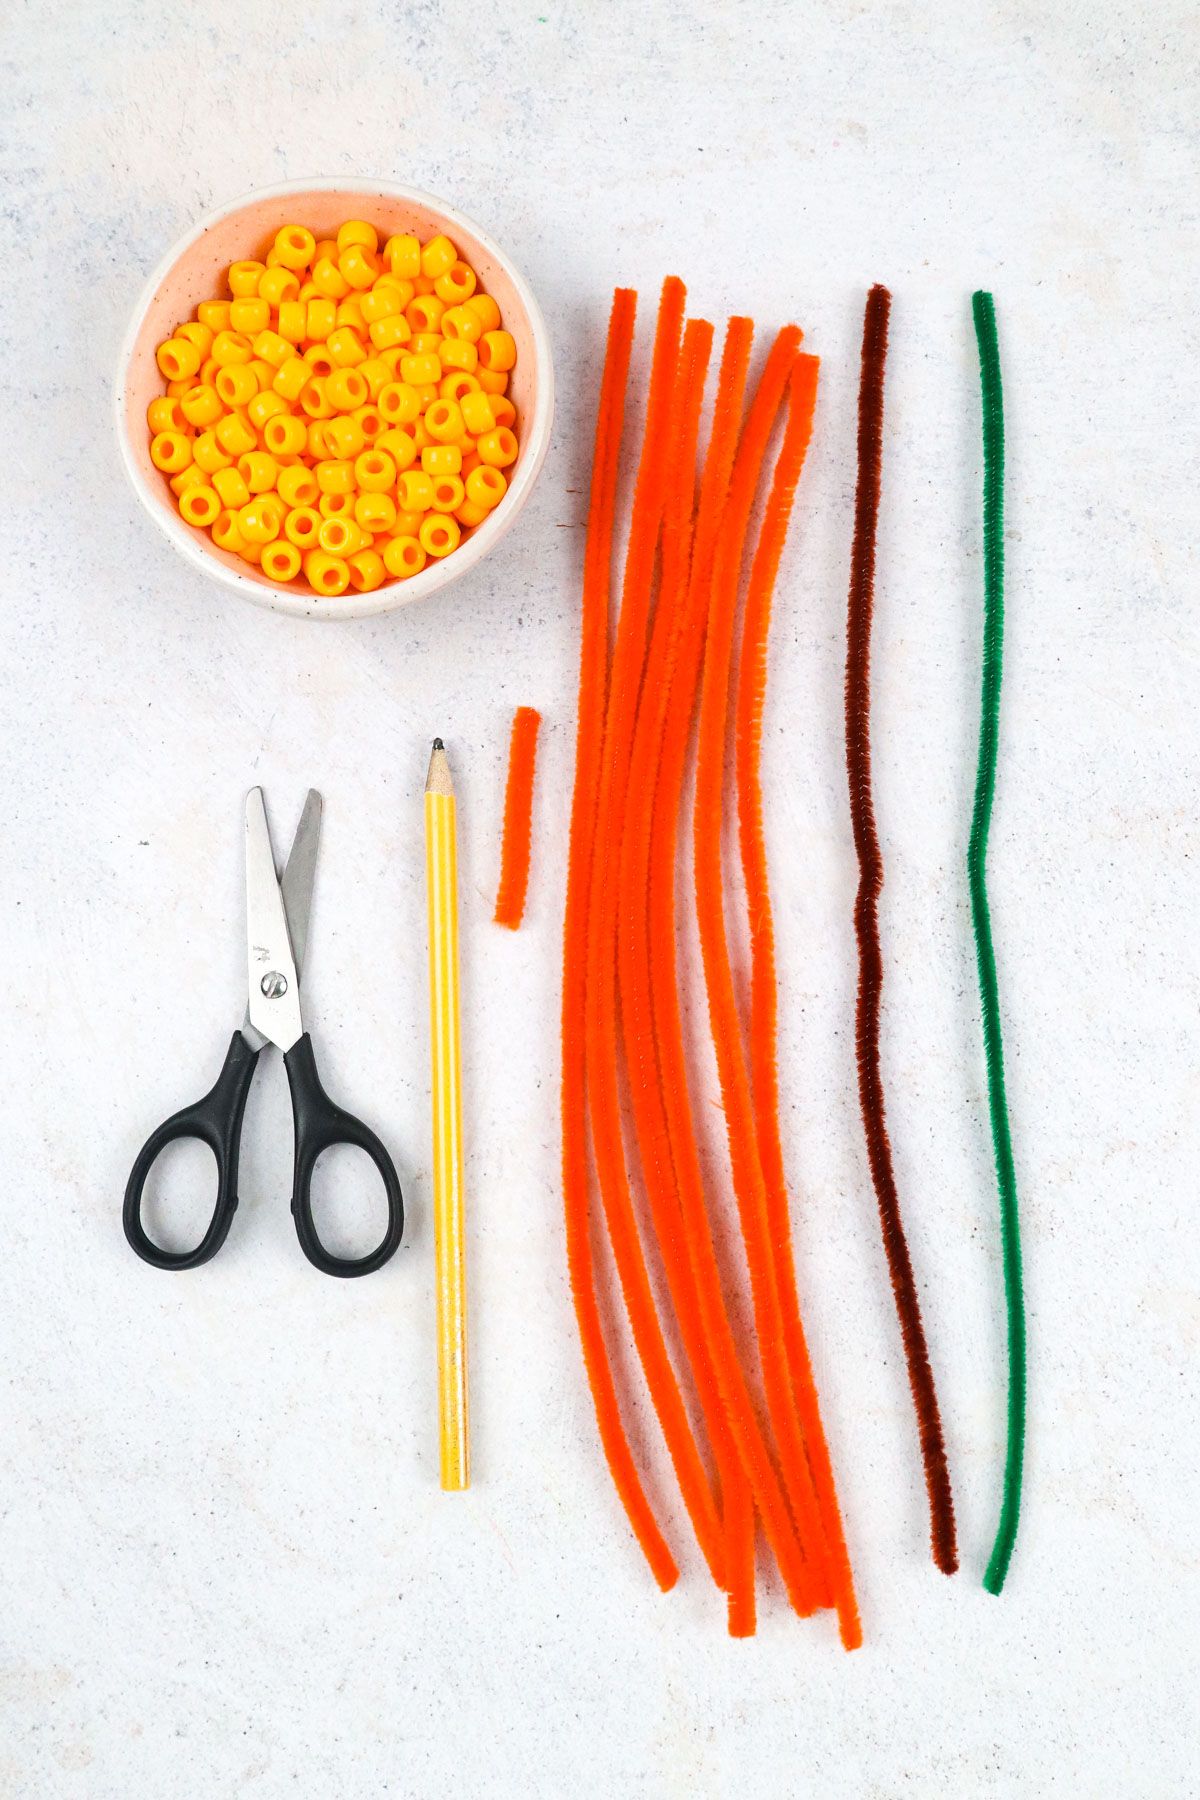
To do this, pull each pipe cleaner individually until you have that star shape.
When you are done, you should have twelve pipe cleaner ends, still held together in the middle.
Step 5.It is time to start adding your beads.
Begin stringing beads onto one of your pipe cleaners.
Leave about an inch of space on the end.
Continue to do this with all your pipe cleaners until each one has beads.
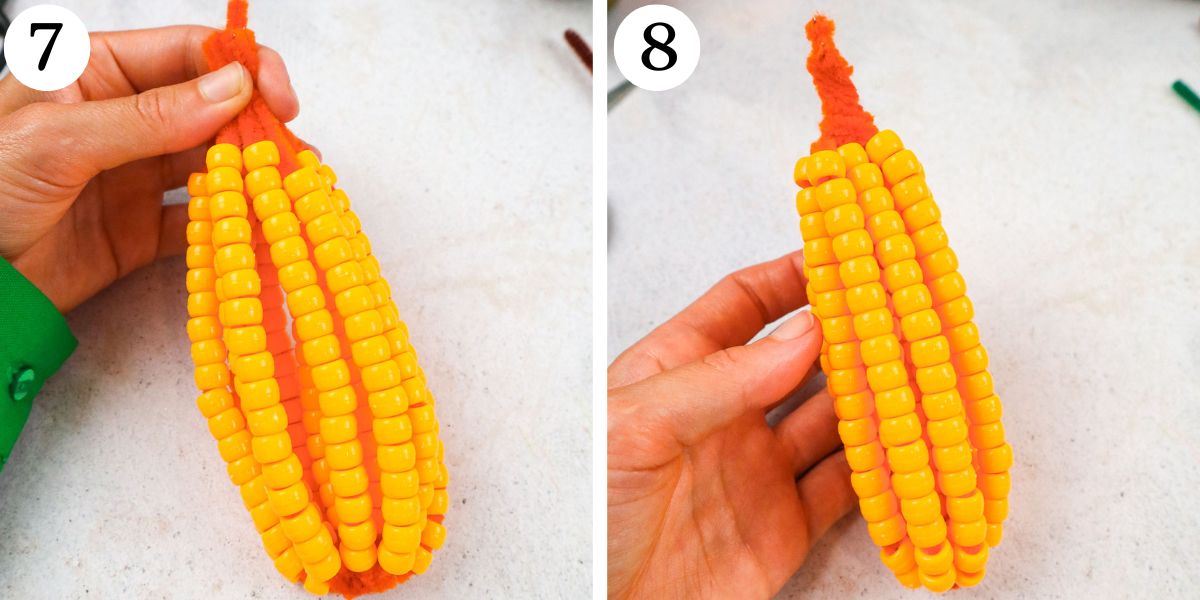
Step 7.Bring all the pipe cleaner ends together.
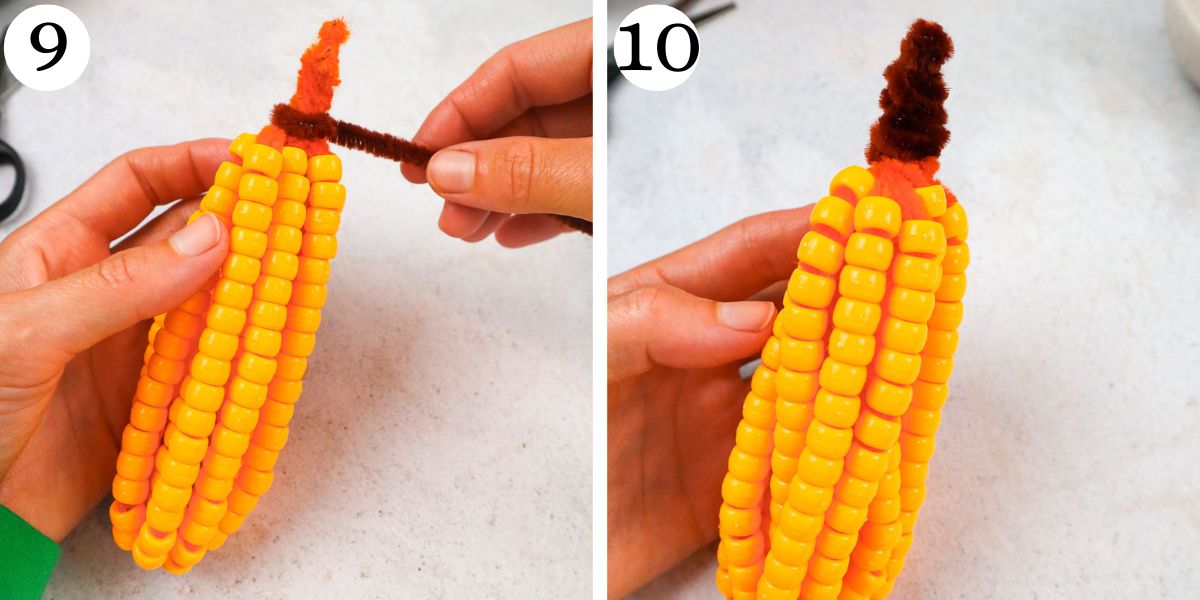
Step 8.While carefully holding your pipe cleaner ends together, twist them tightly to form a stem shape.
Step 10.Keep wrapping until you have wrapped the entire stem.
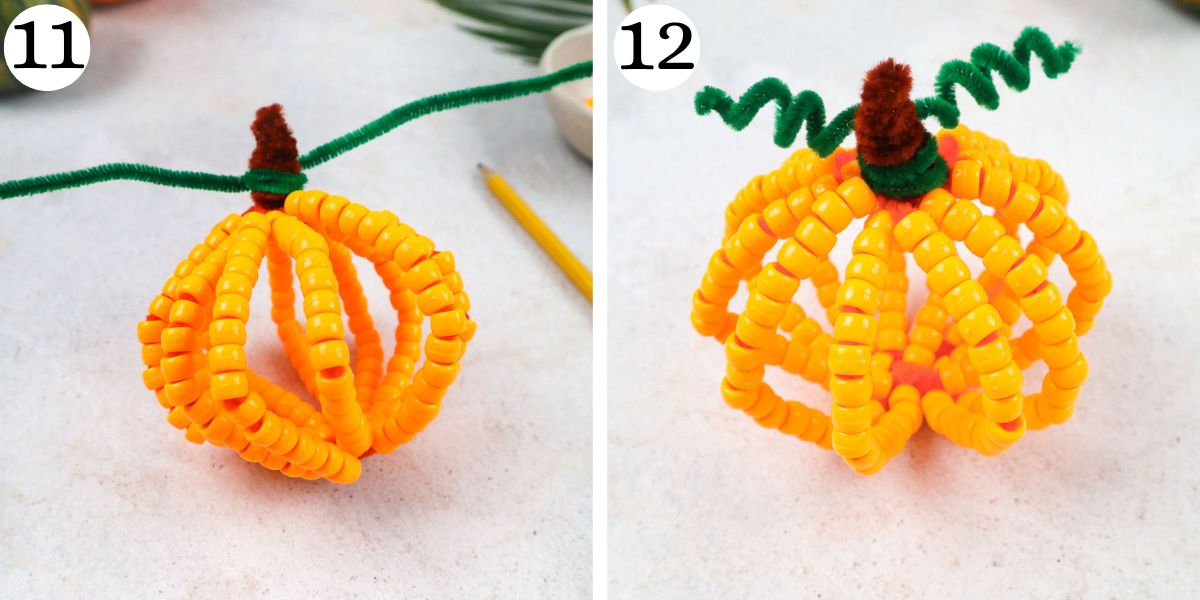
Step 11.Now, begin to form your pumpkin shape.
Get your green pipe cleaner and wrap it twice around the brown stem.
Step 12.Curl the loose ends of your green pipe cleaner around a pencil.
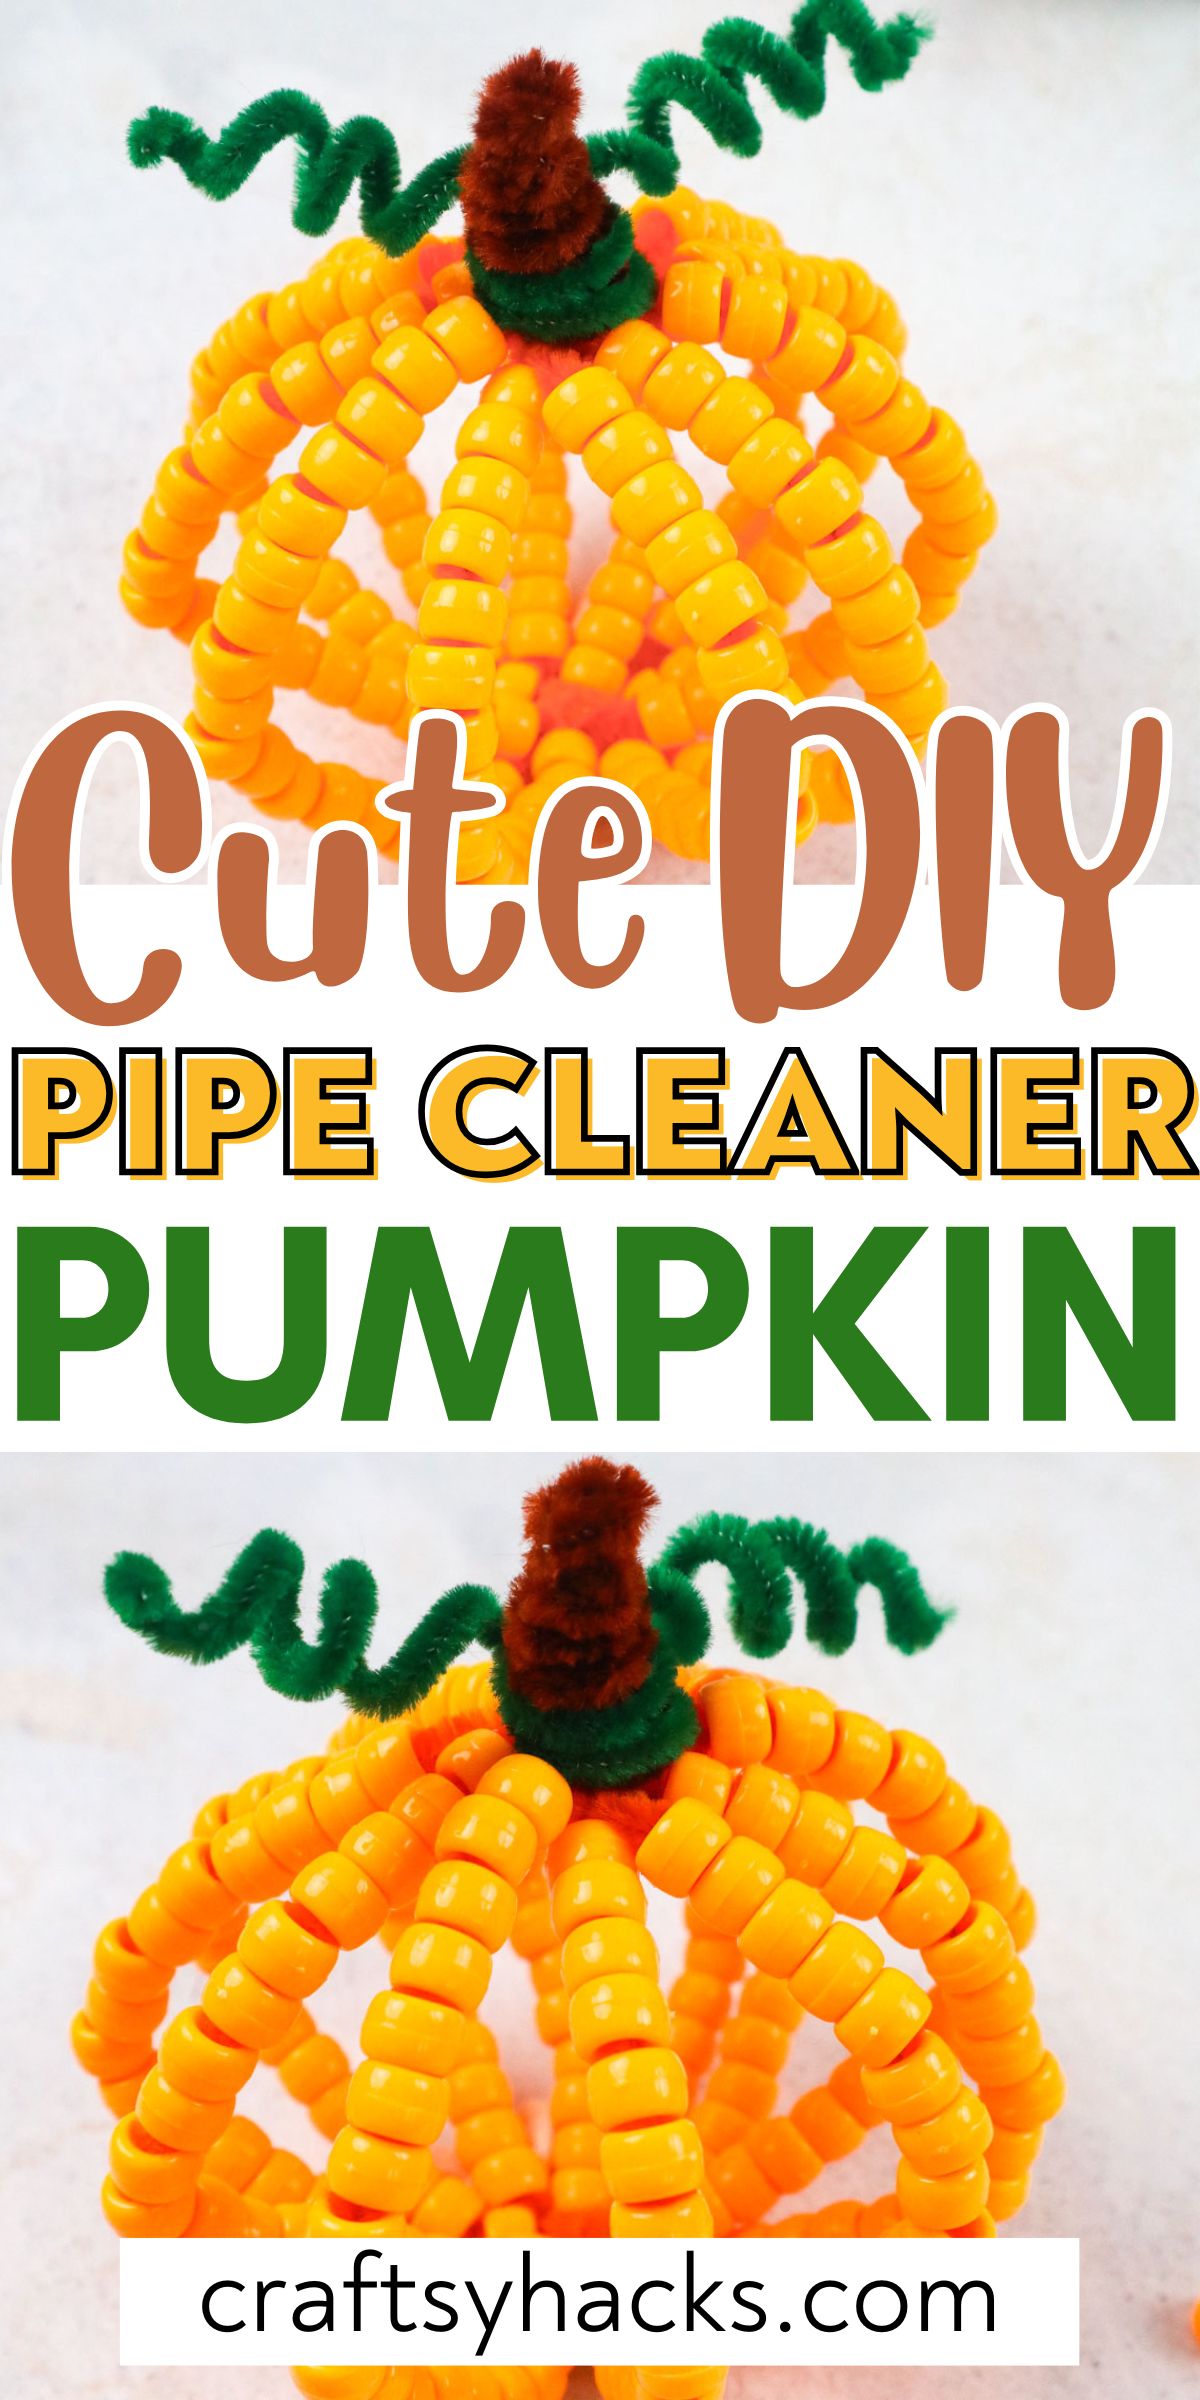
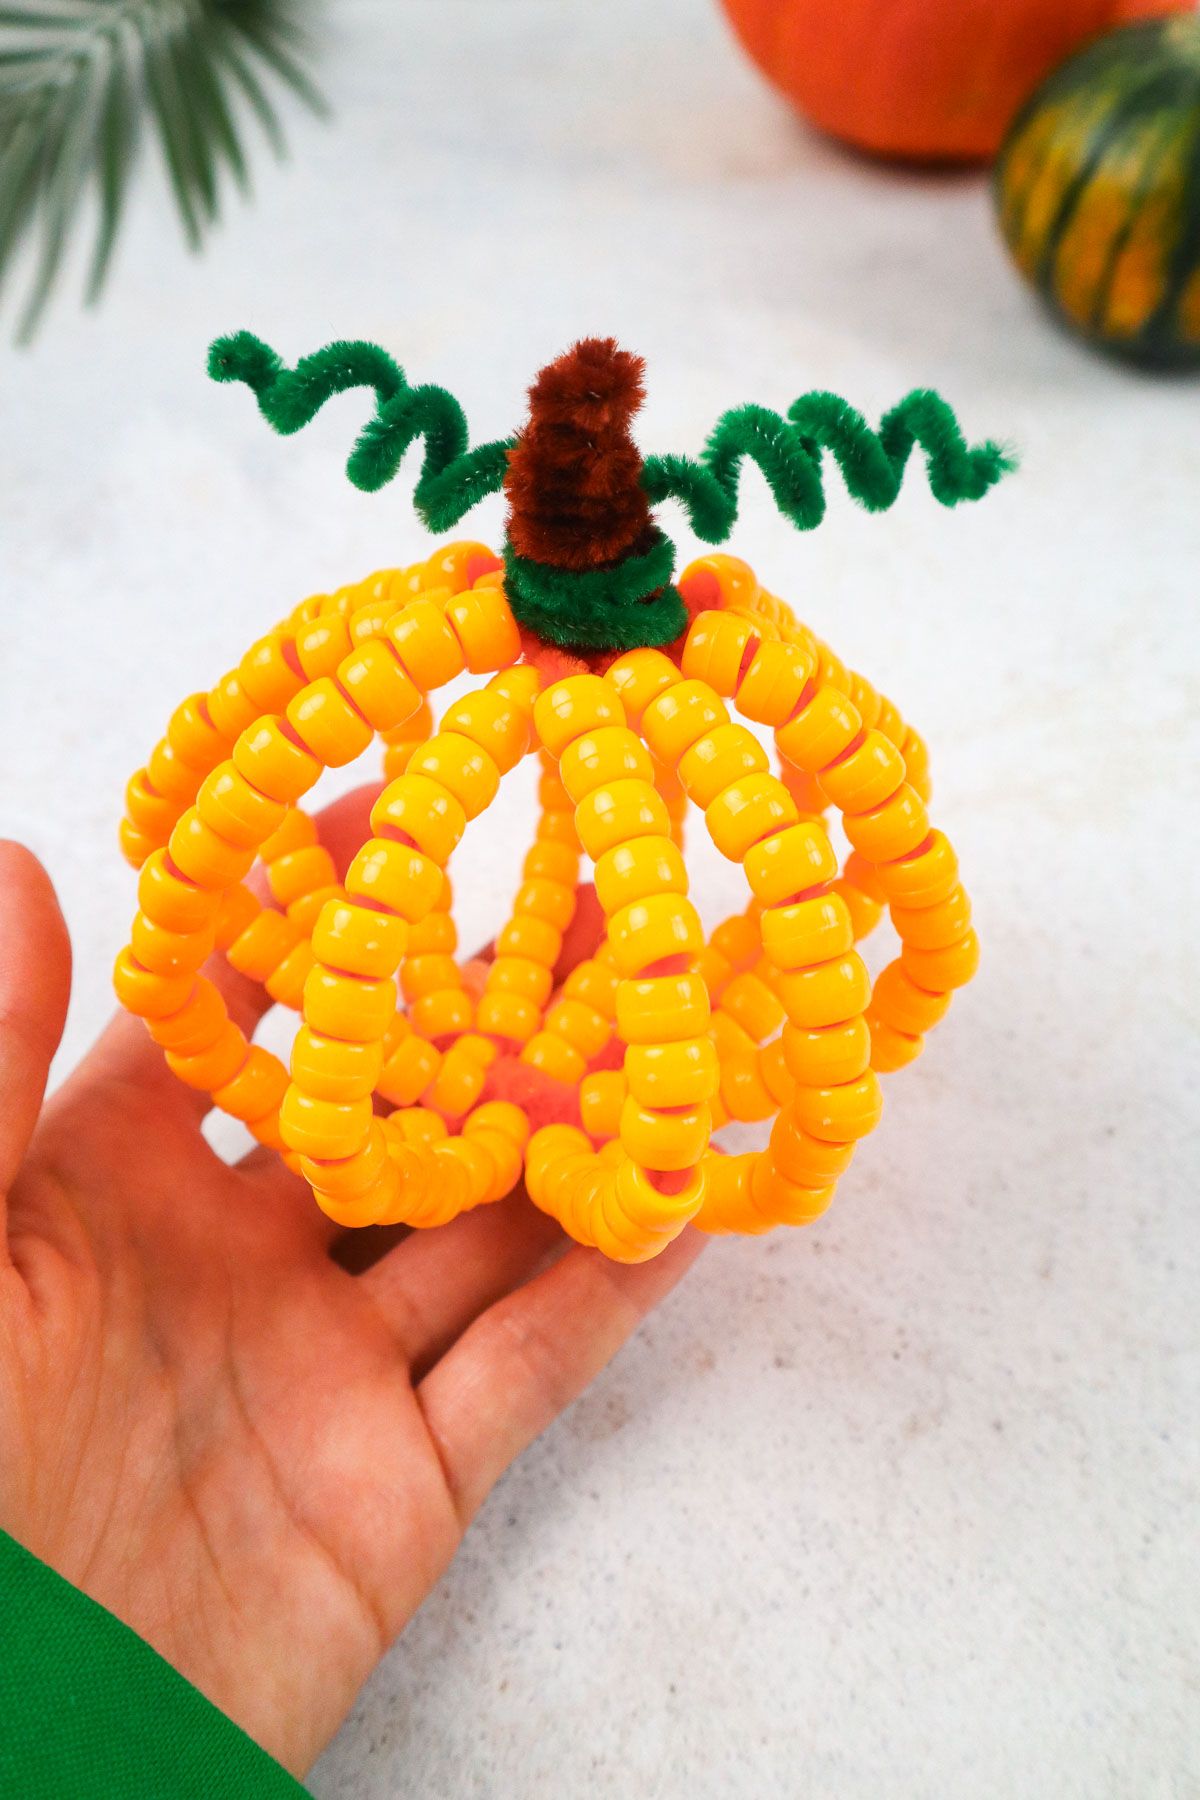
Your pipe cleaner pumpkin is complete!
Watch How to Make
How Long Do These DIY Pipe Cleaner Pumpkins Take to Make?
One of the best things about this pipe cleaner pumpkin craft is that it comes together super quickly.
Stringing the beads should take you about 10 minutes in total.
The rest of the project involves assembling the pumpkin.
These tasks should add up to about 10 minutes as well.
All in all, you’re free to make your own pipe cleaner pumpkin in about 20 minutes.
This makes it a great rainy-day project or weekend project.
It is simple enough to make alongside little ones.
Because it is such a simple and quick craft, you could even make several in one afternoon!