HomeDIY
This post may contain affiliate links:full affiliate disclosure.
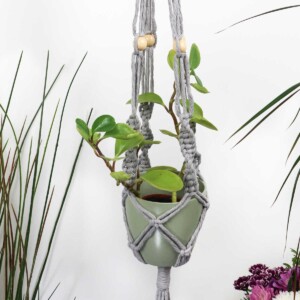
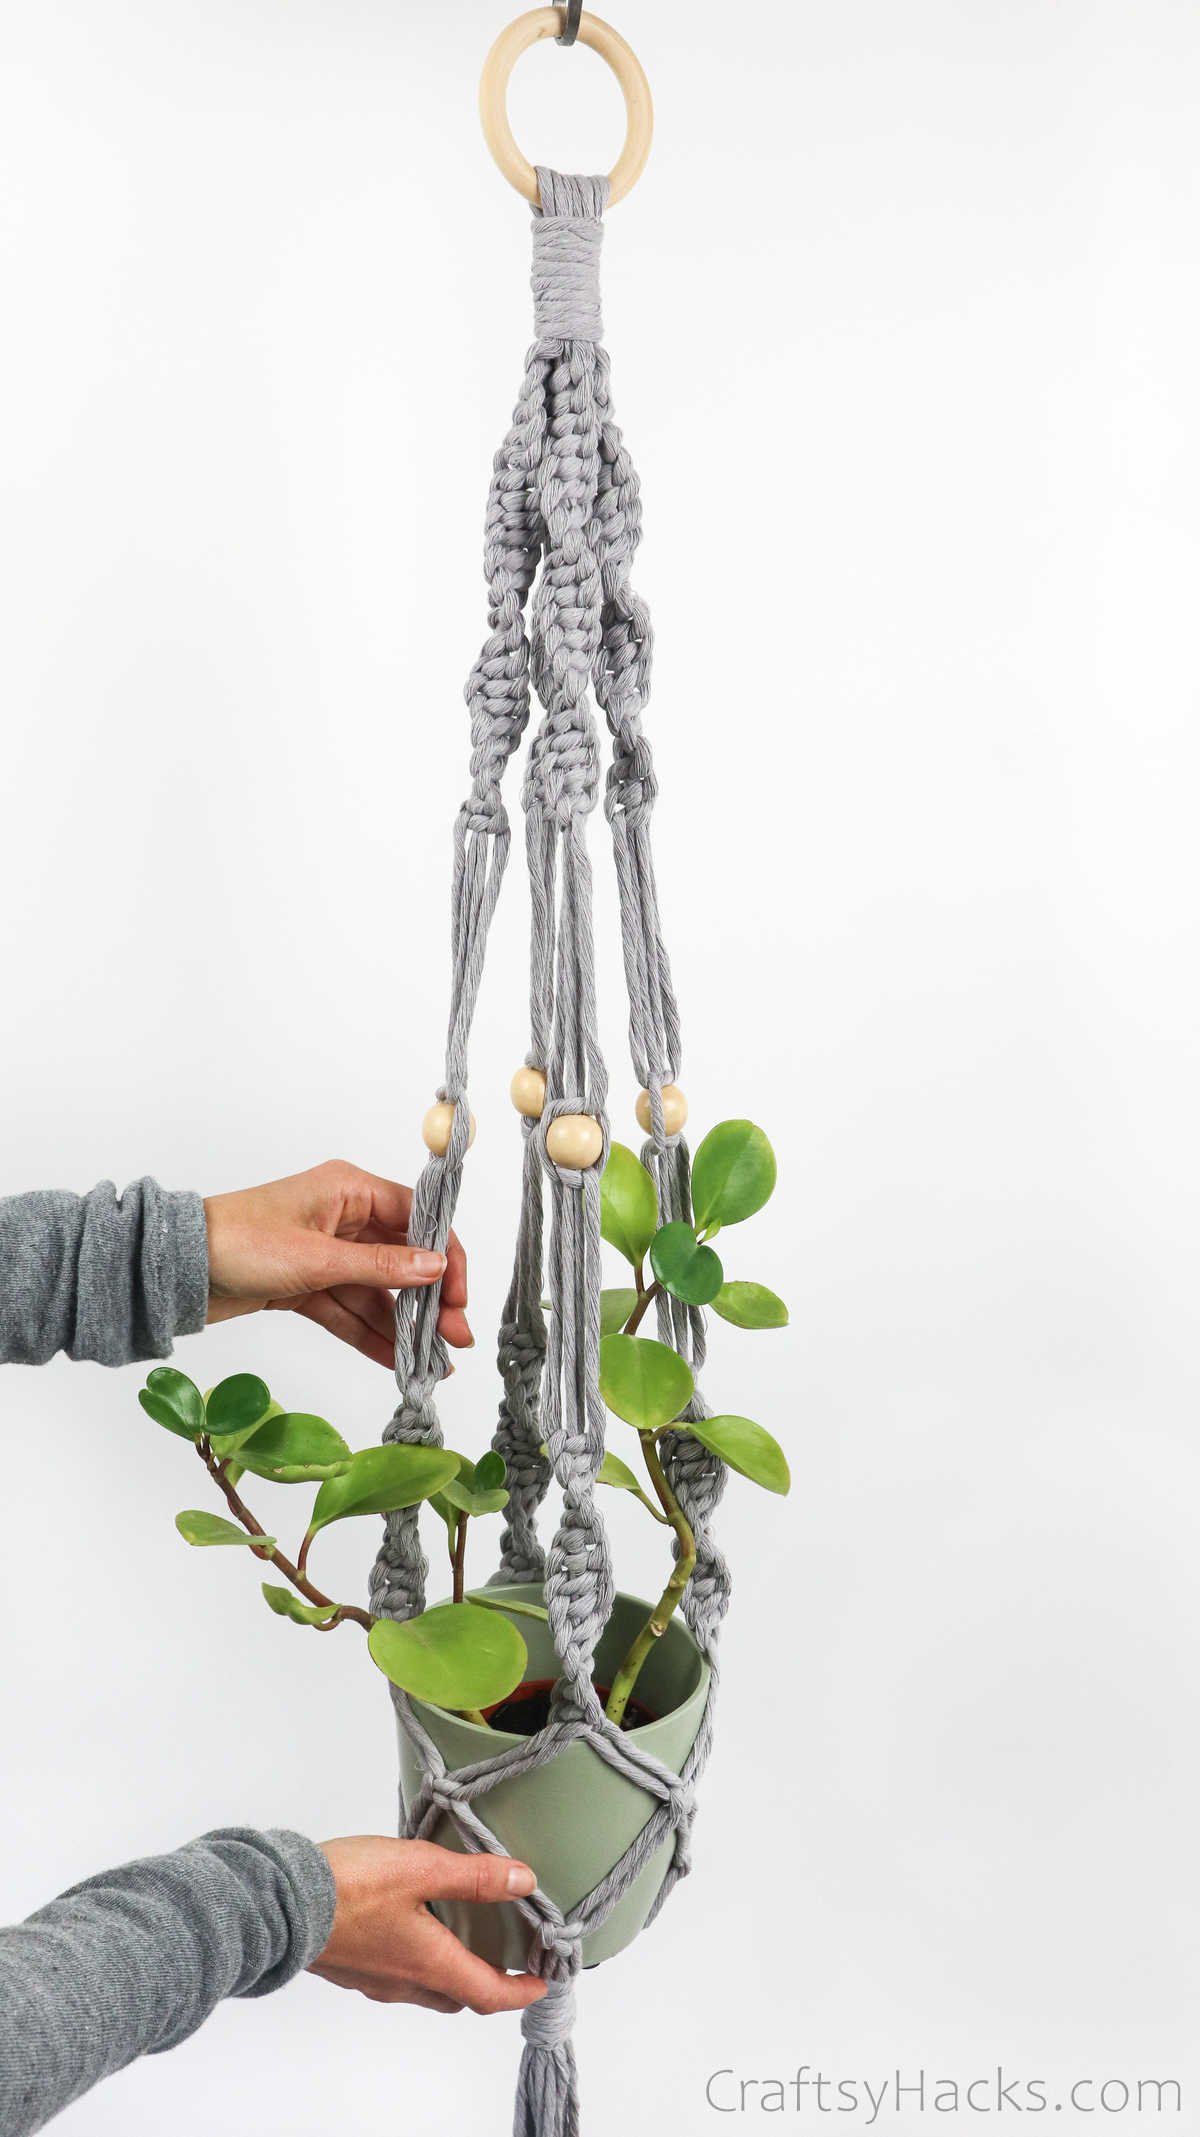
Make thismacrame plant hangerto upgrade the way you display your plants!
This is a great, relaxing DIY project for adults and even teens.
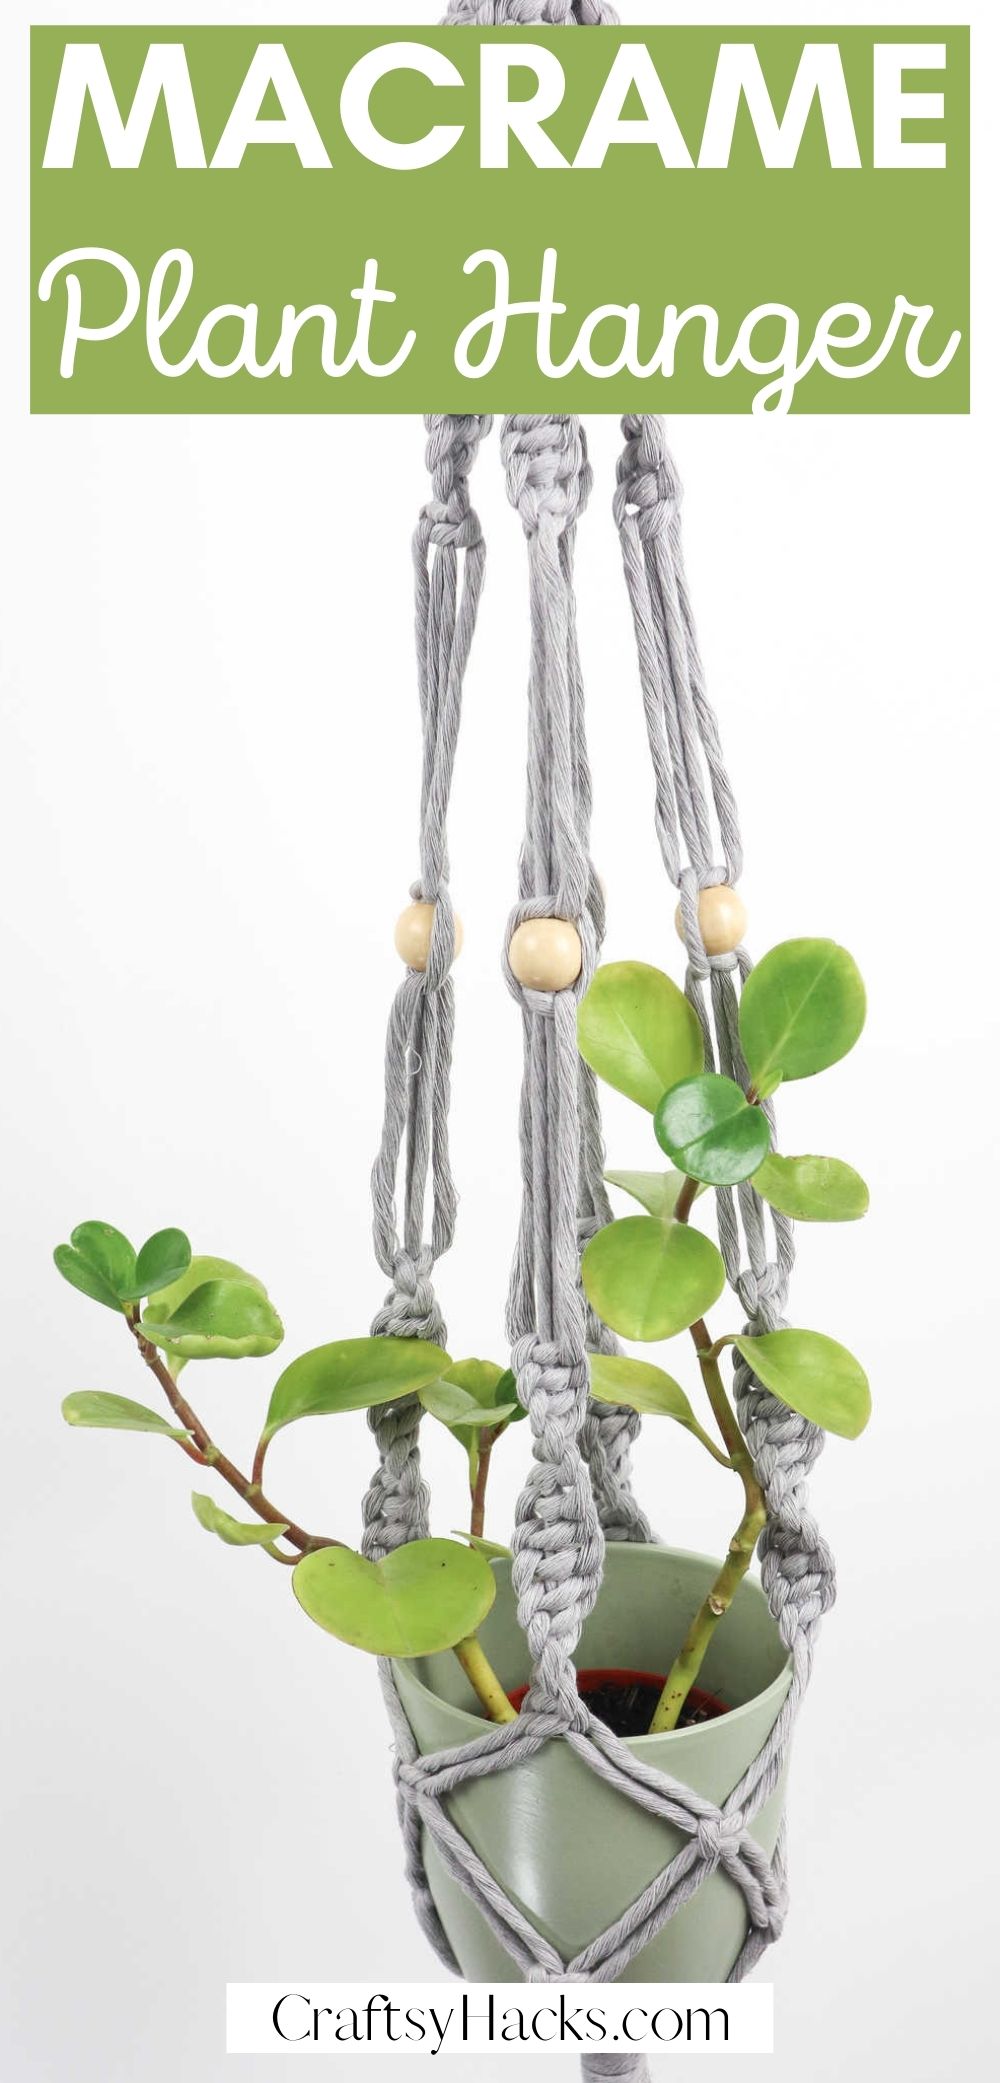
Macrame is all the rage these days, and rightfully so.
Take this macrame plant hanger, for example.
Its a lovely way to spice up your indoor garden.
Dont you think your home deserves a change from just regular planters on shelves and windowsills?
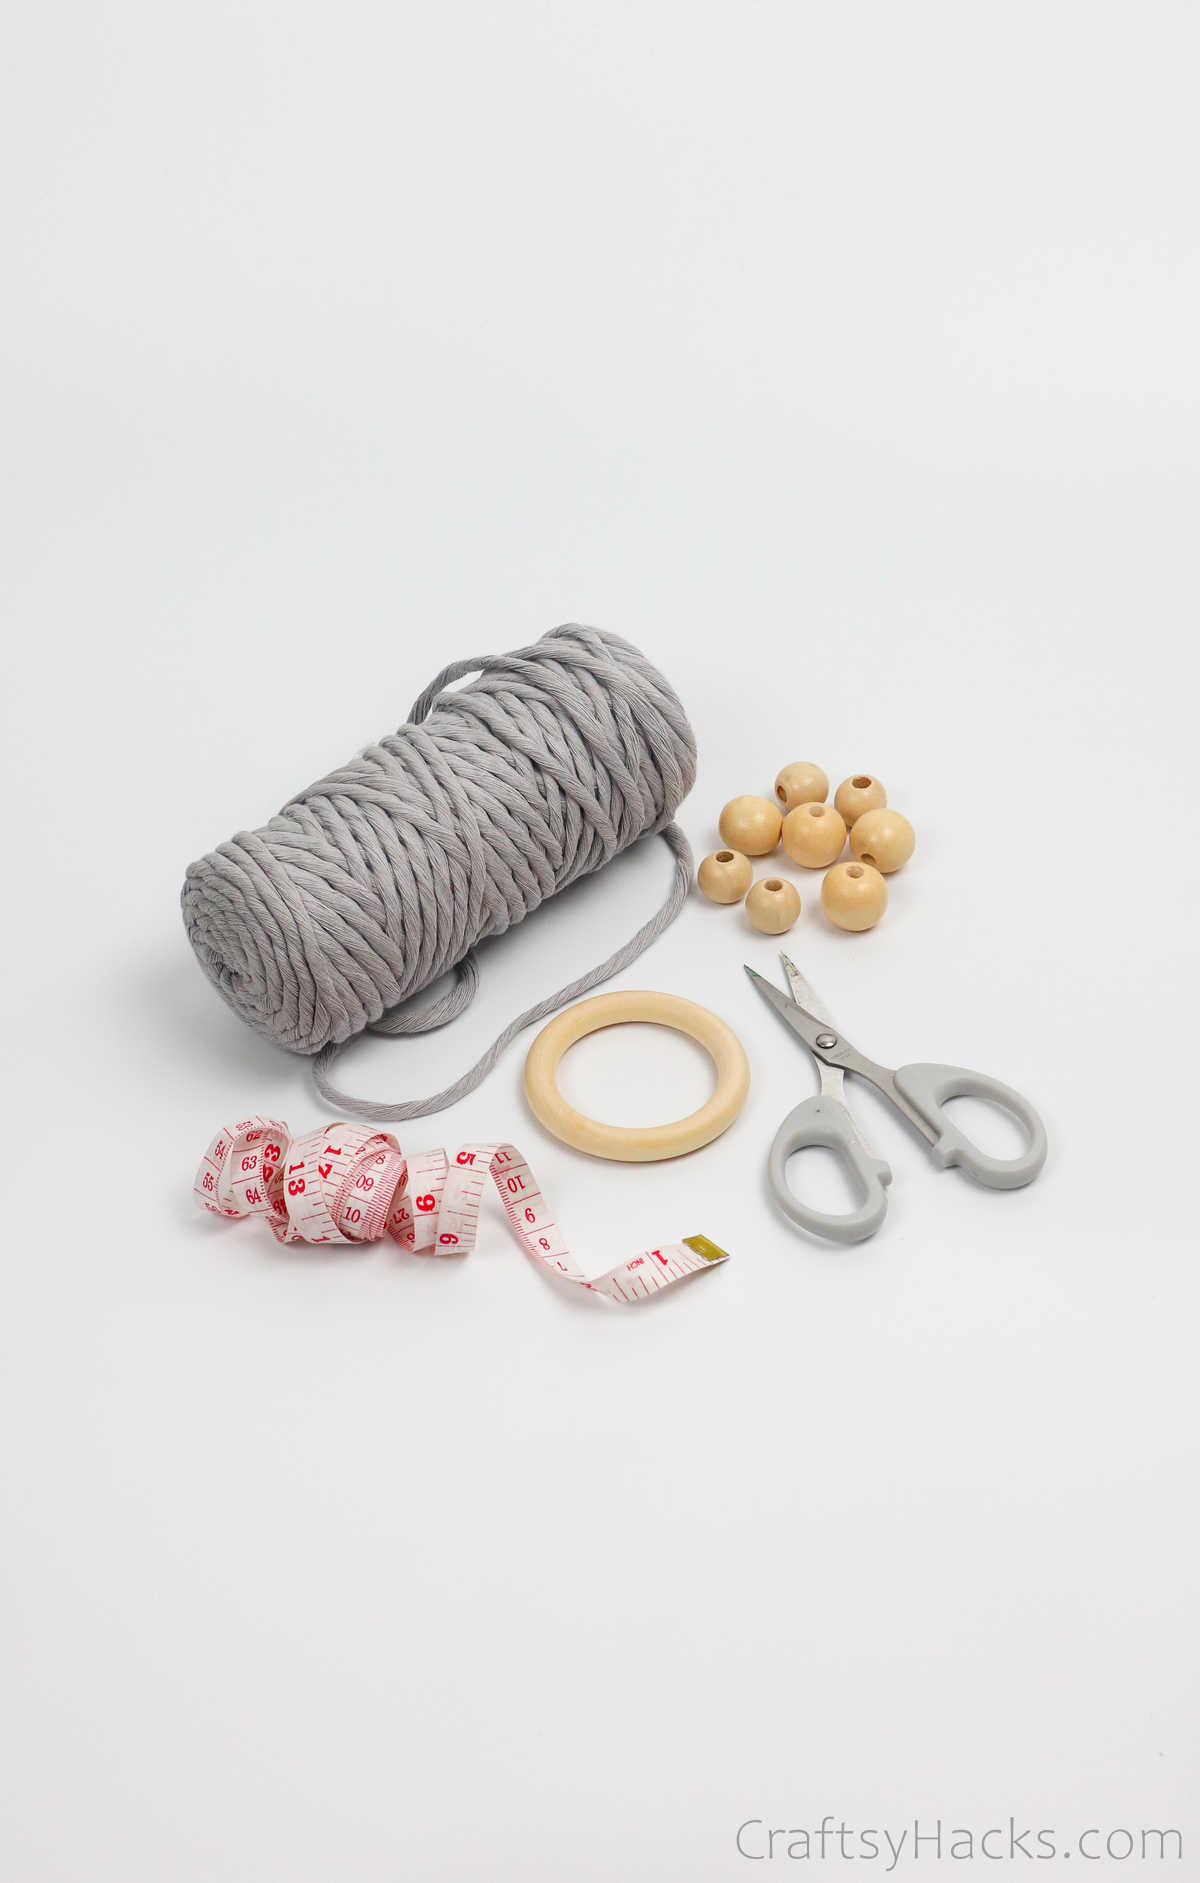
All you need is a hook to hang it from, and youre set.
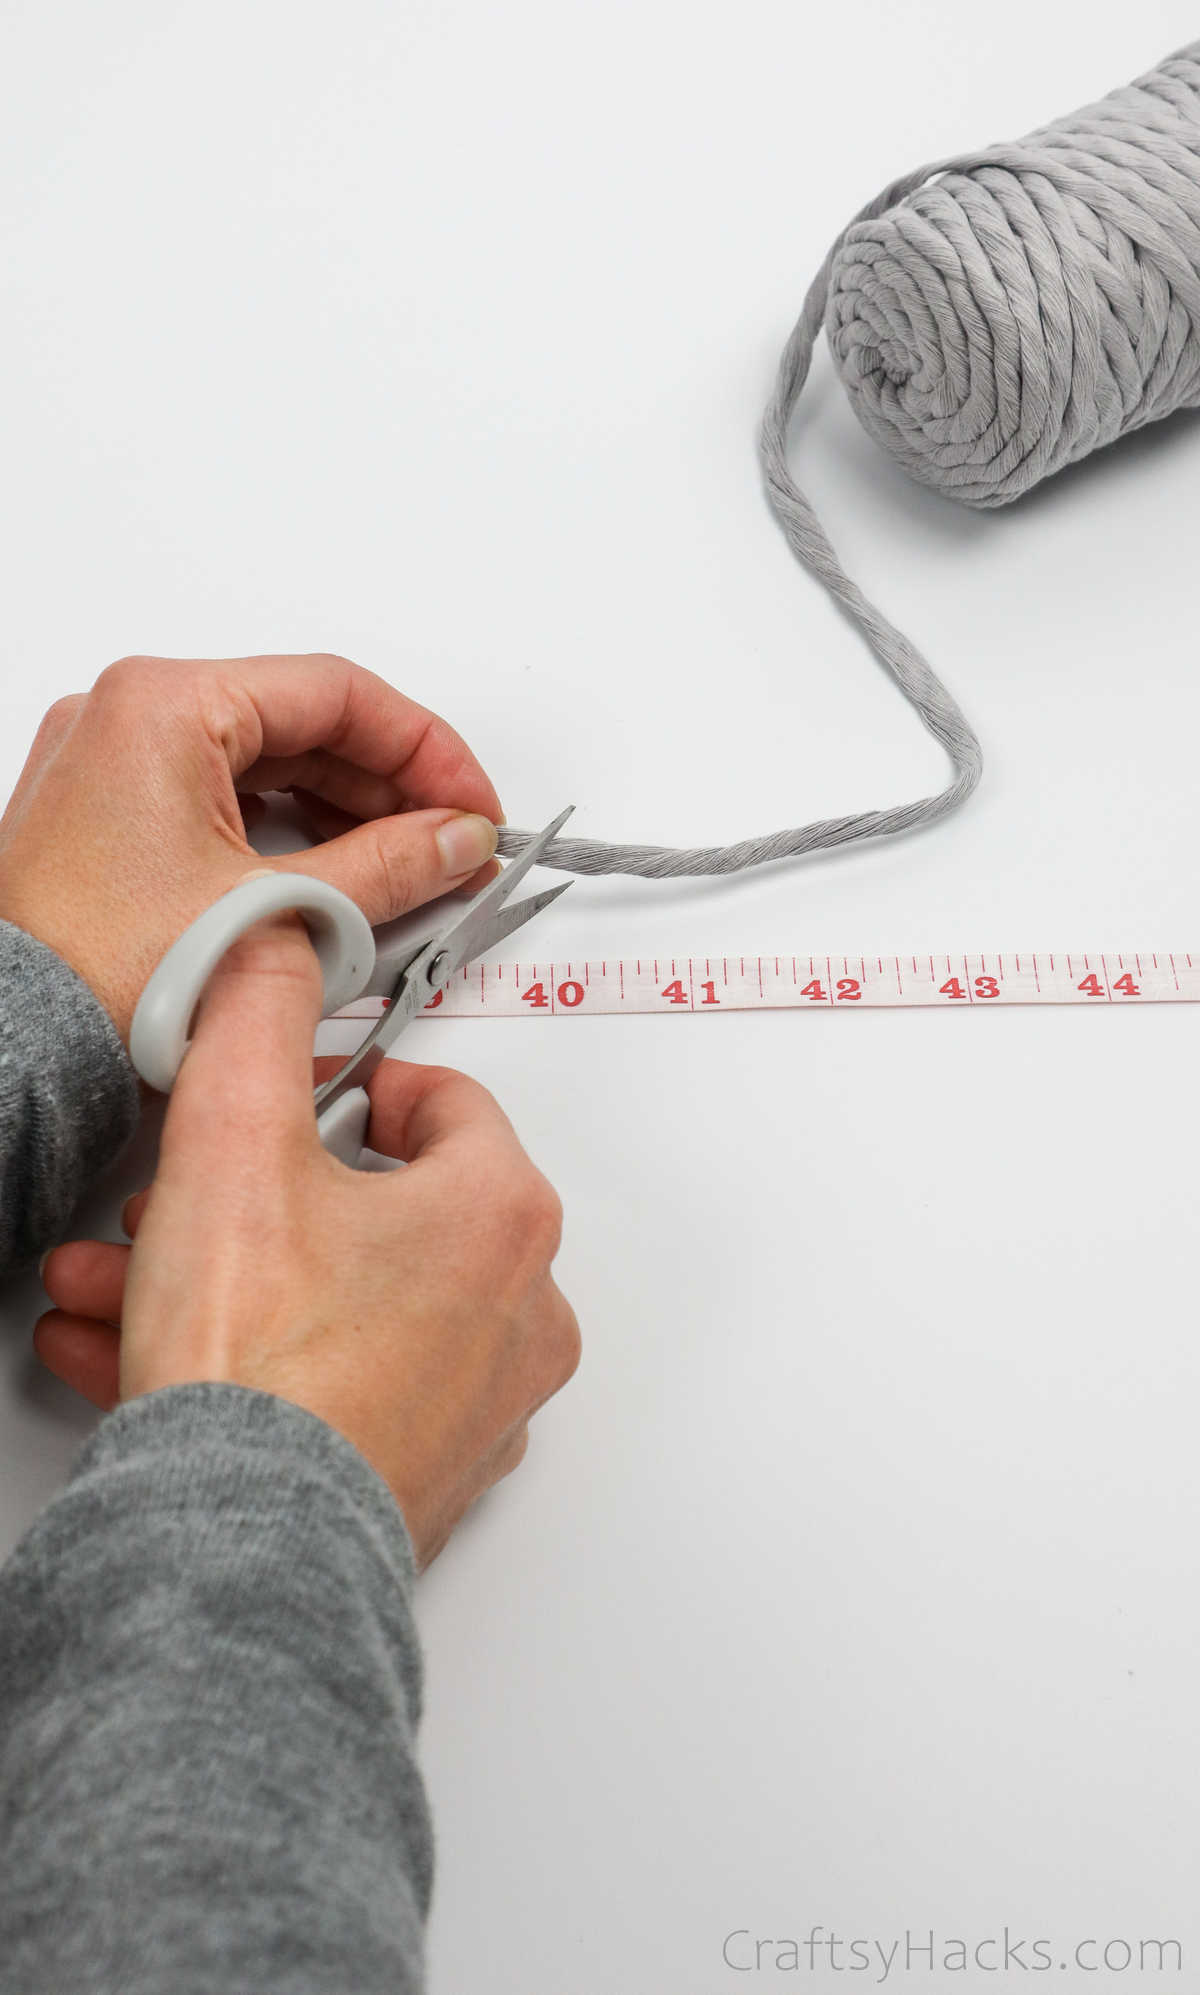
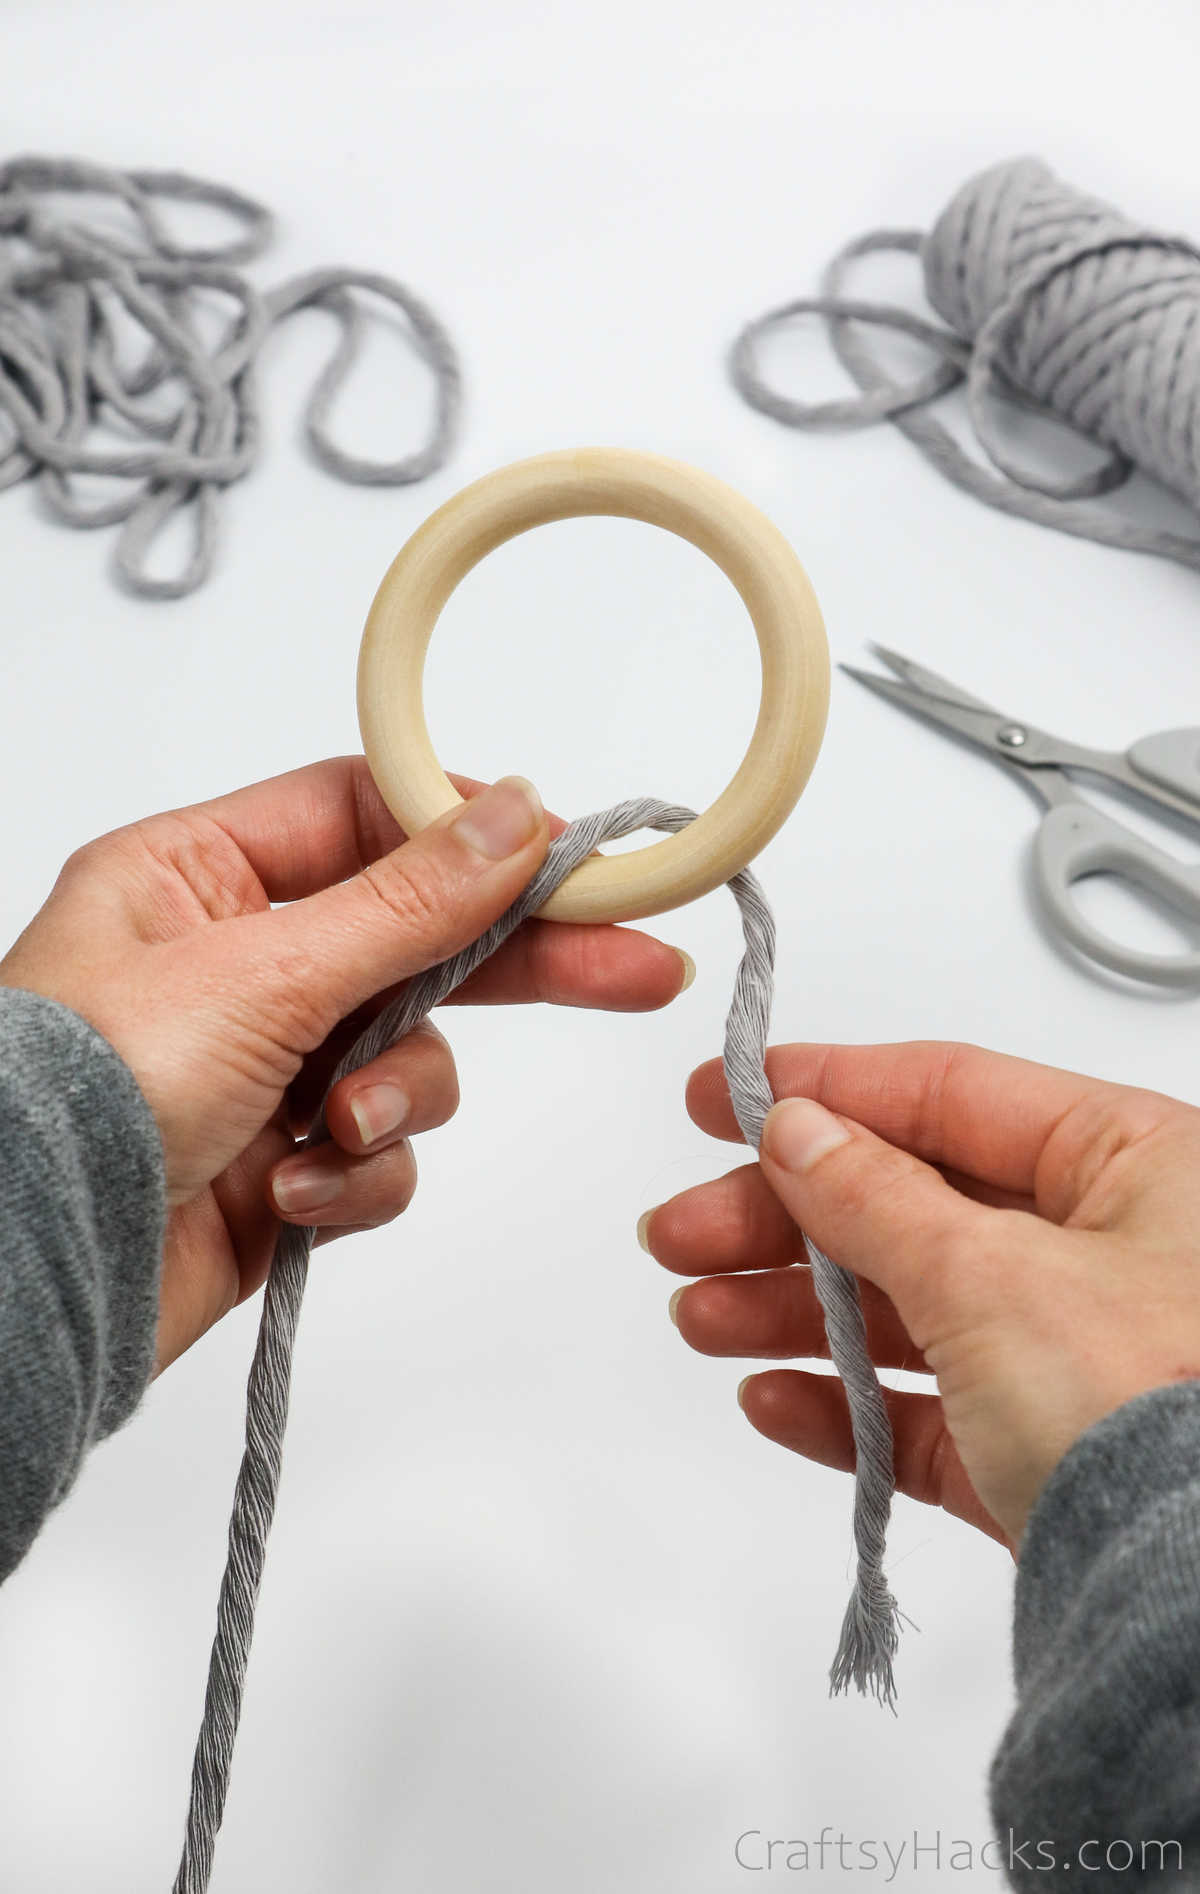
Step 1
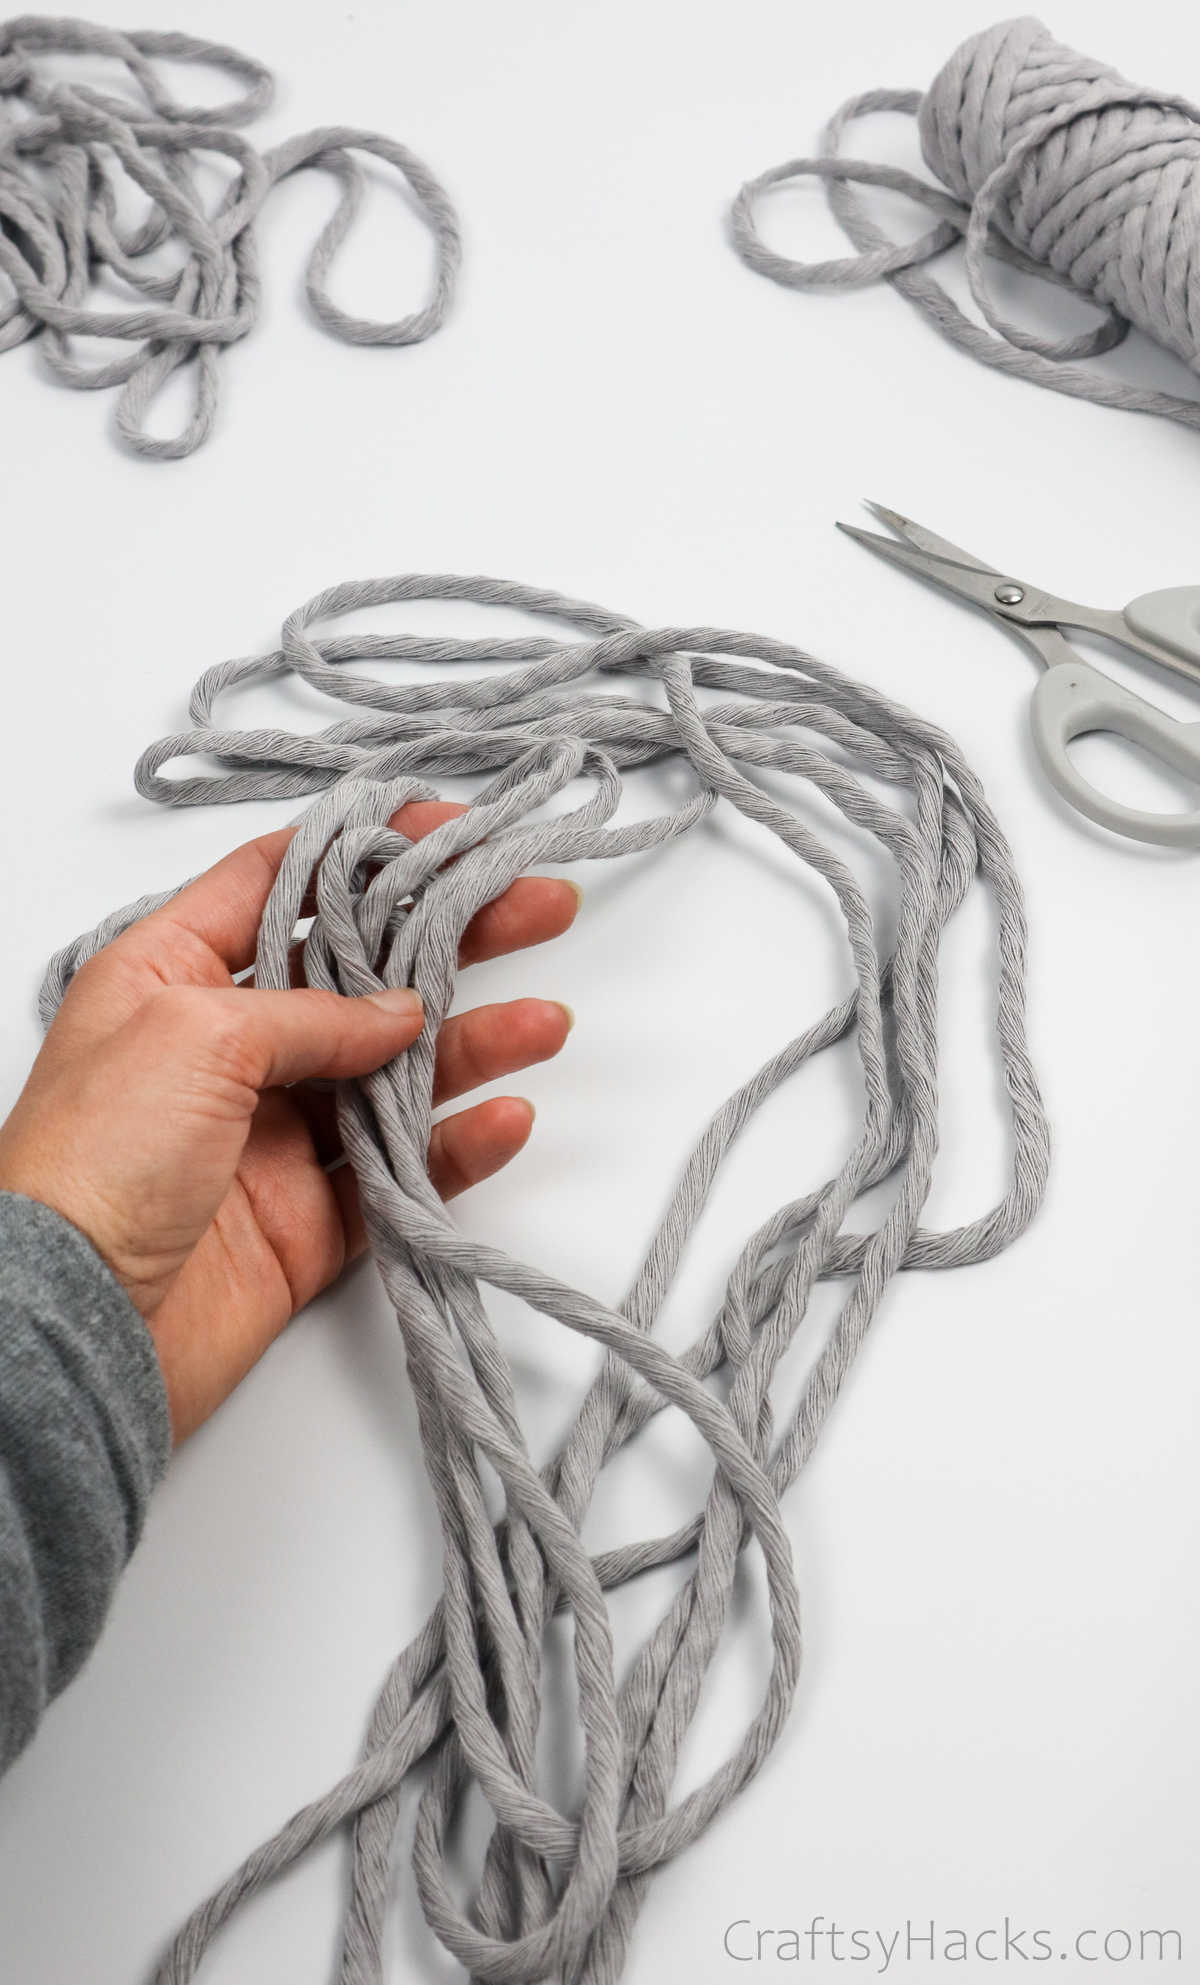
The first order of business is to cut your macrame cords.
Go ahead and cut the macrame cords accordingly.
Step 2
Next, take your wooden ring.
You are going to pull the eight macrame cords through it so they hang down on either side equally.
Youll have sixteen strands.
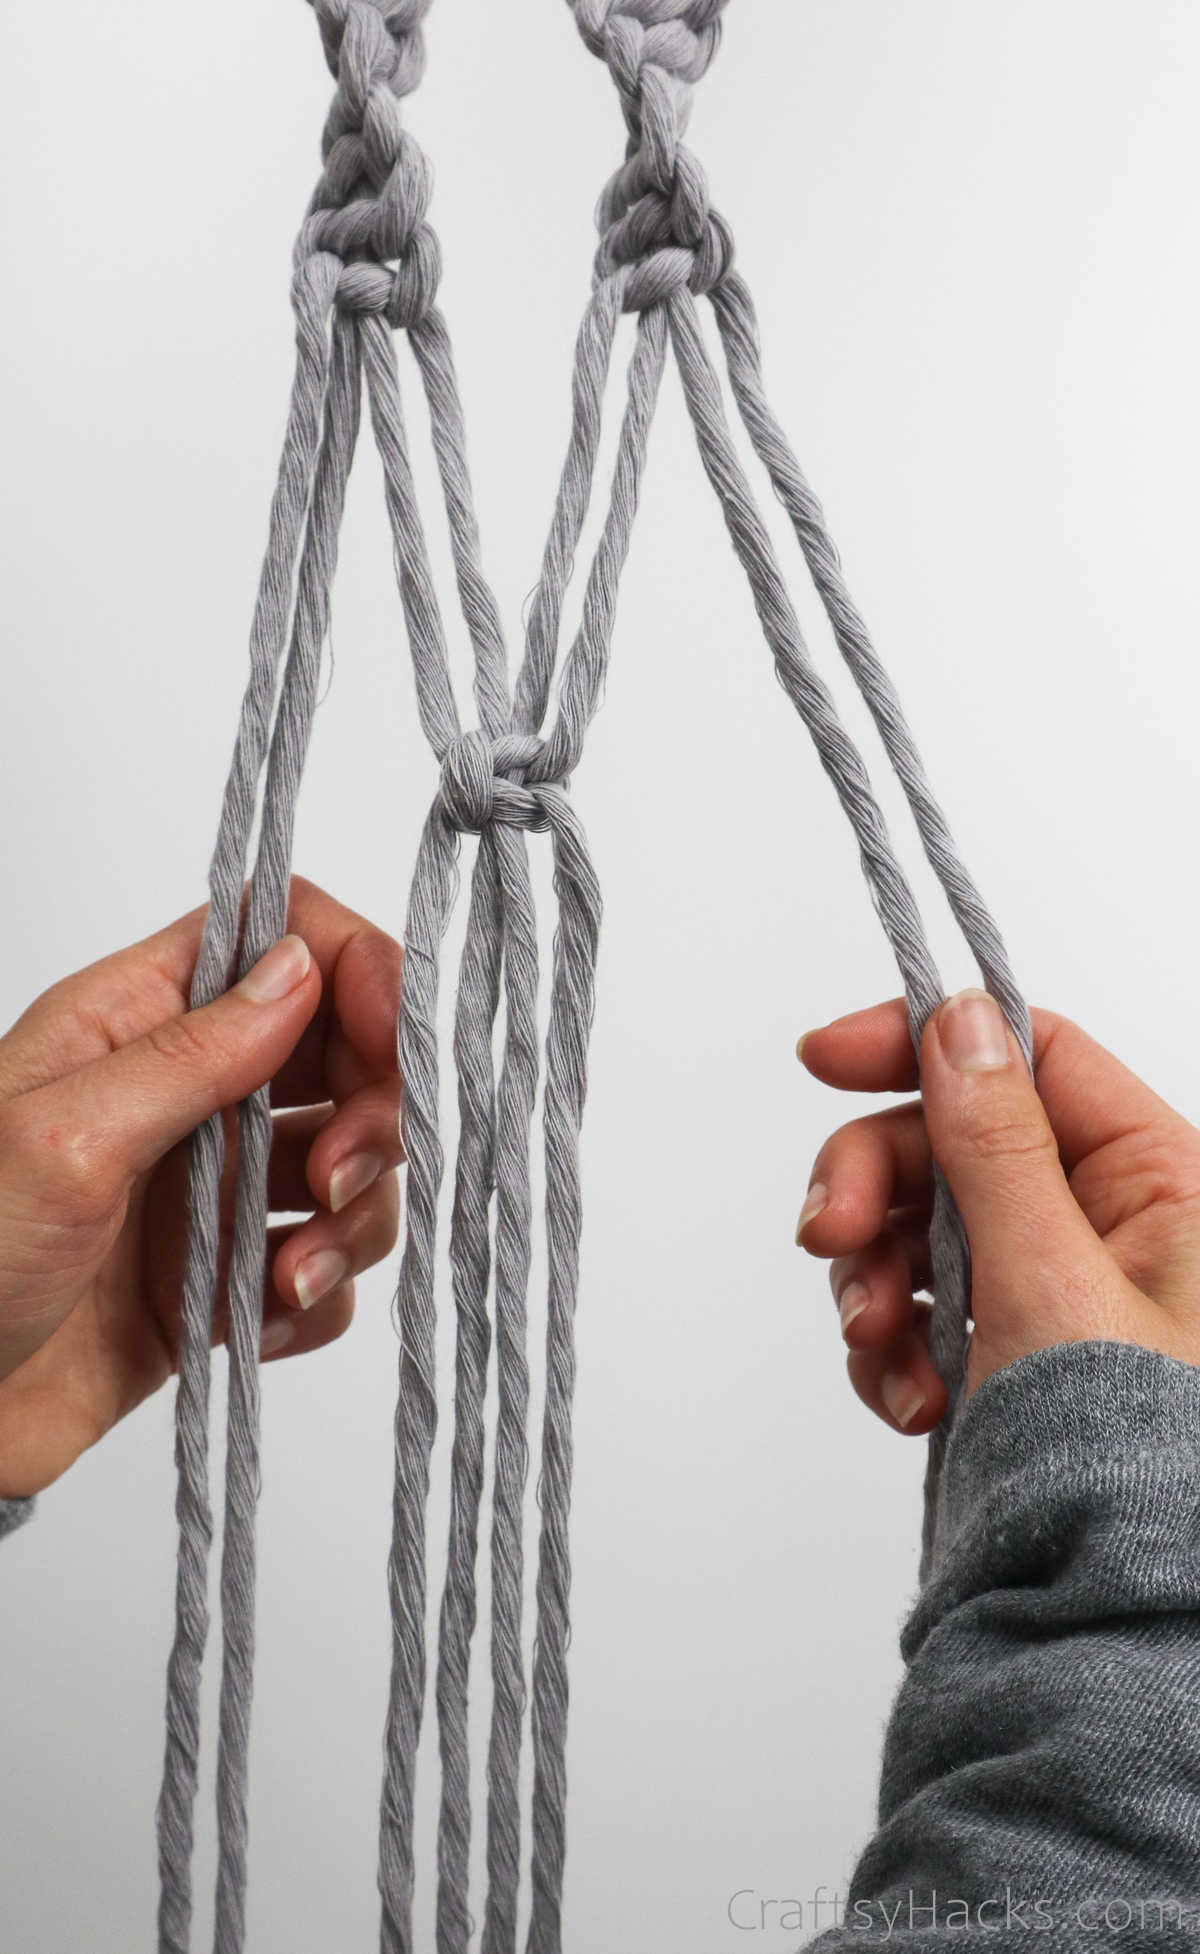
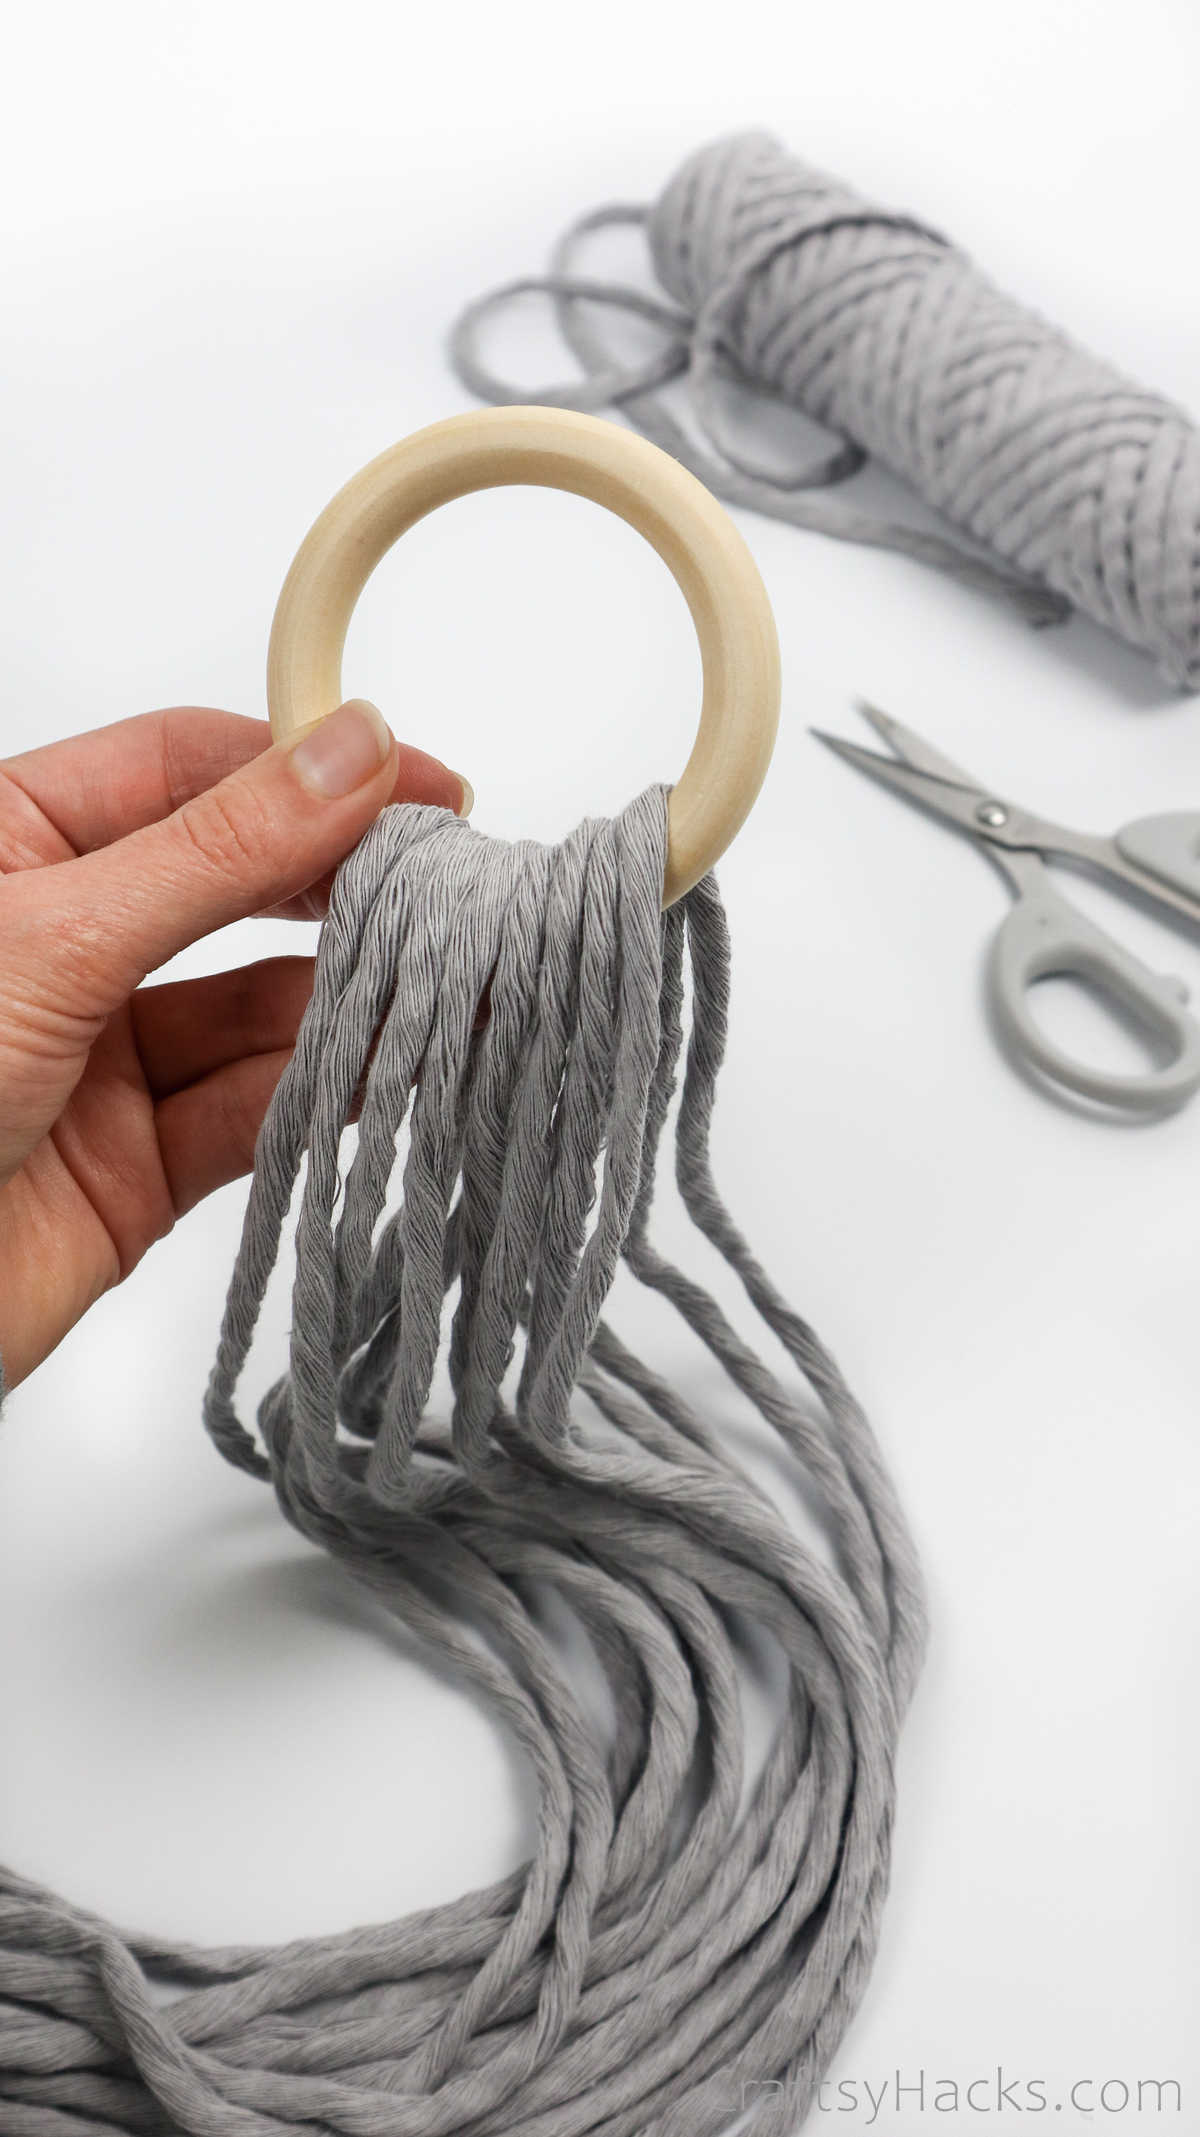
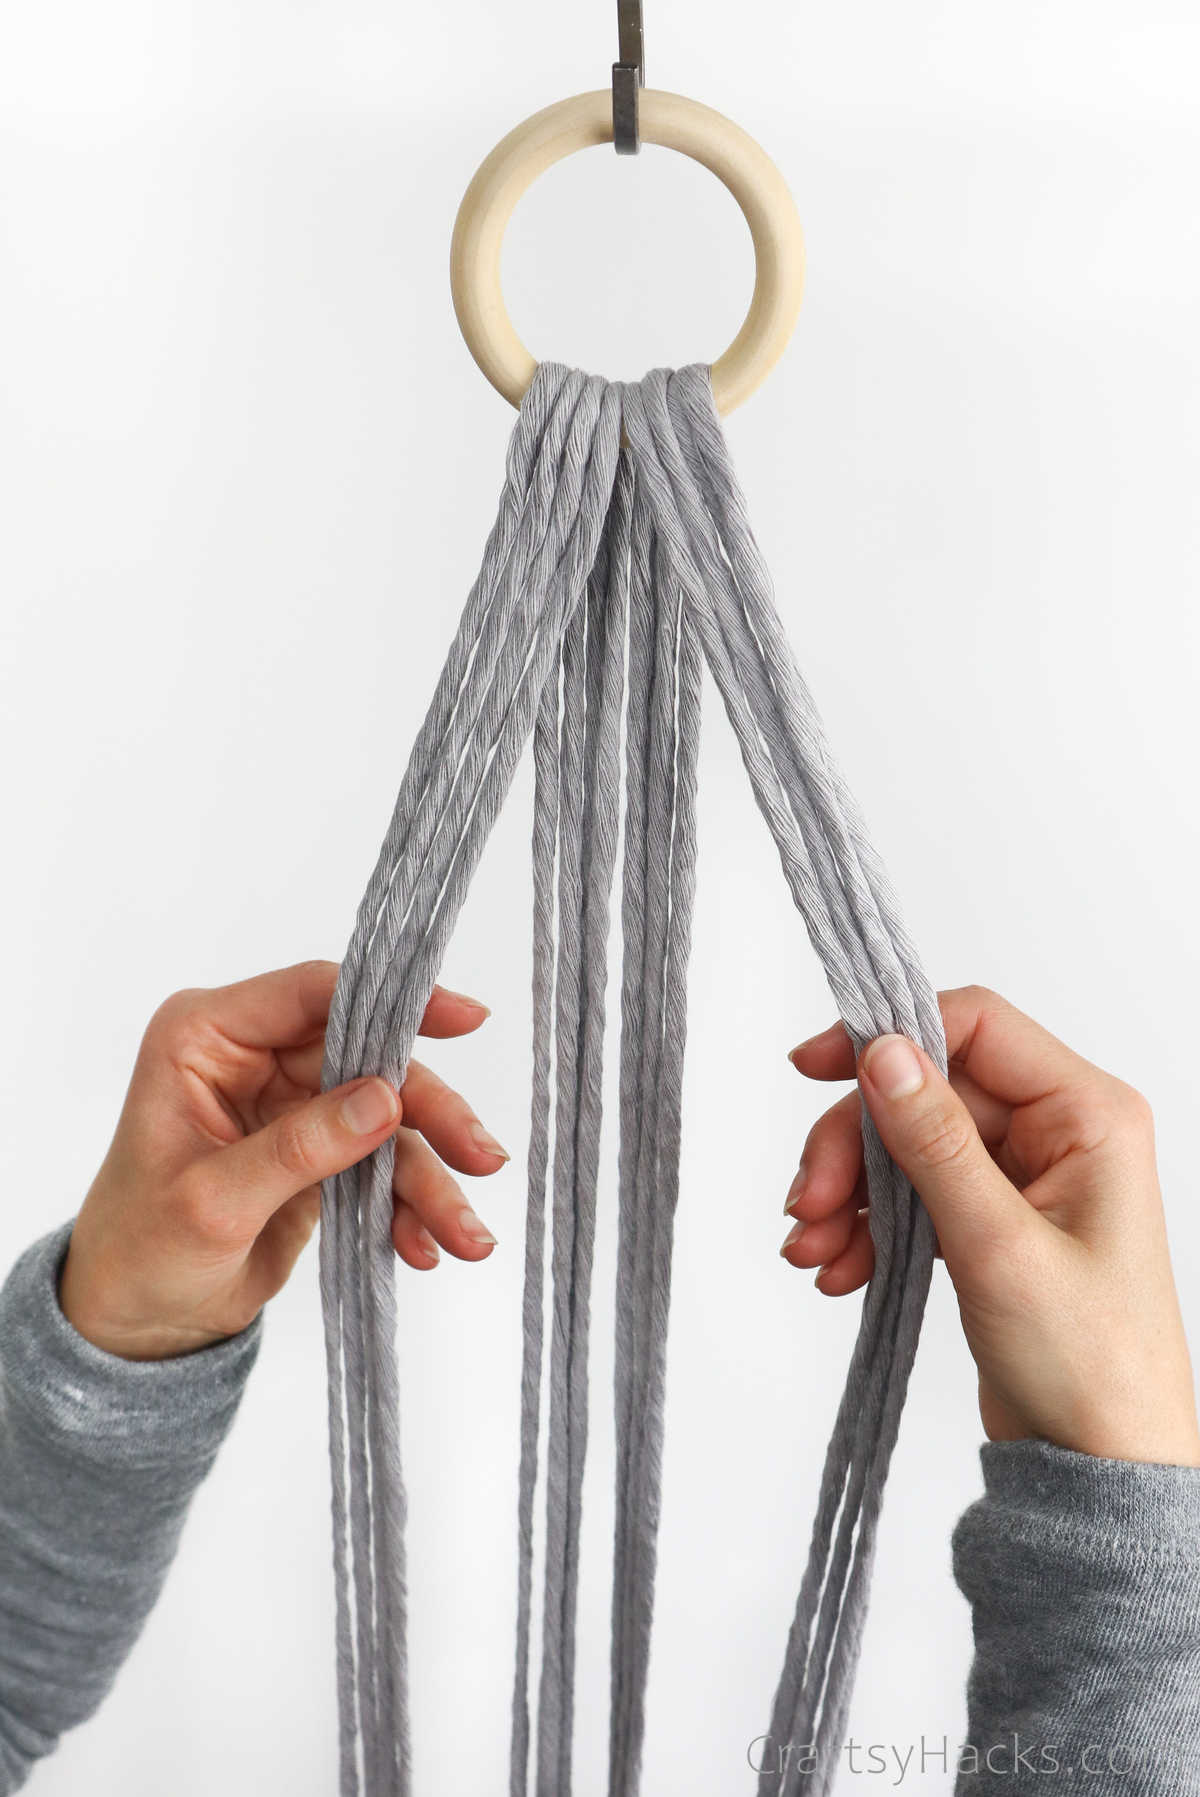
Step 3
Pull apart the two sets of cords, eight cords each, as shown below.
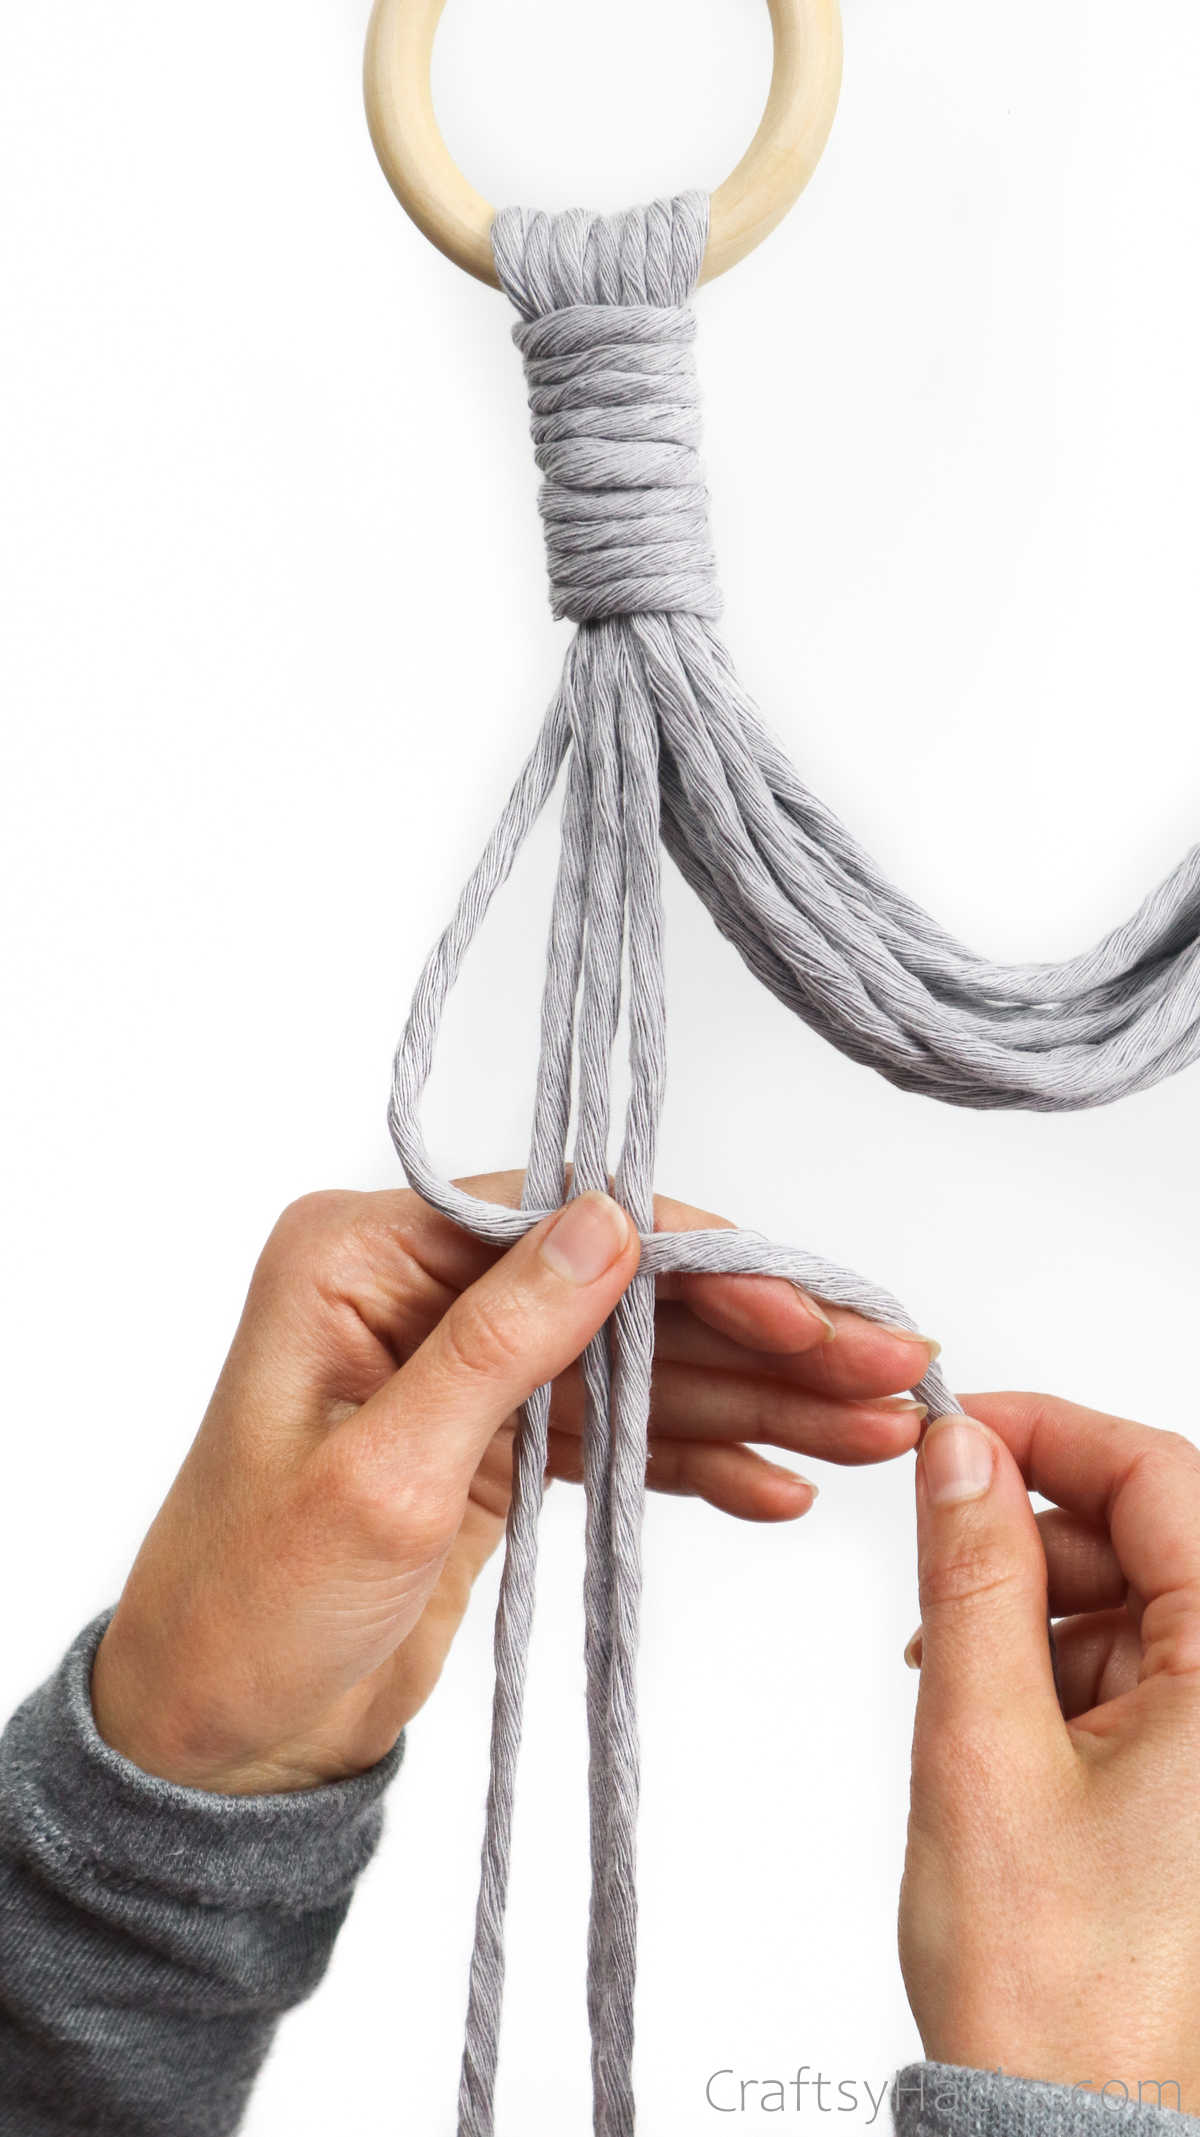
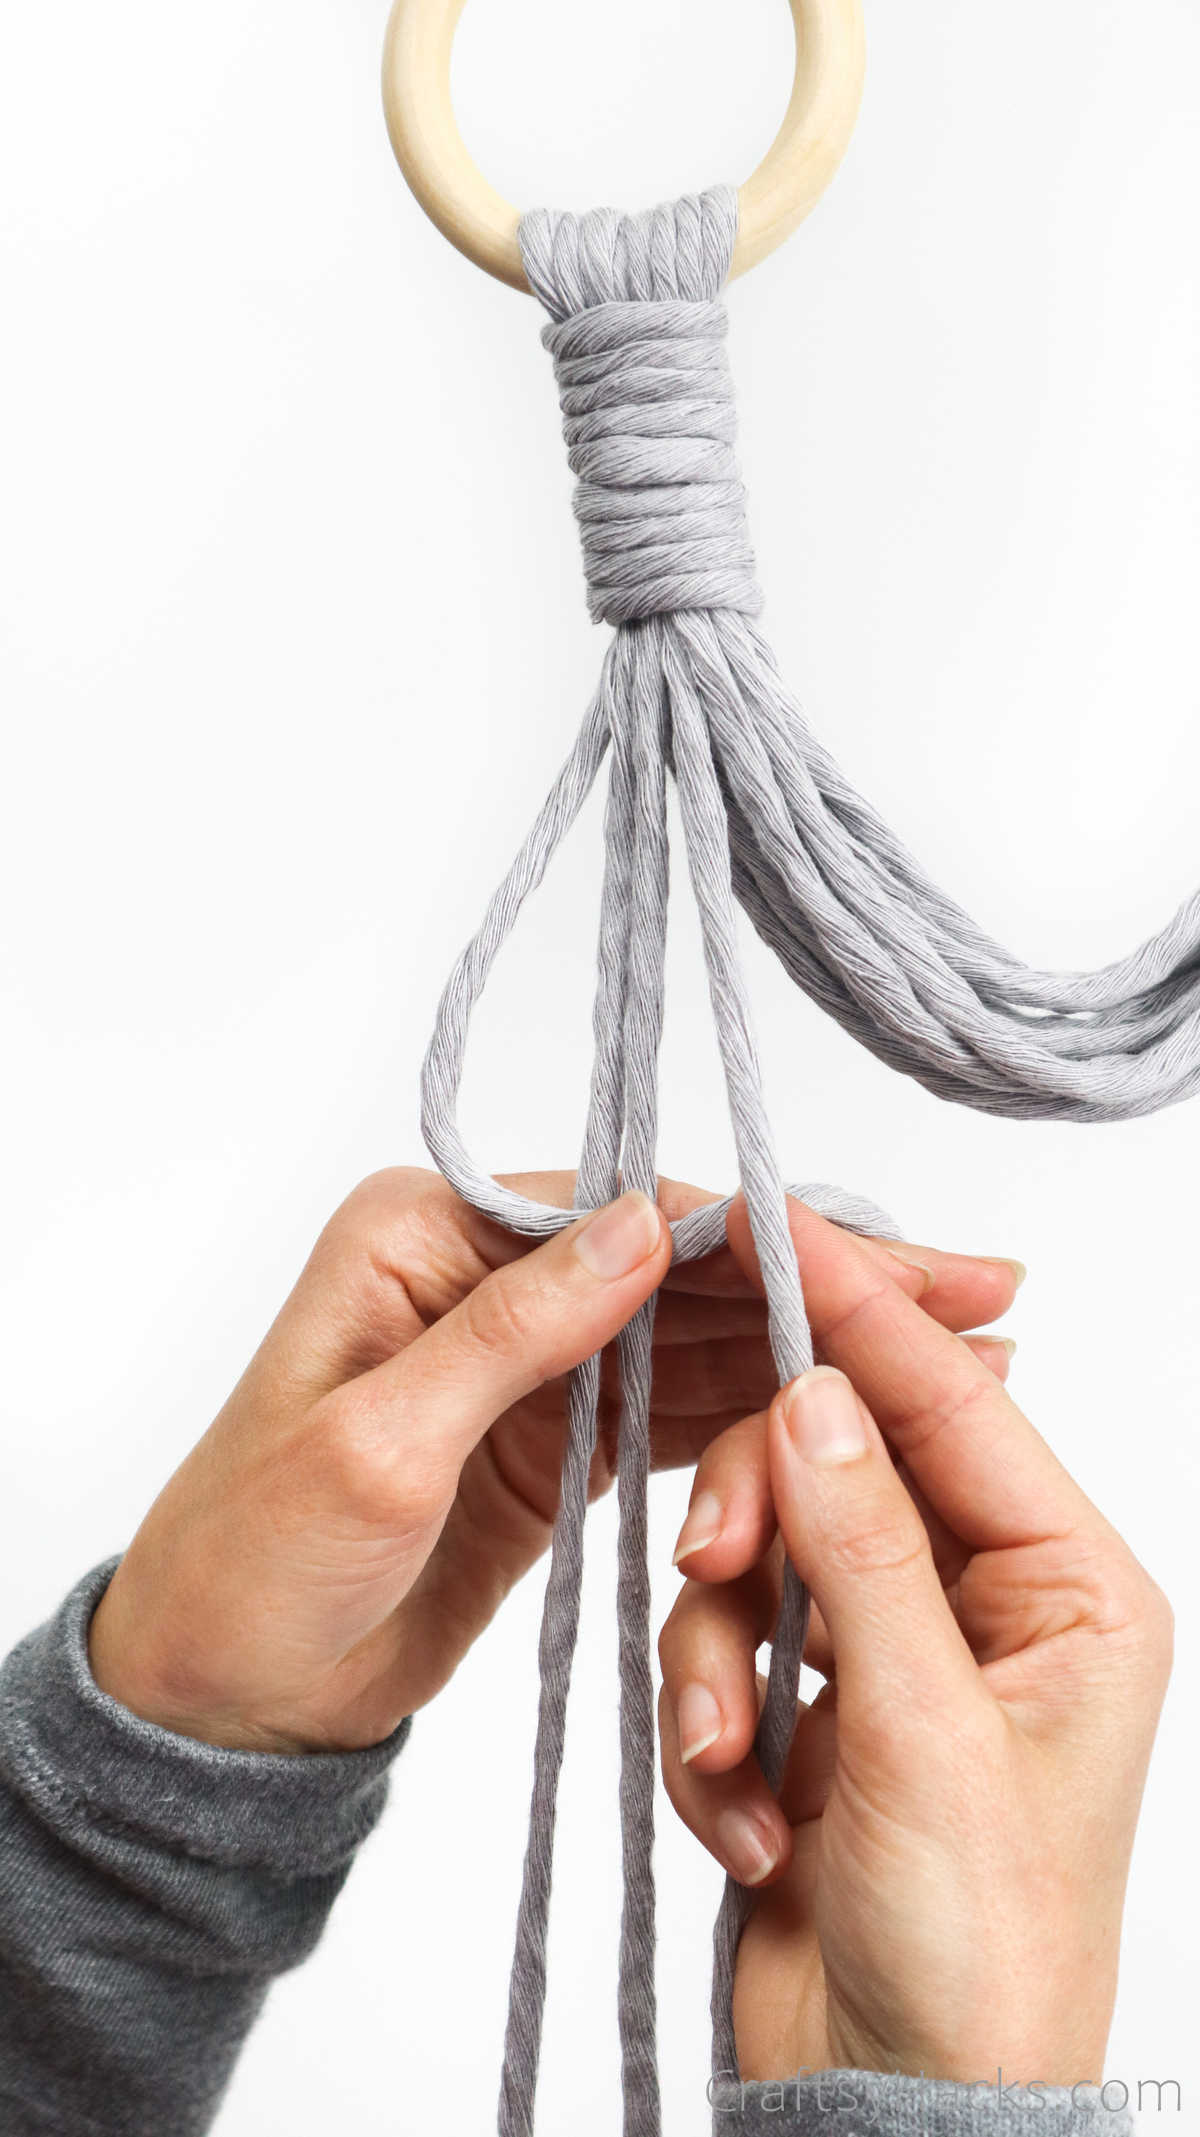
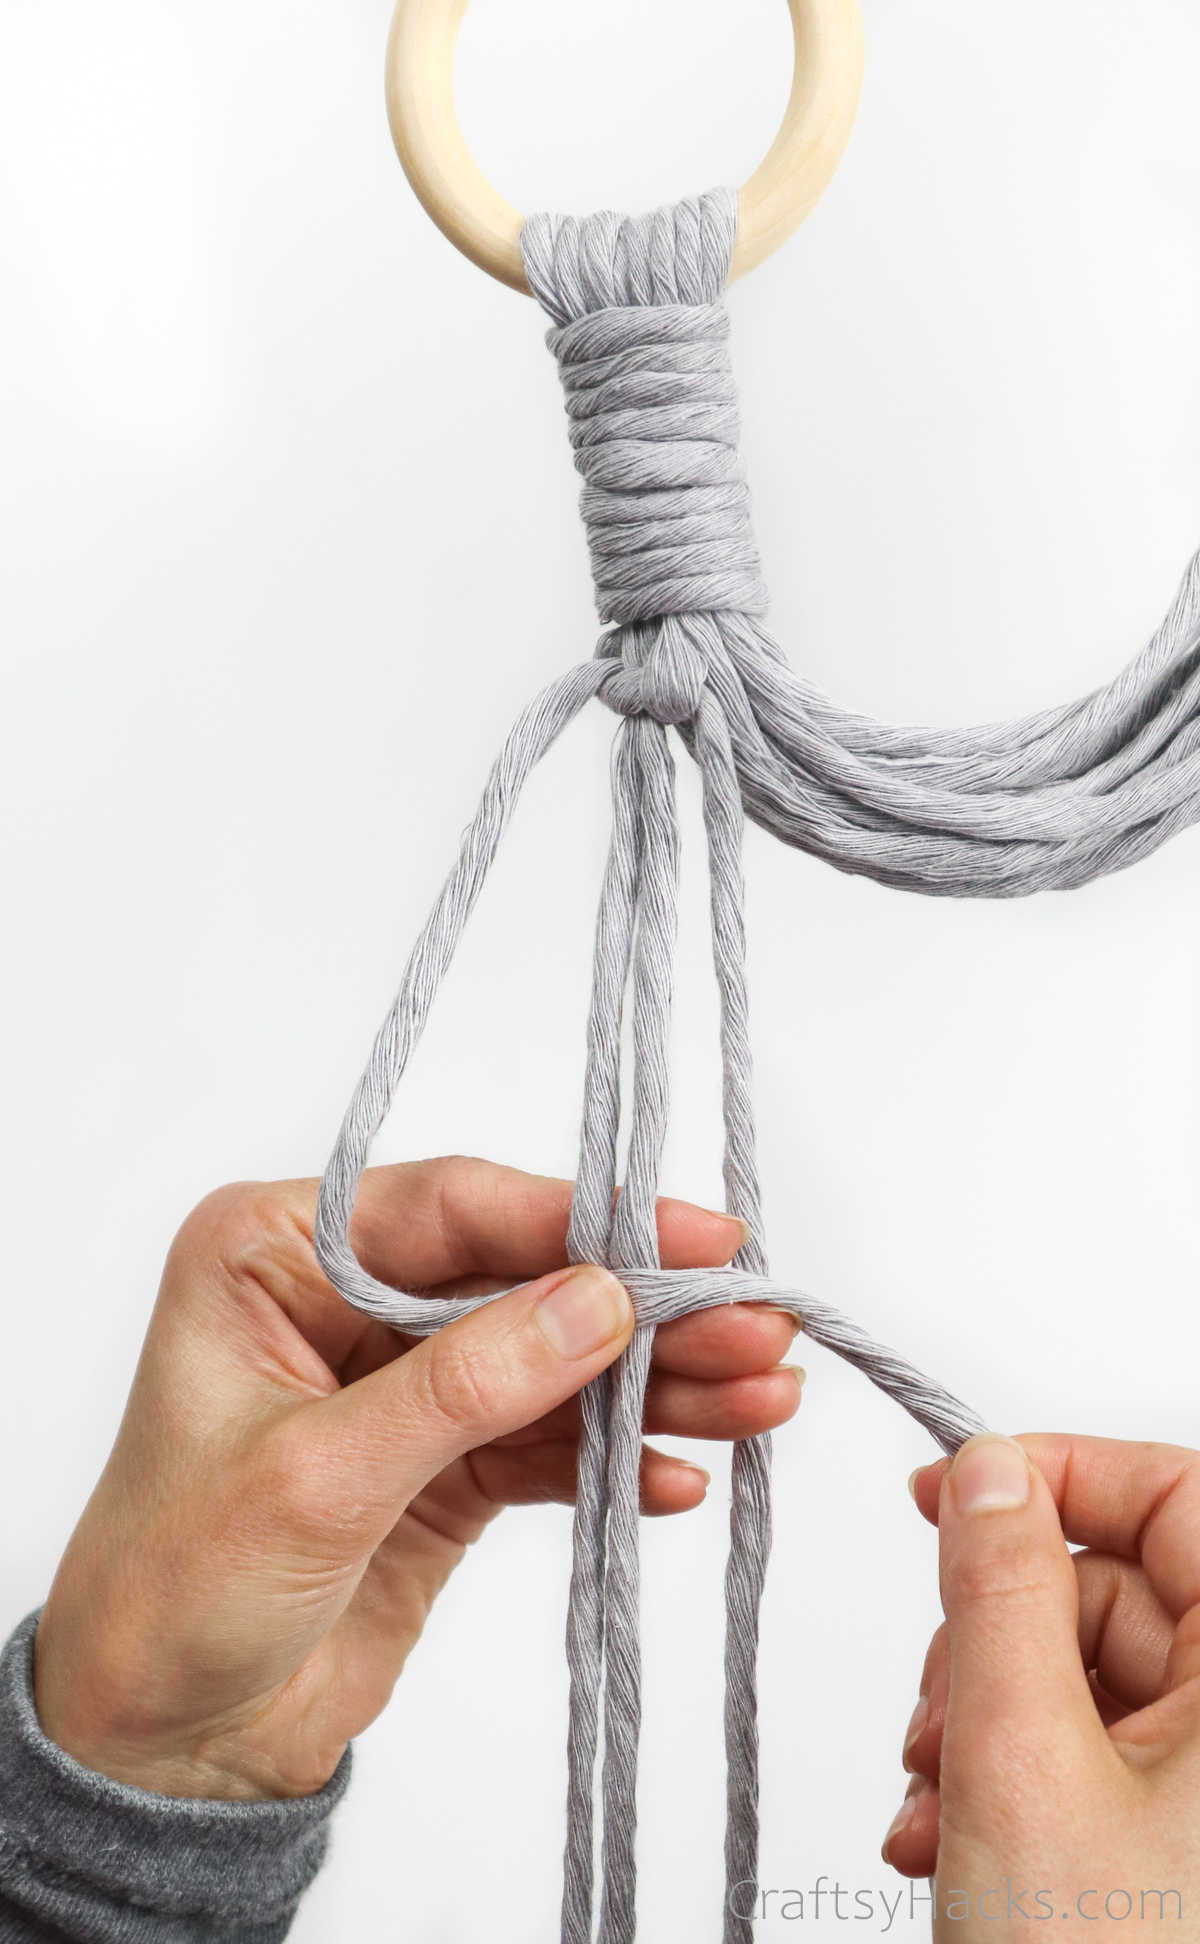
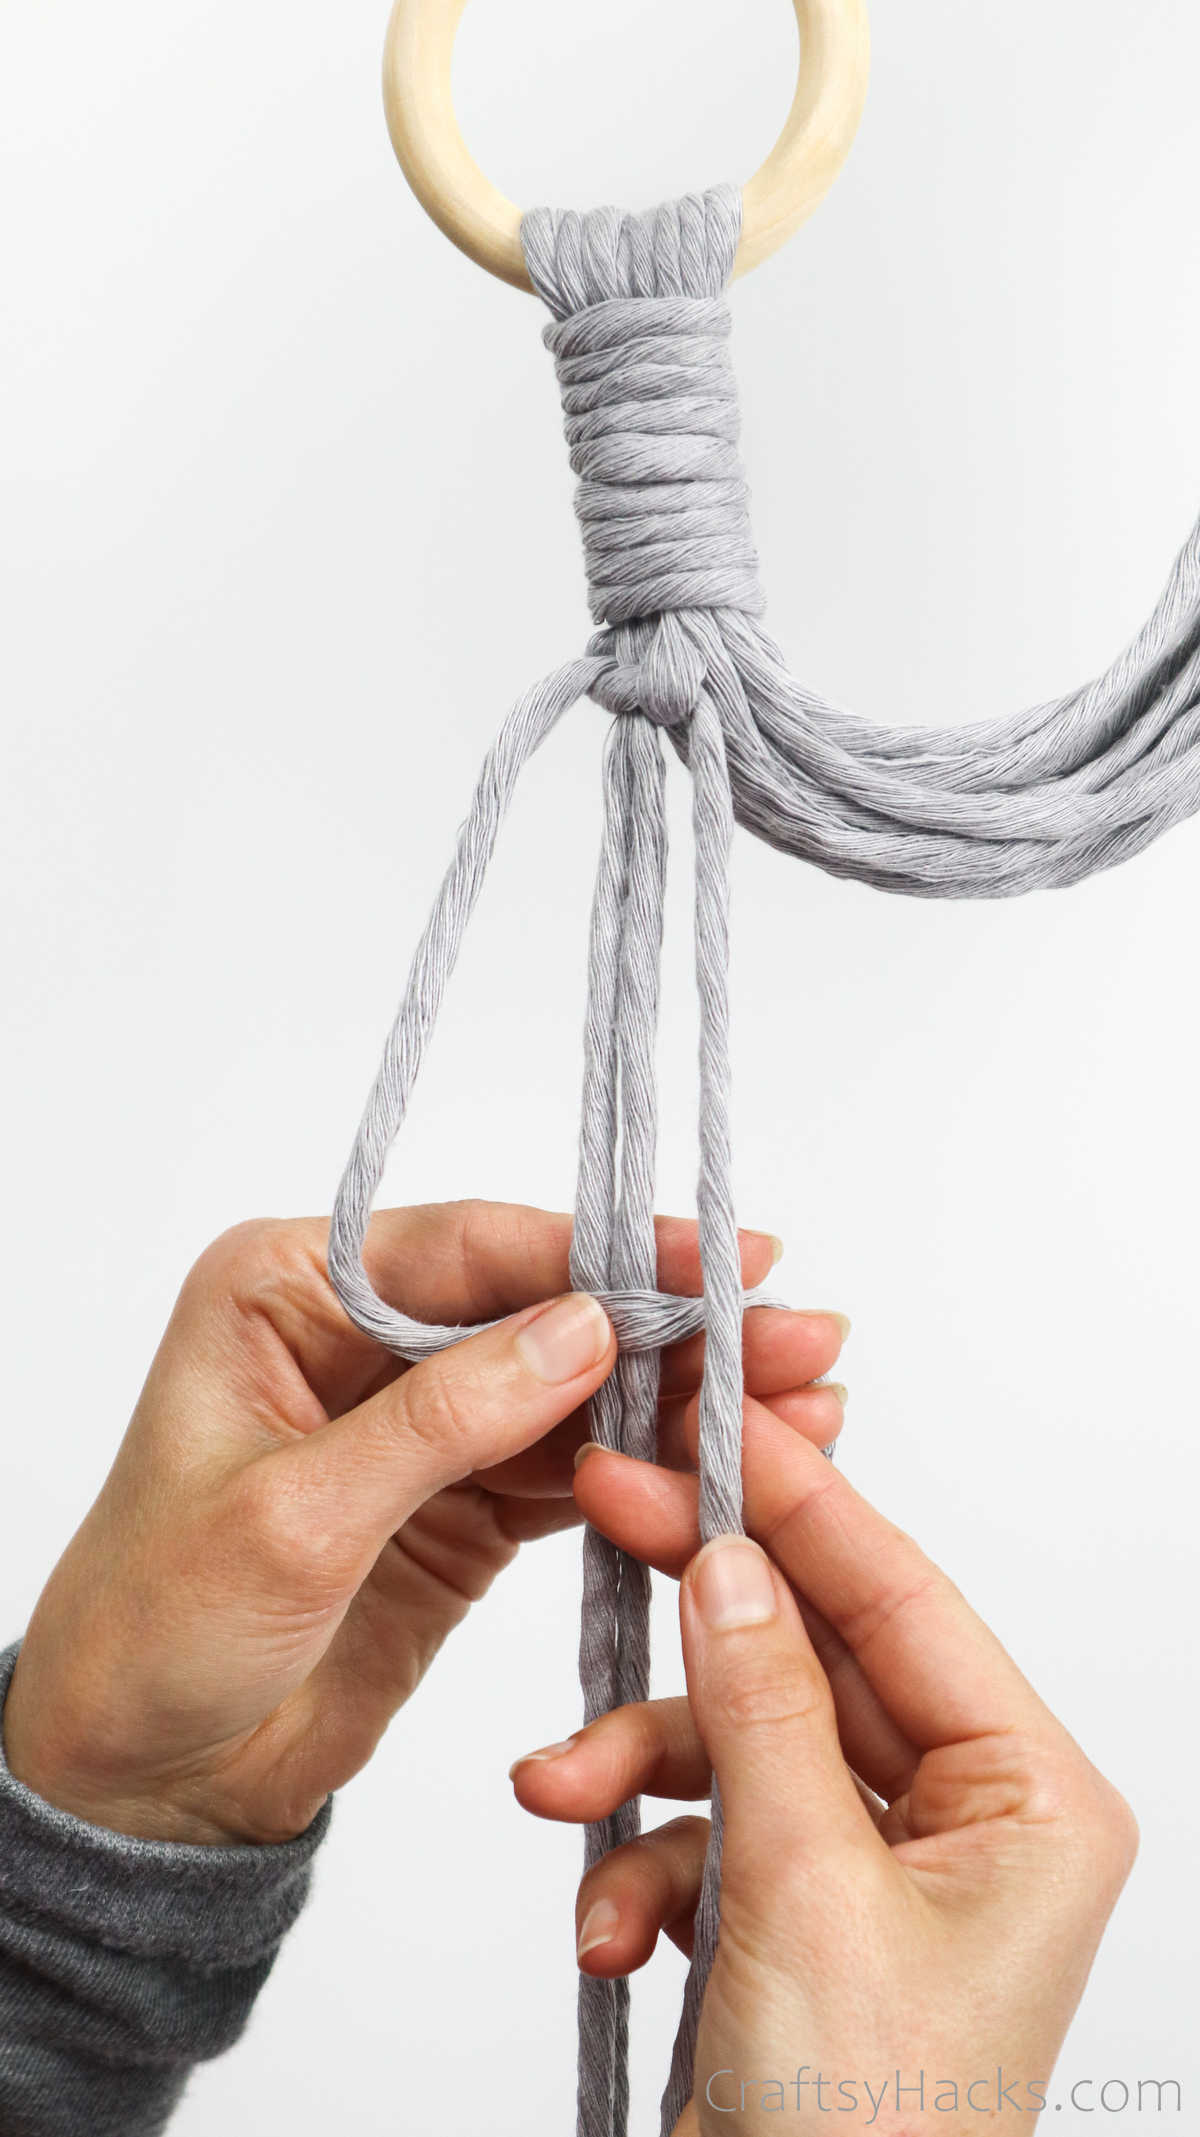
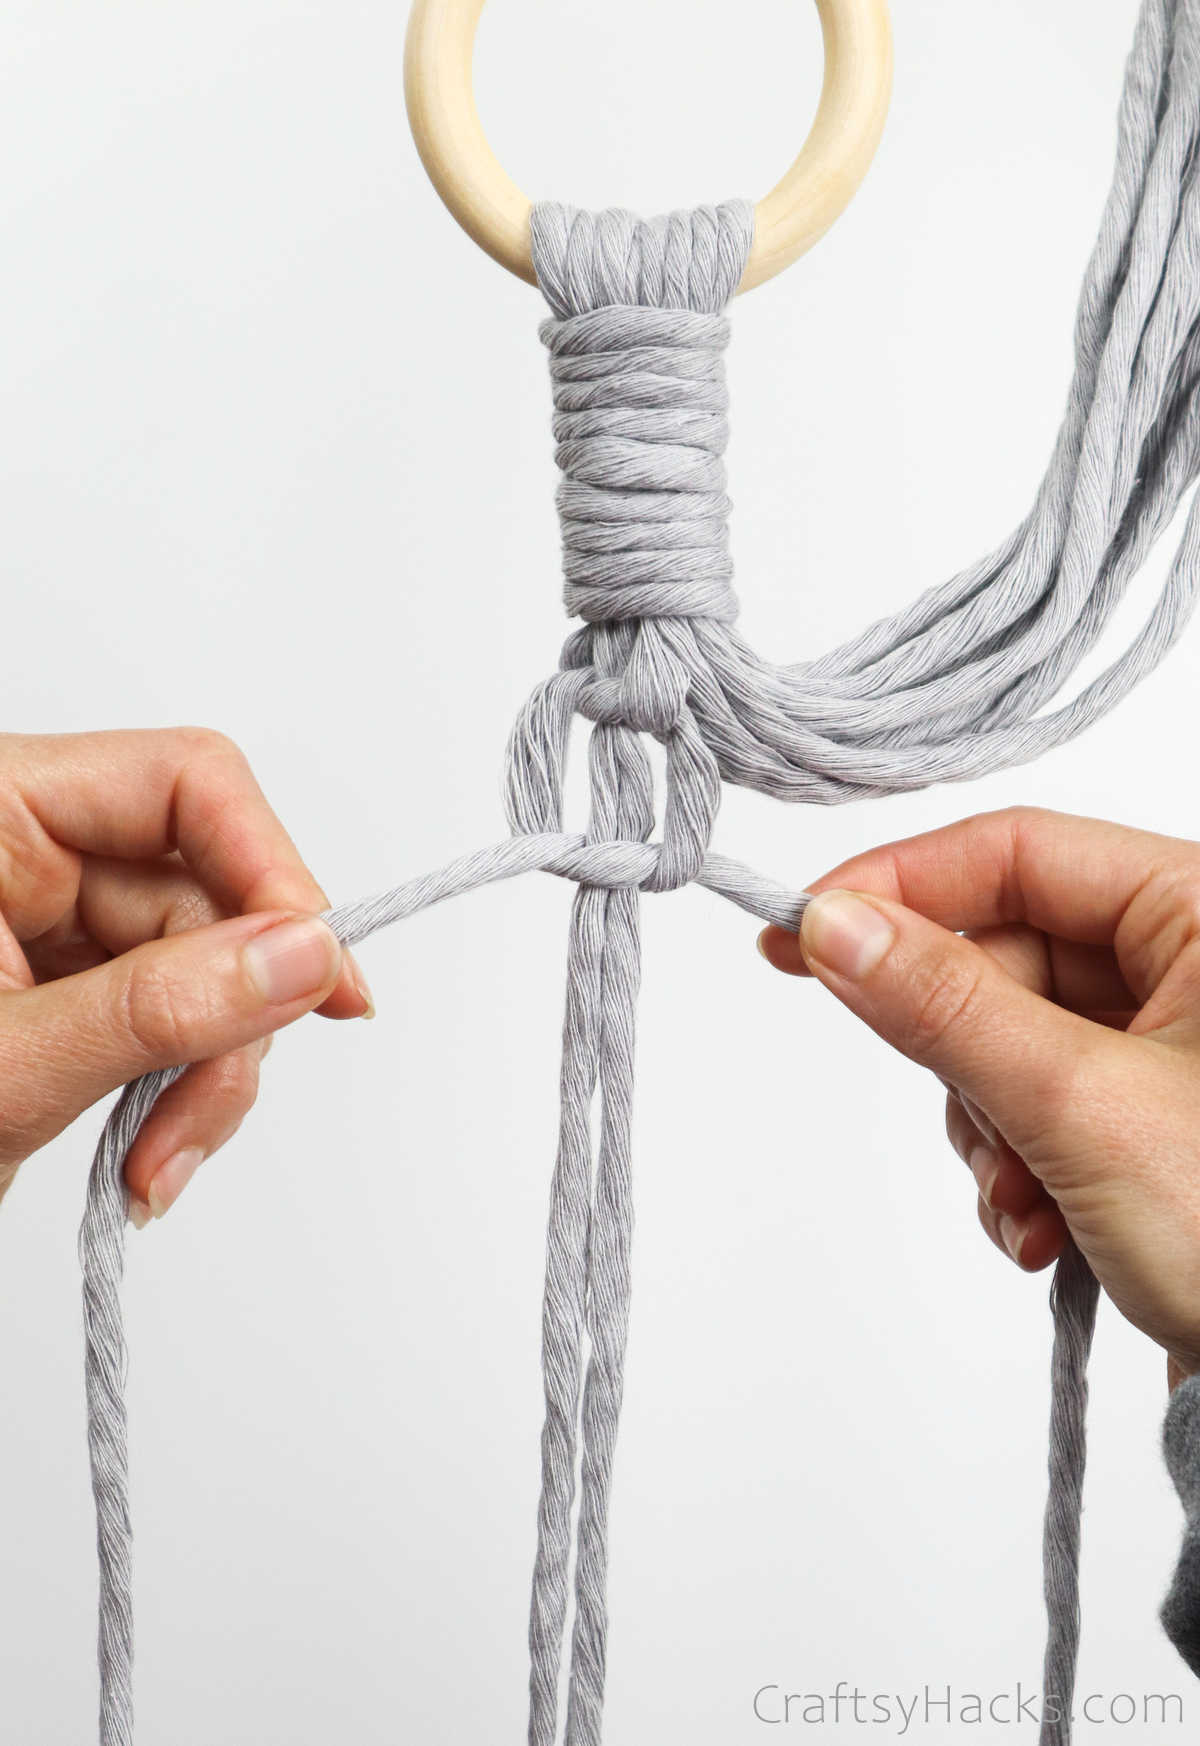
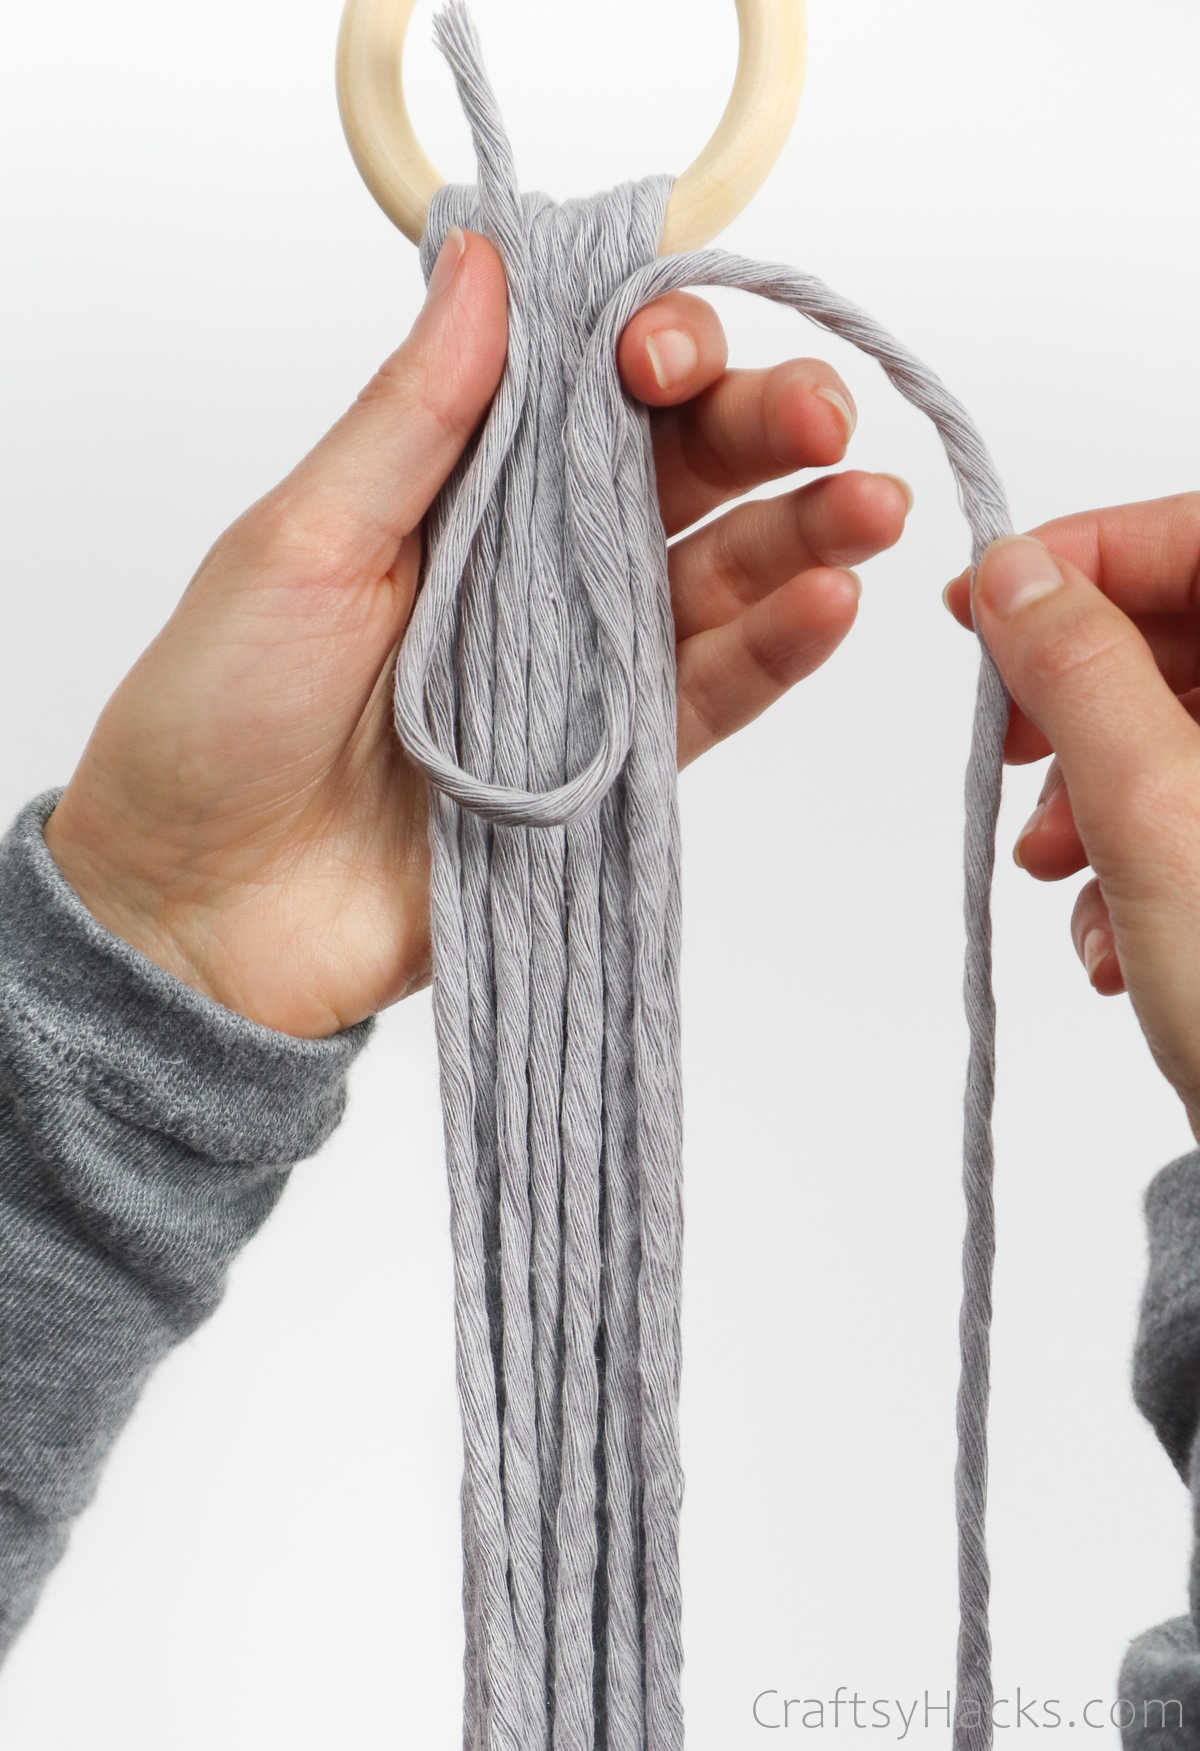
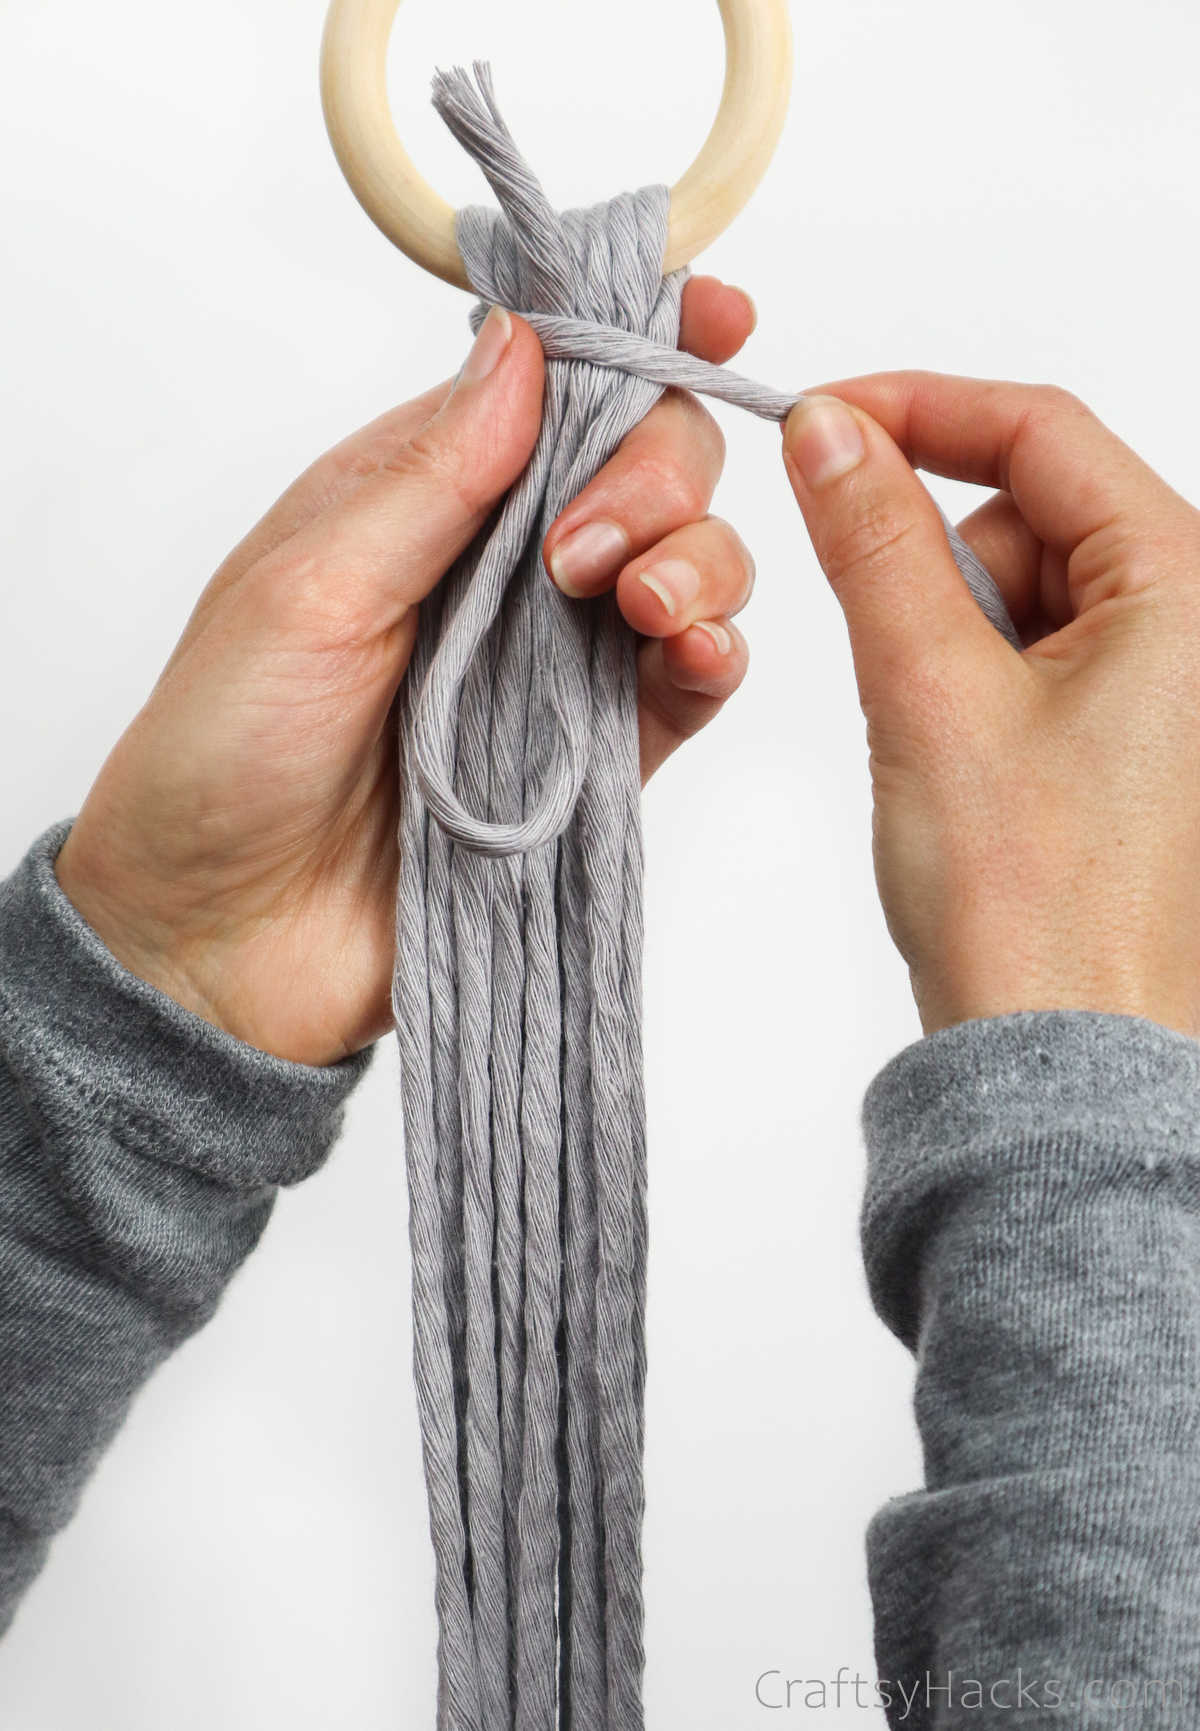
Step 4
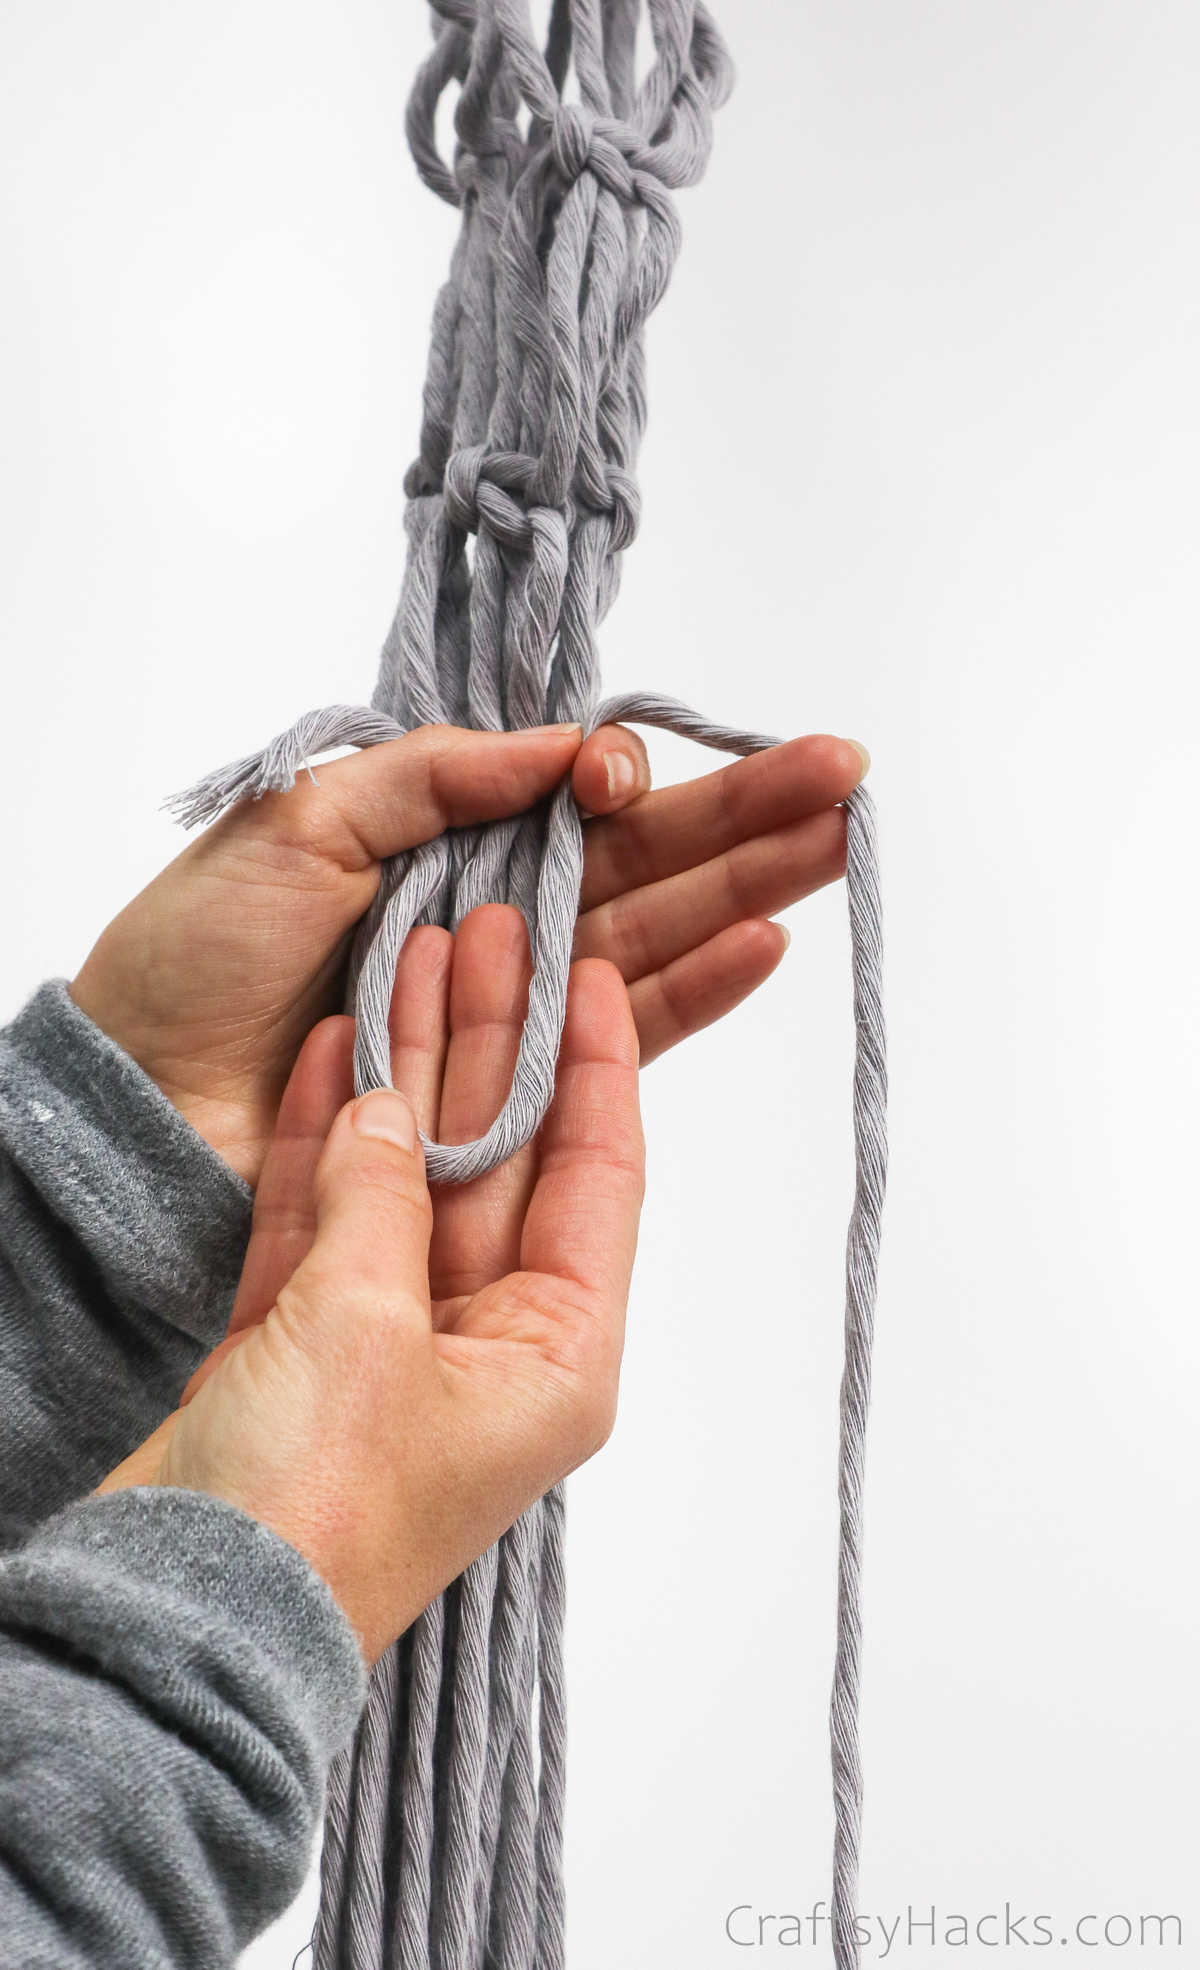
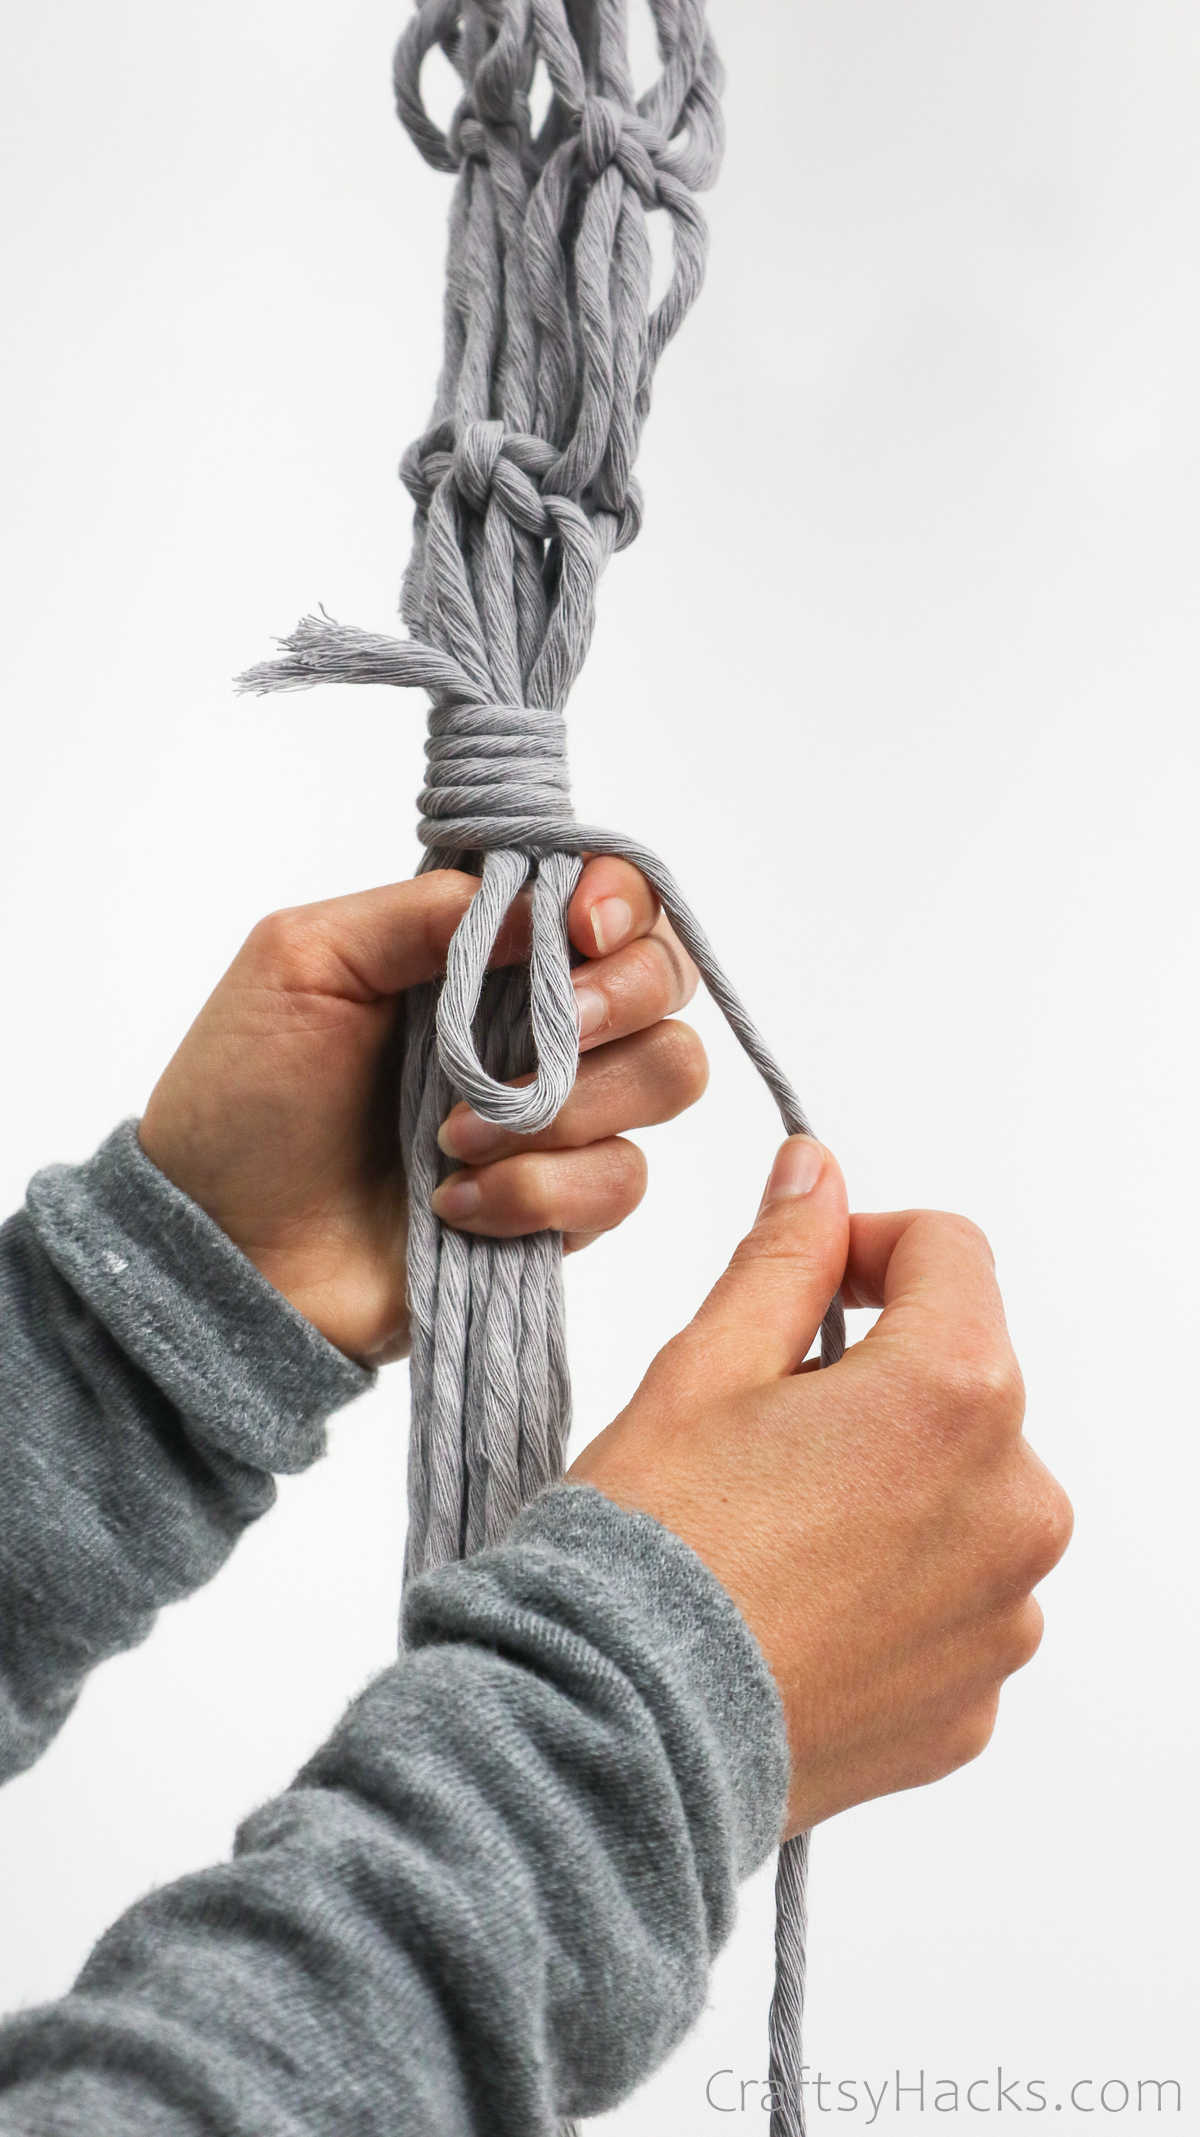
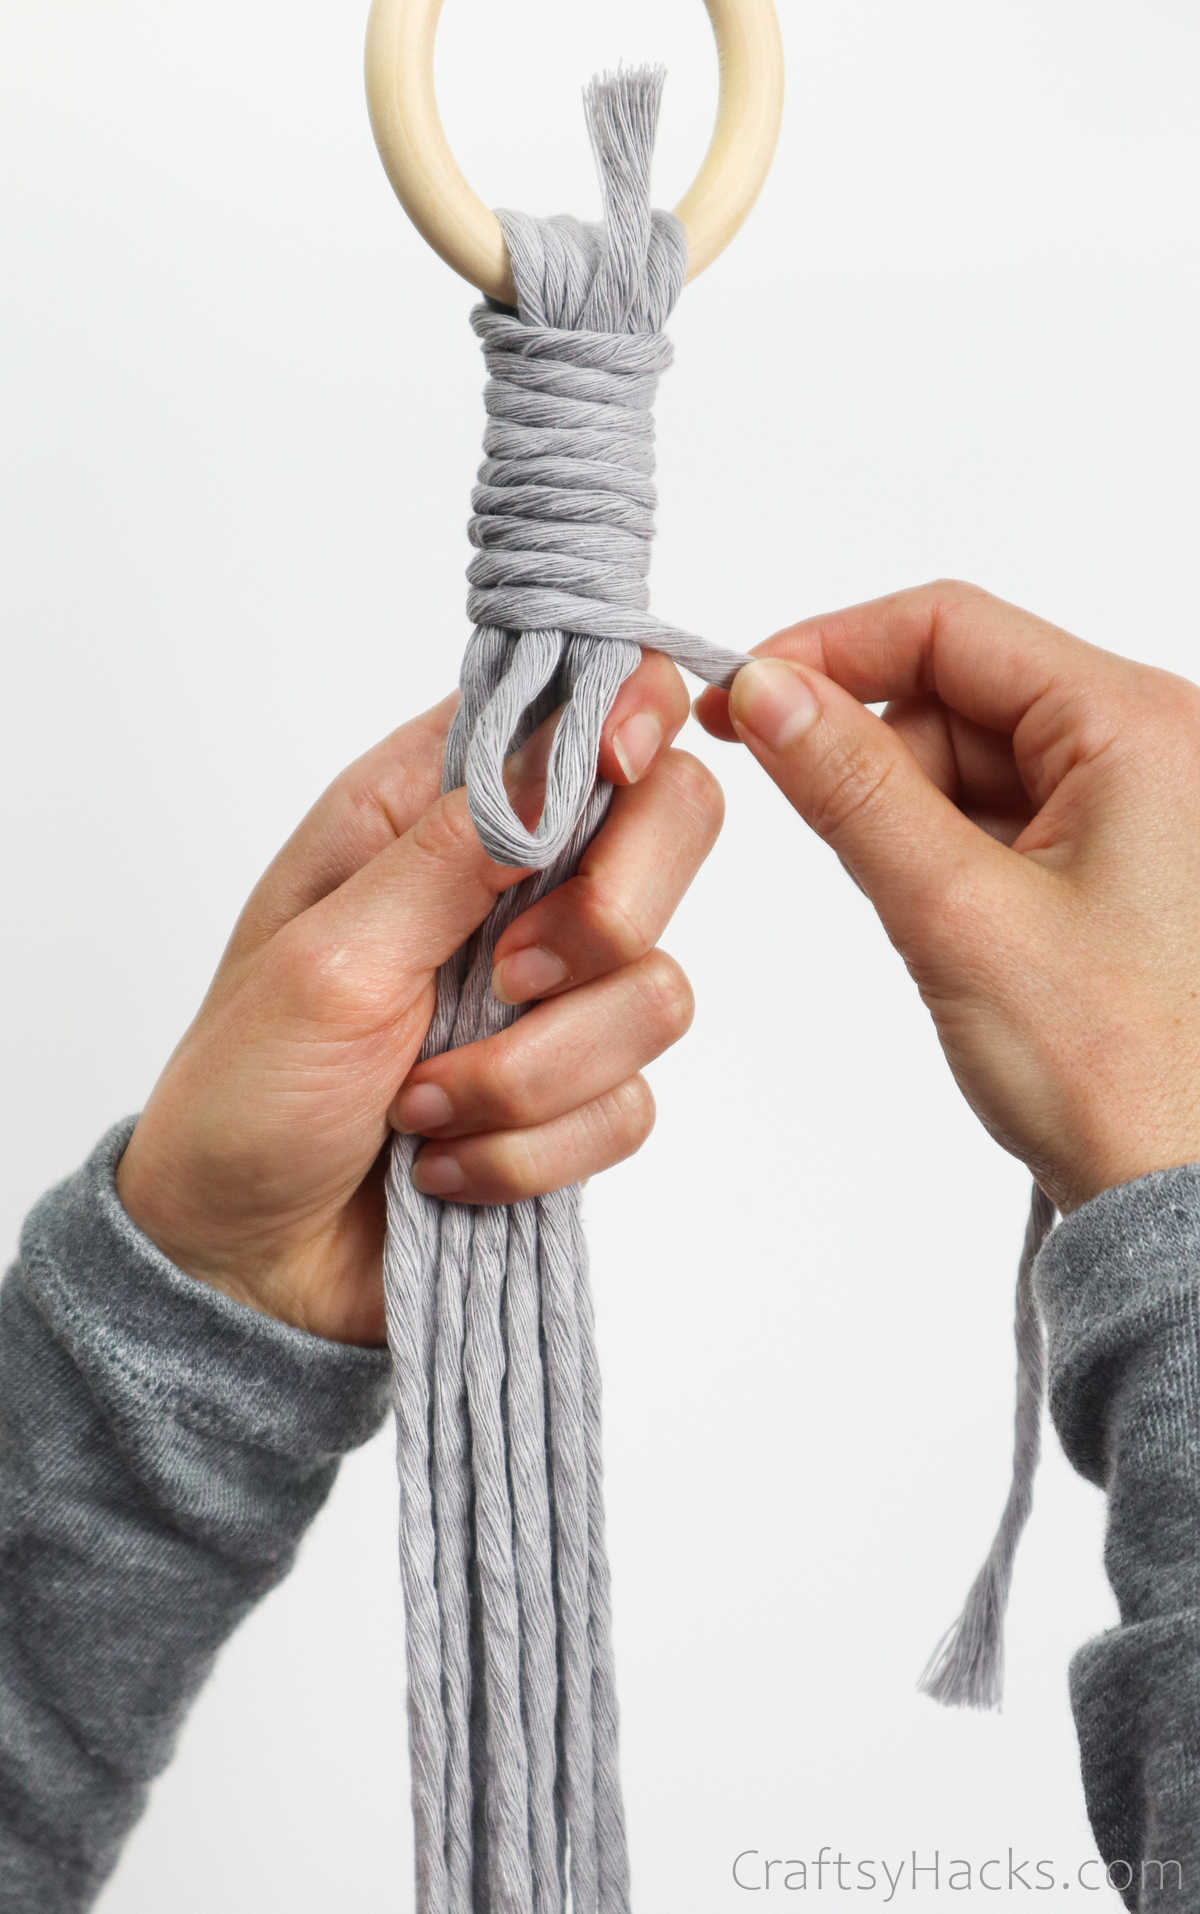
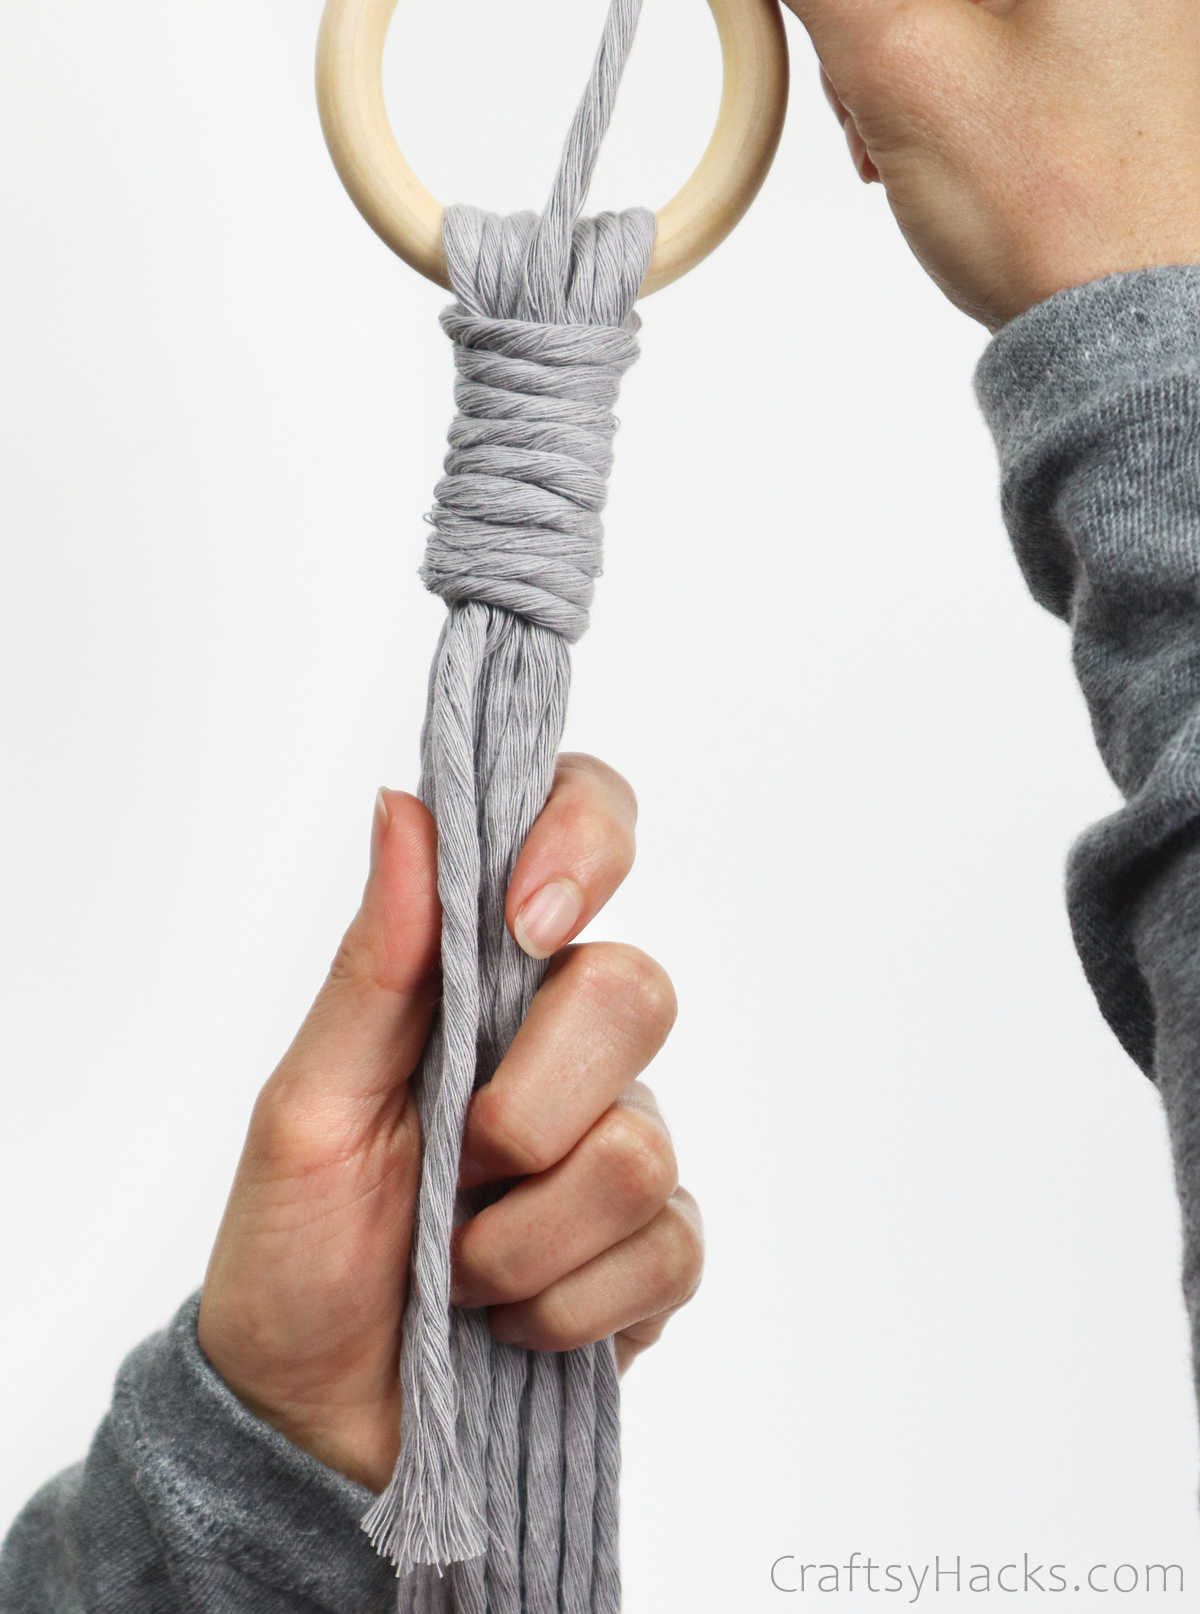
To make a gathering knot, gather all the strands together just below the ring.
Then, pull the longer end of the cord around all the strands and the U-shaped loop.
Just go ahead and continue to wrap the cord several times over the strands and the loop.
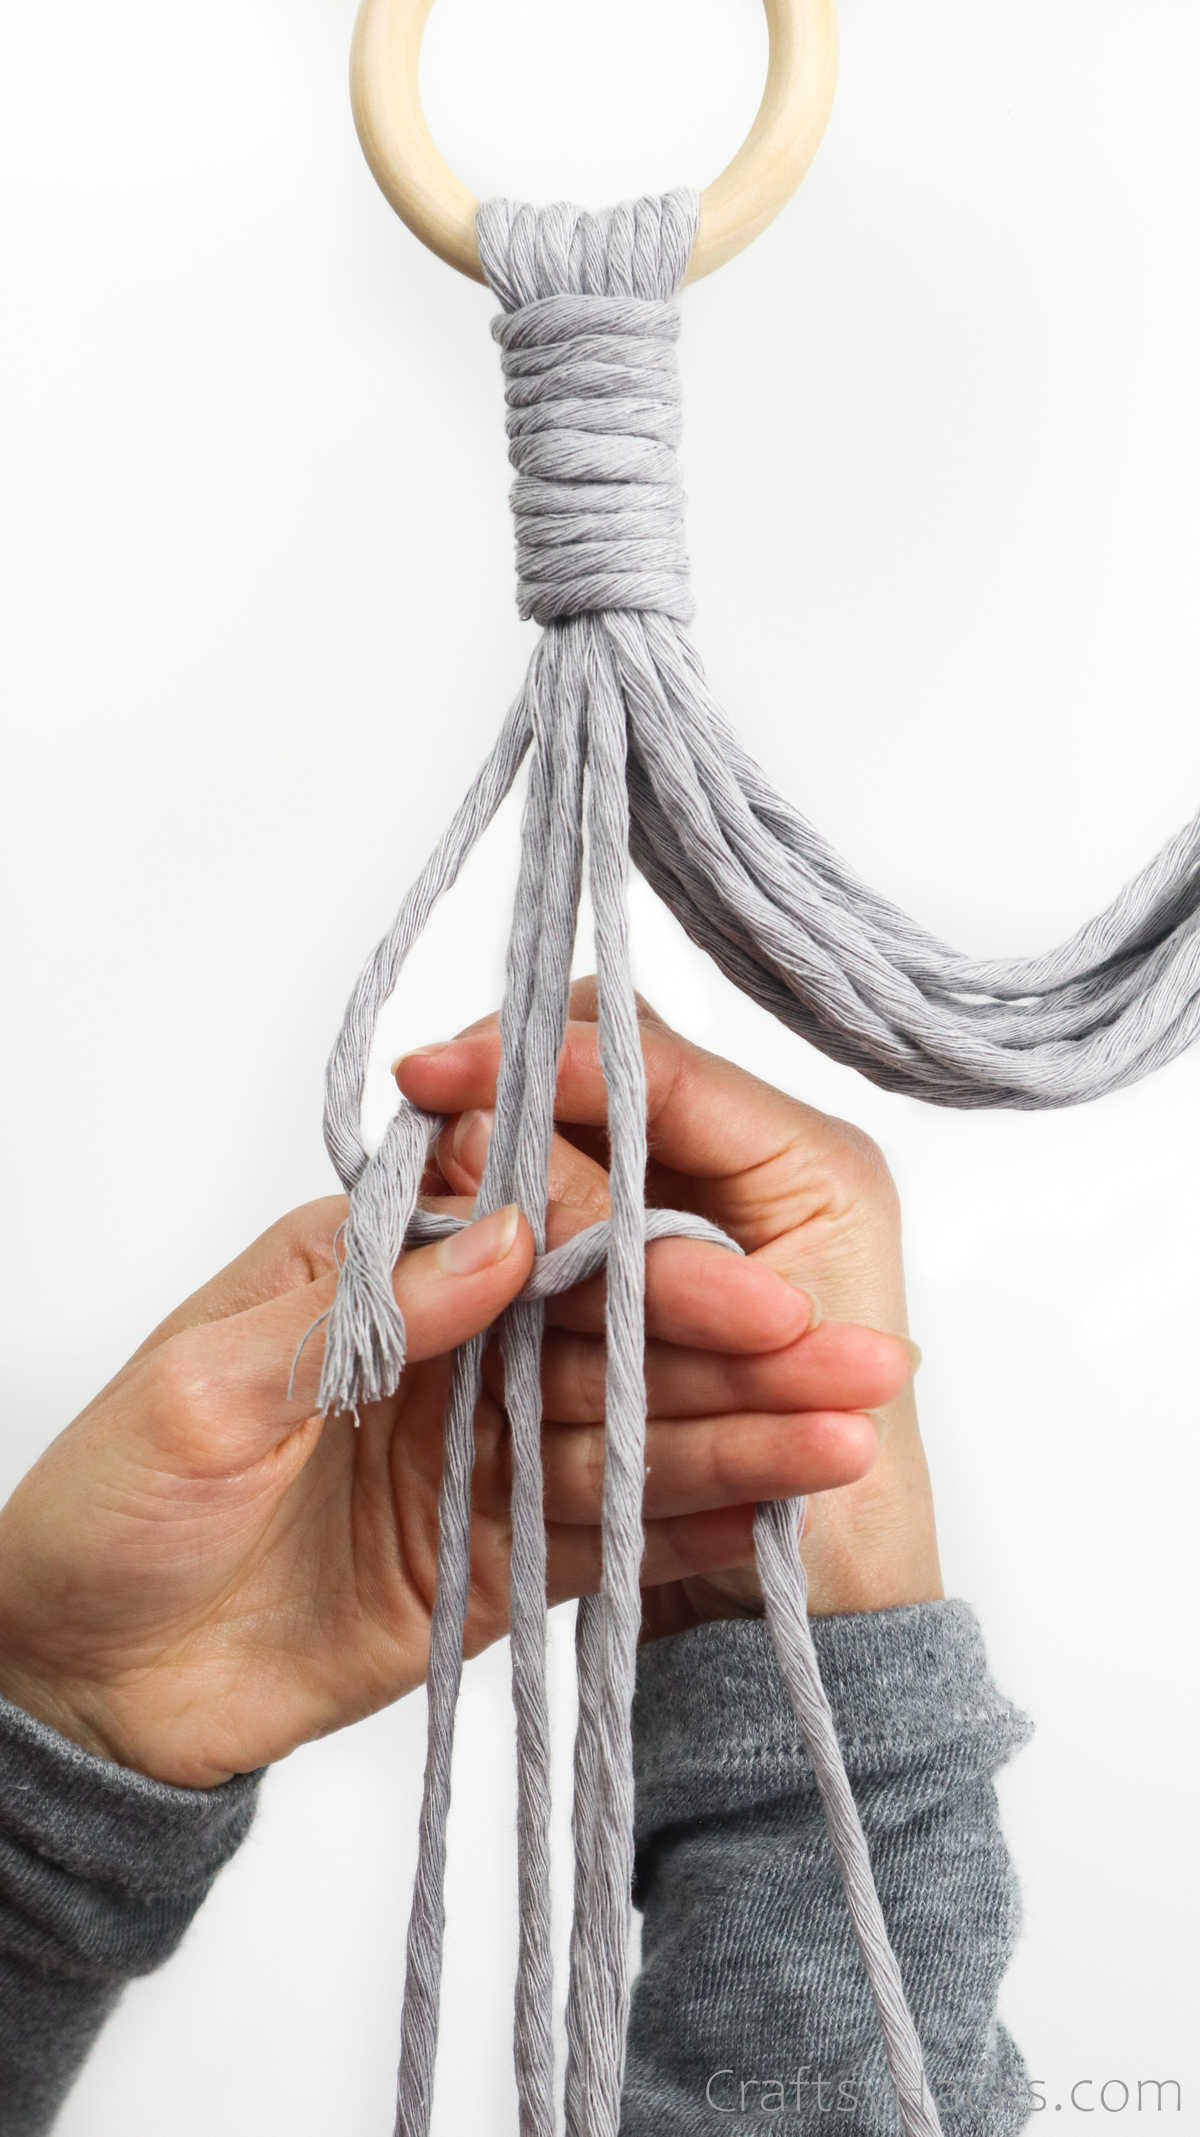
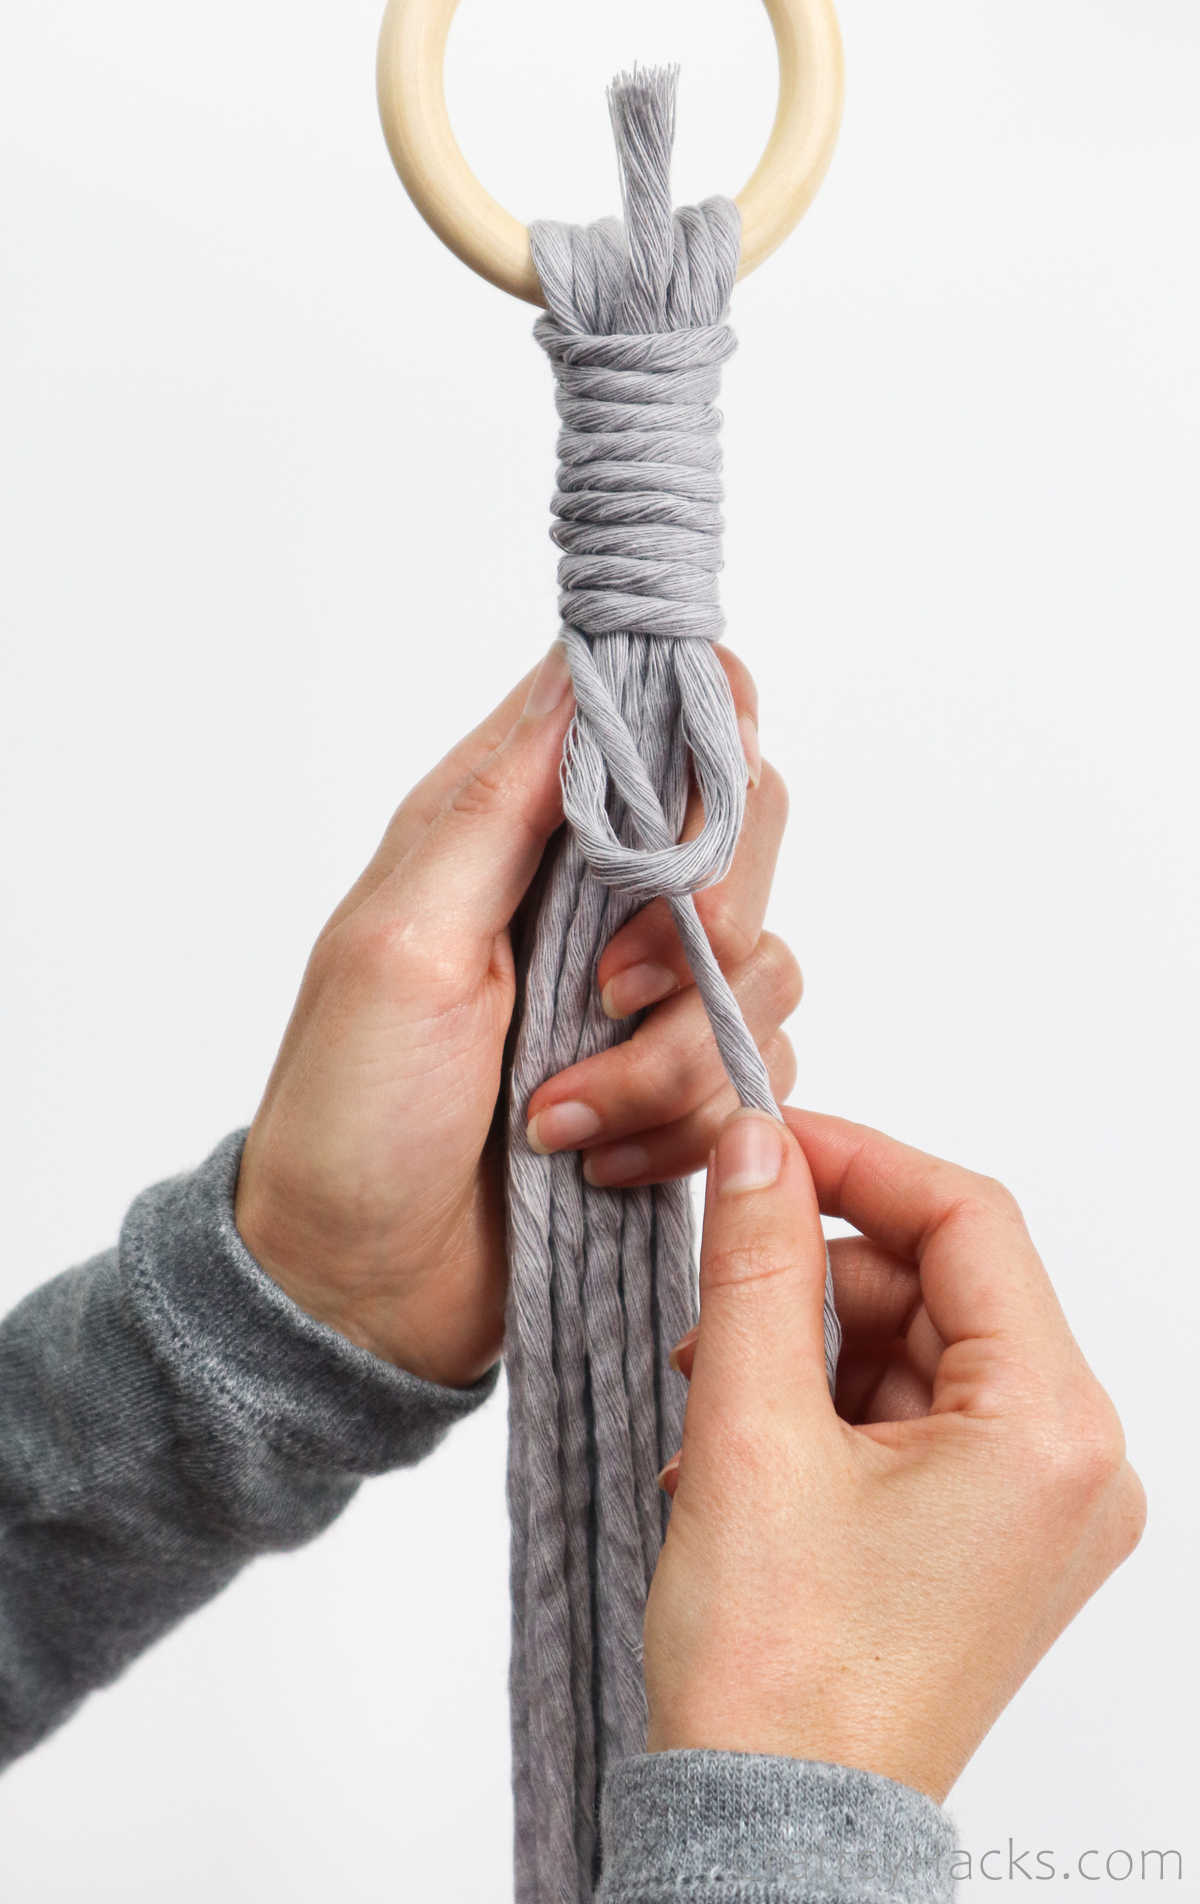
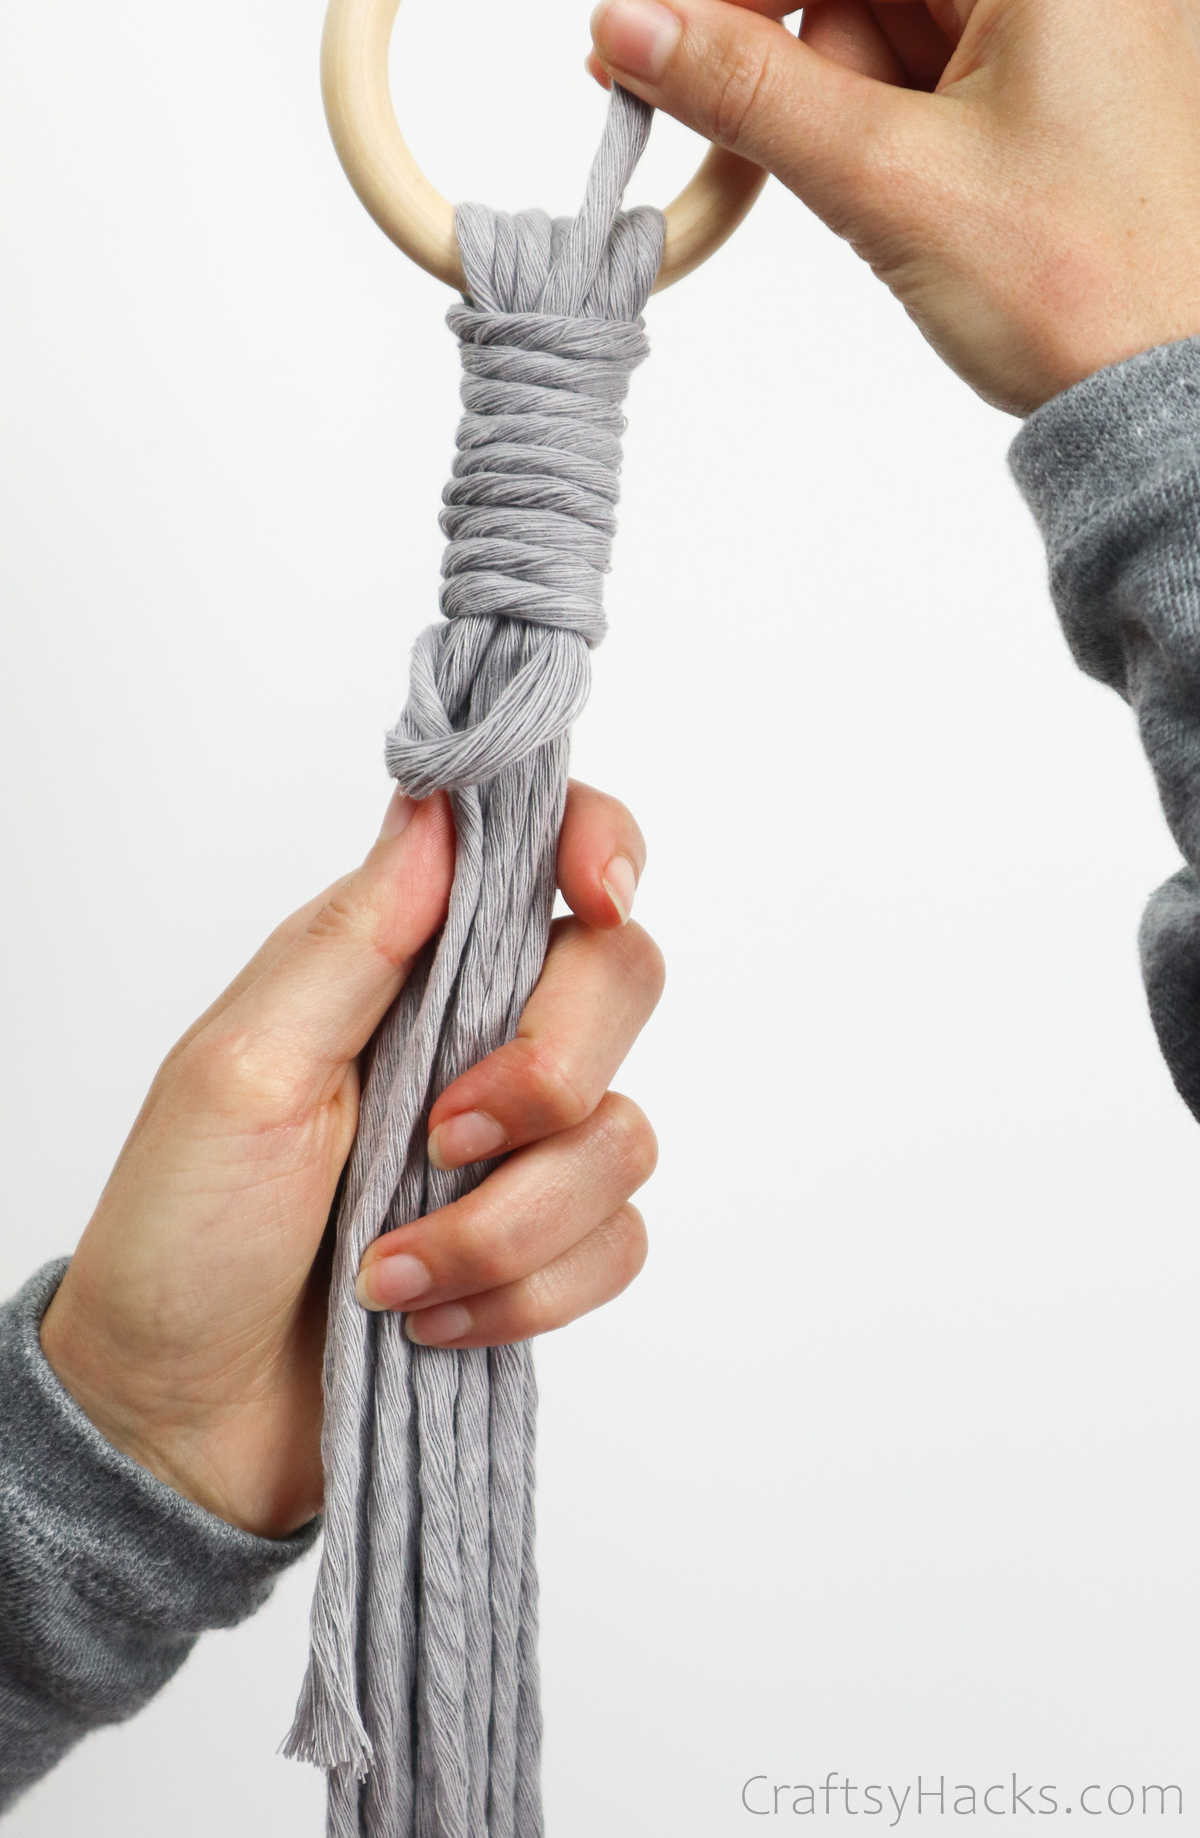
Pull the end on top firmly to pull the U-loop inside the knot to secure it.
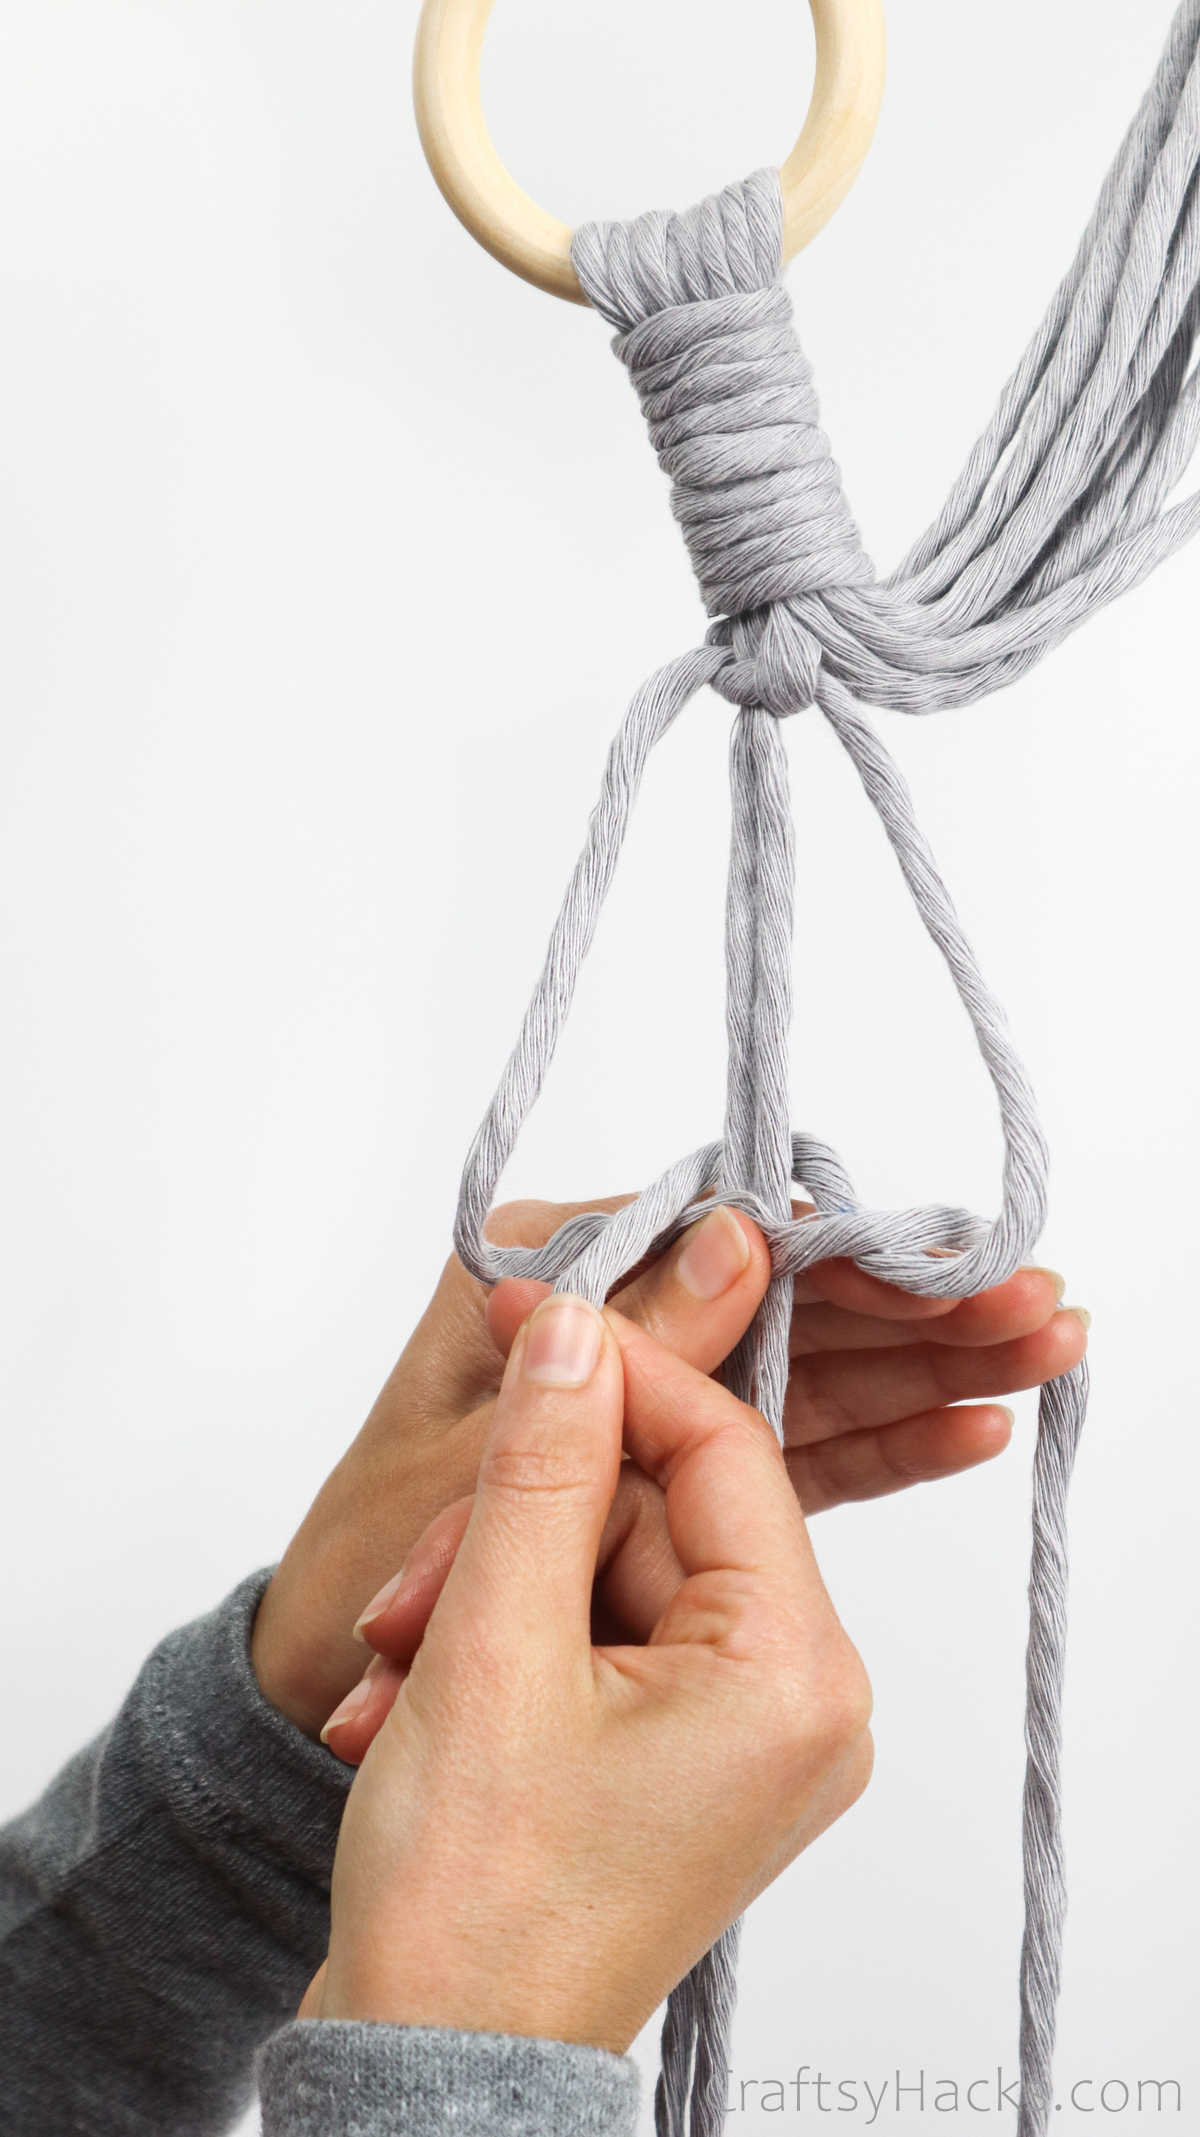
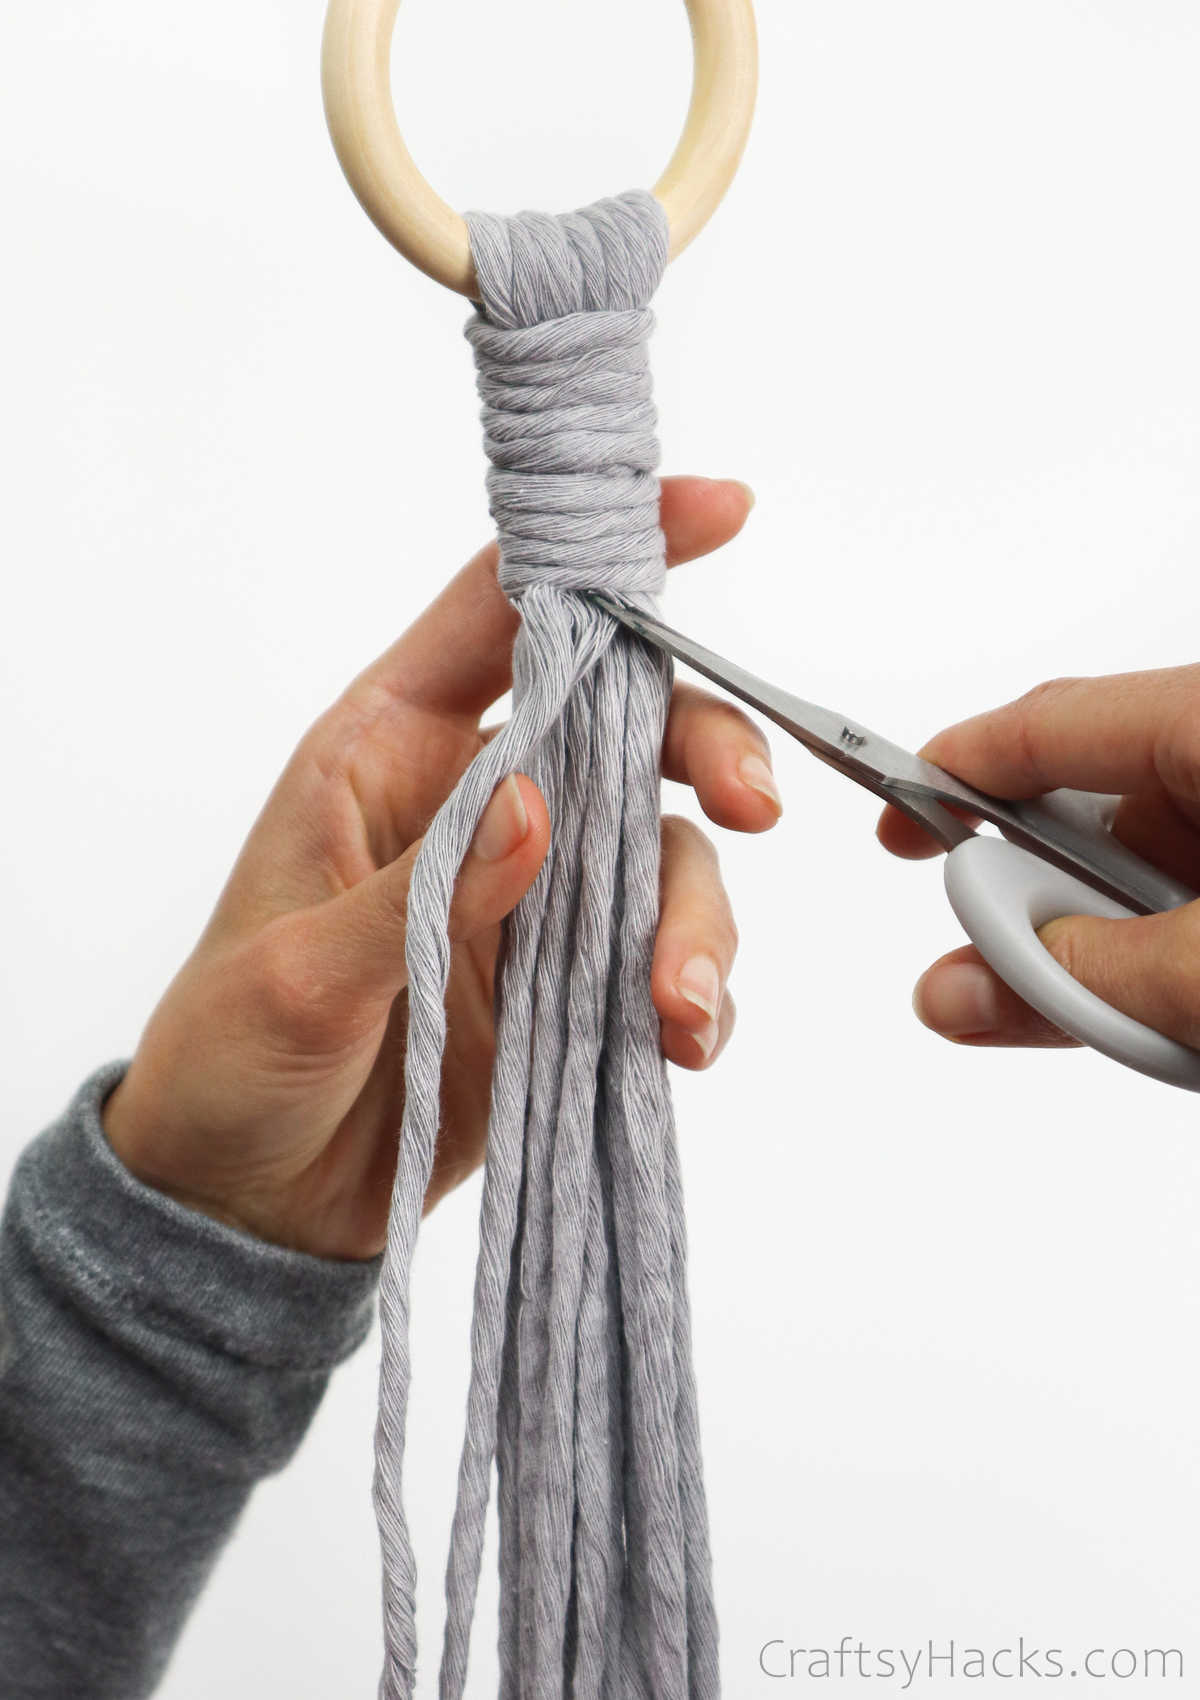
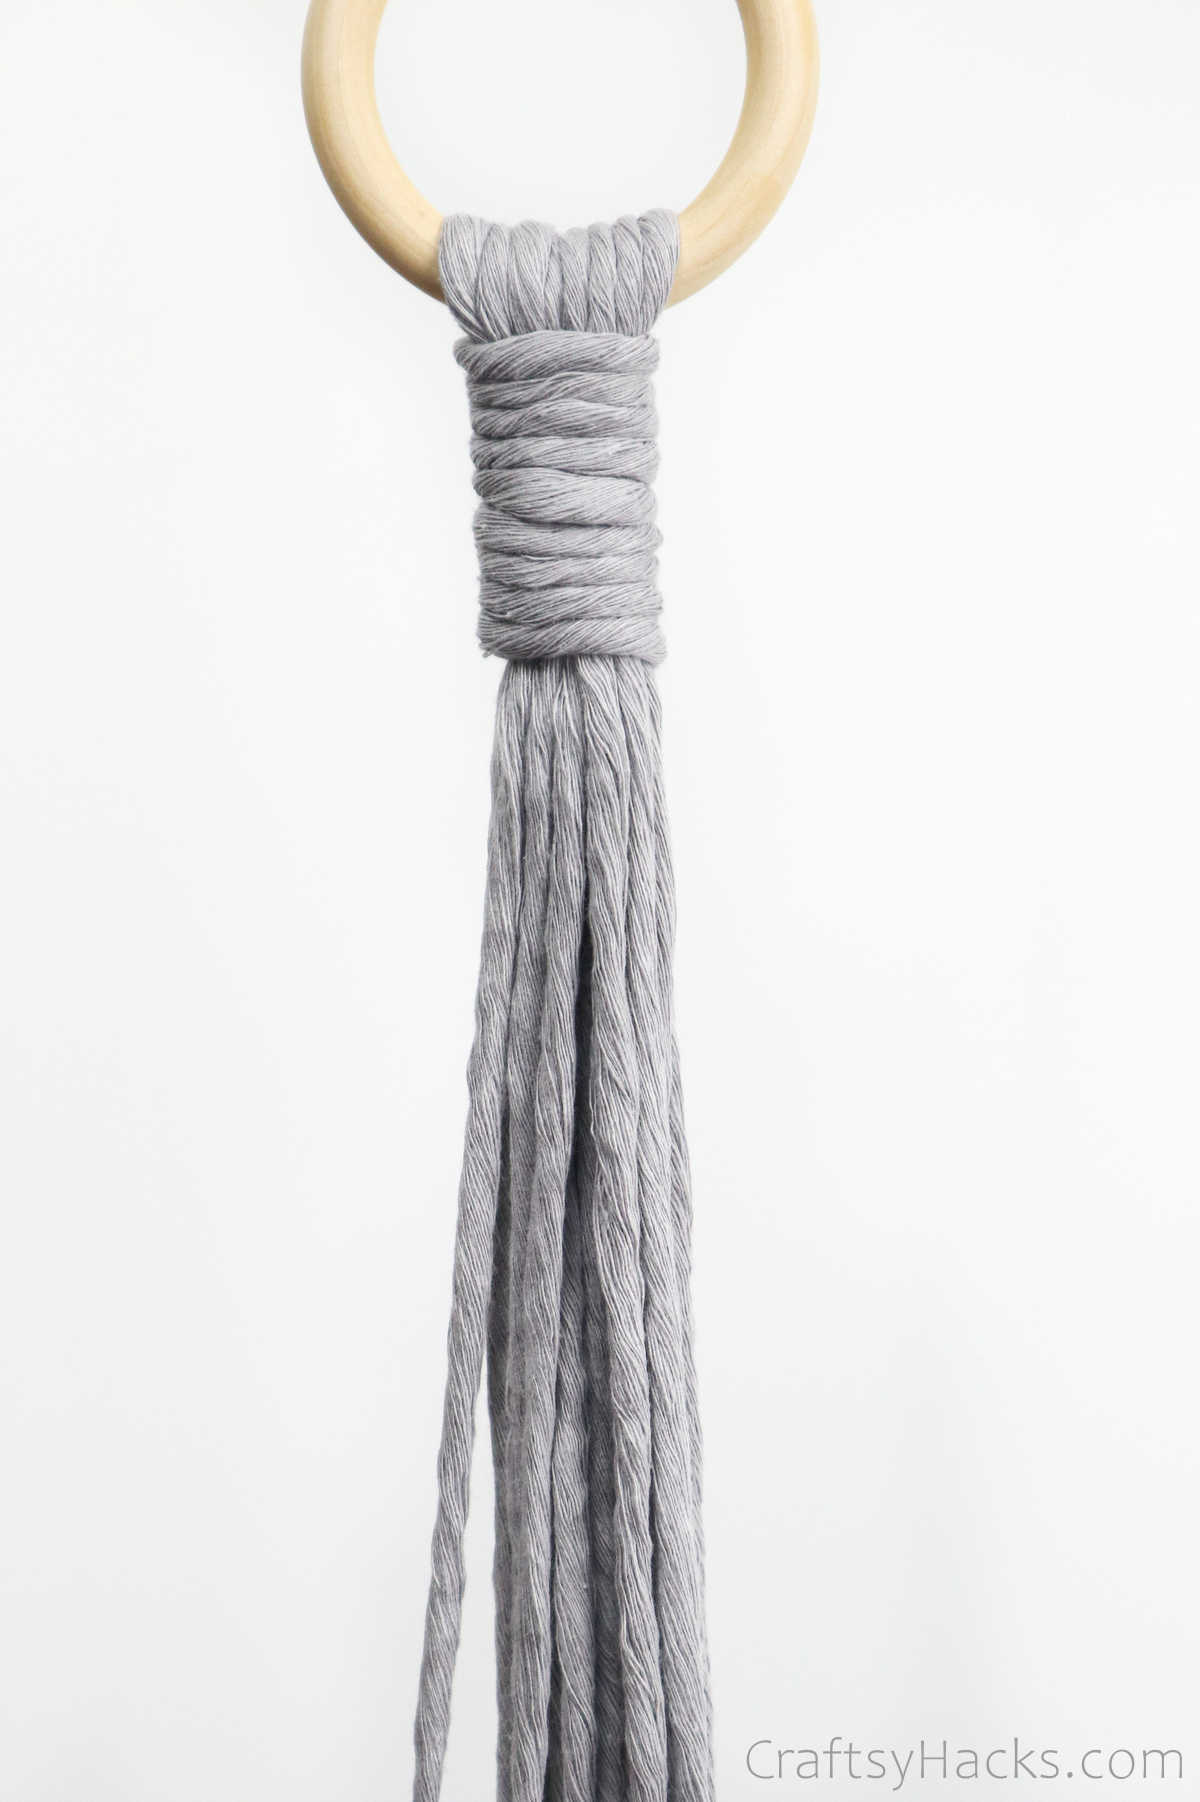
Finally, just snip the ends off and your gathering knot is all done.
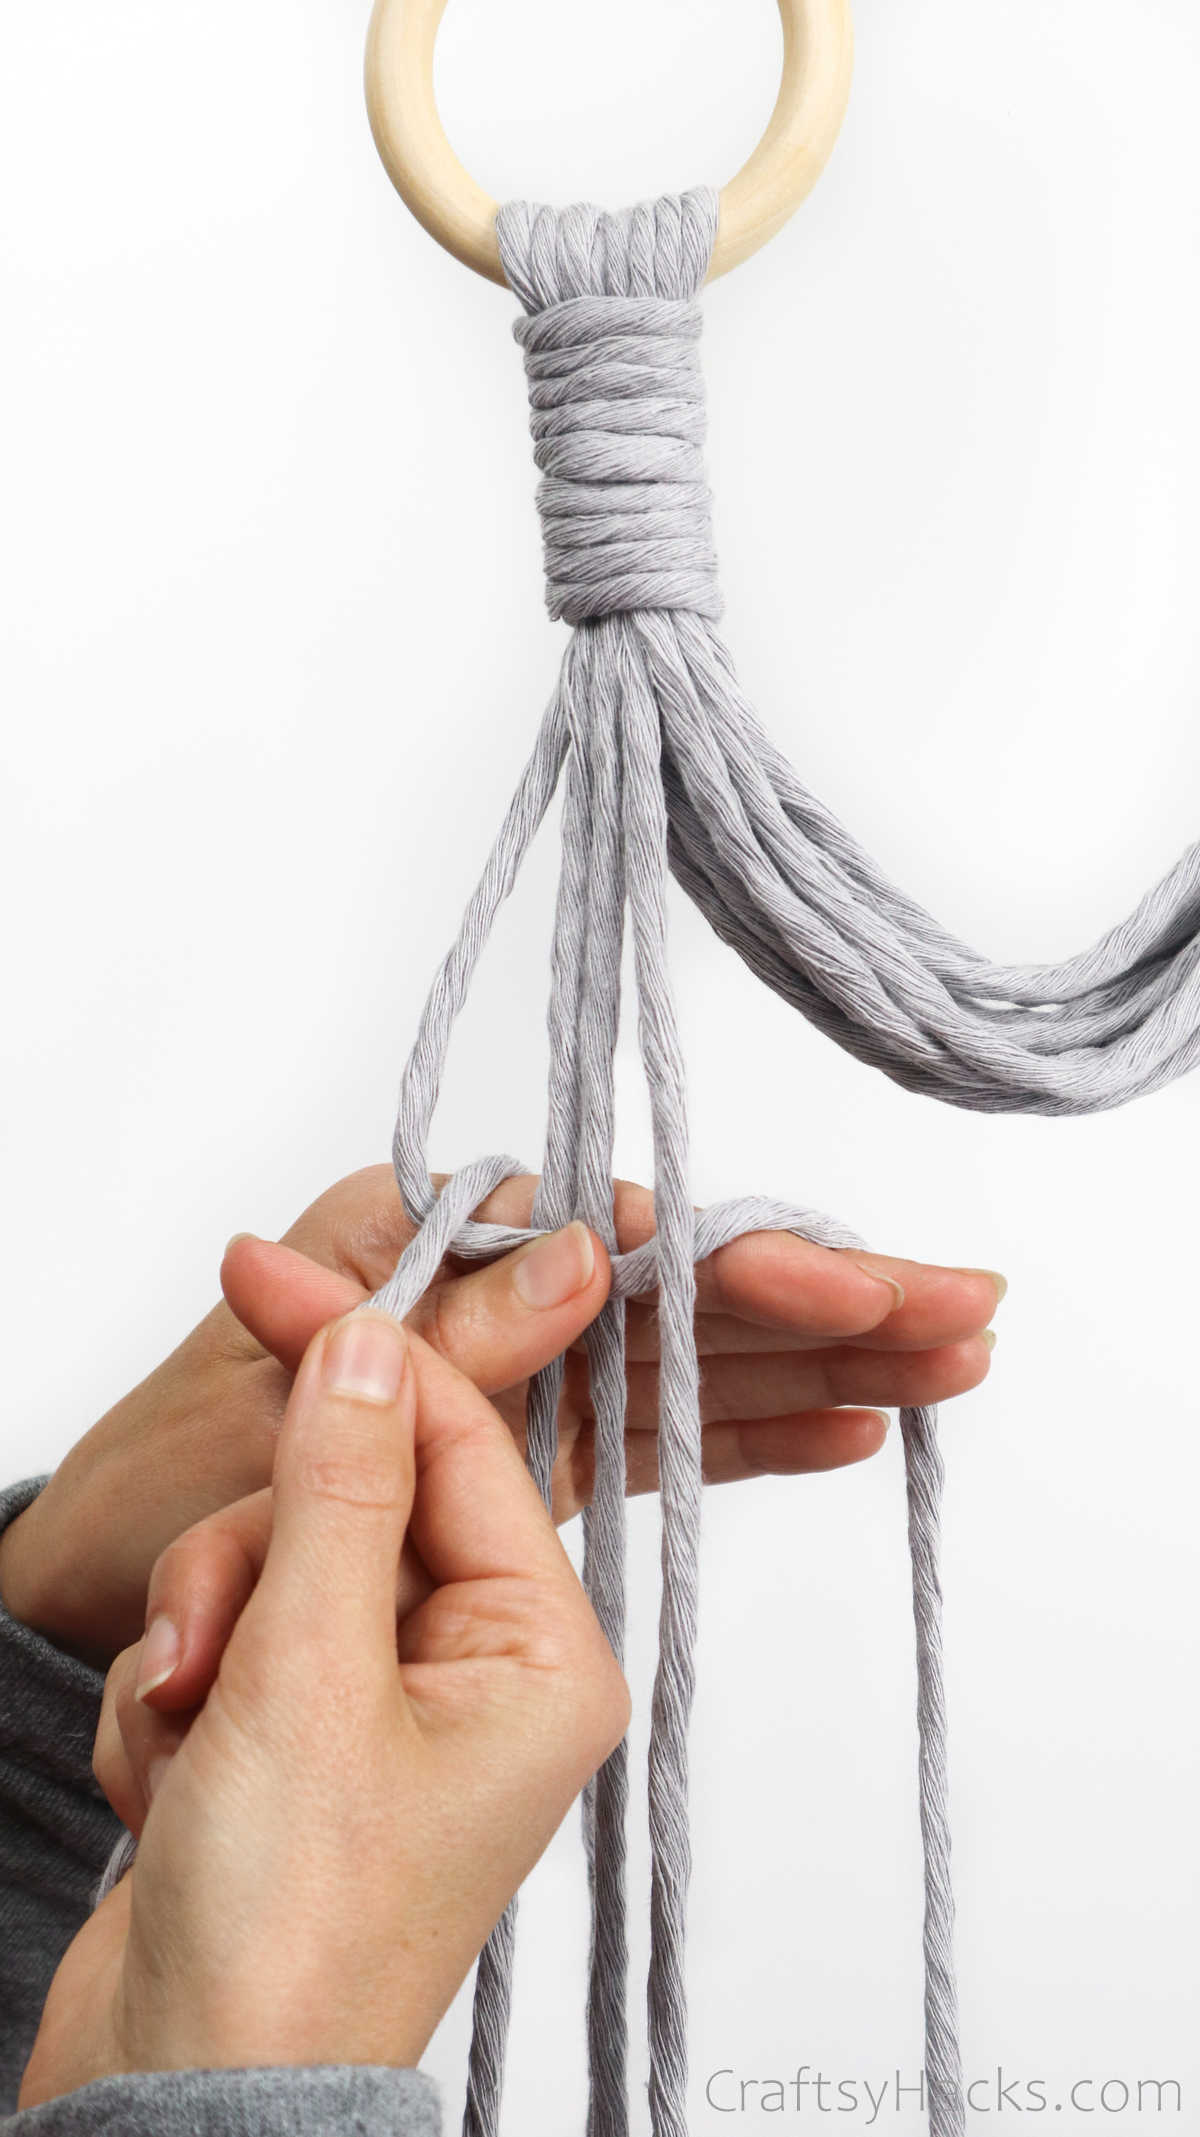
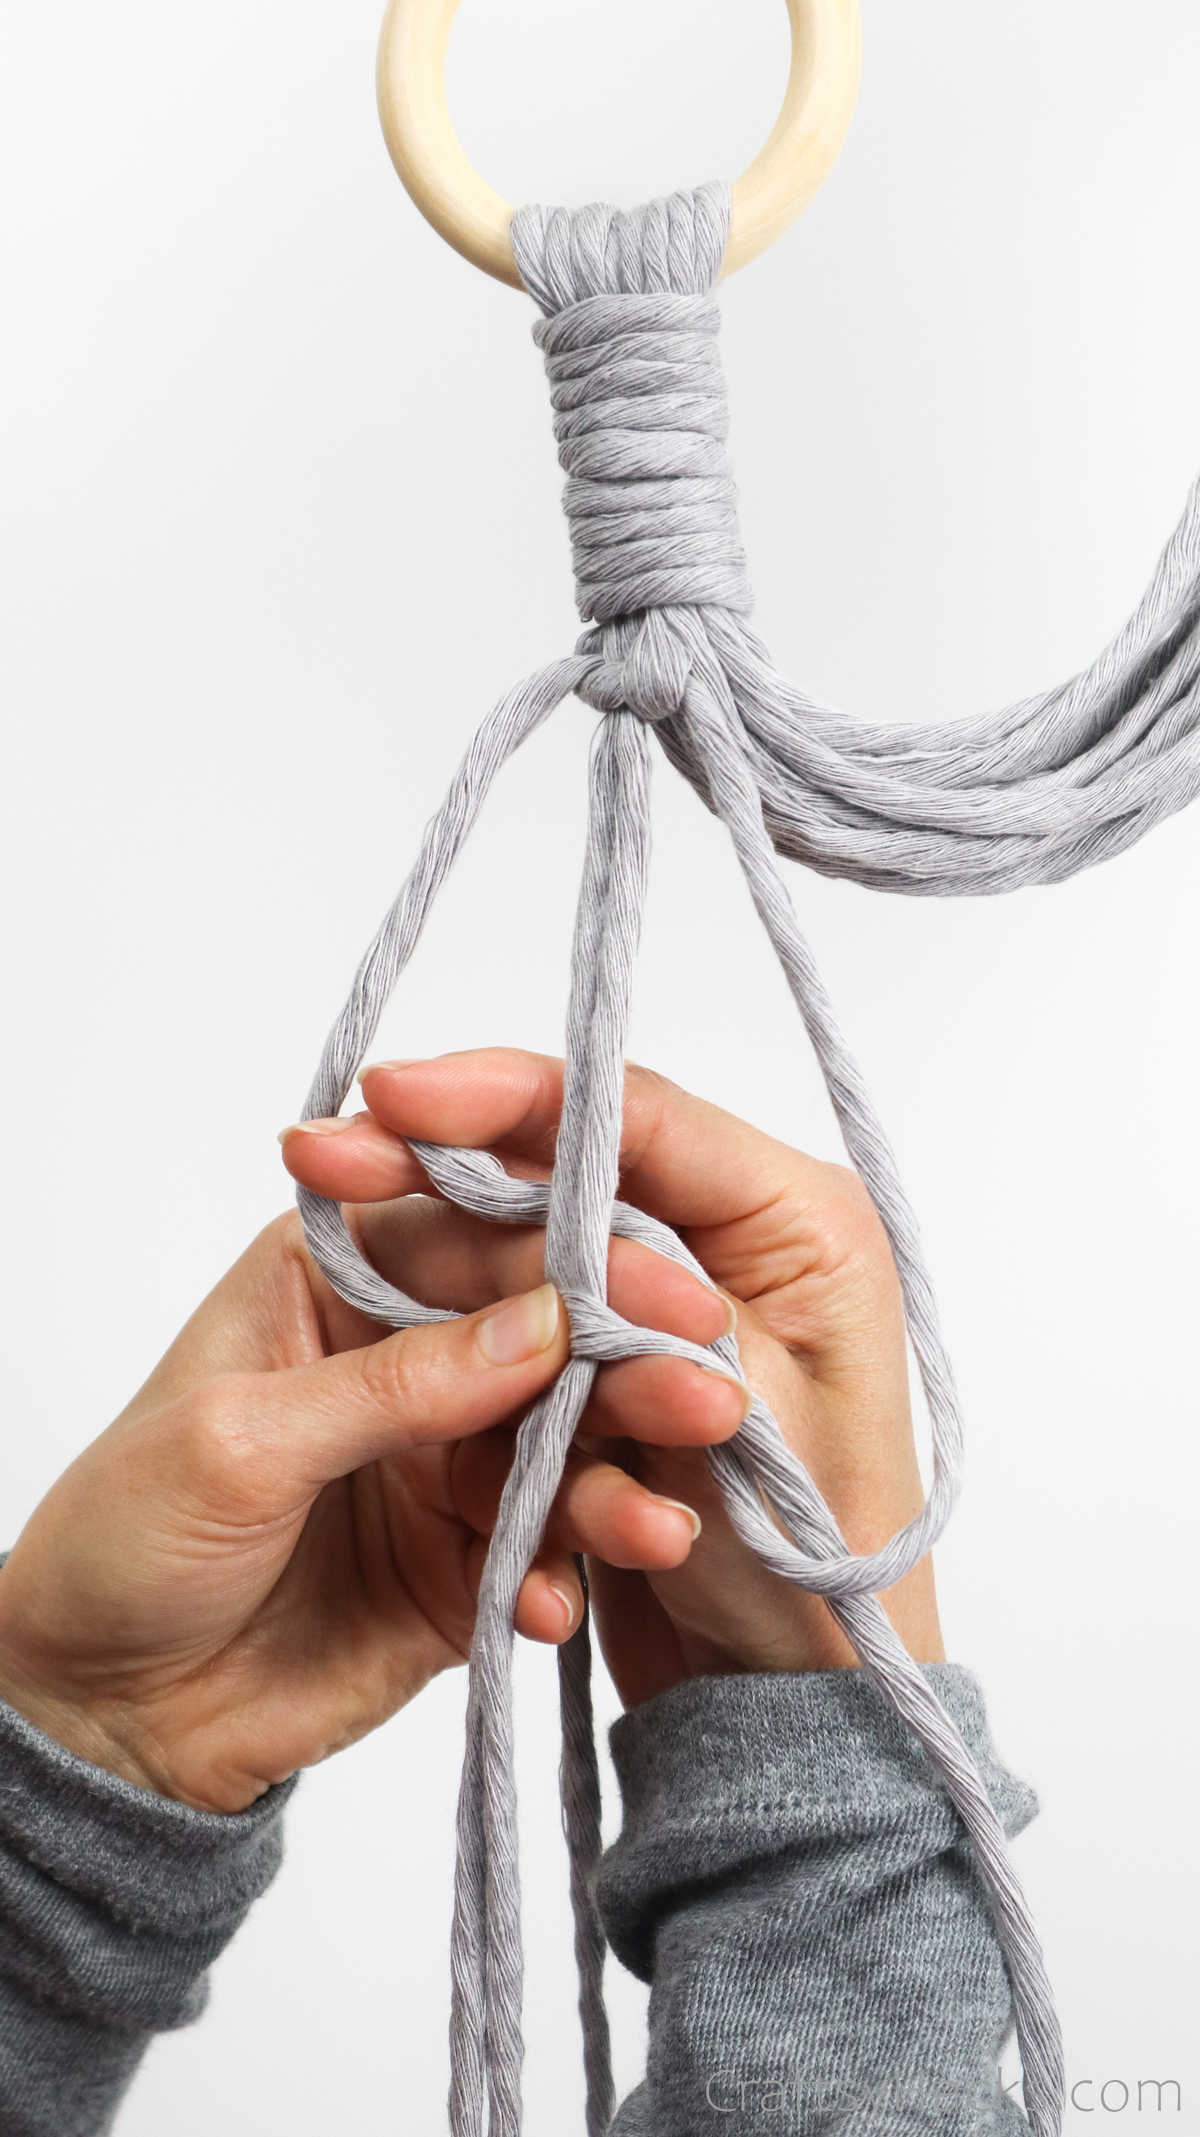
Step 5
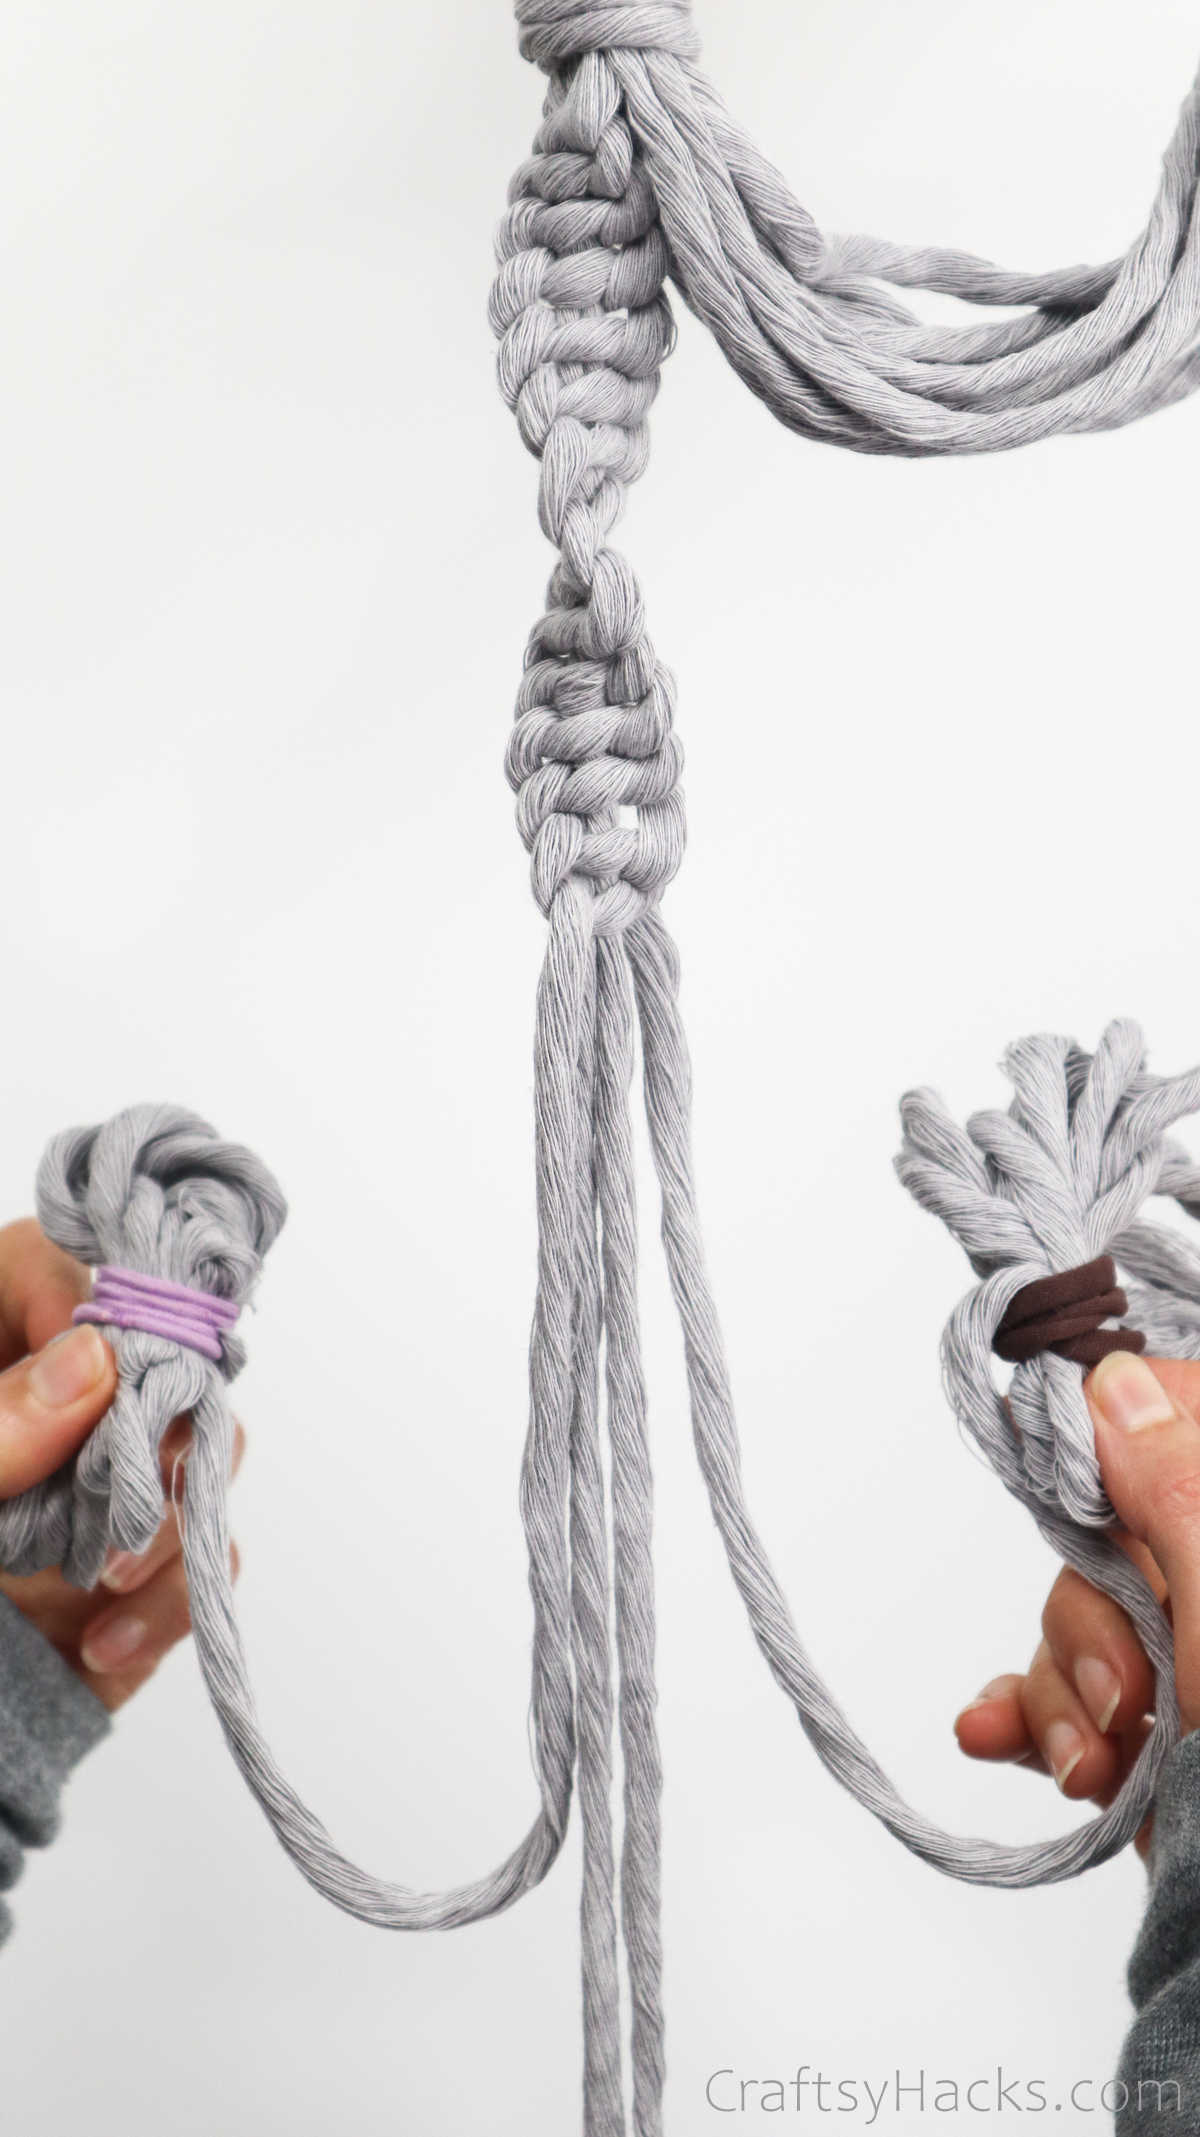
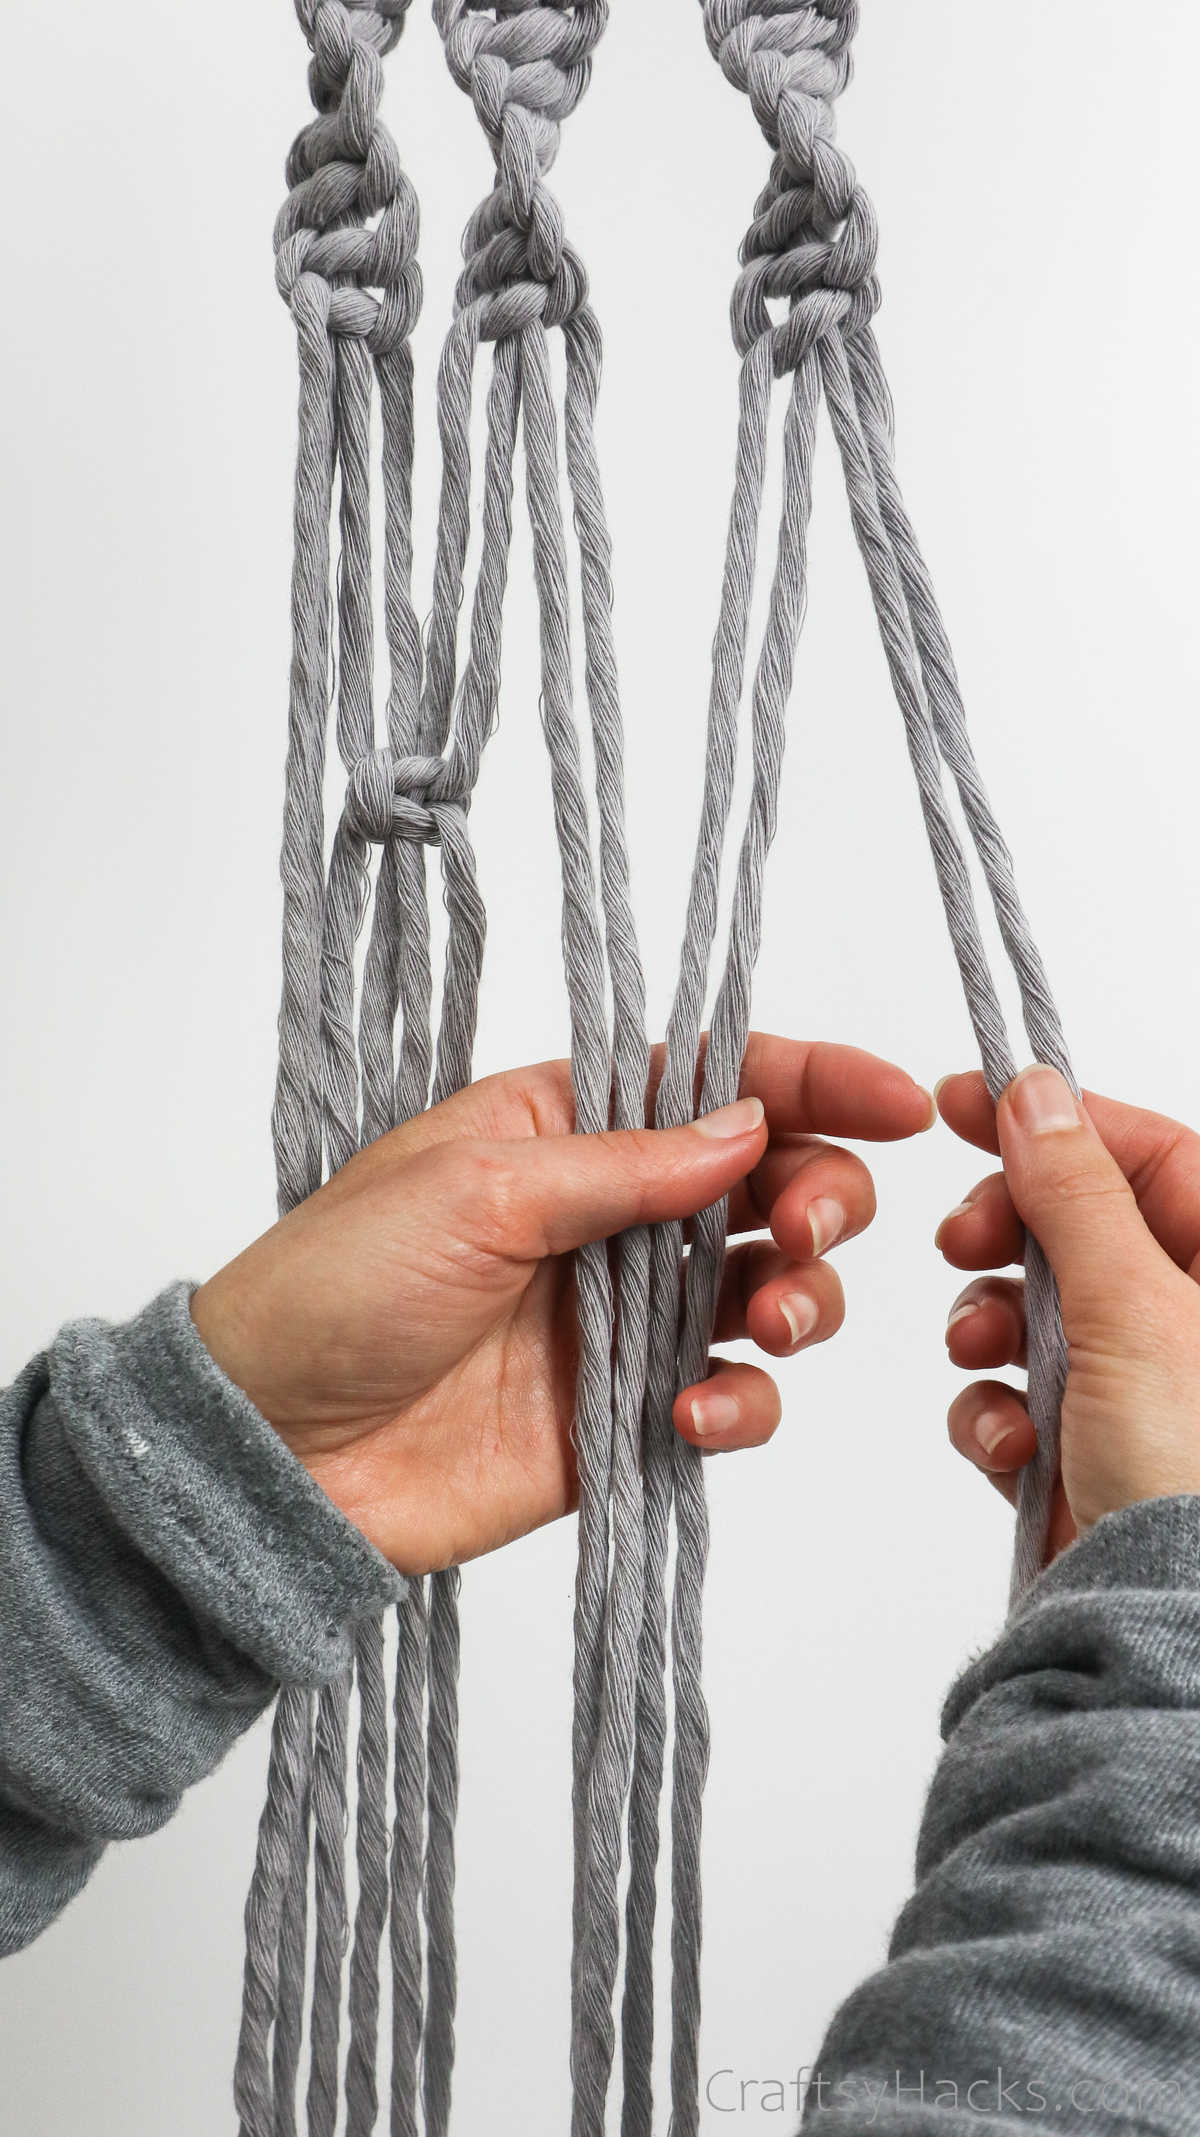
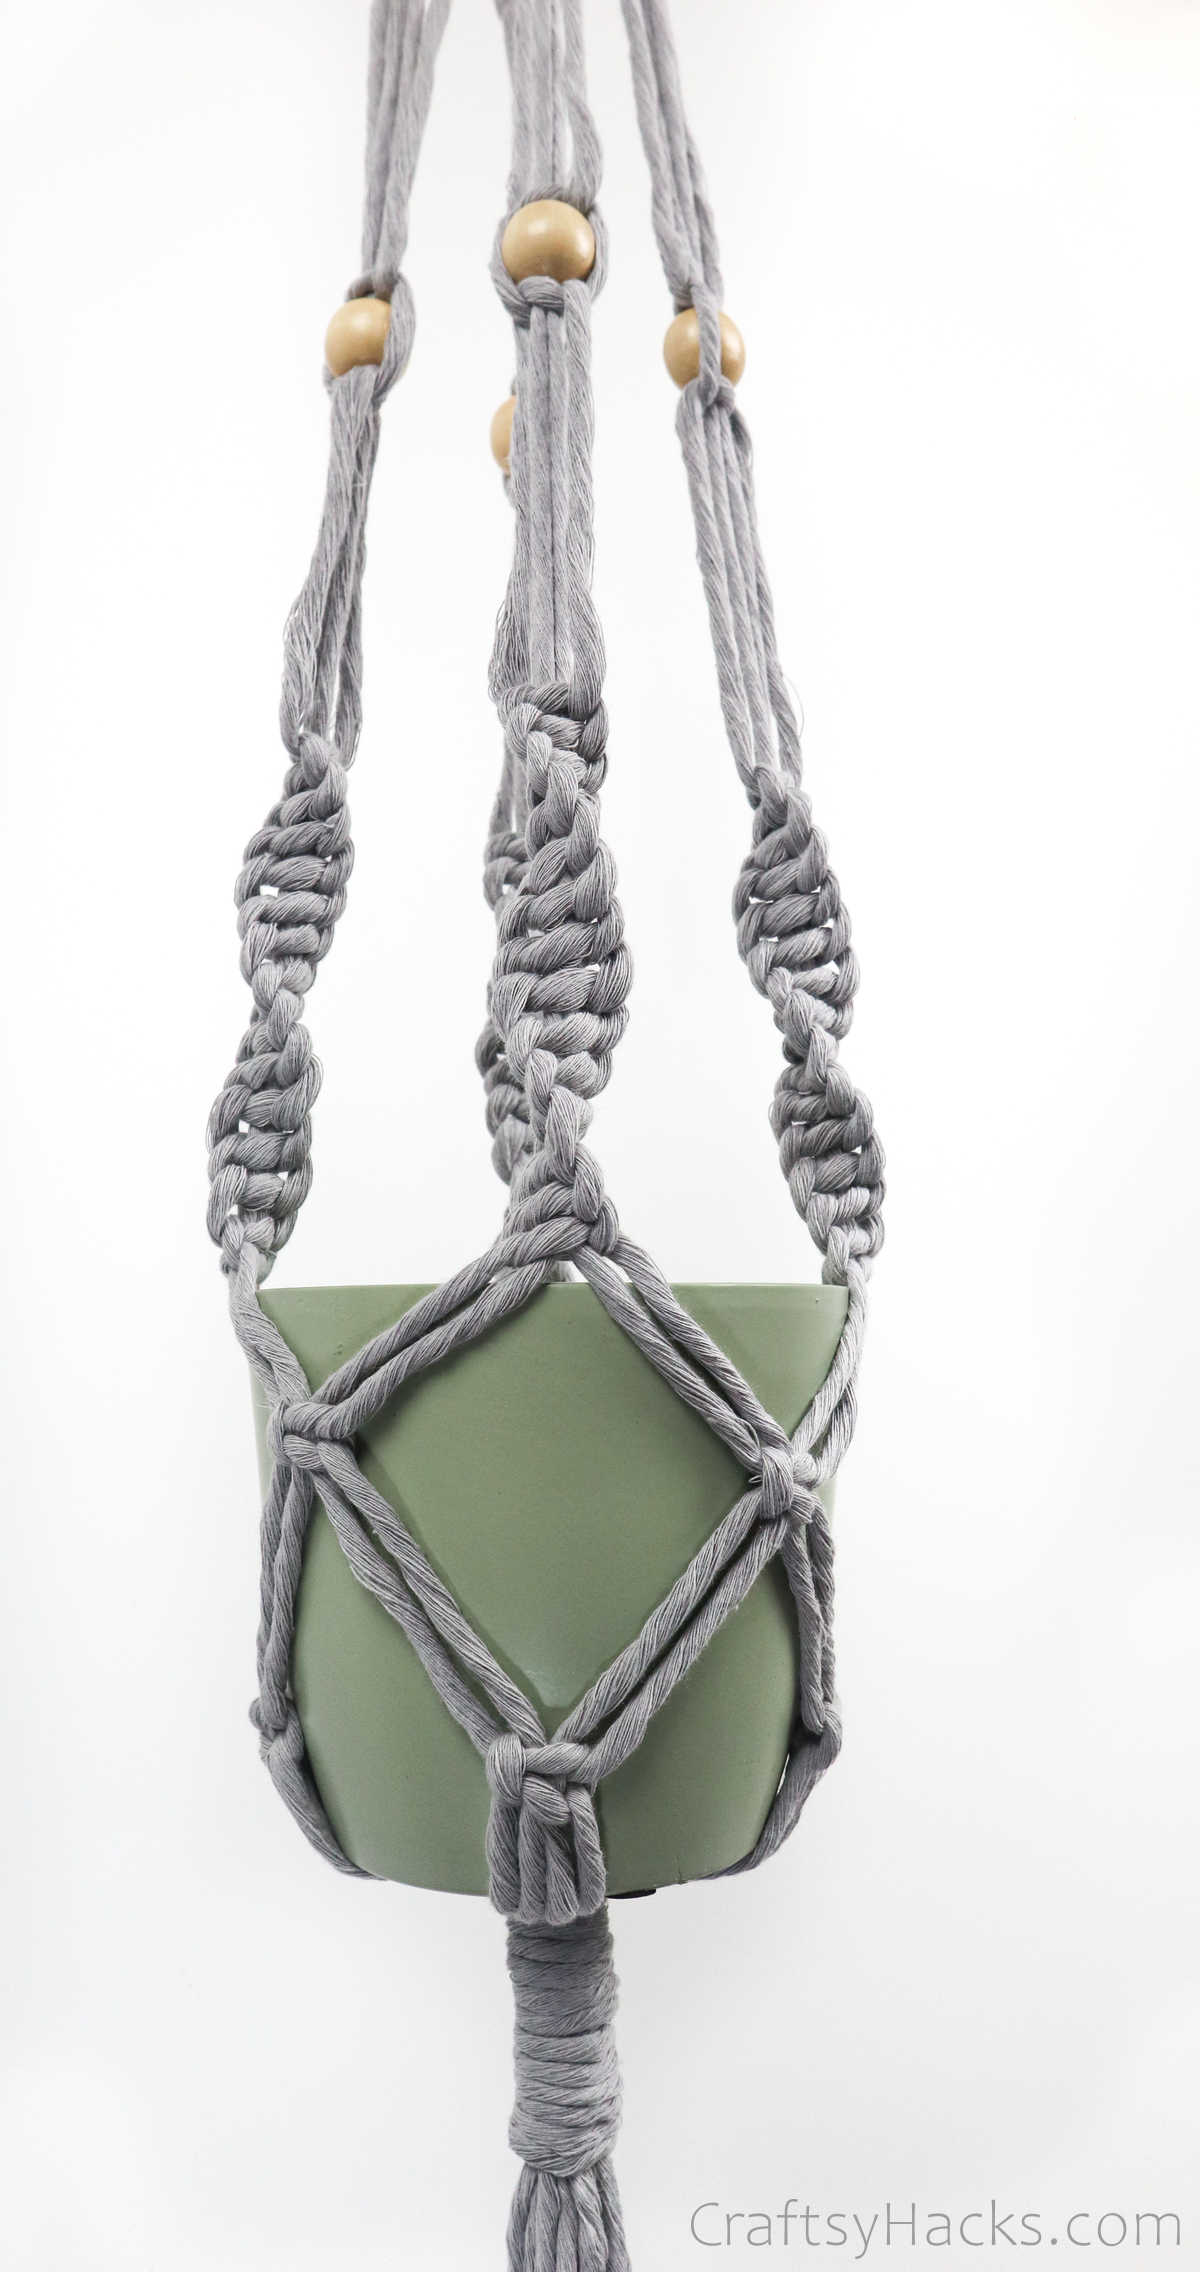
Its time to start working on your design and make spiral knots.
Gather four strands to form one section.
Pull the left strand over the middle to form a loop.
Pull both the ends up and tug it firmly to form your first knot.
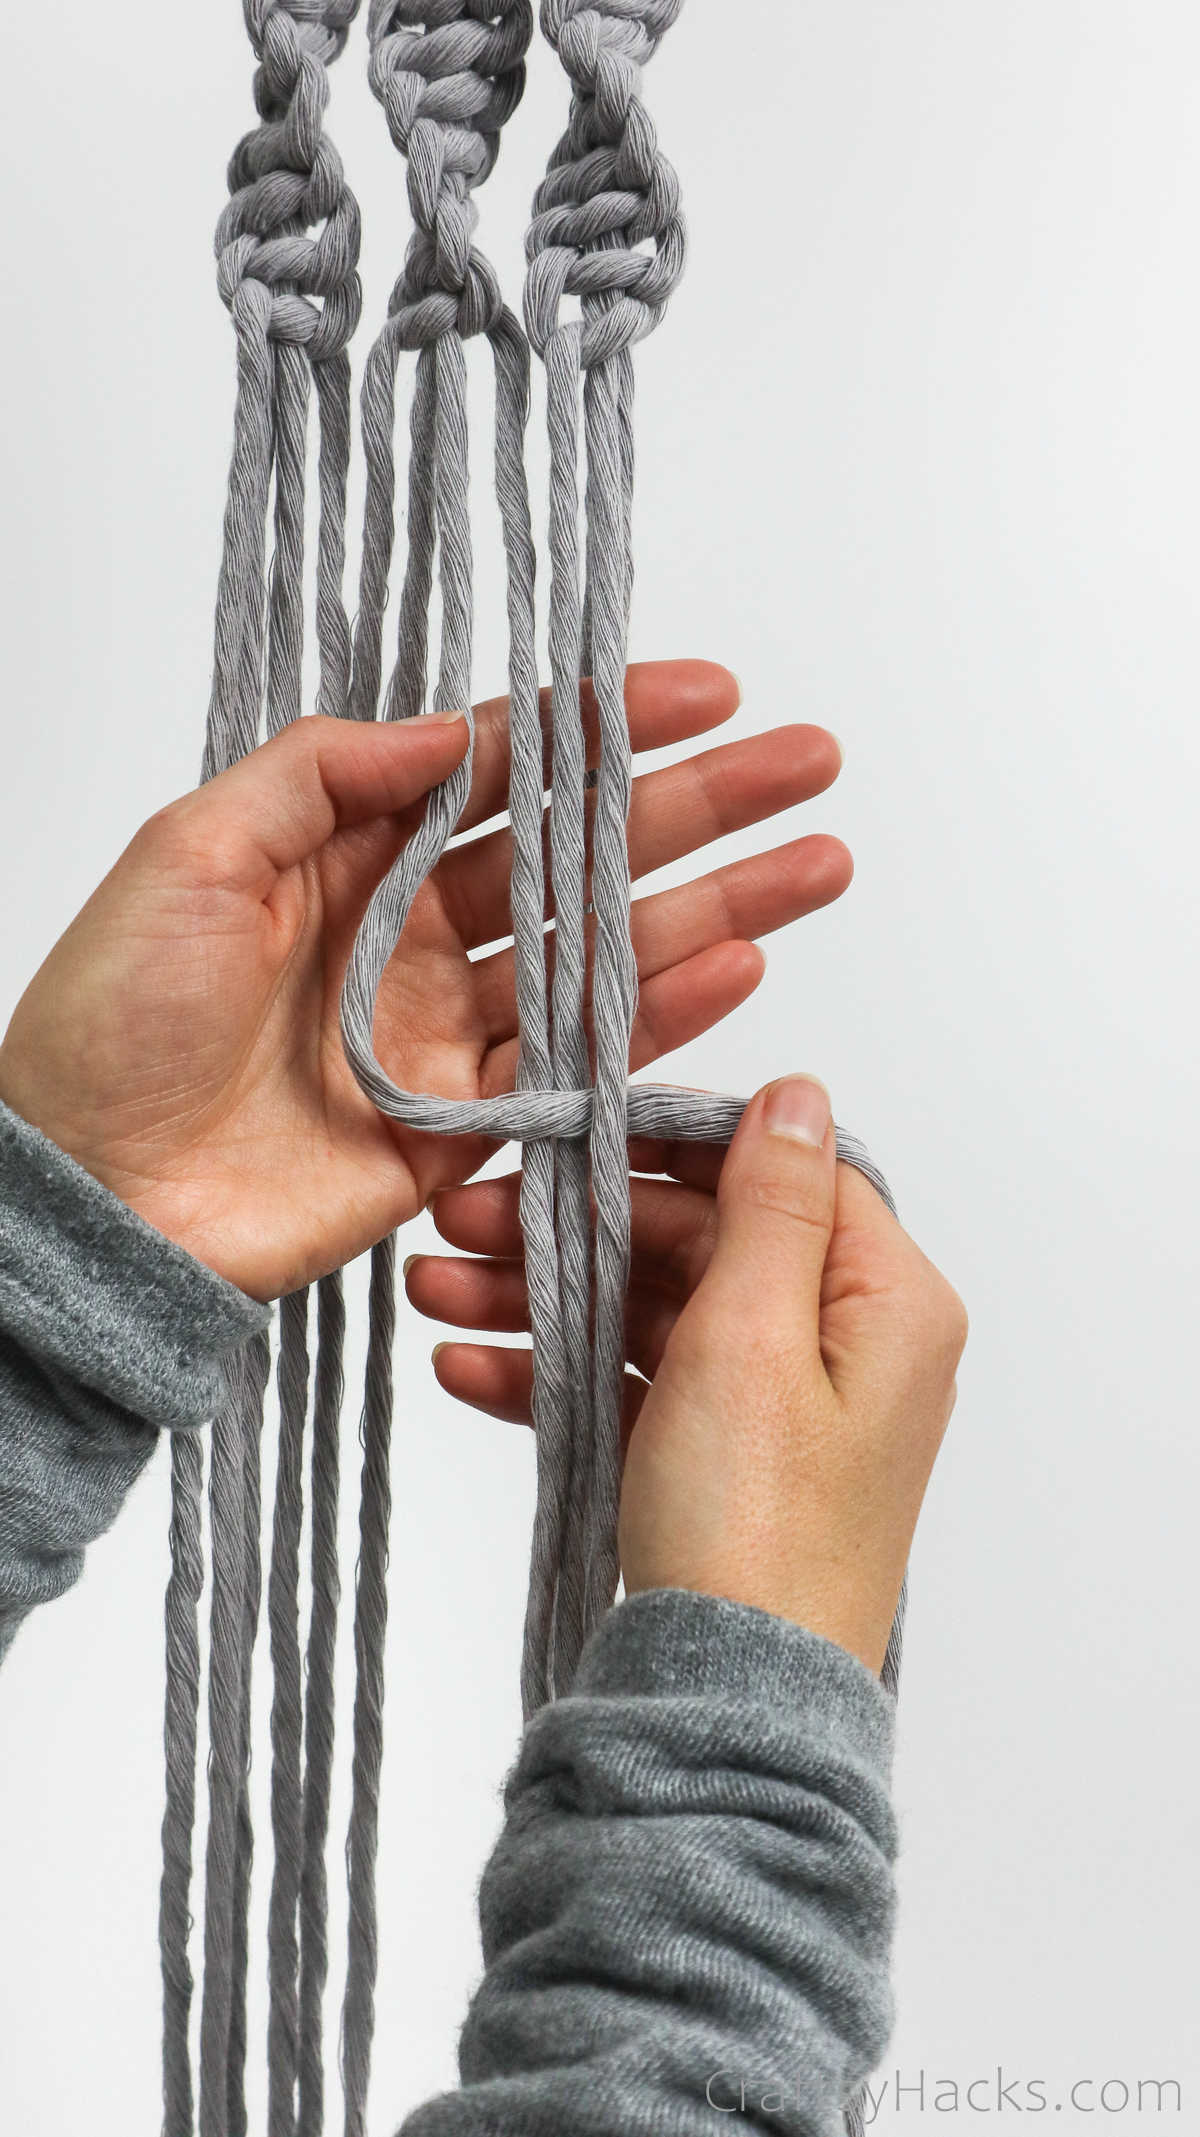
Step 6
Continue to make this single knot down the length of the cords.
You will notice that the cords will start to spiral!
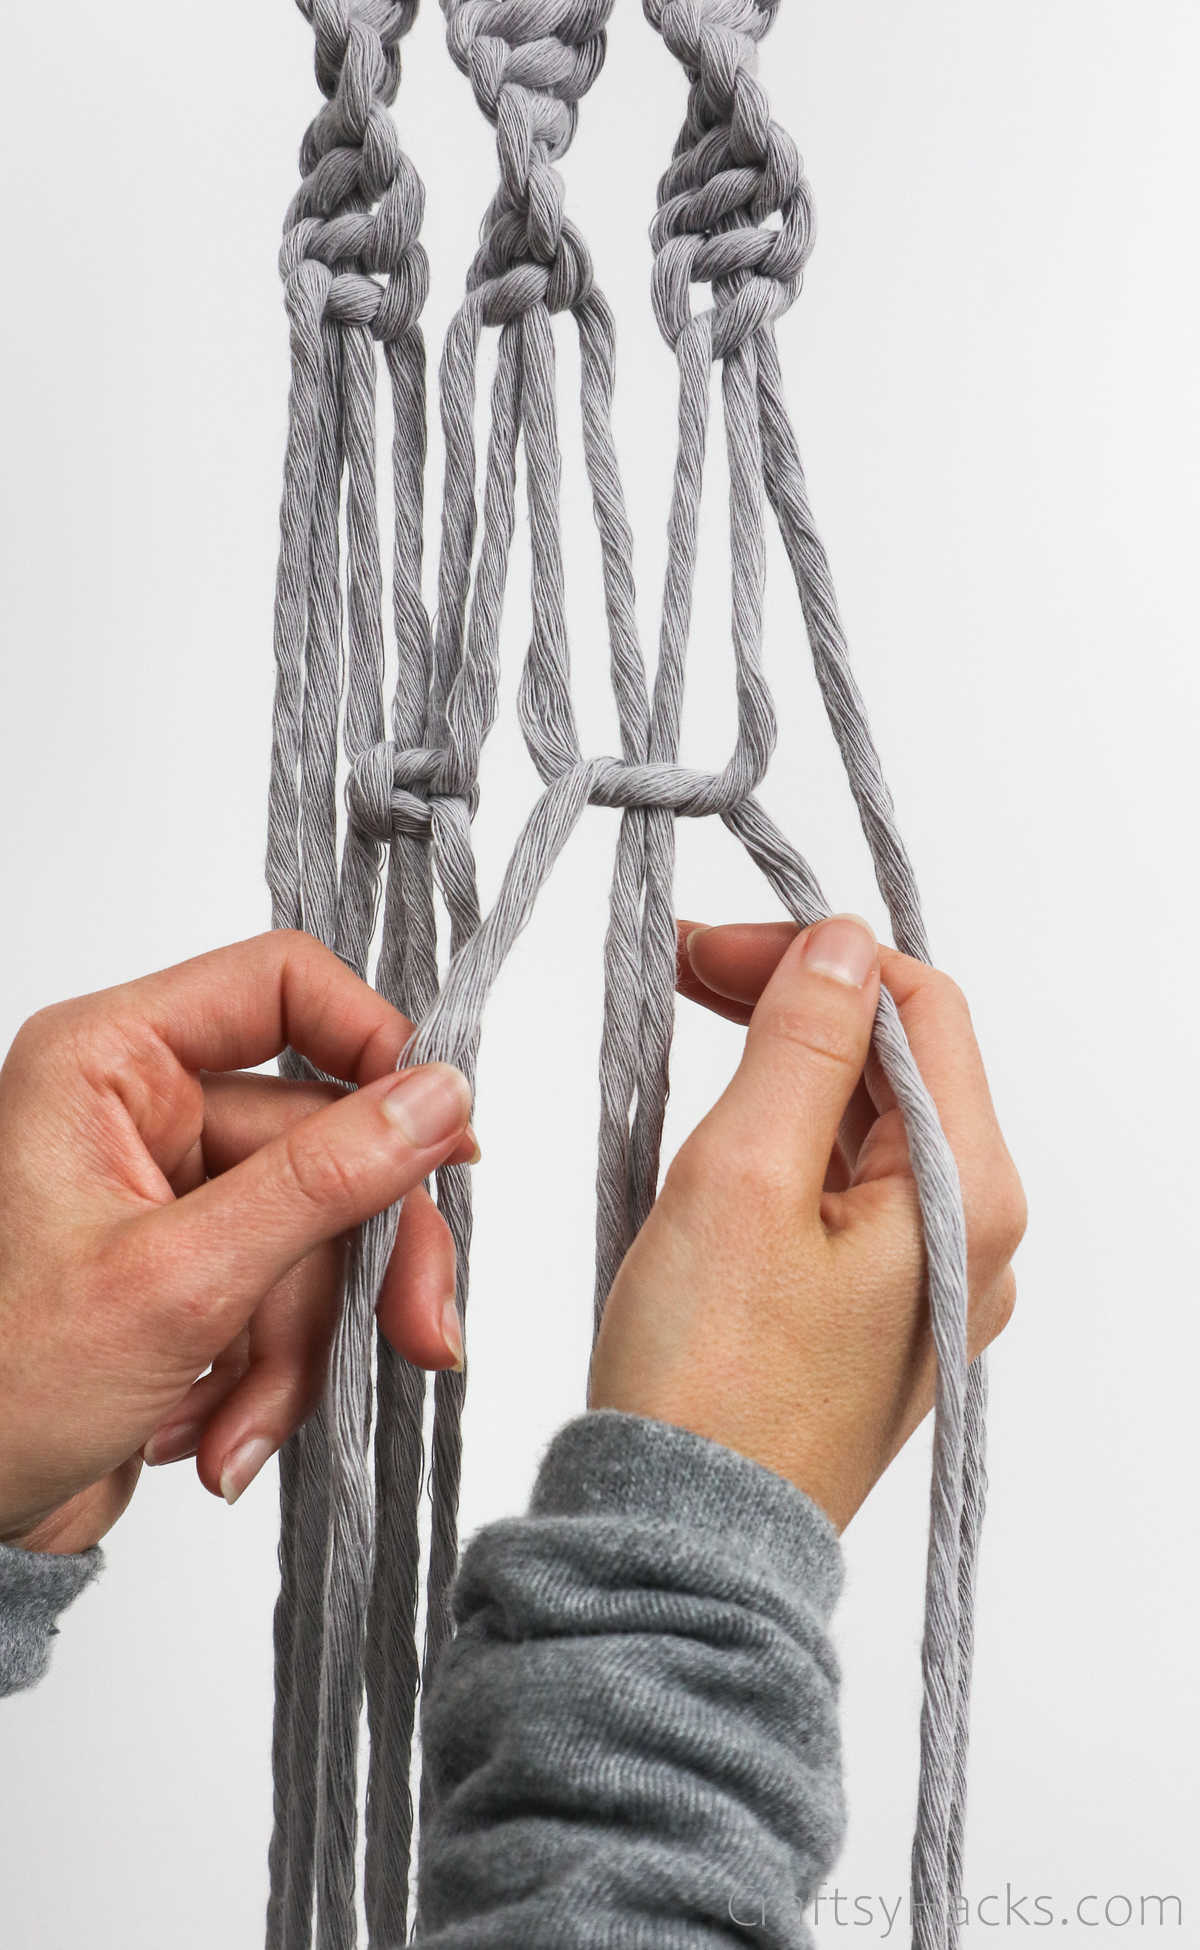
Step 7
Next, grab another four strands.
Youre going to make another set of spiraling knots down these four strands, too.
You know the drill!
Step 8
Go ahead and finish up the other two sections, as well.
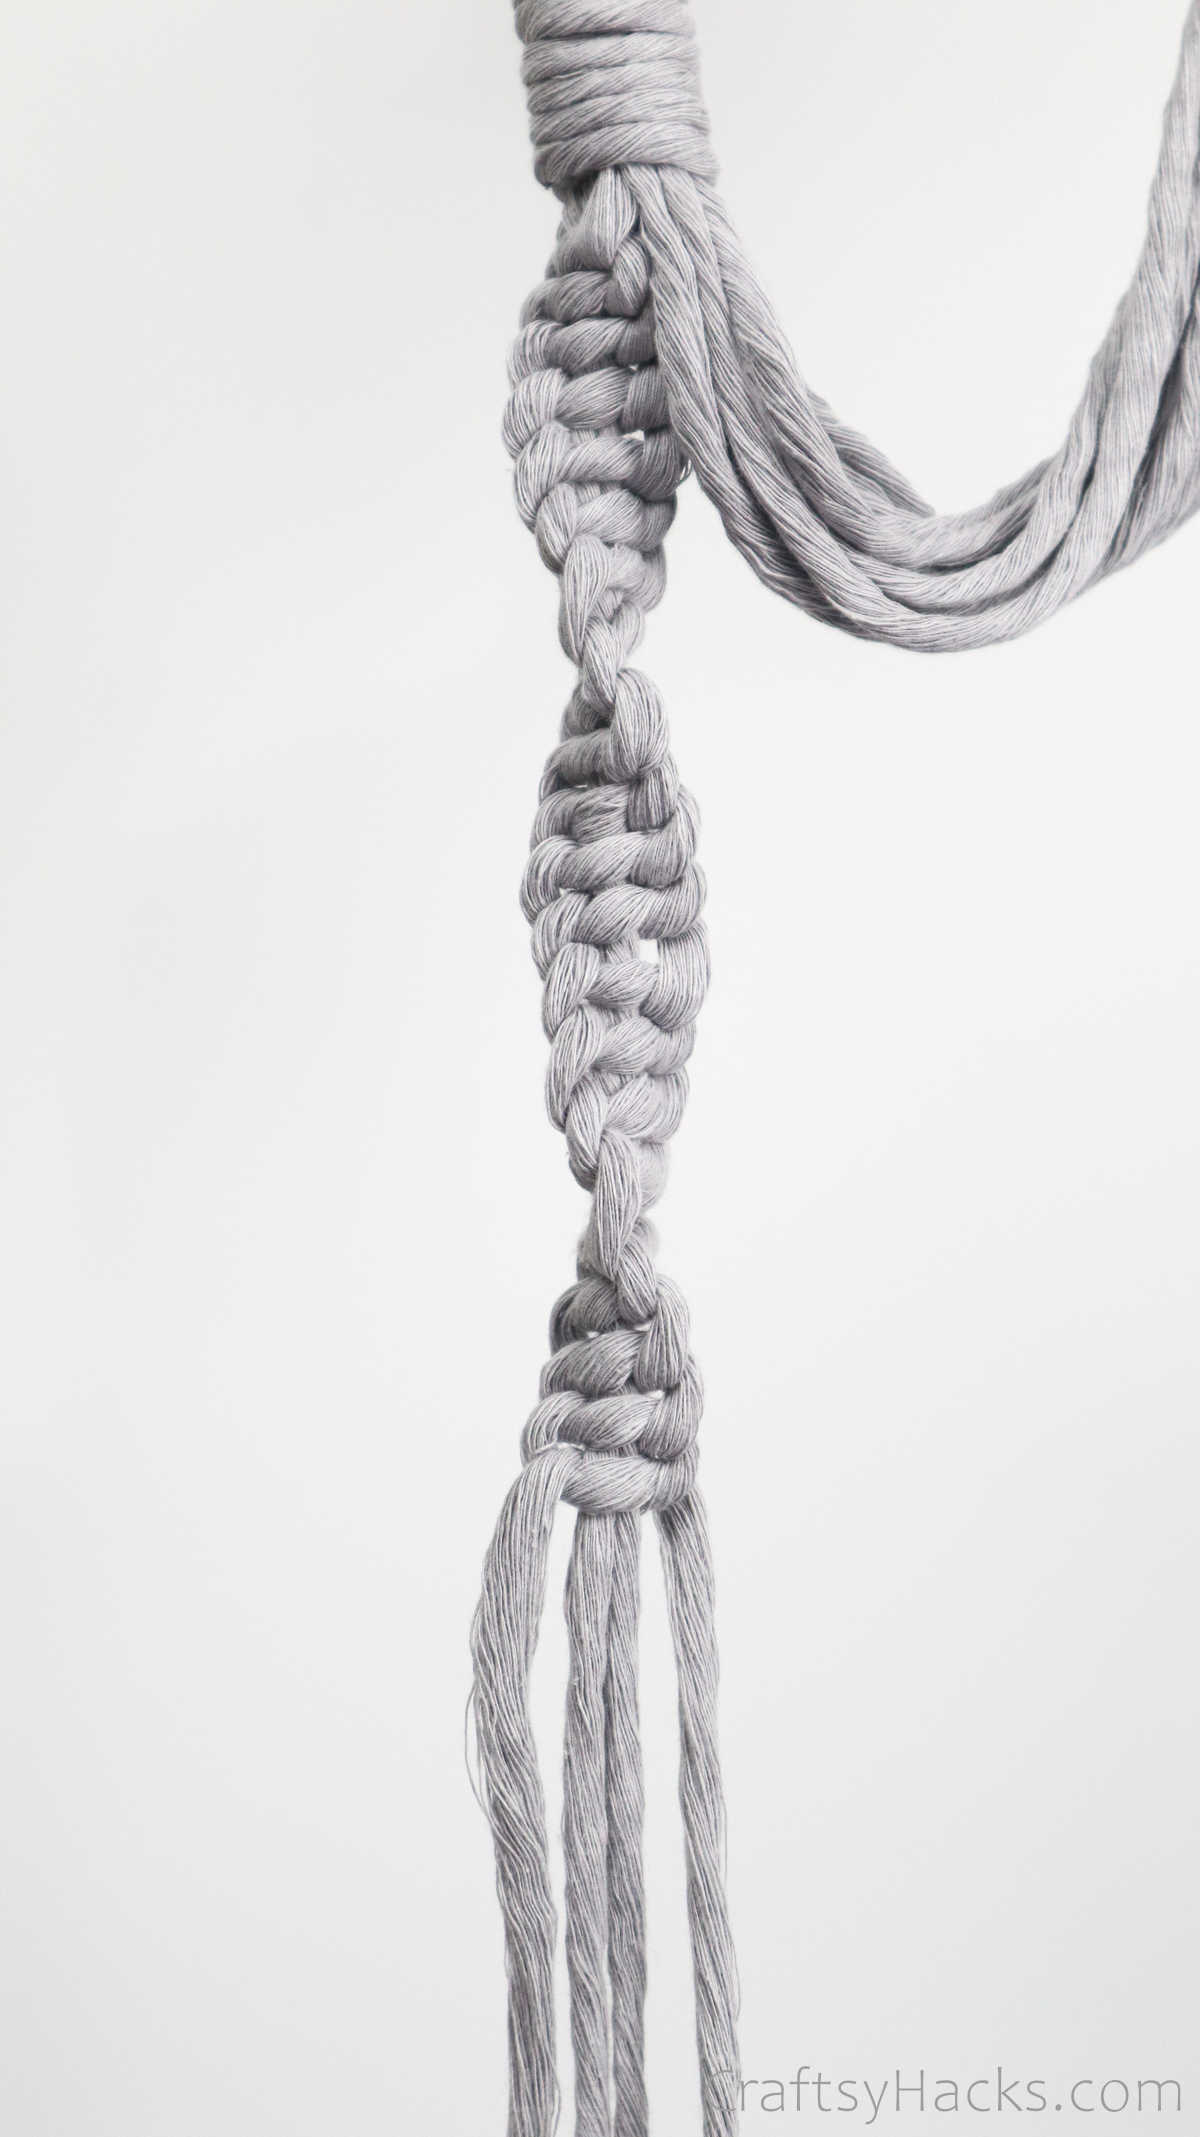
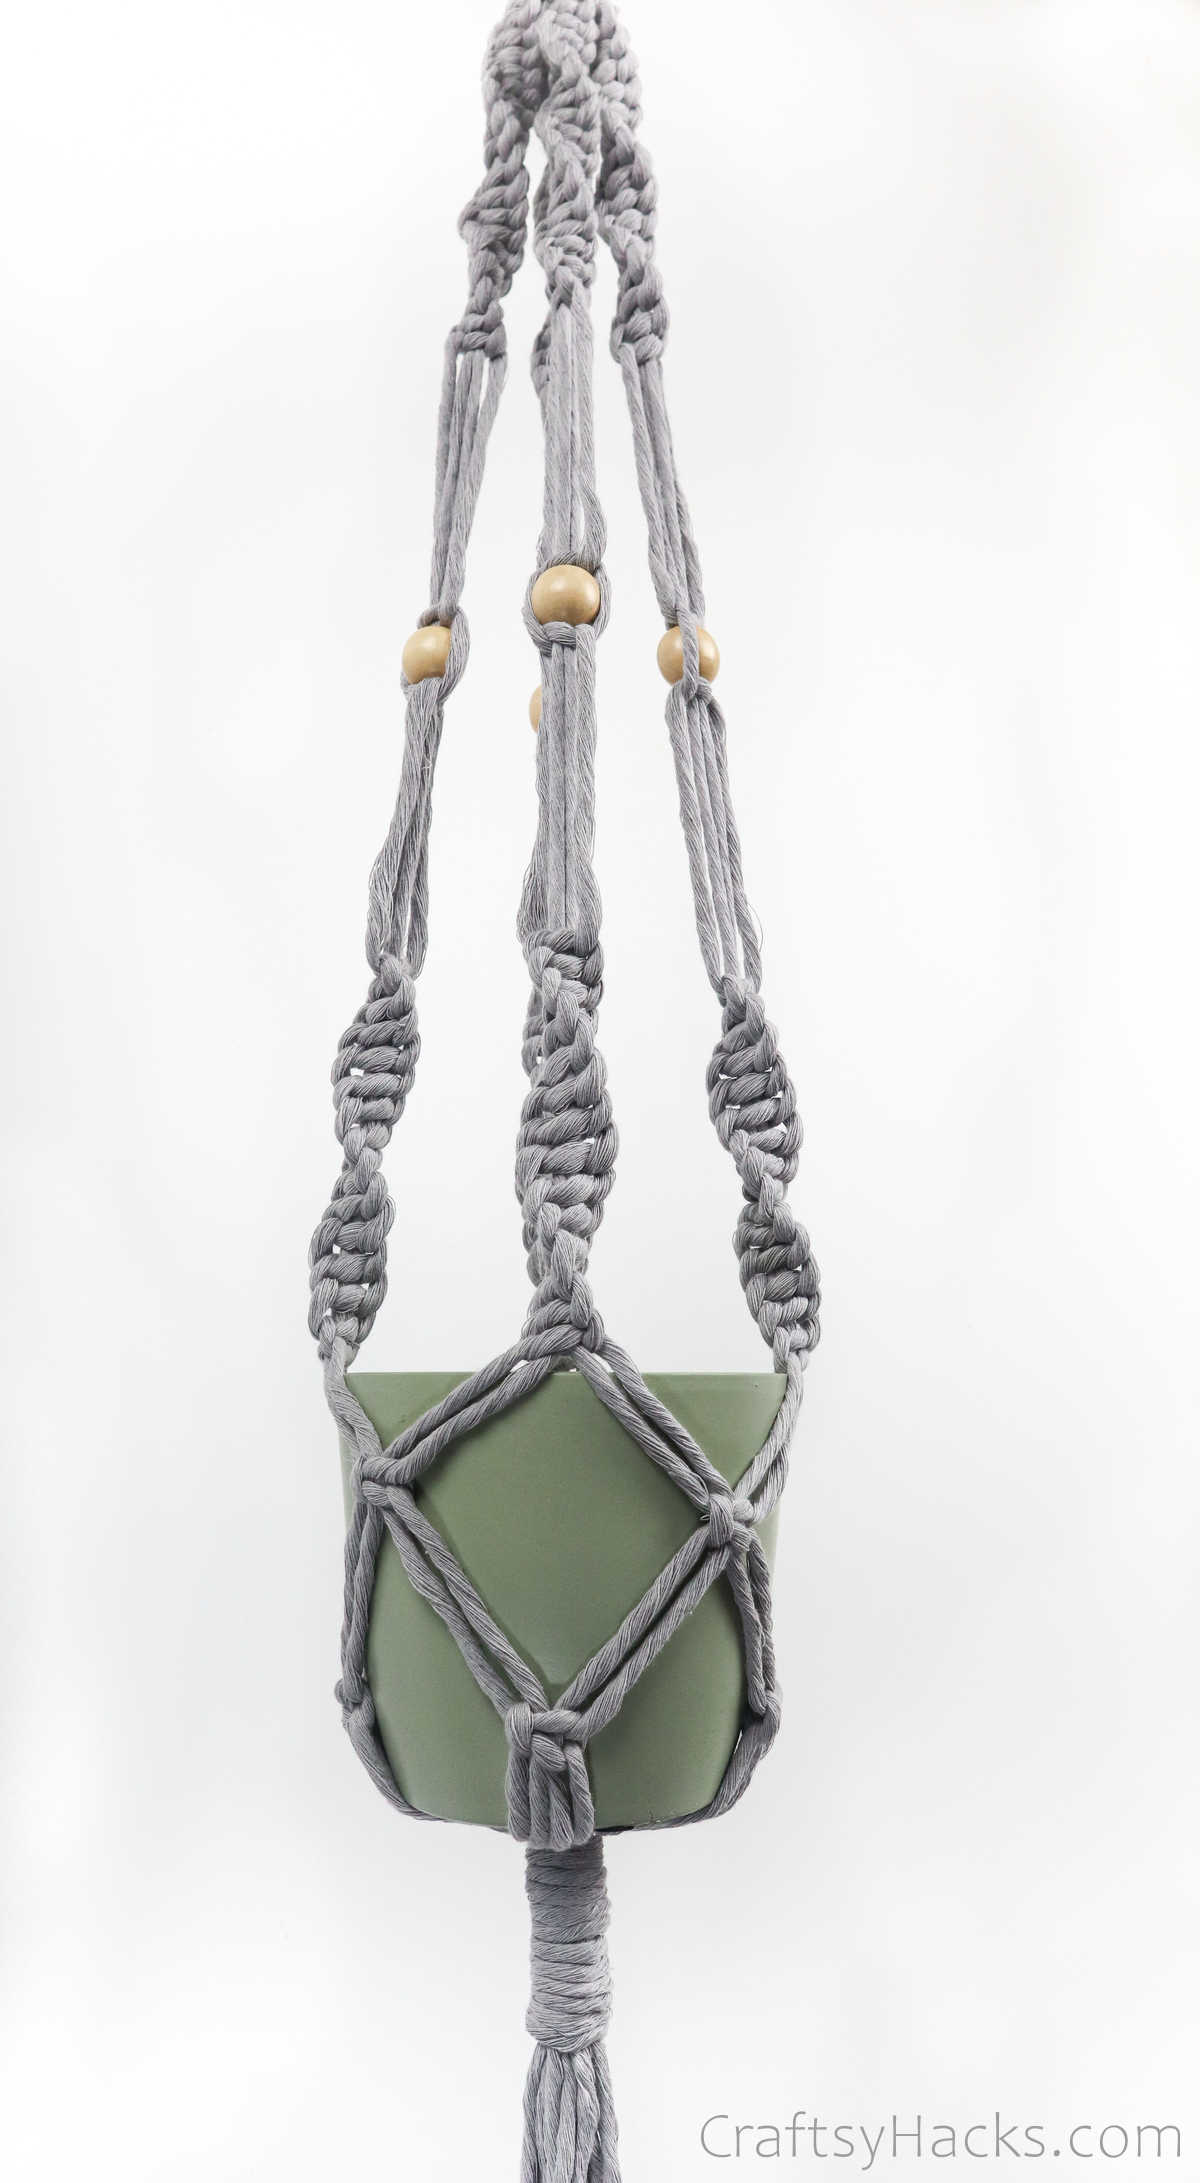
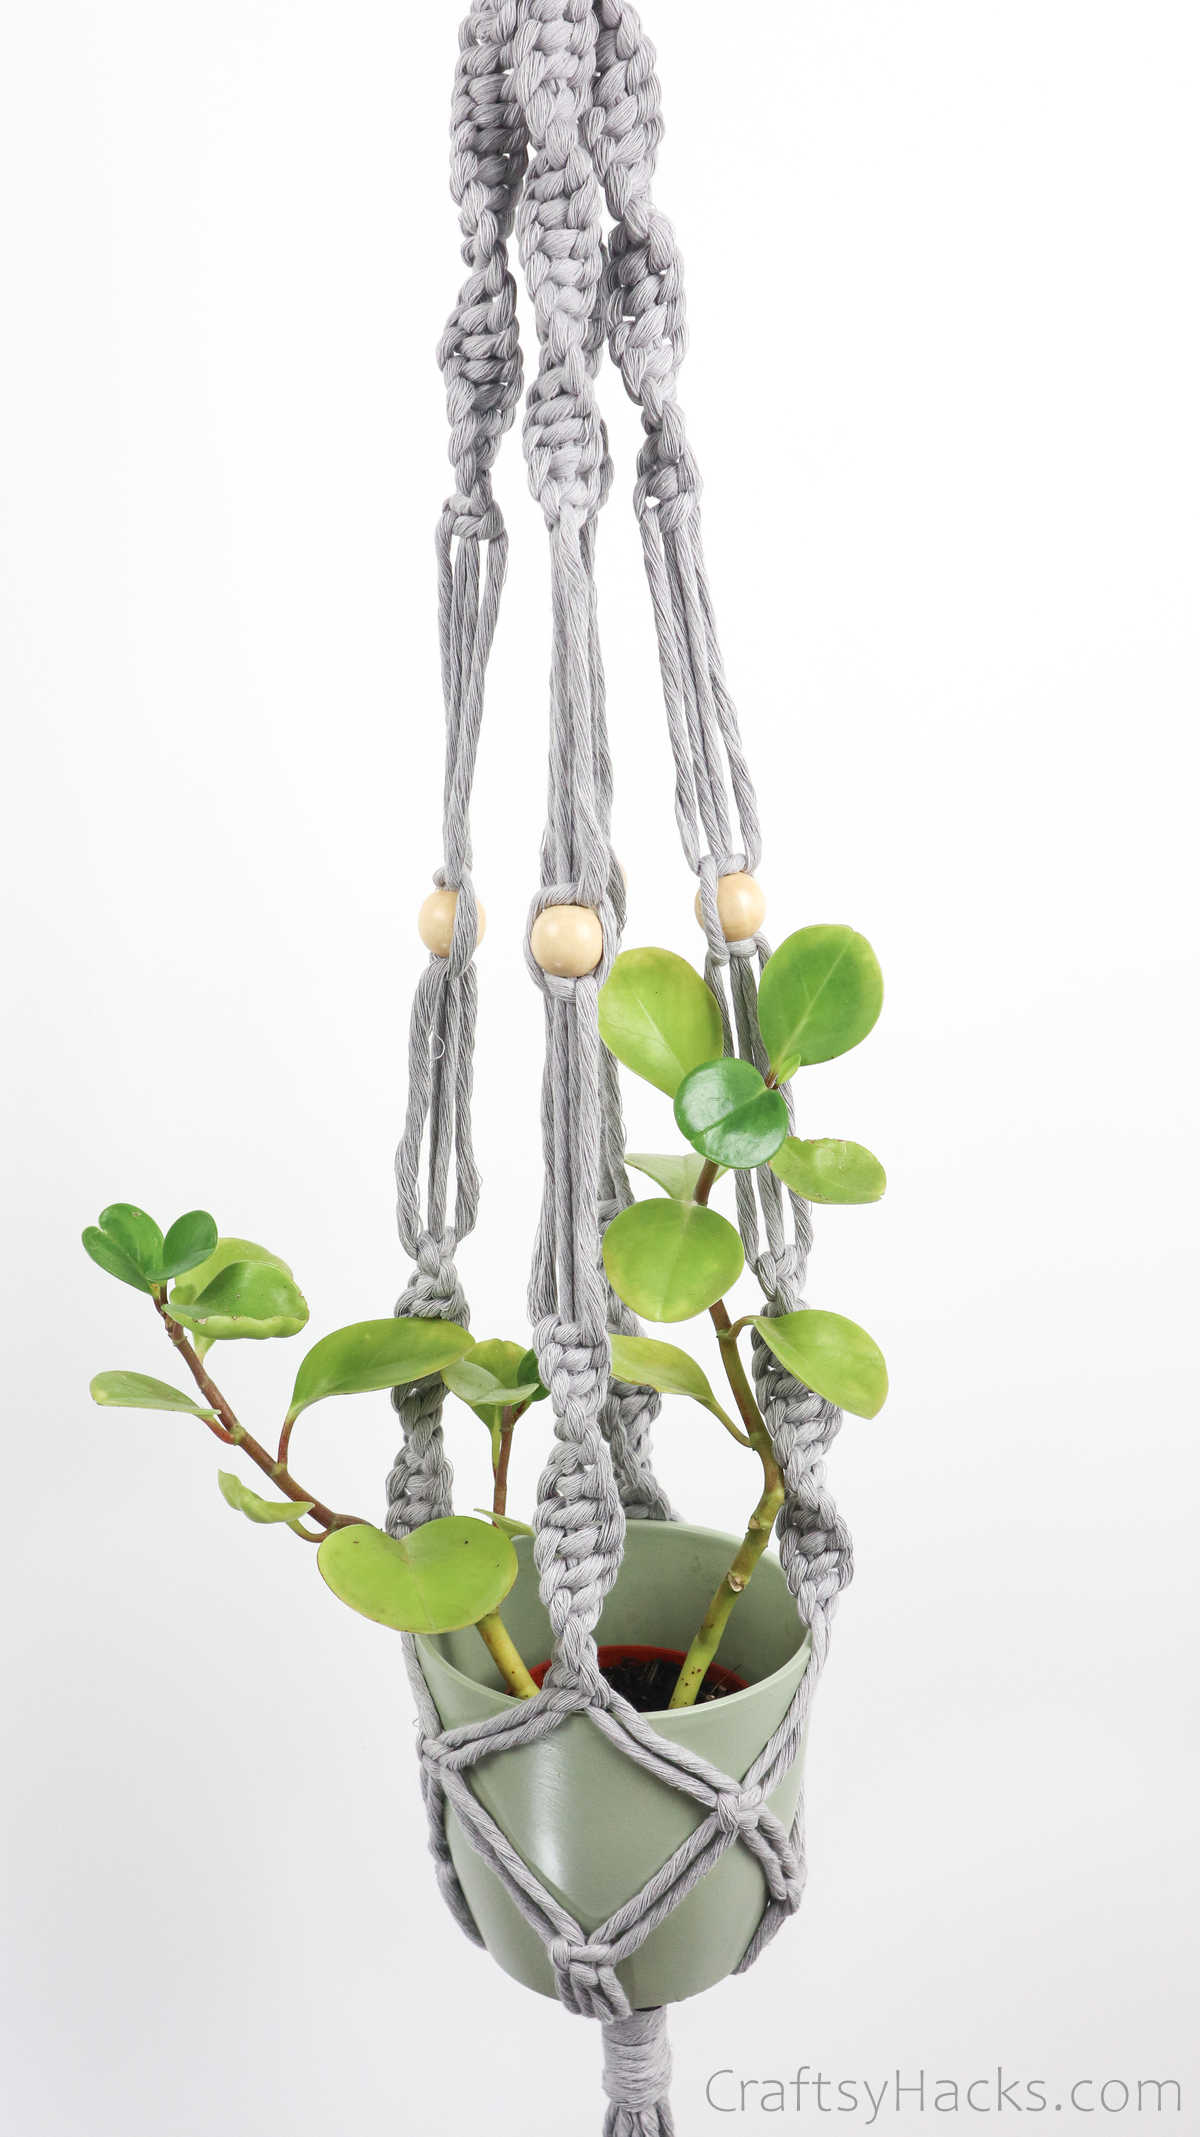
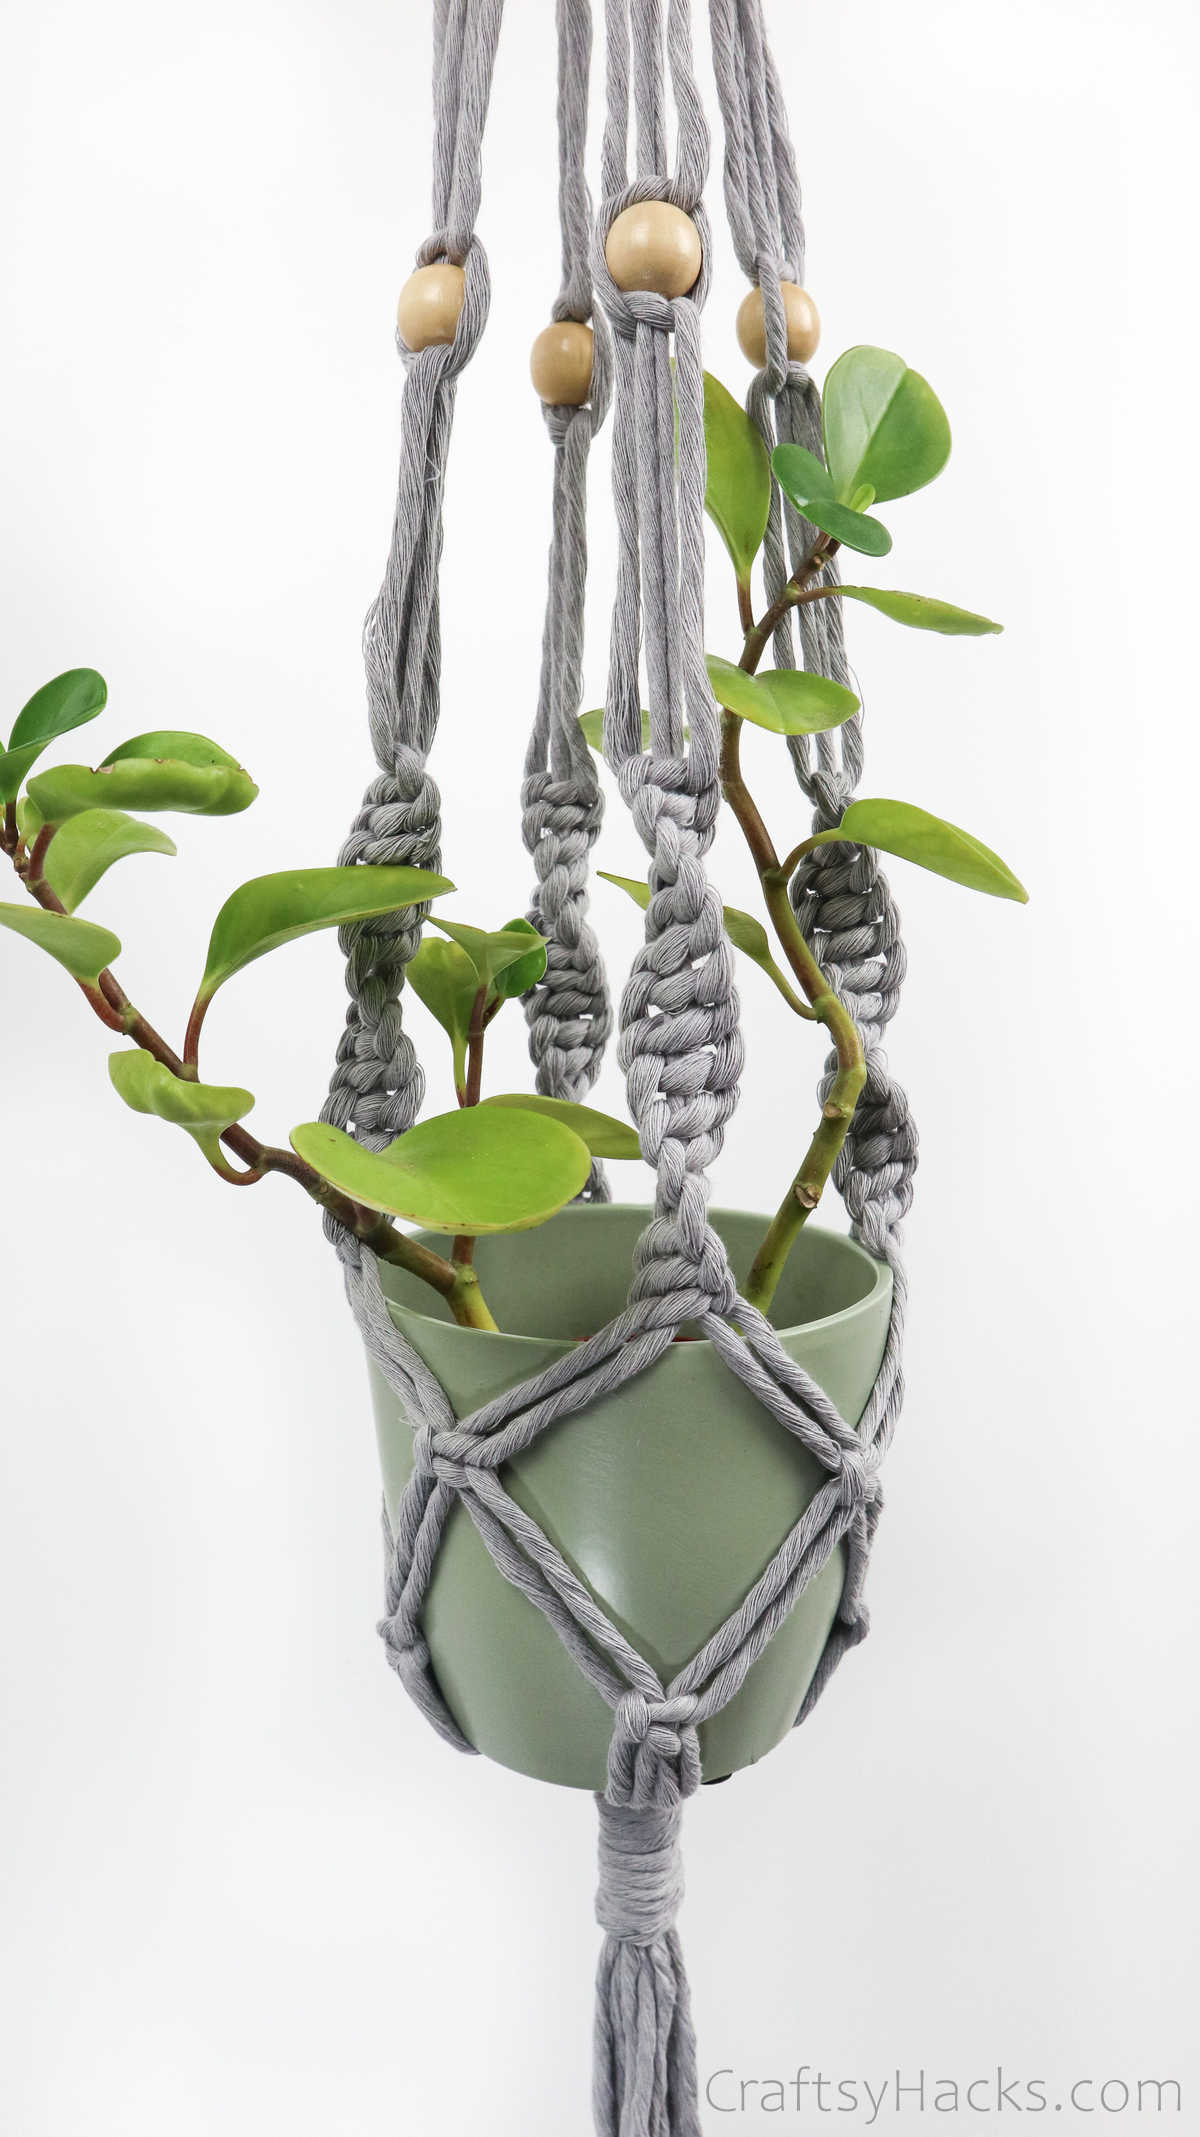
This is how your macrame hanger should look when youre done.

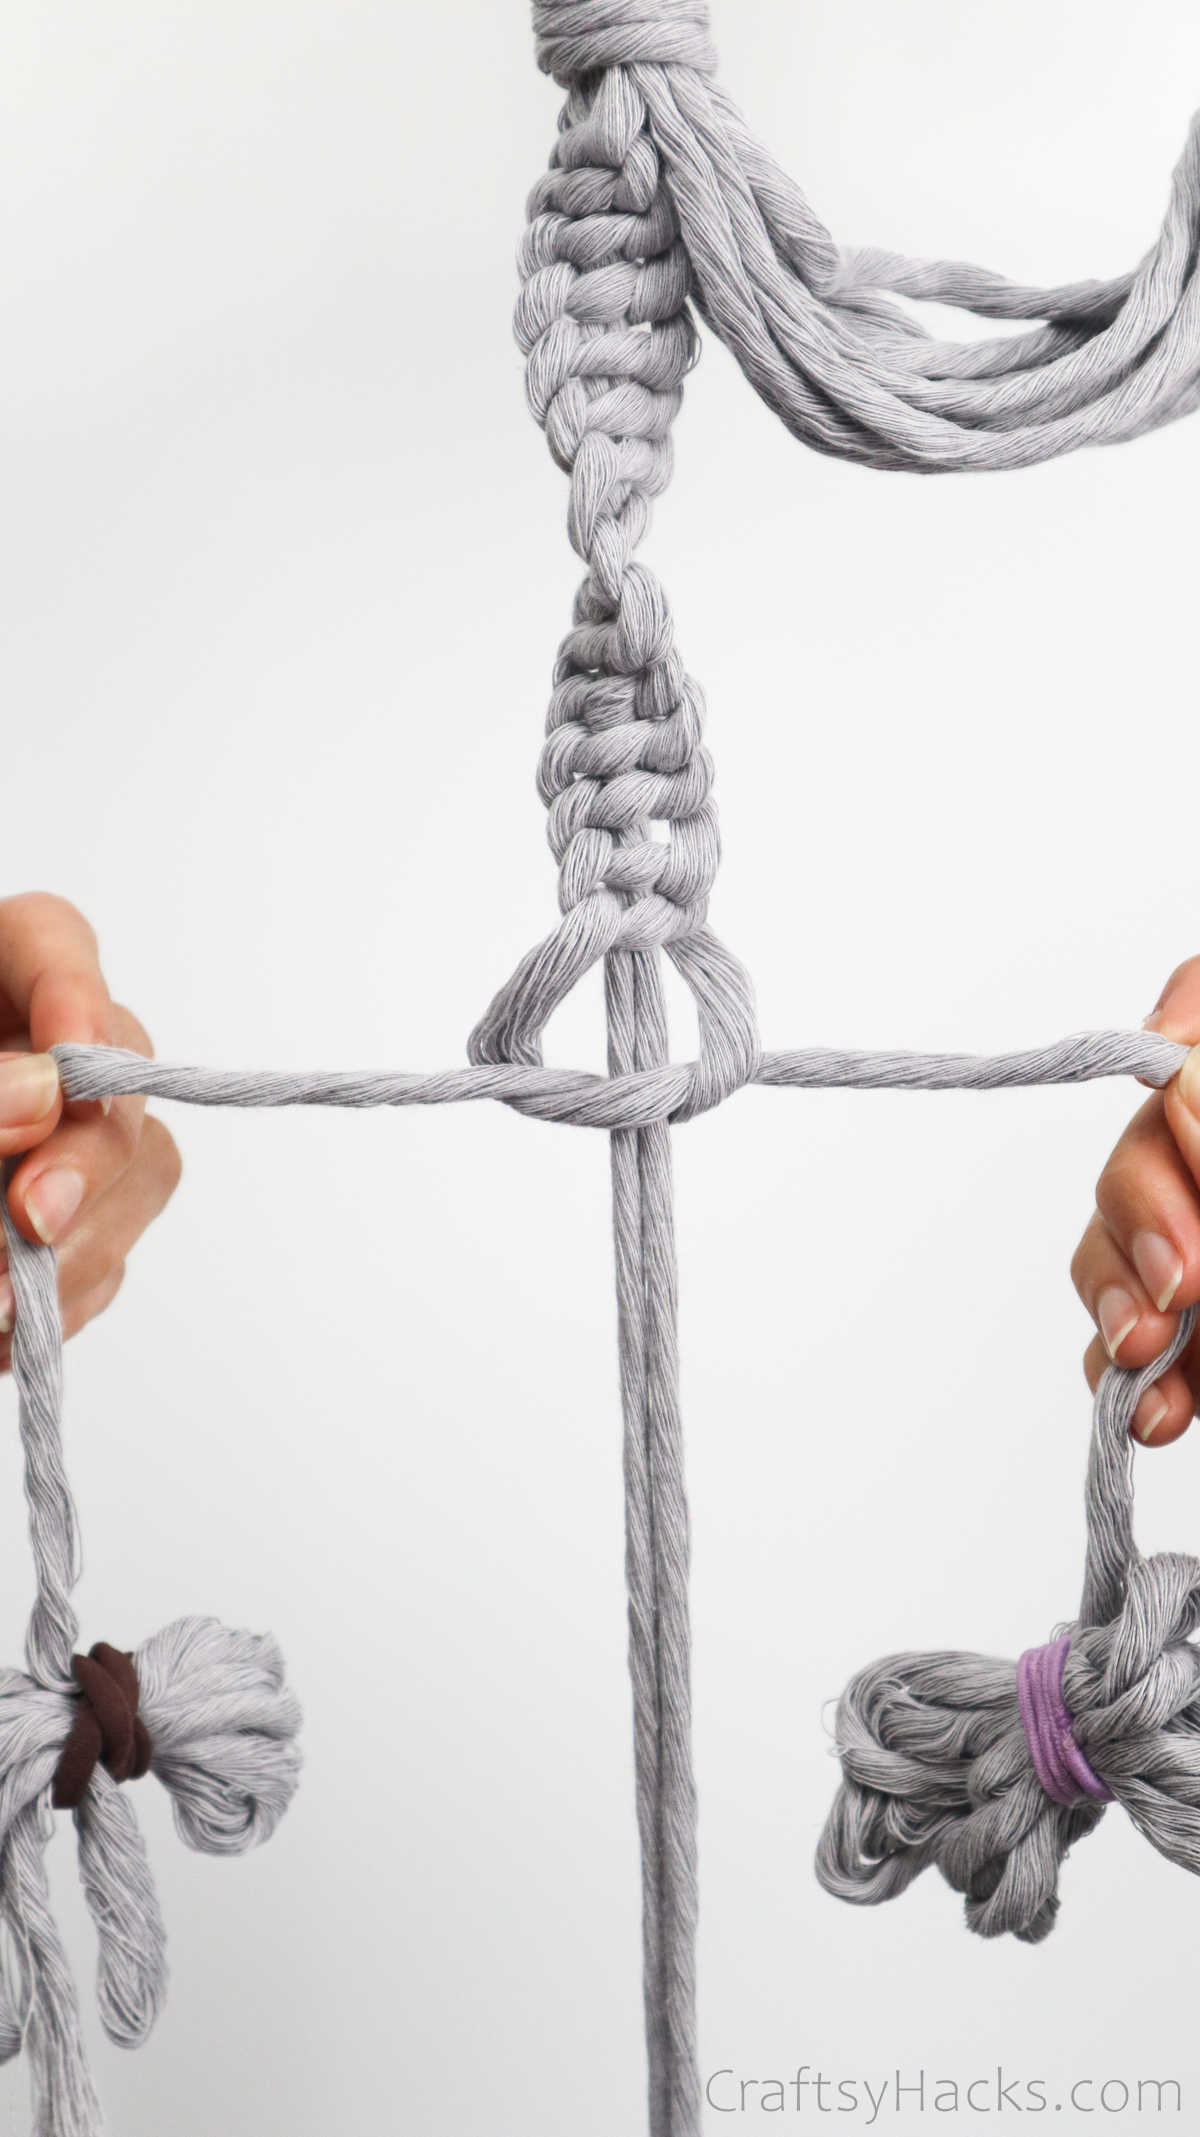
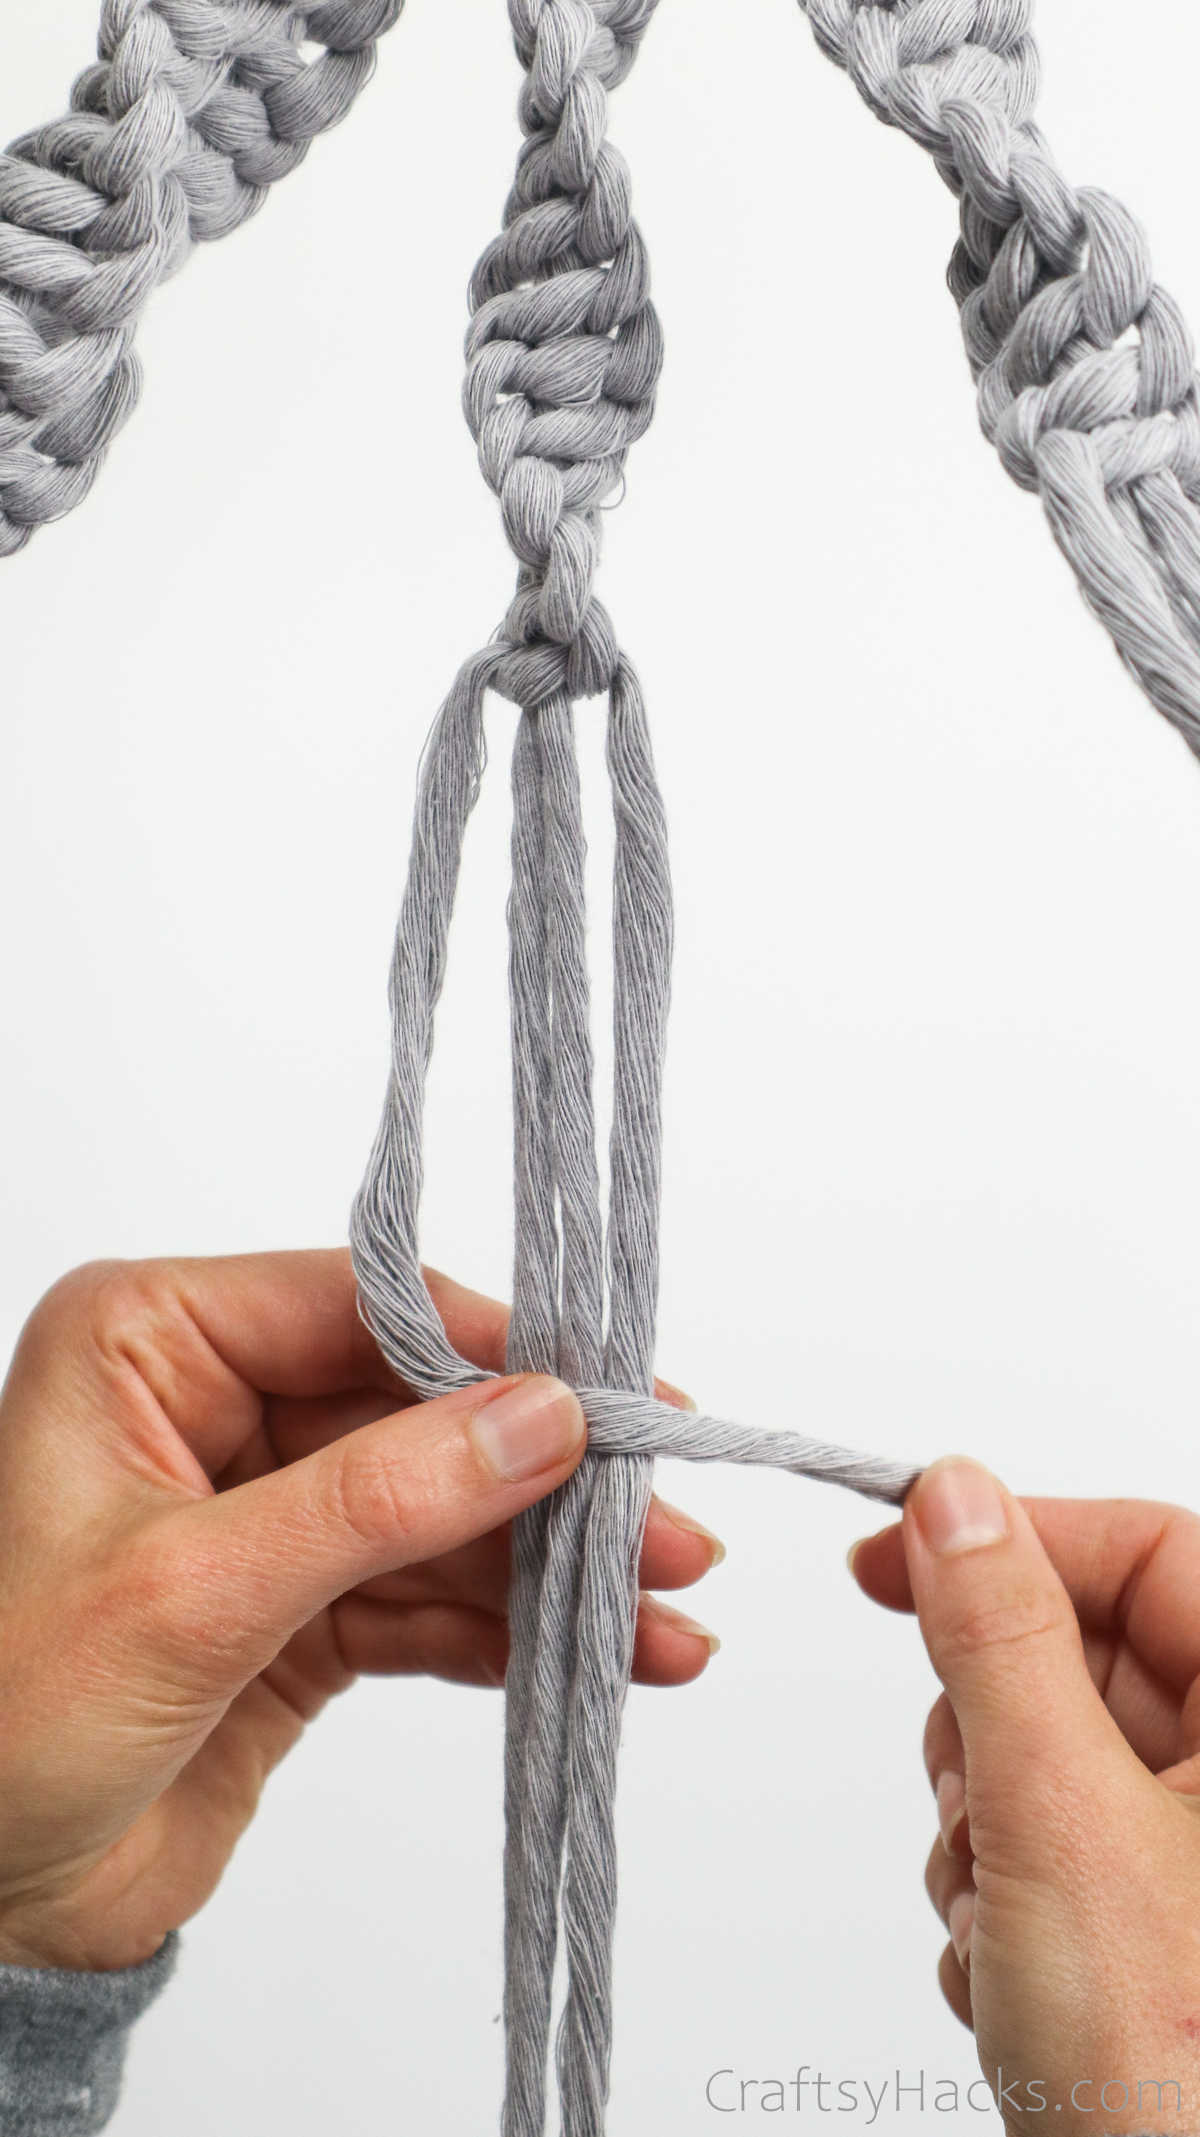
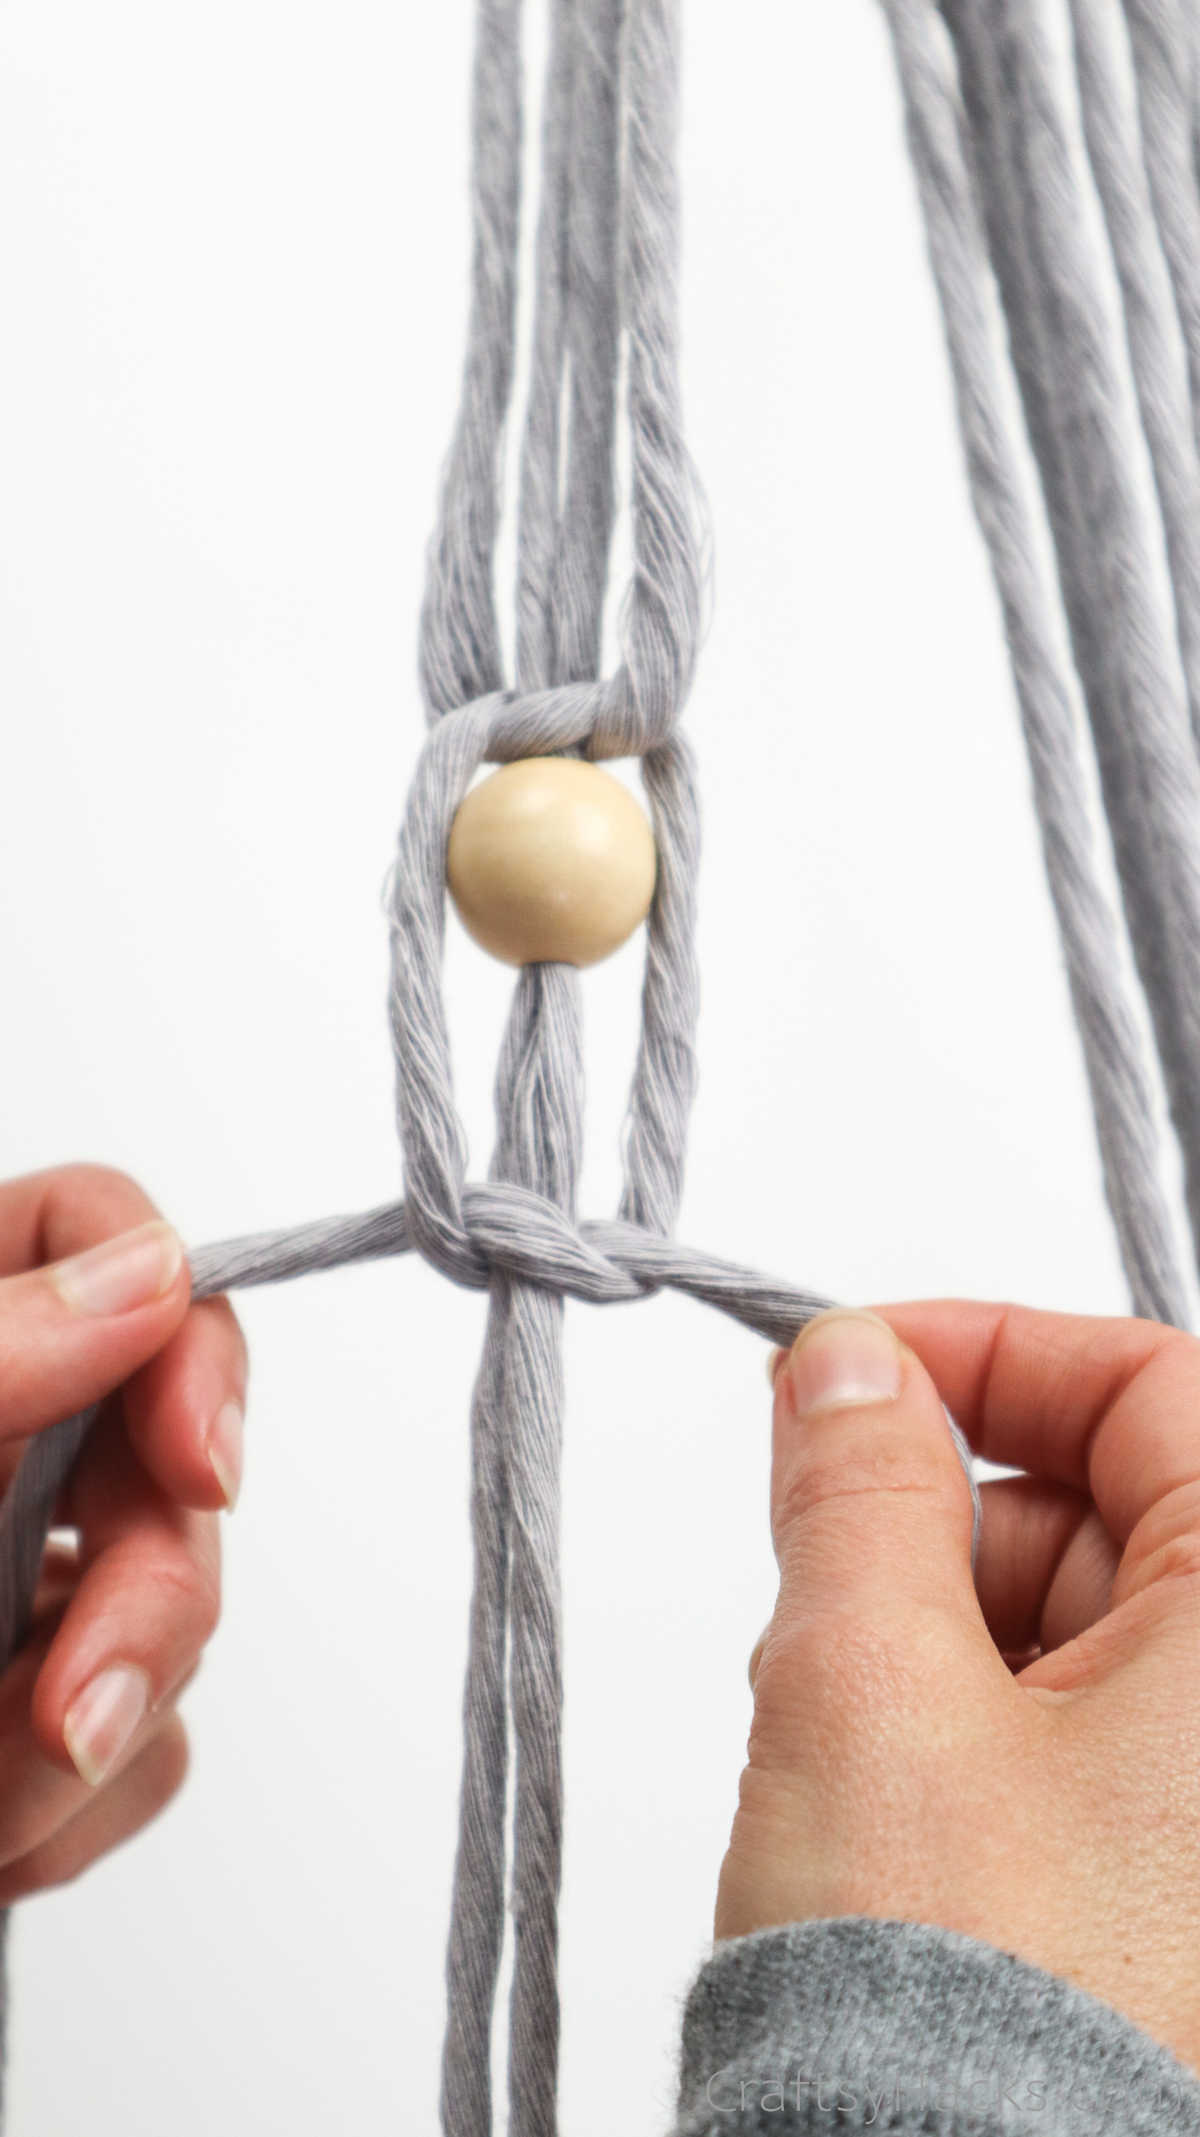
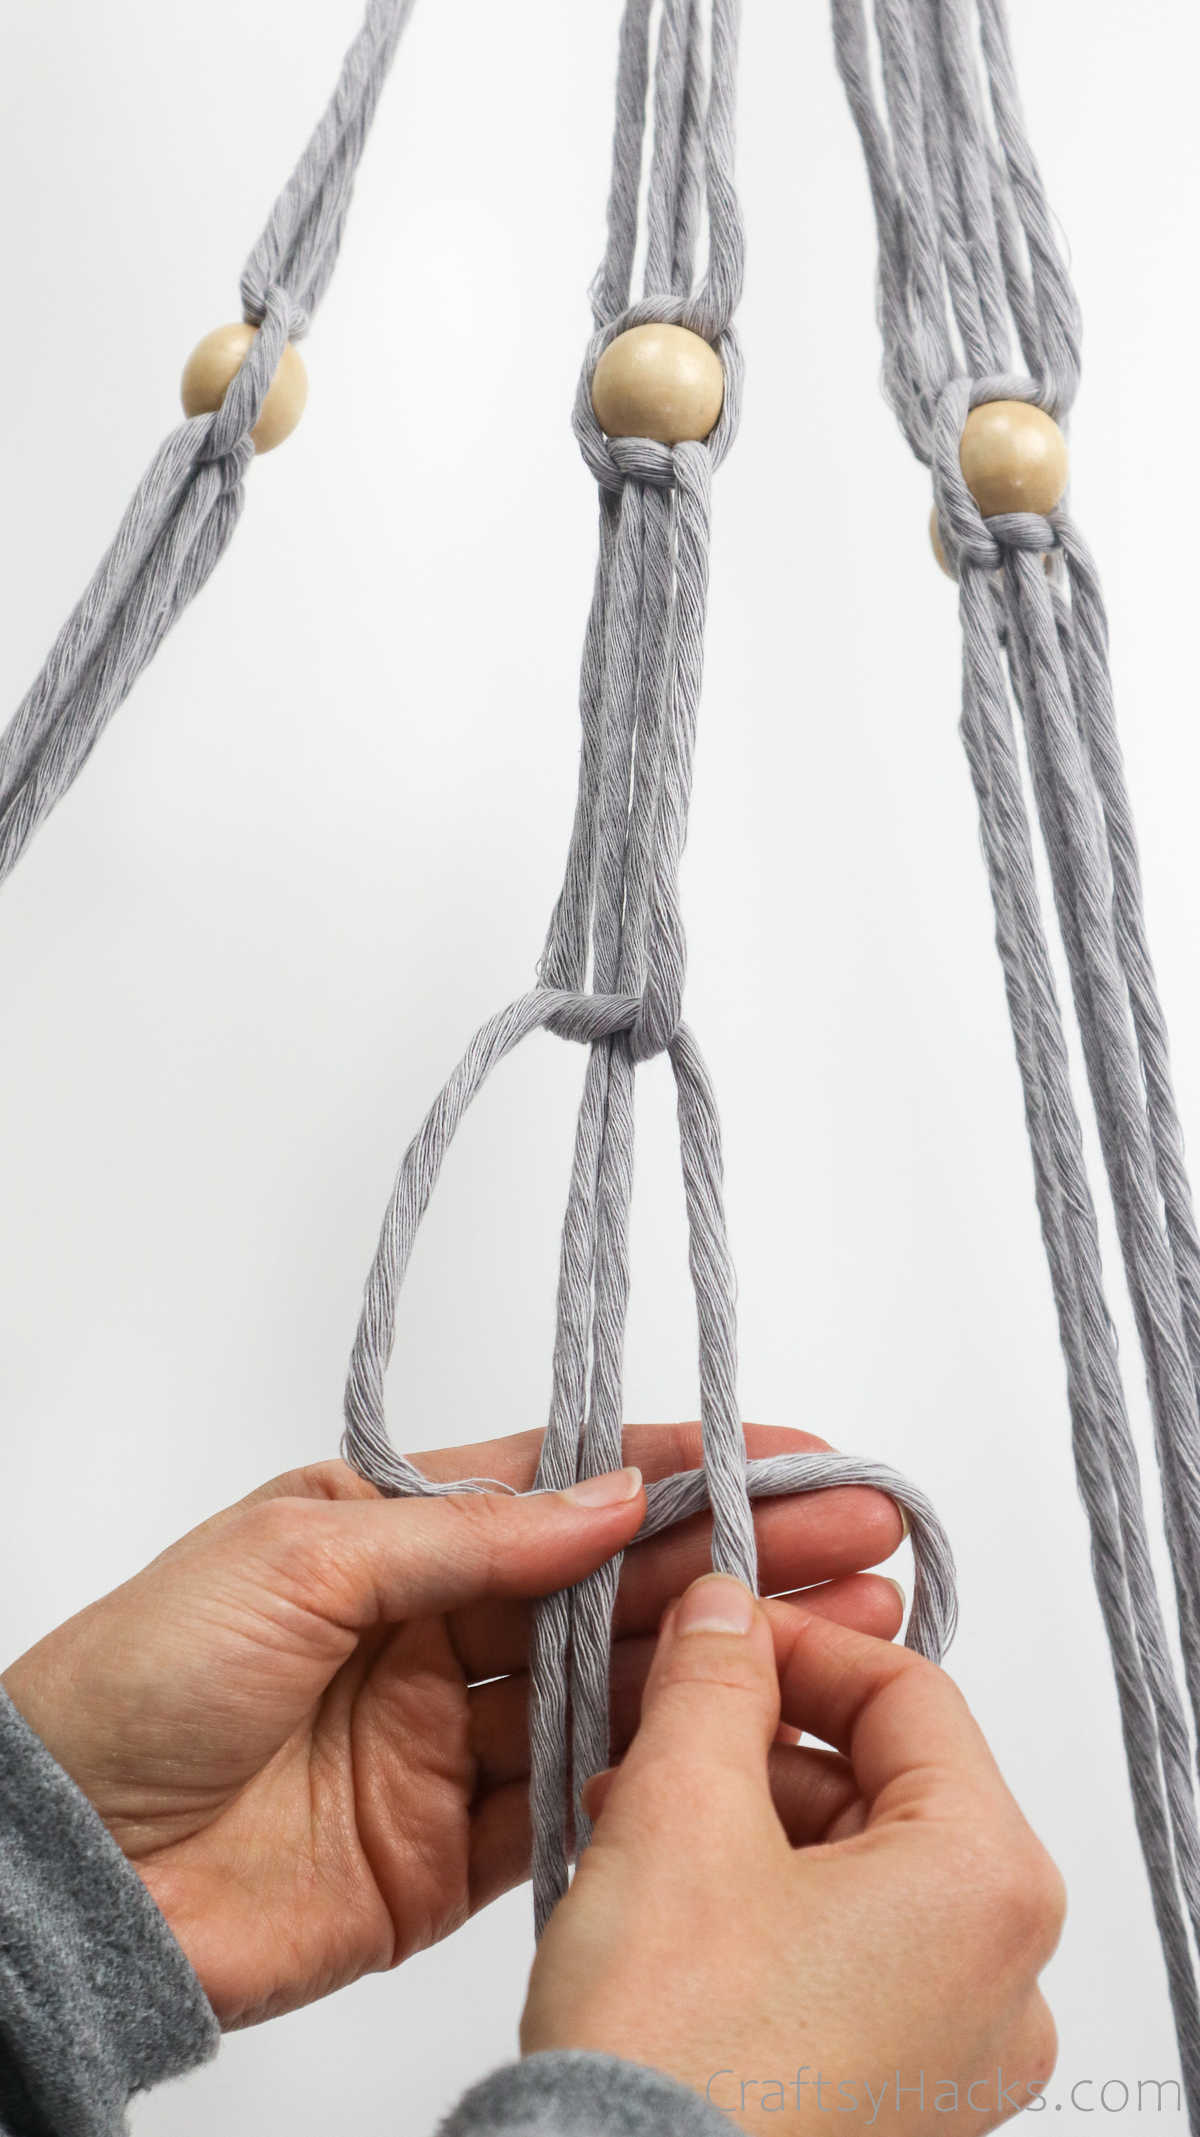
Were going to embed the bead in between a square knot.
First, make one half of a square knot with the left side of the cord.
Just remember to leave about 2 to 3 inches of gap after your last spiral knot.
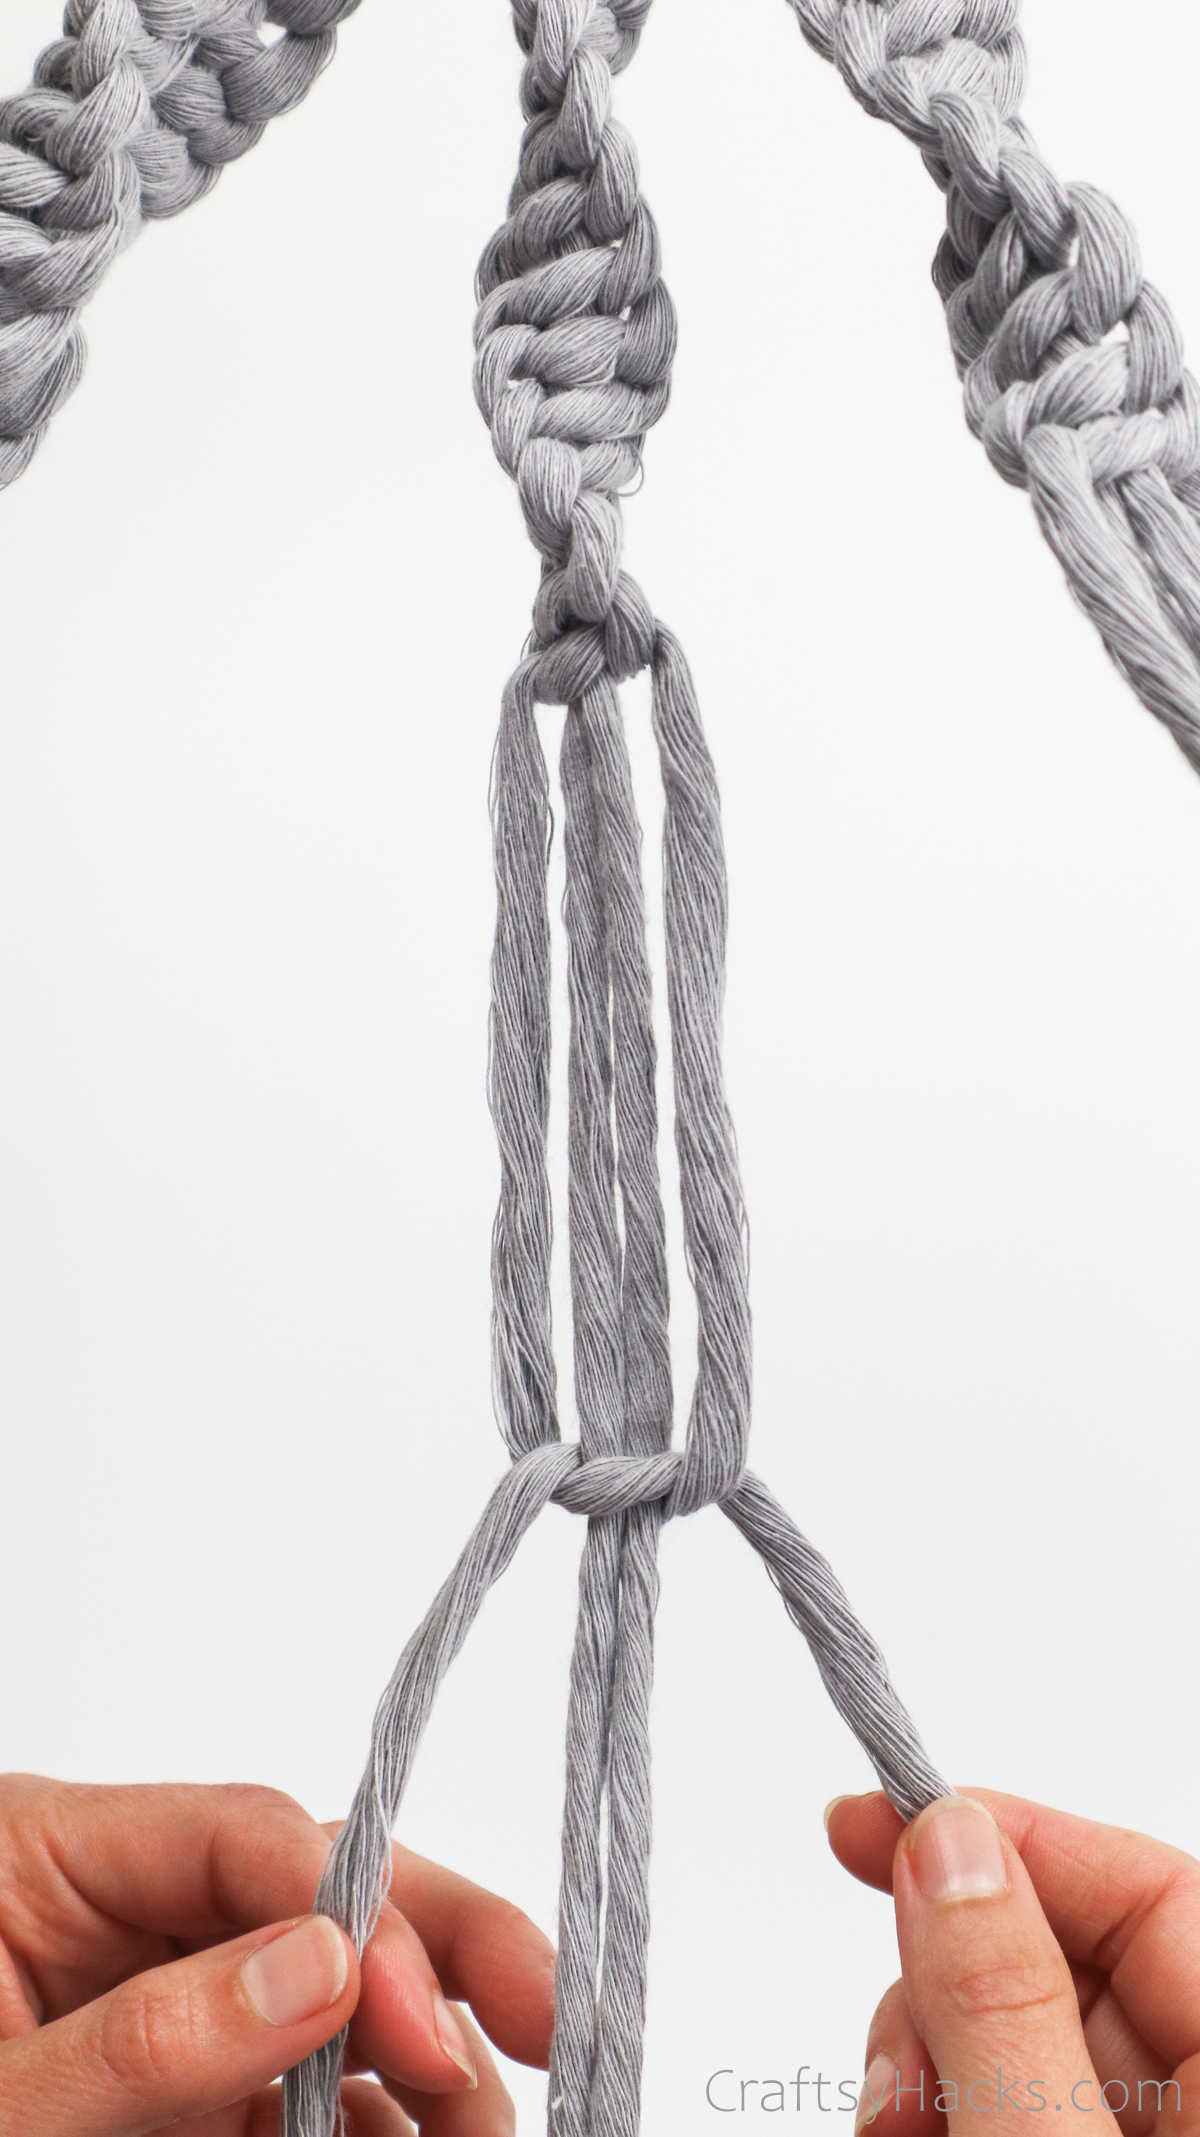
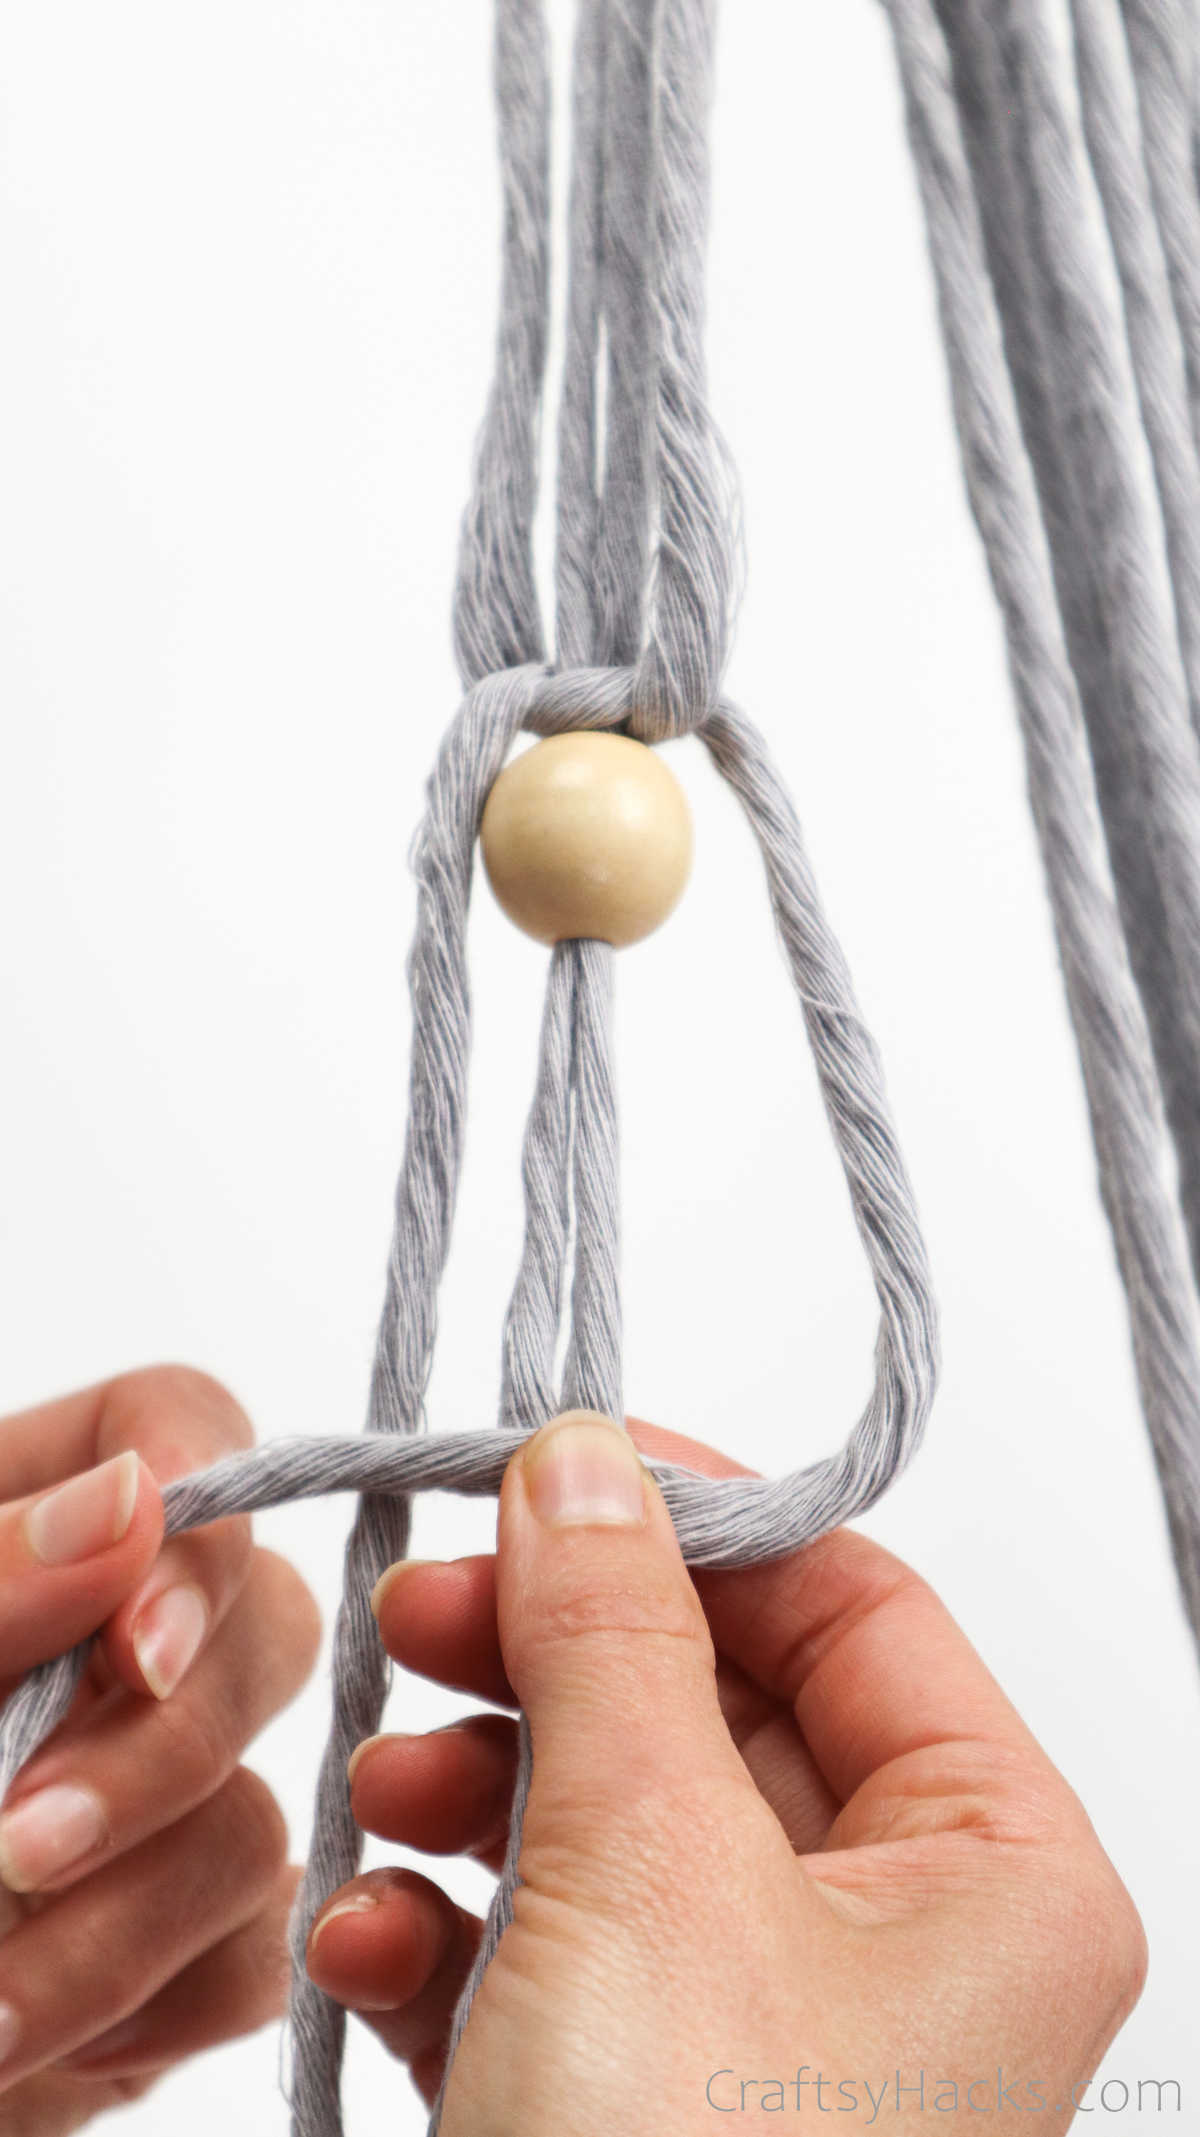
Grab a bead and pull the two middle strands through the hole.
Pull the bead up so it sits right below that half square knot.
Then, grab the right strand and make the second half of the square knot.
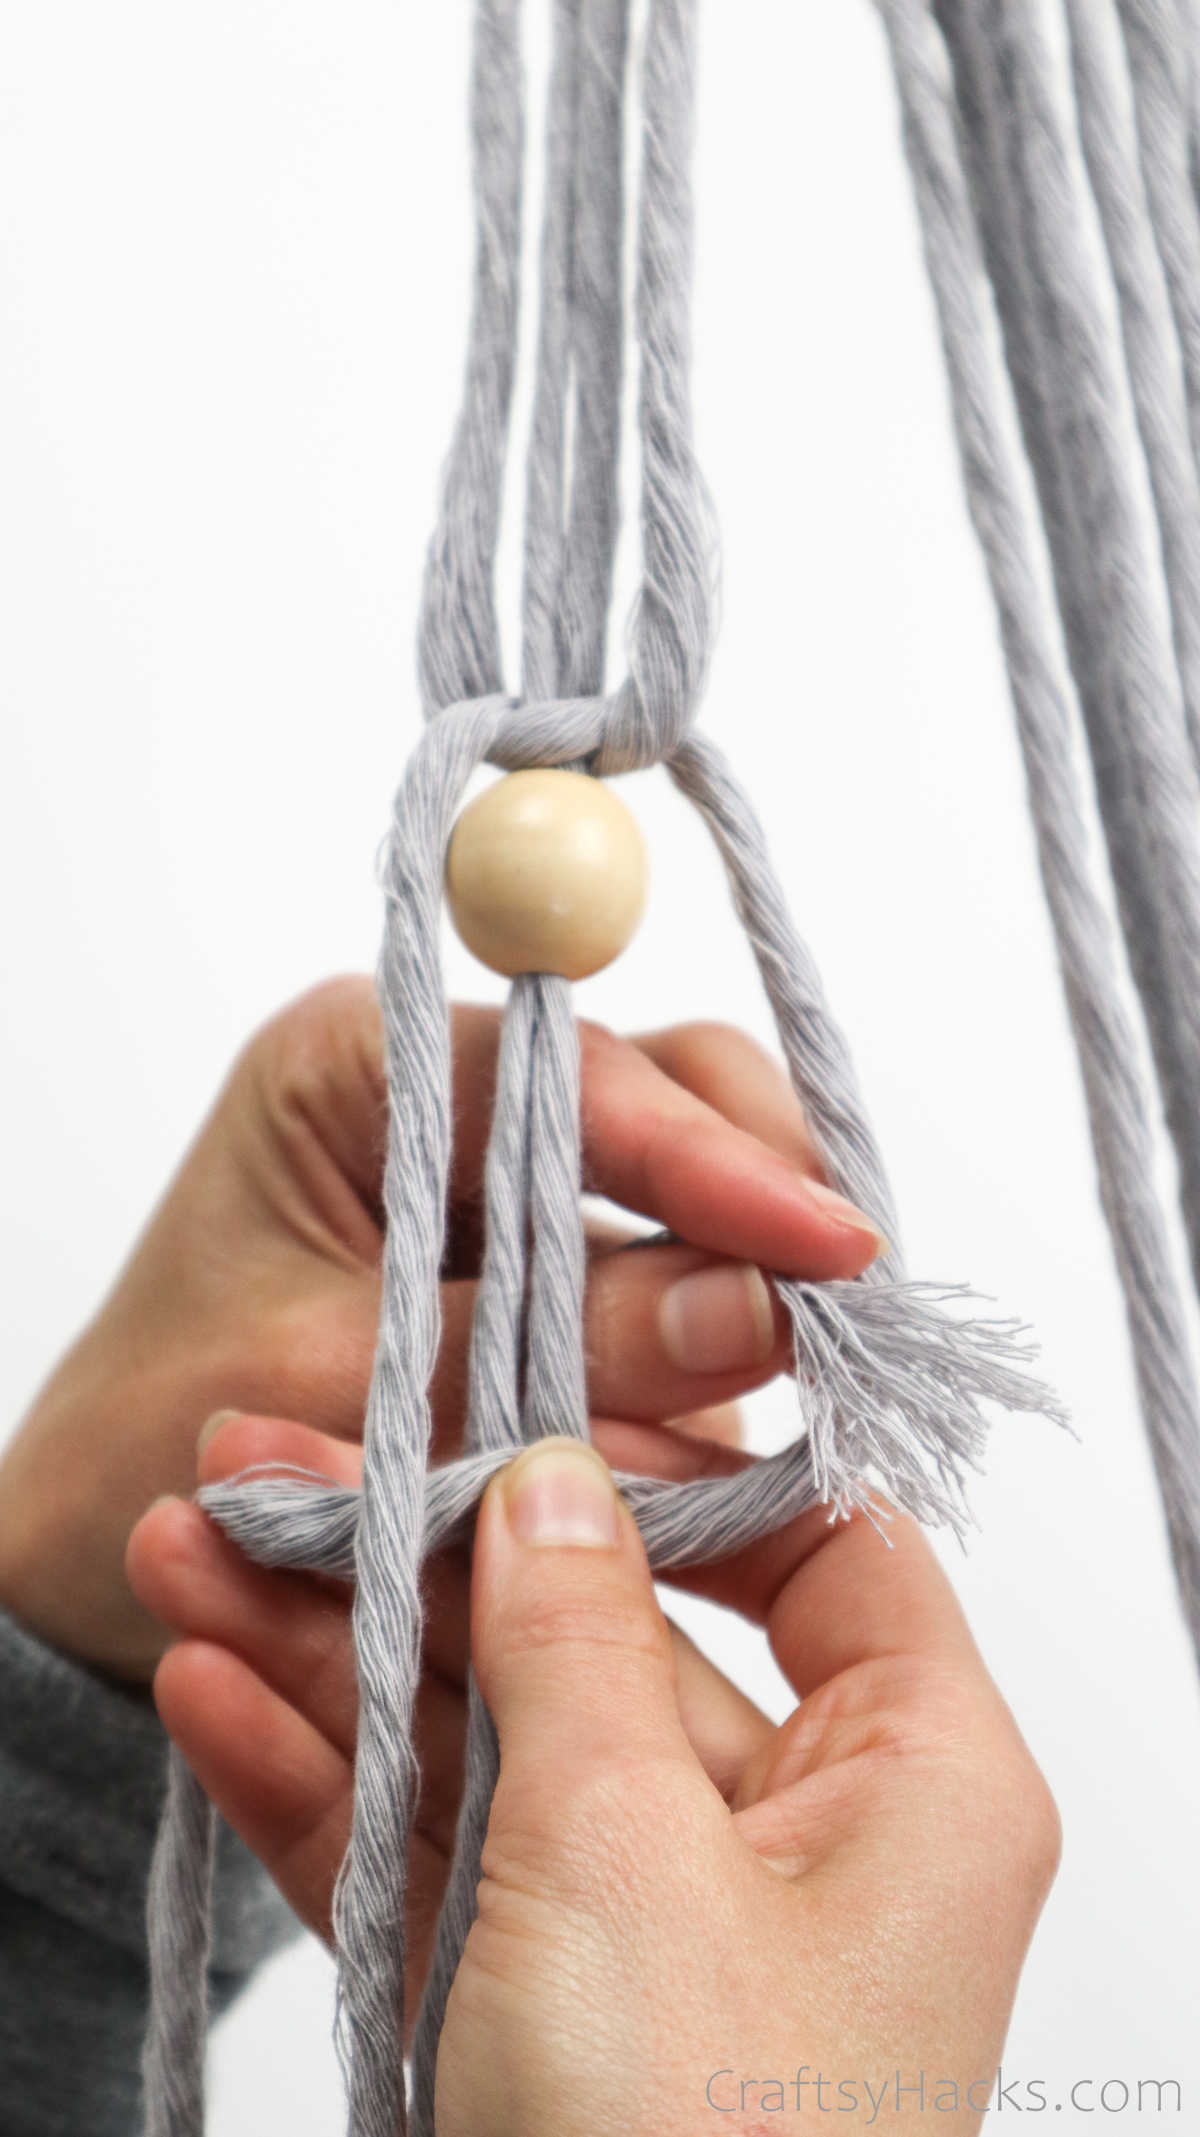
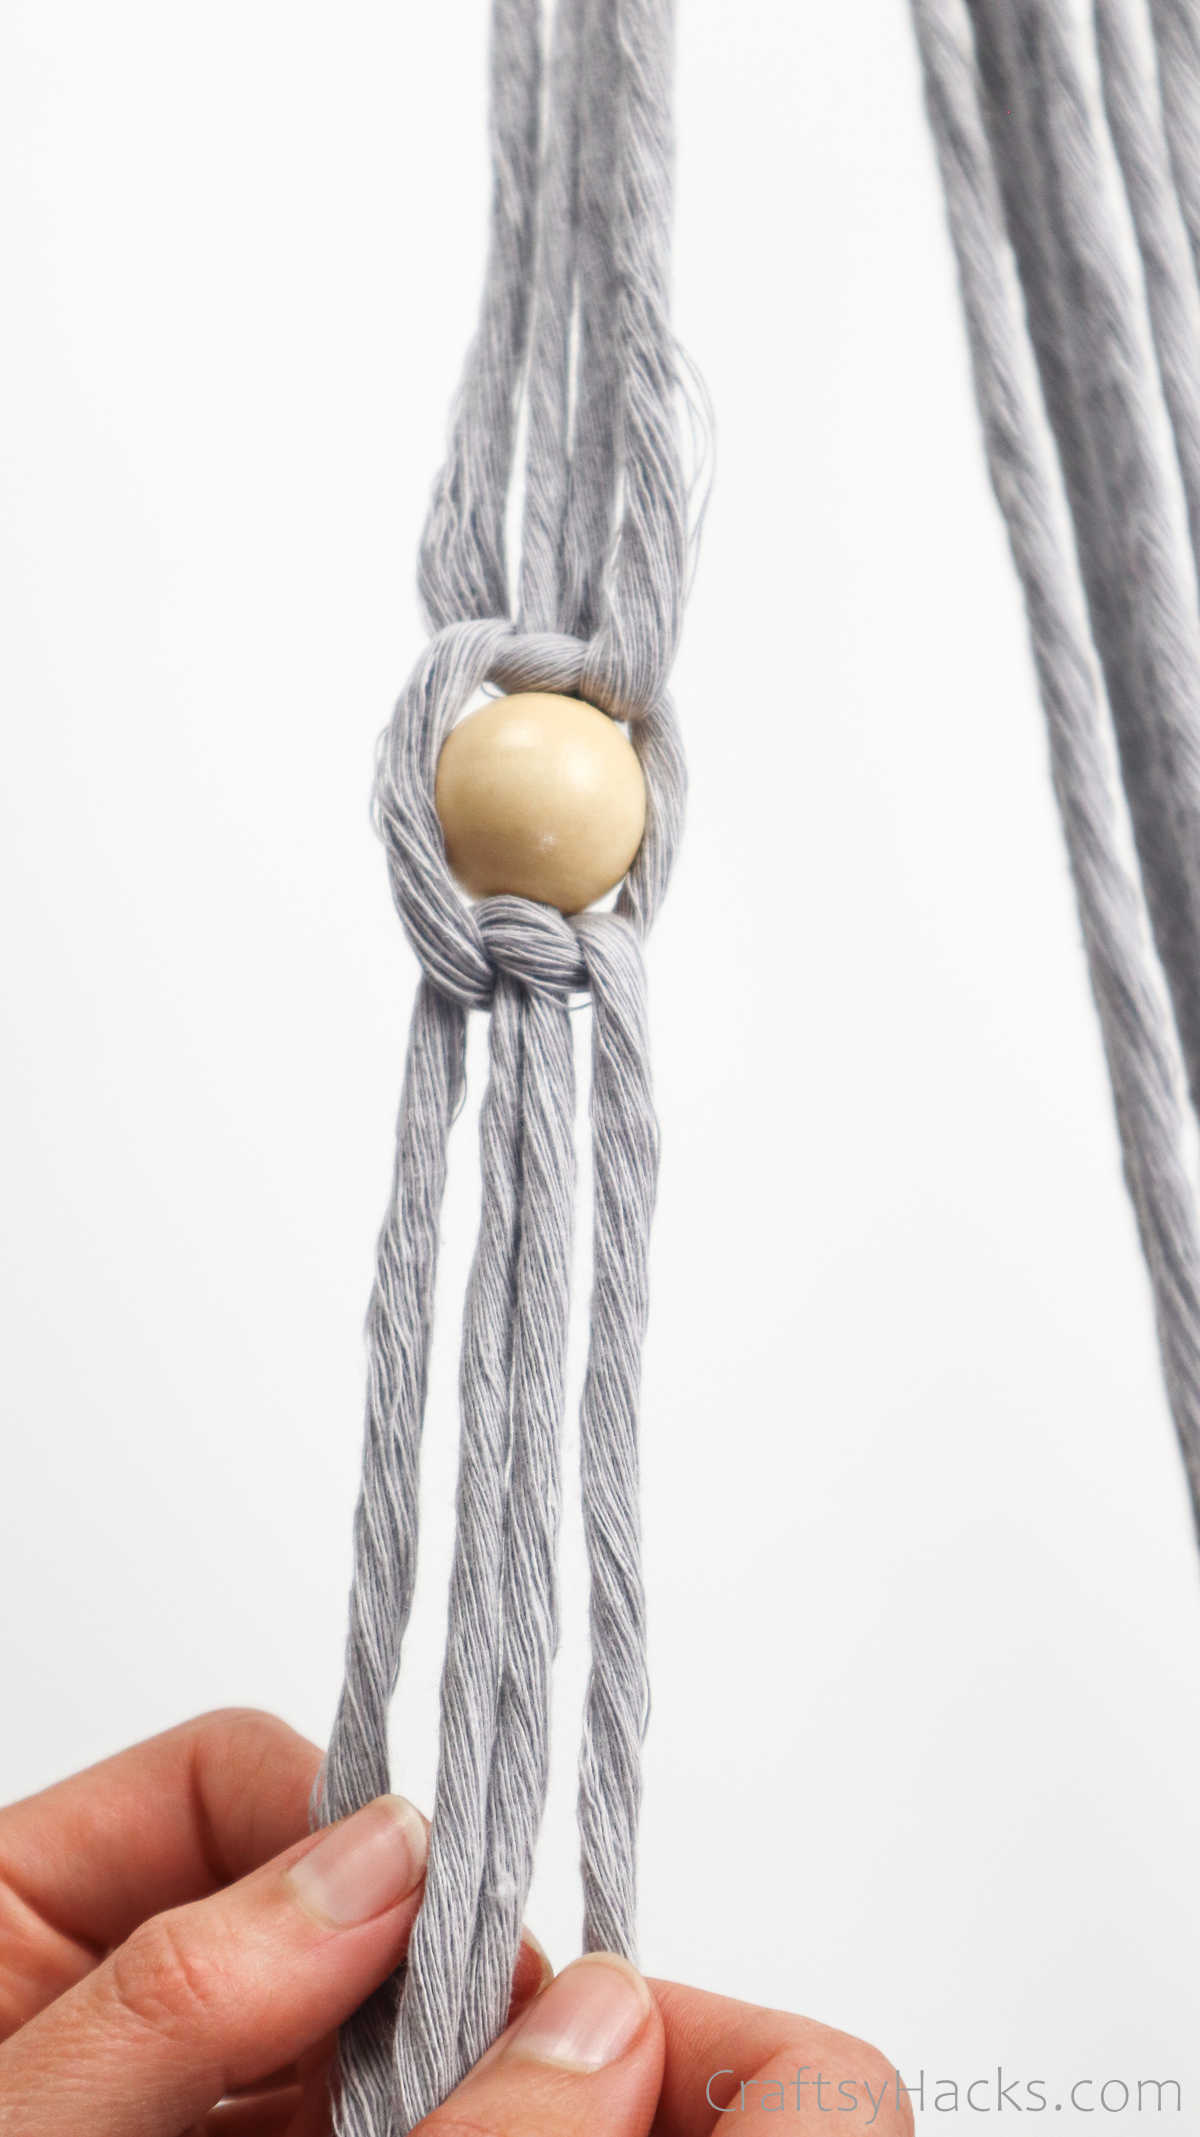
Tug both ends to secure the bead in place.
verify they are all properly aligned.
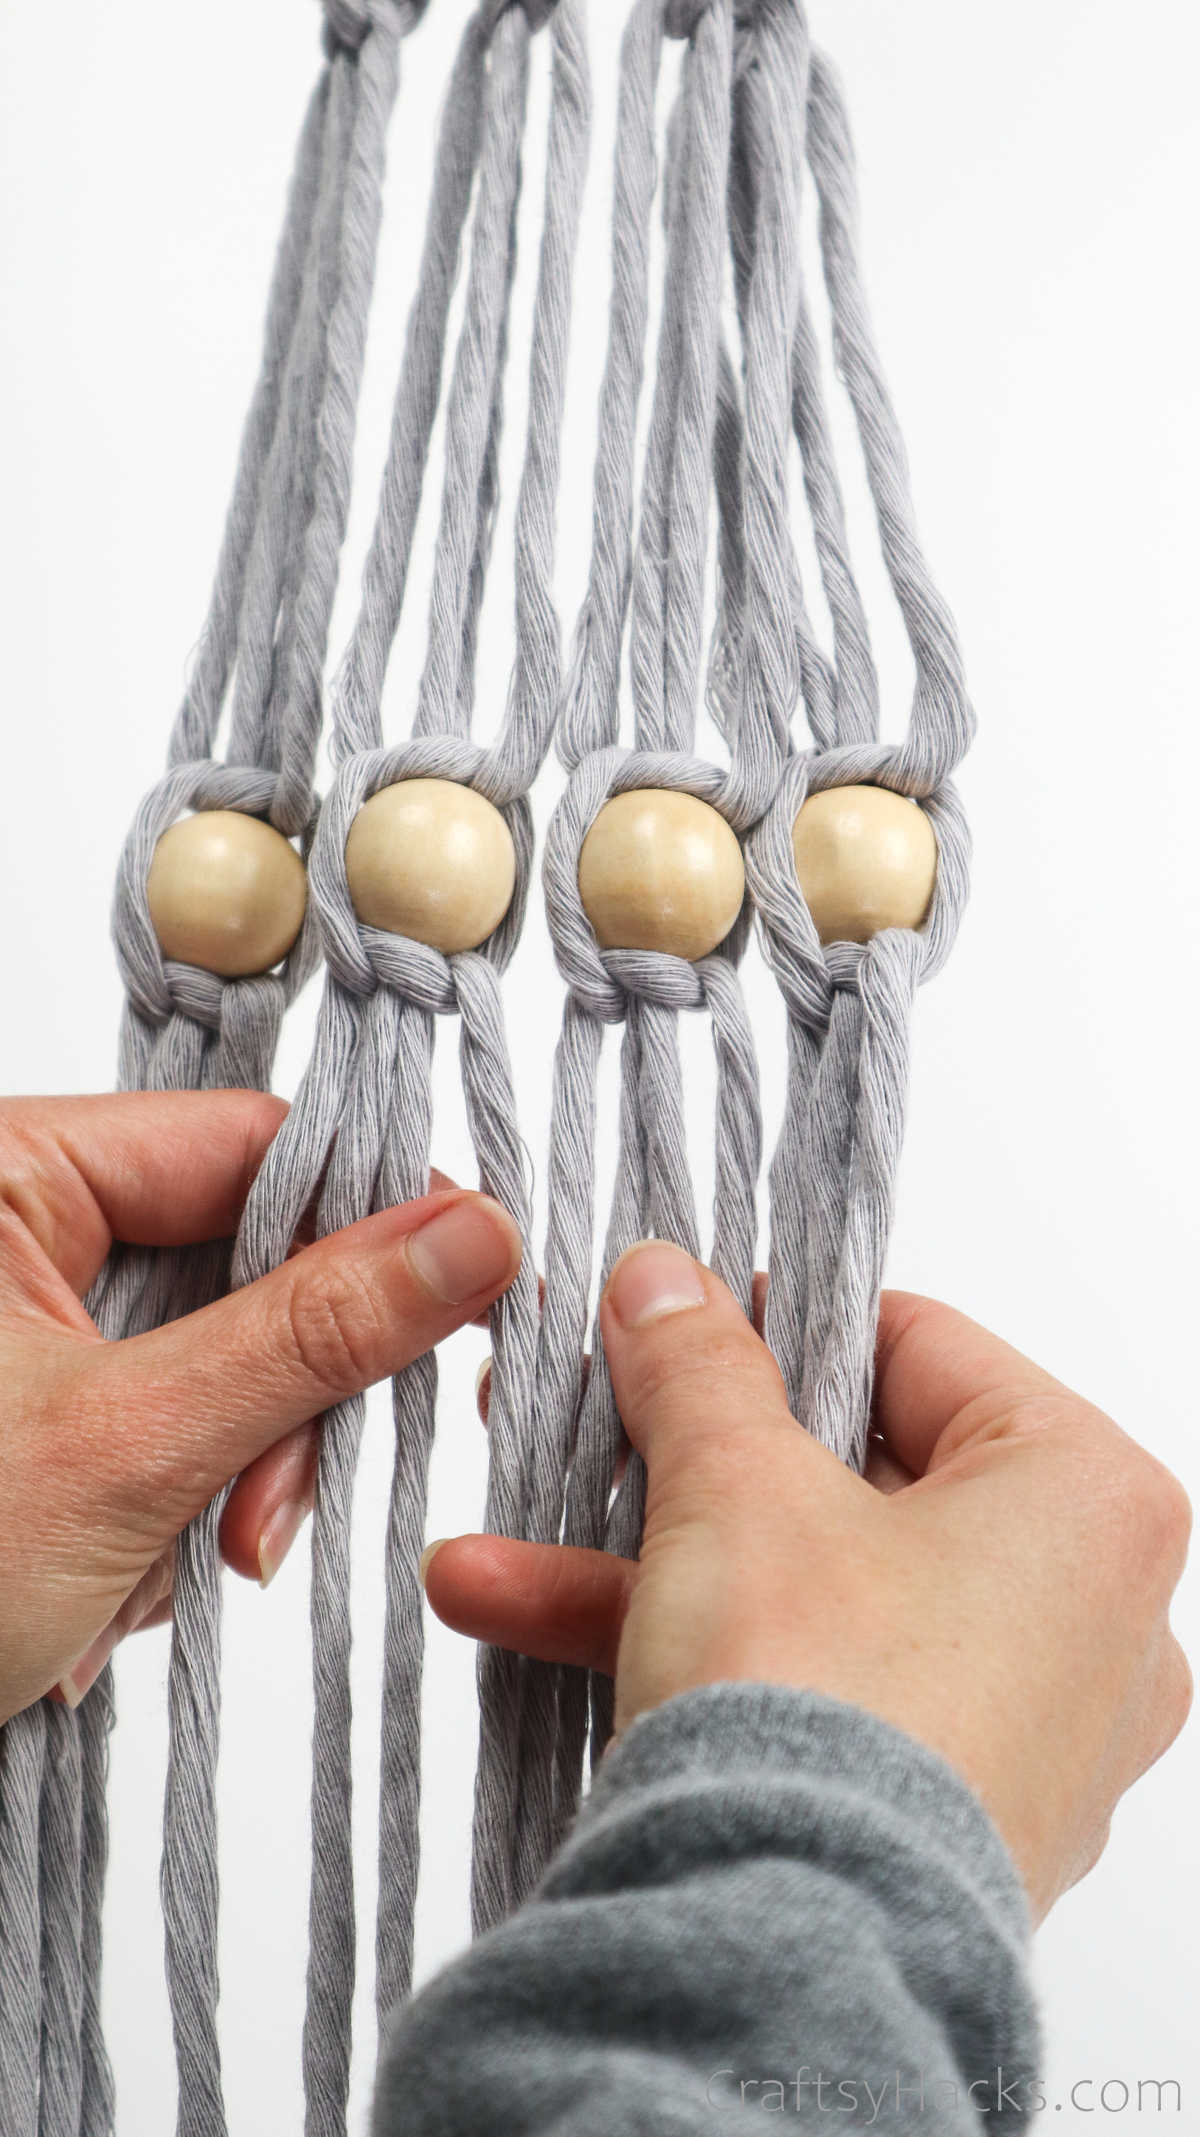
Leave a gap of 2 to 3 inches and gather one section of four strands.
Go ahead and make your spiraling knots, as instructed.
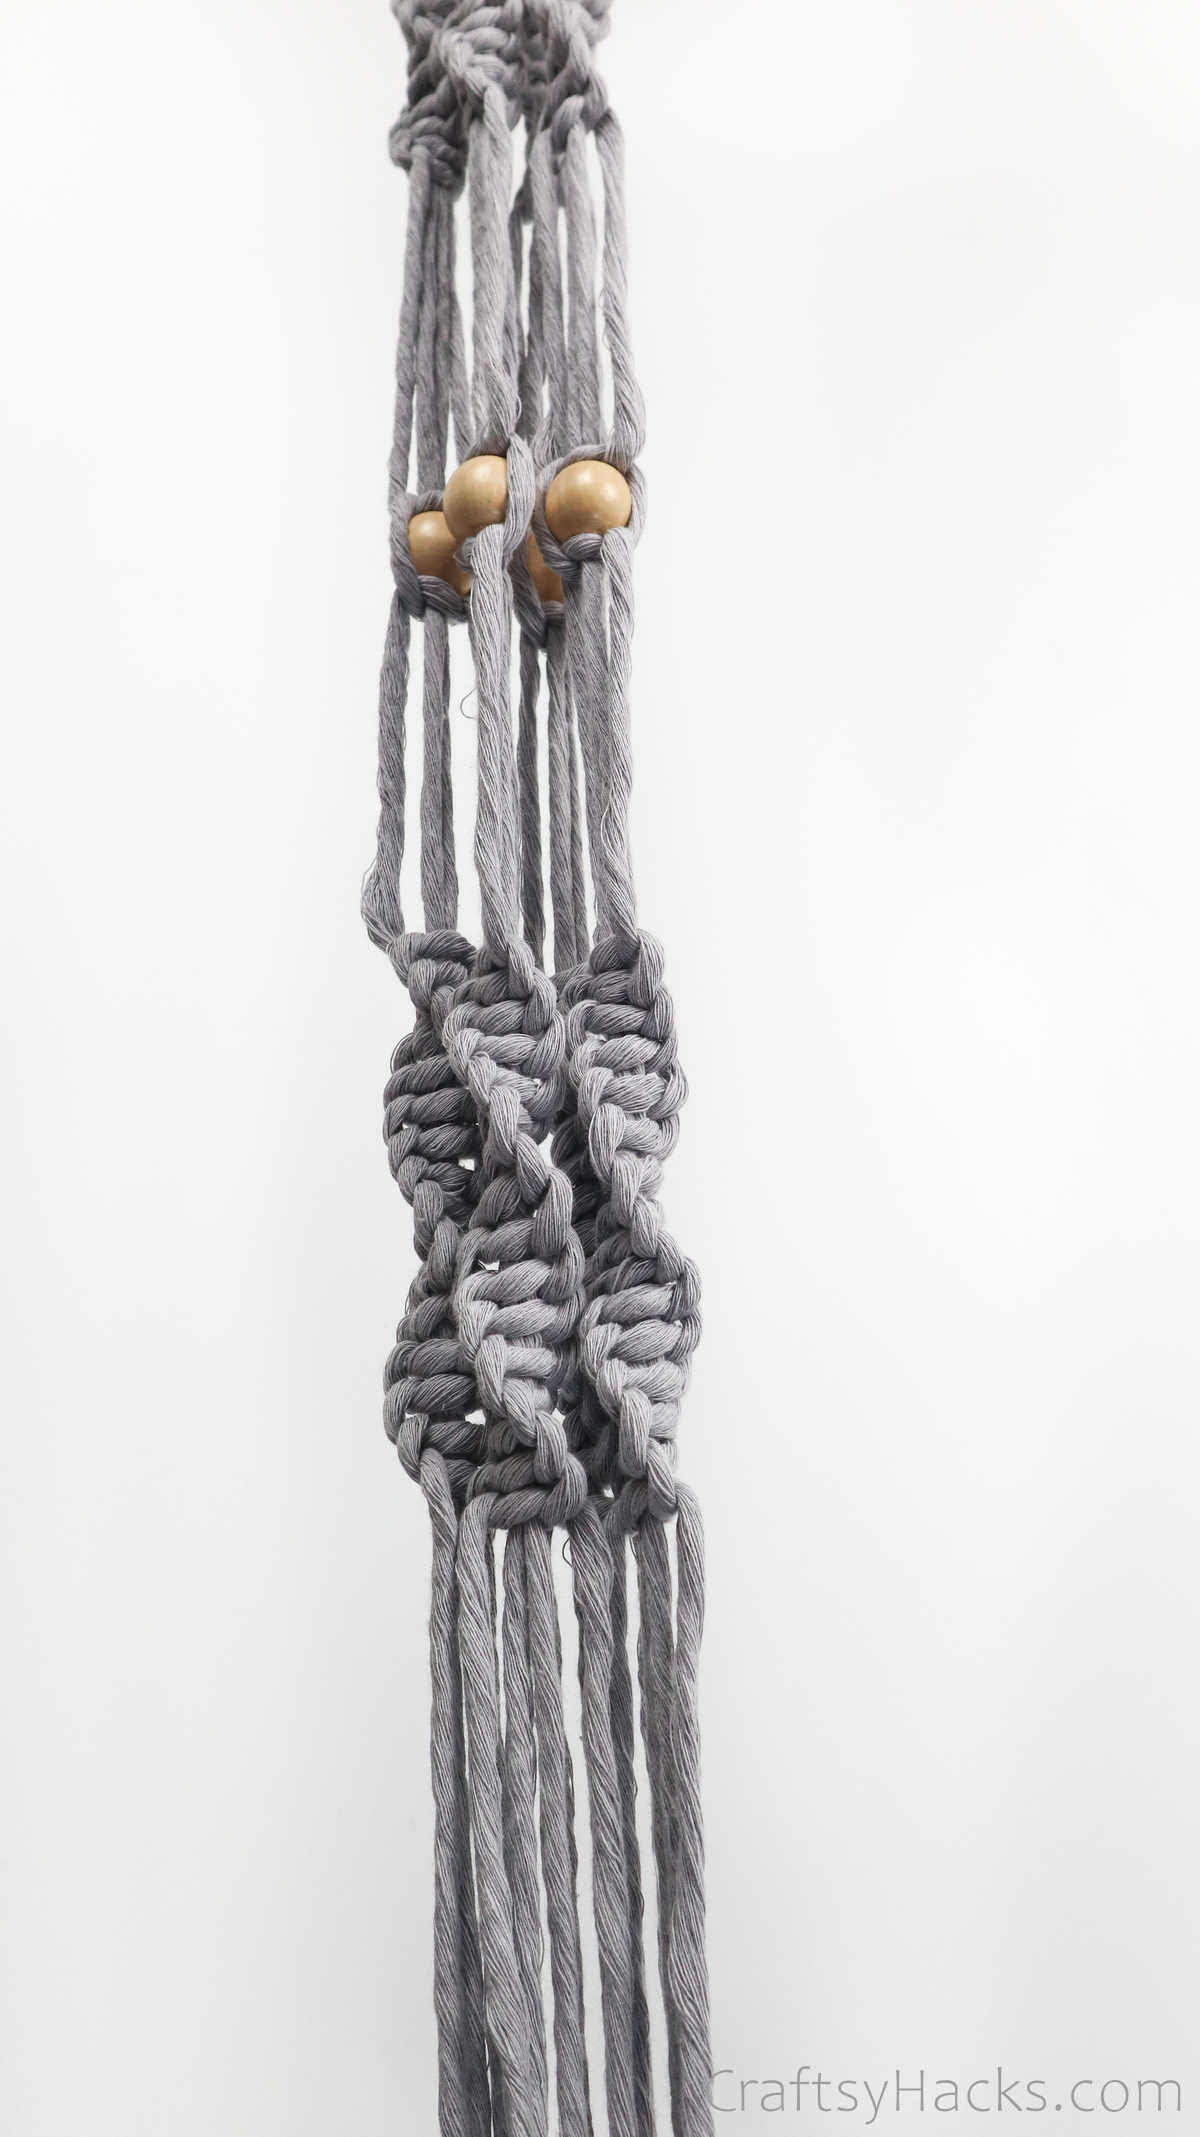
Step 11
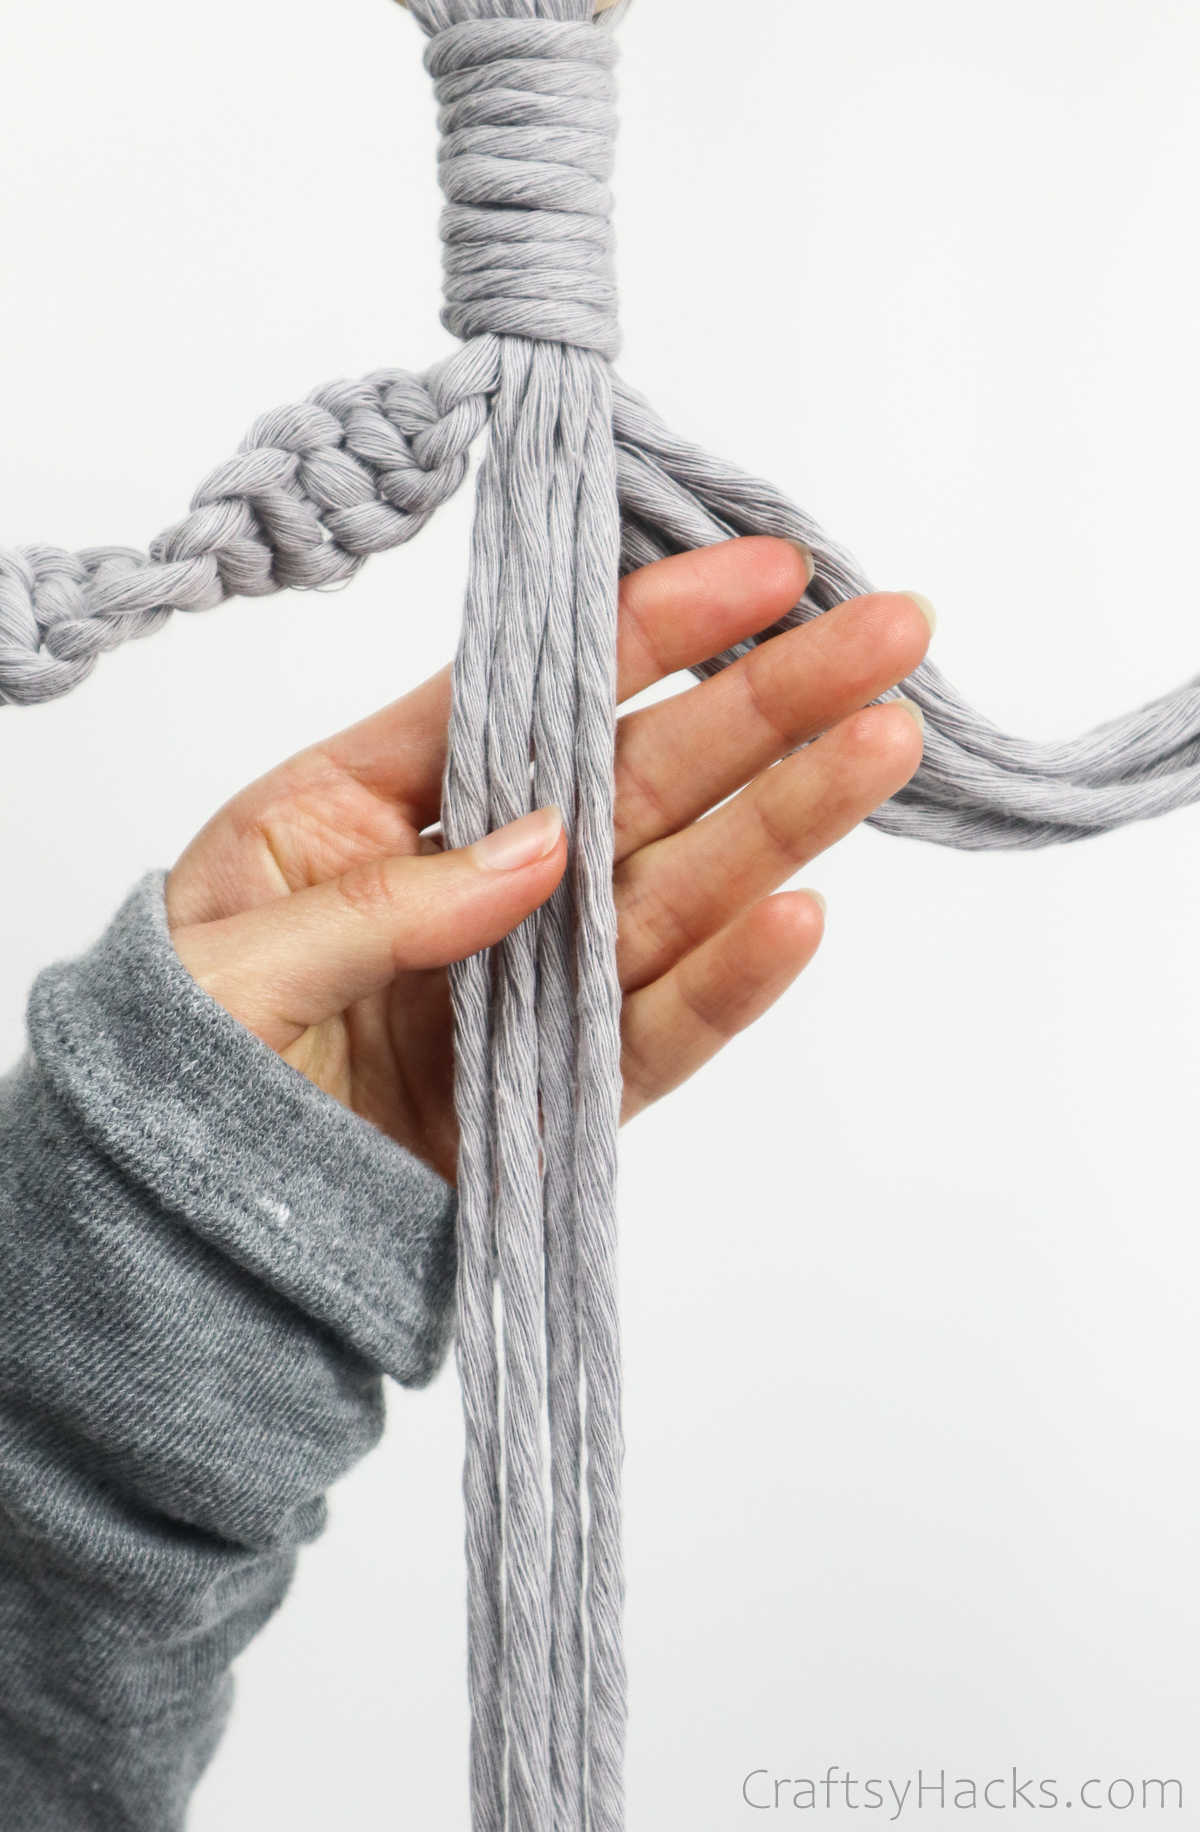
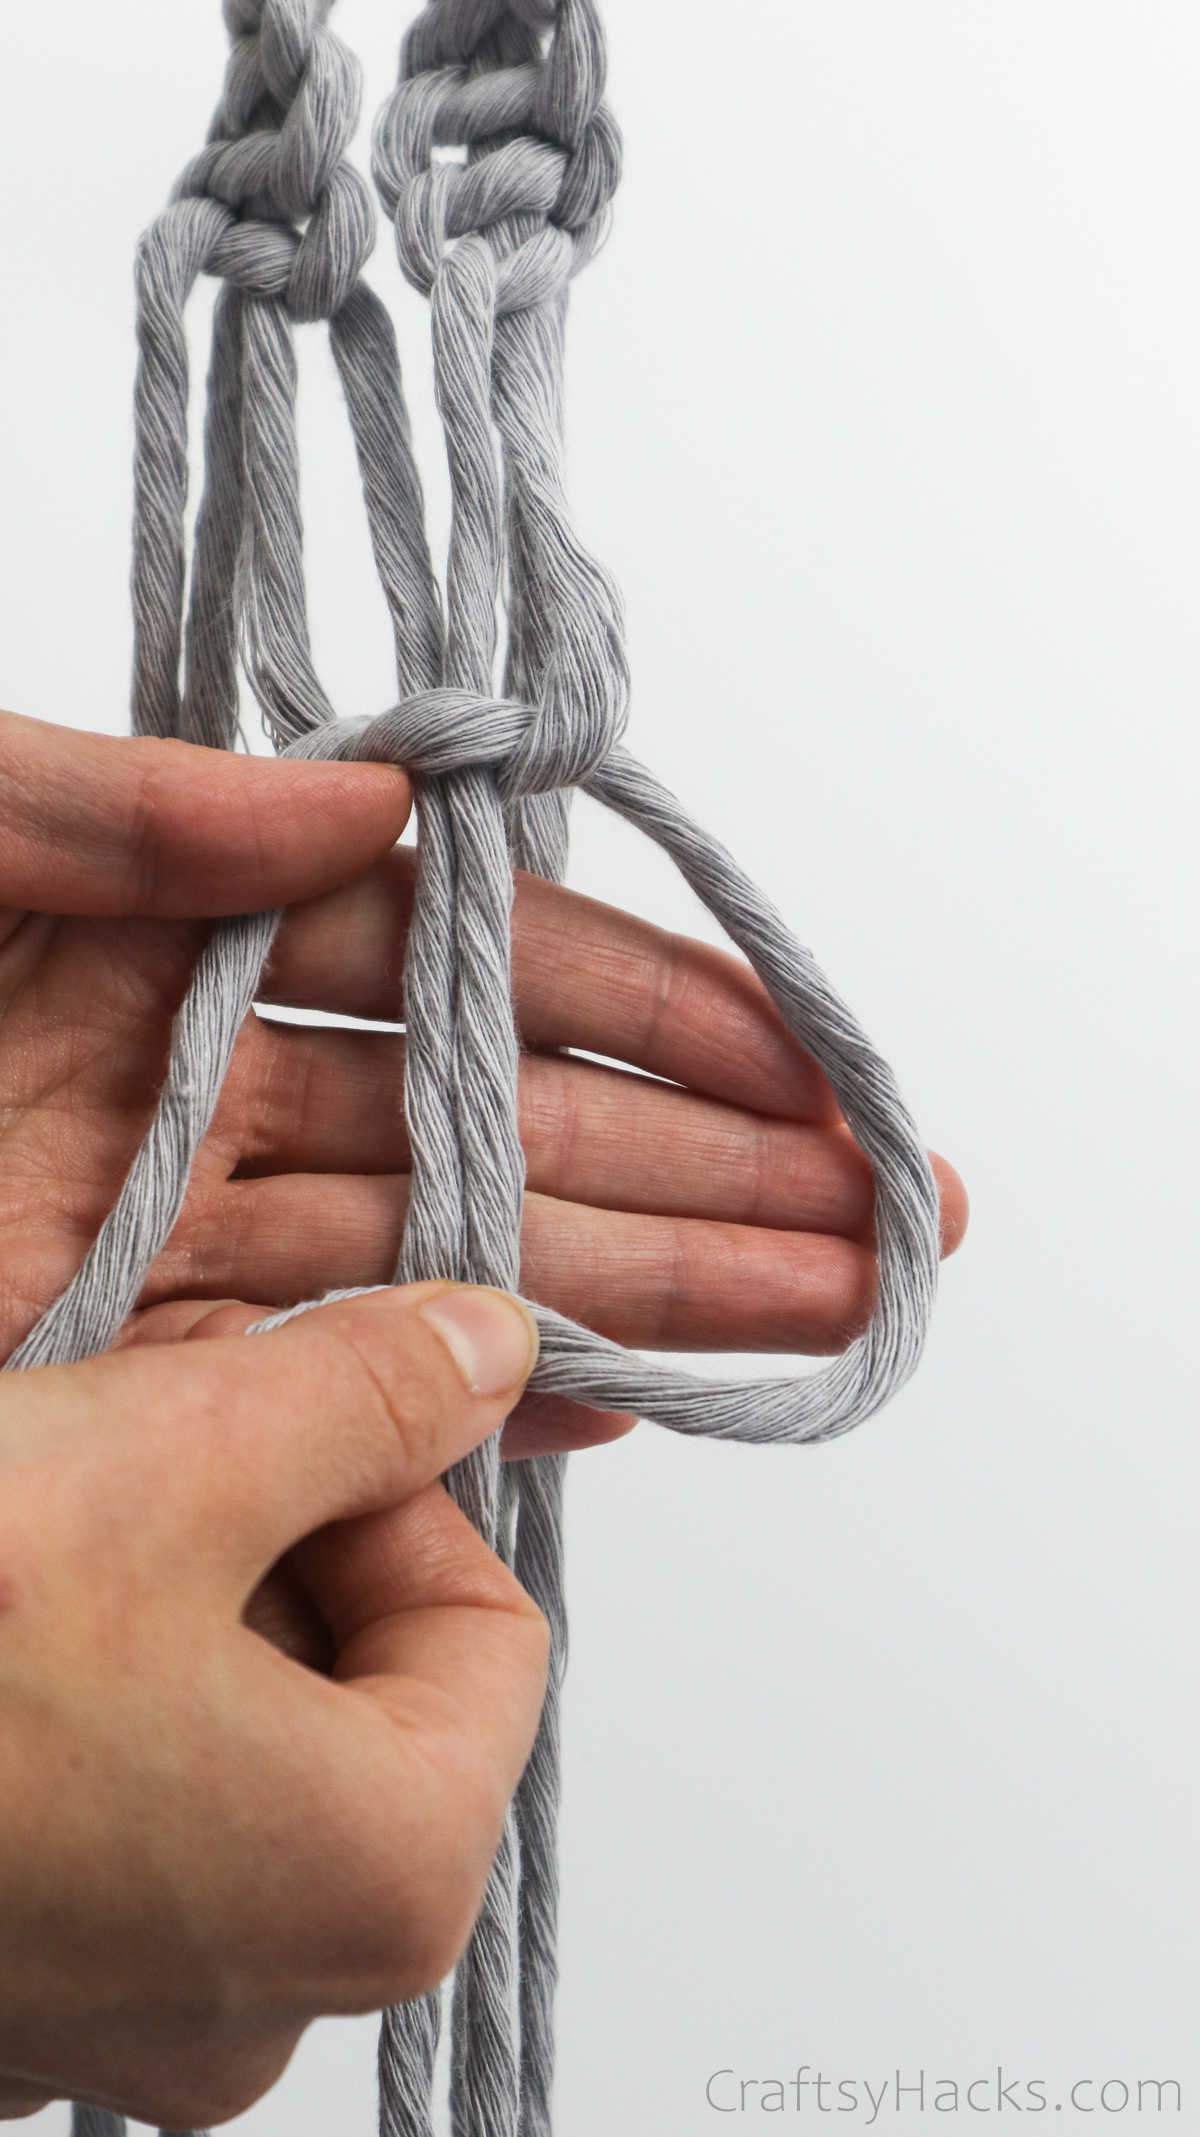
Now, grab two sections of spiraling knots.
For this next step, you will be working with the four strands in the middle.
Repeat this for the other two sections, as well.
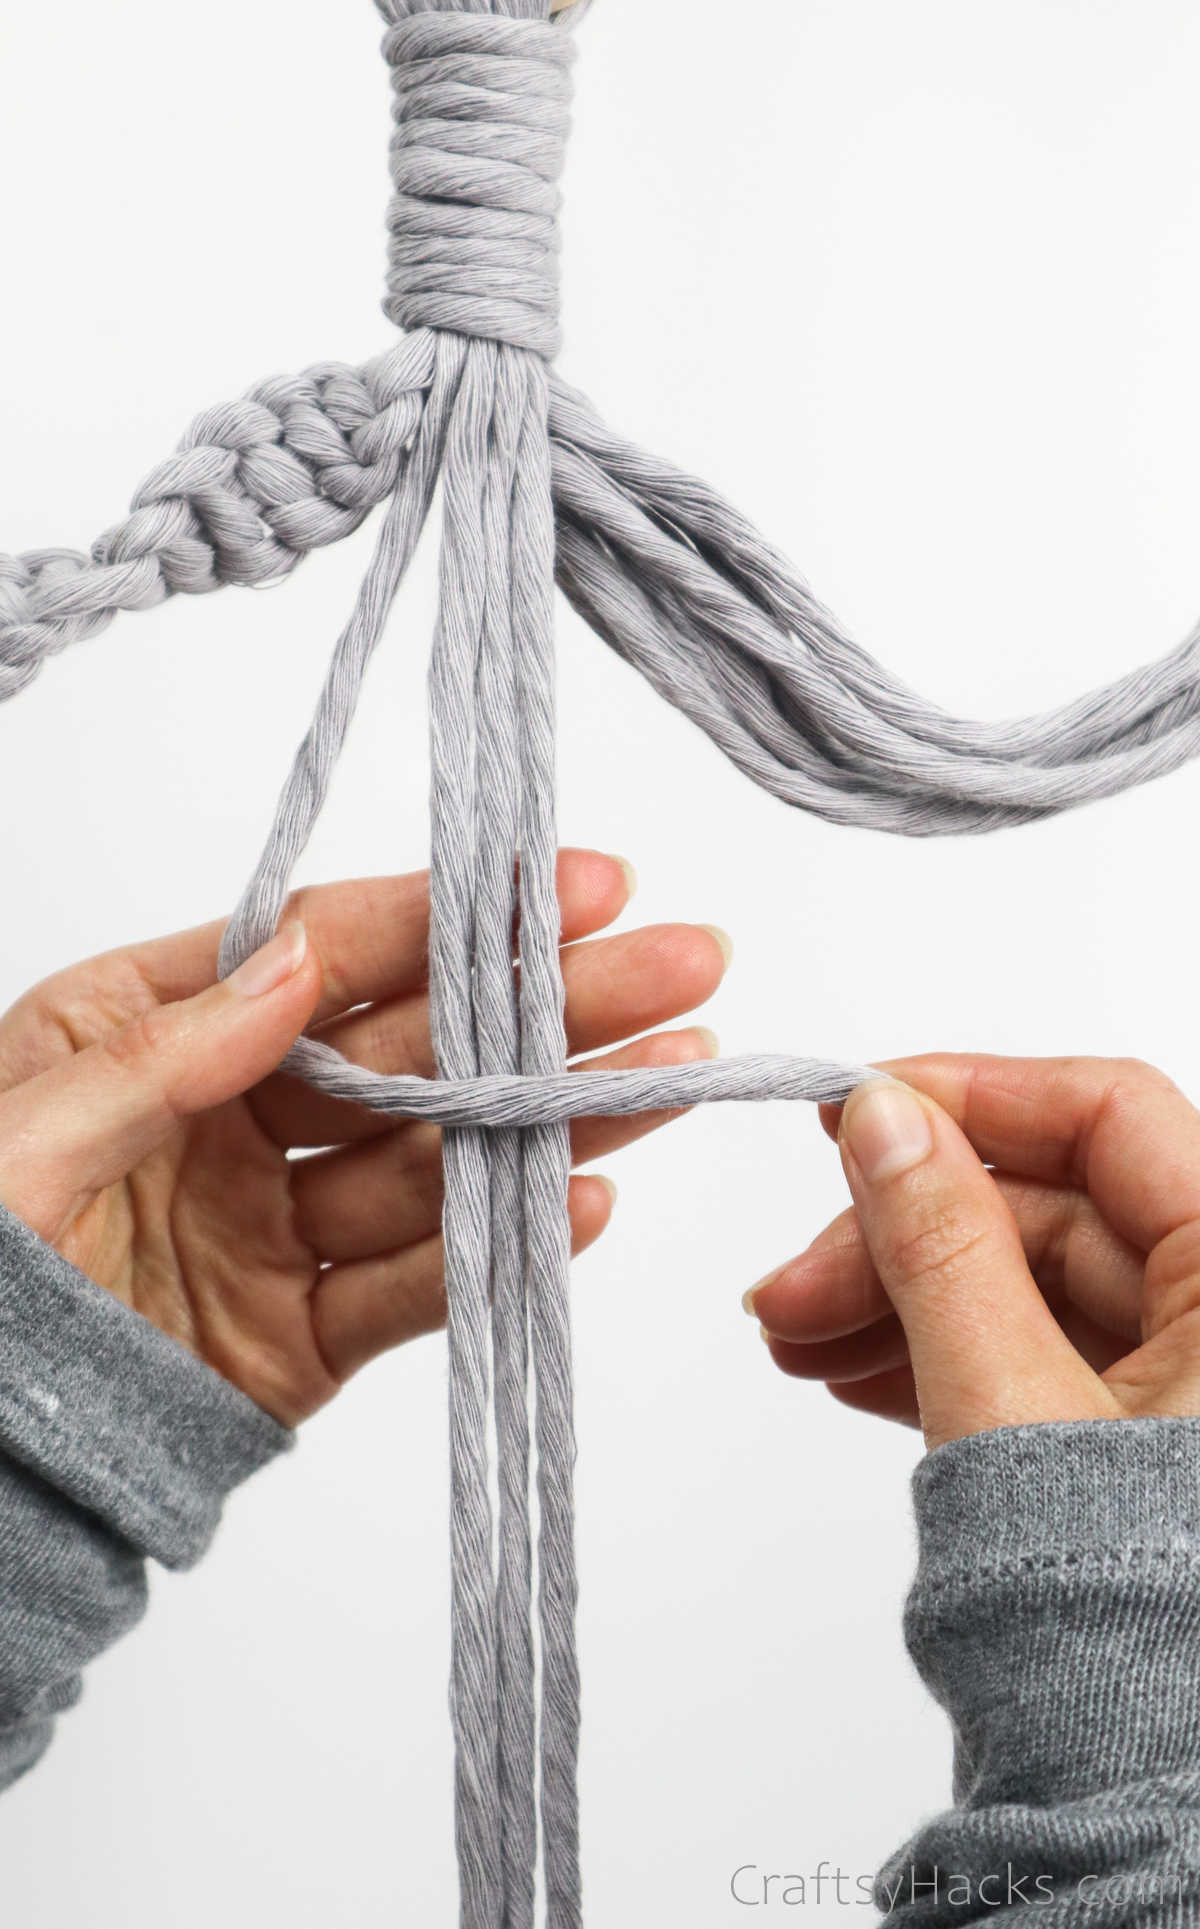
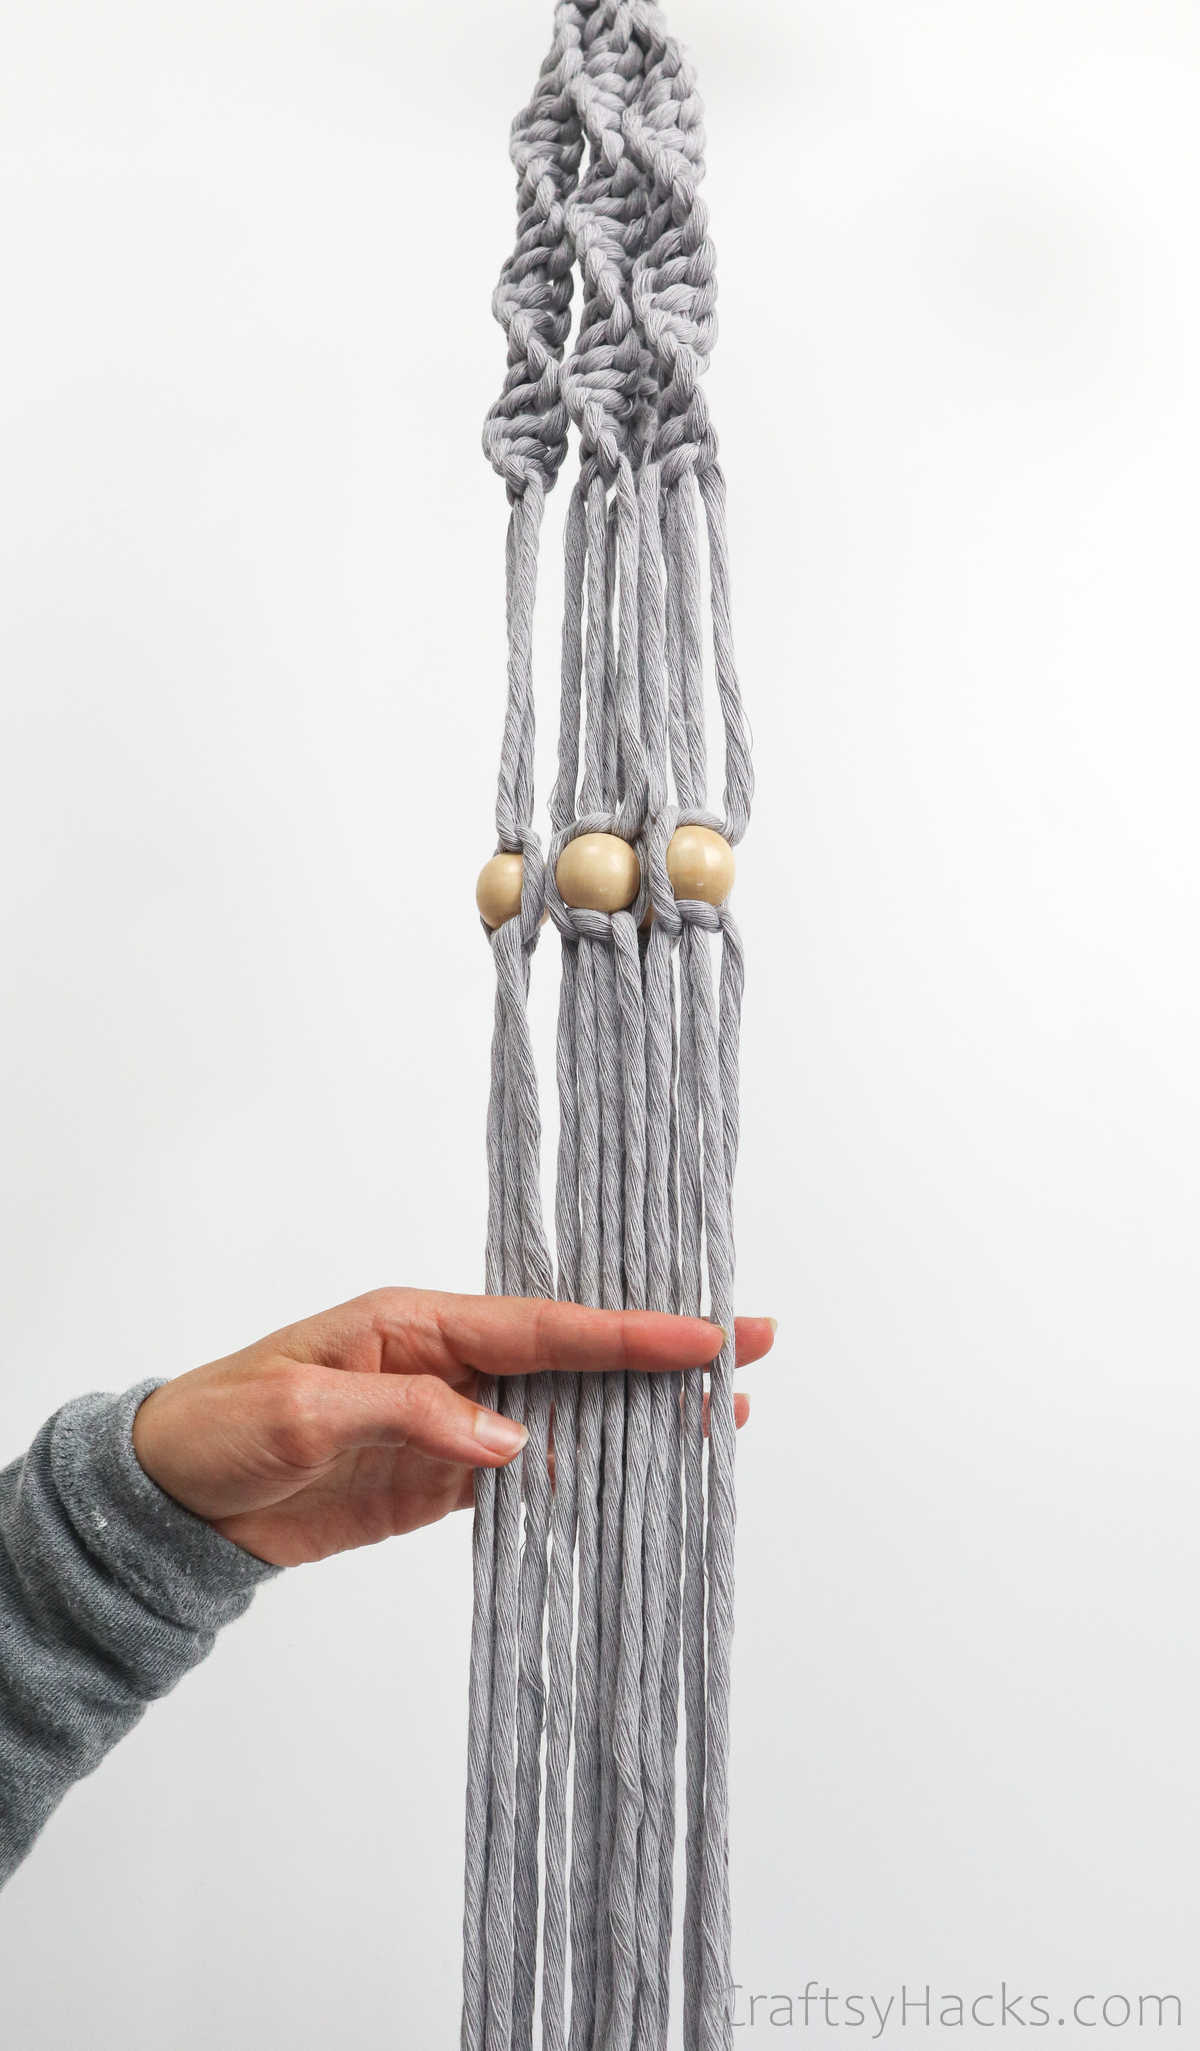
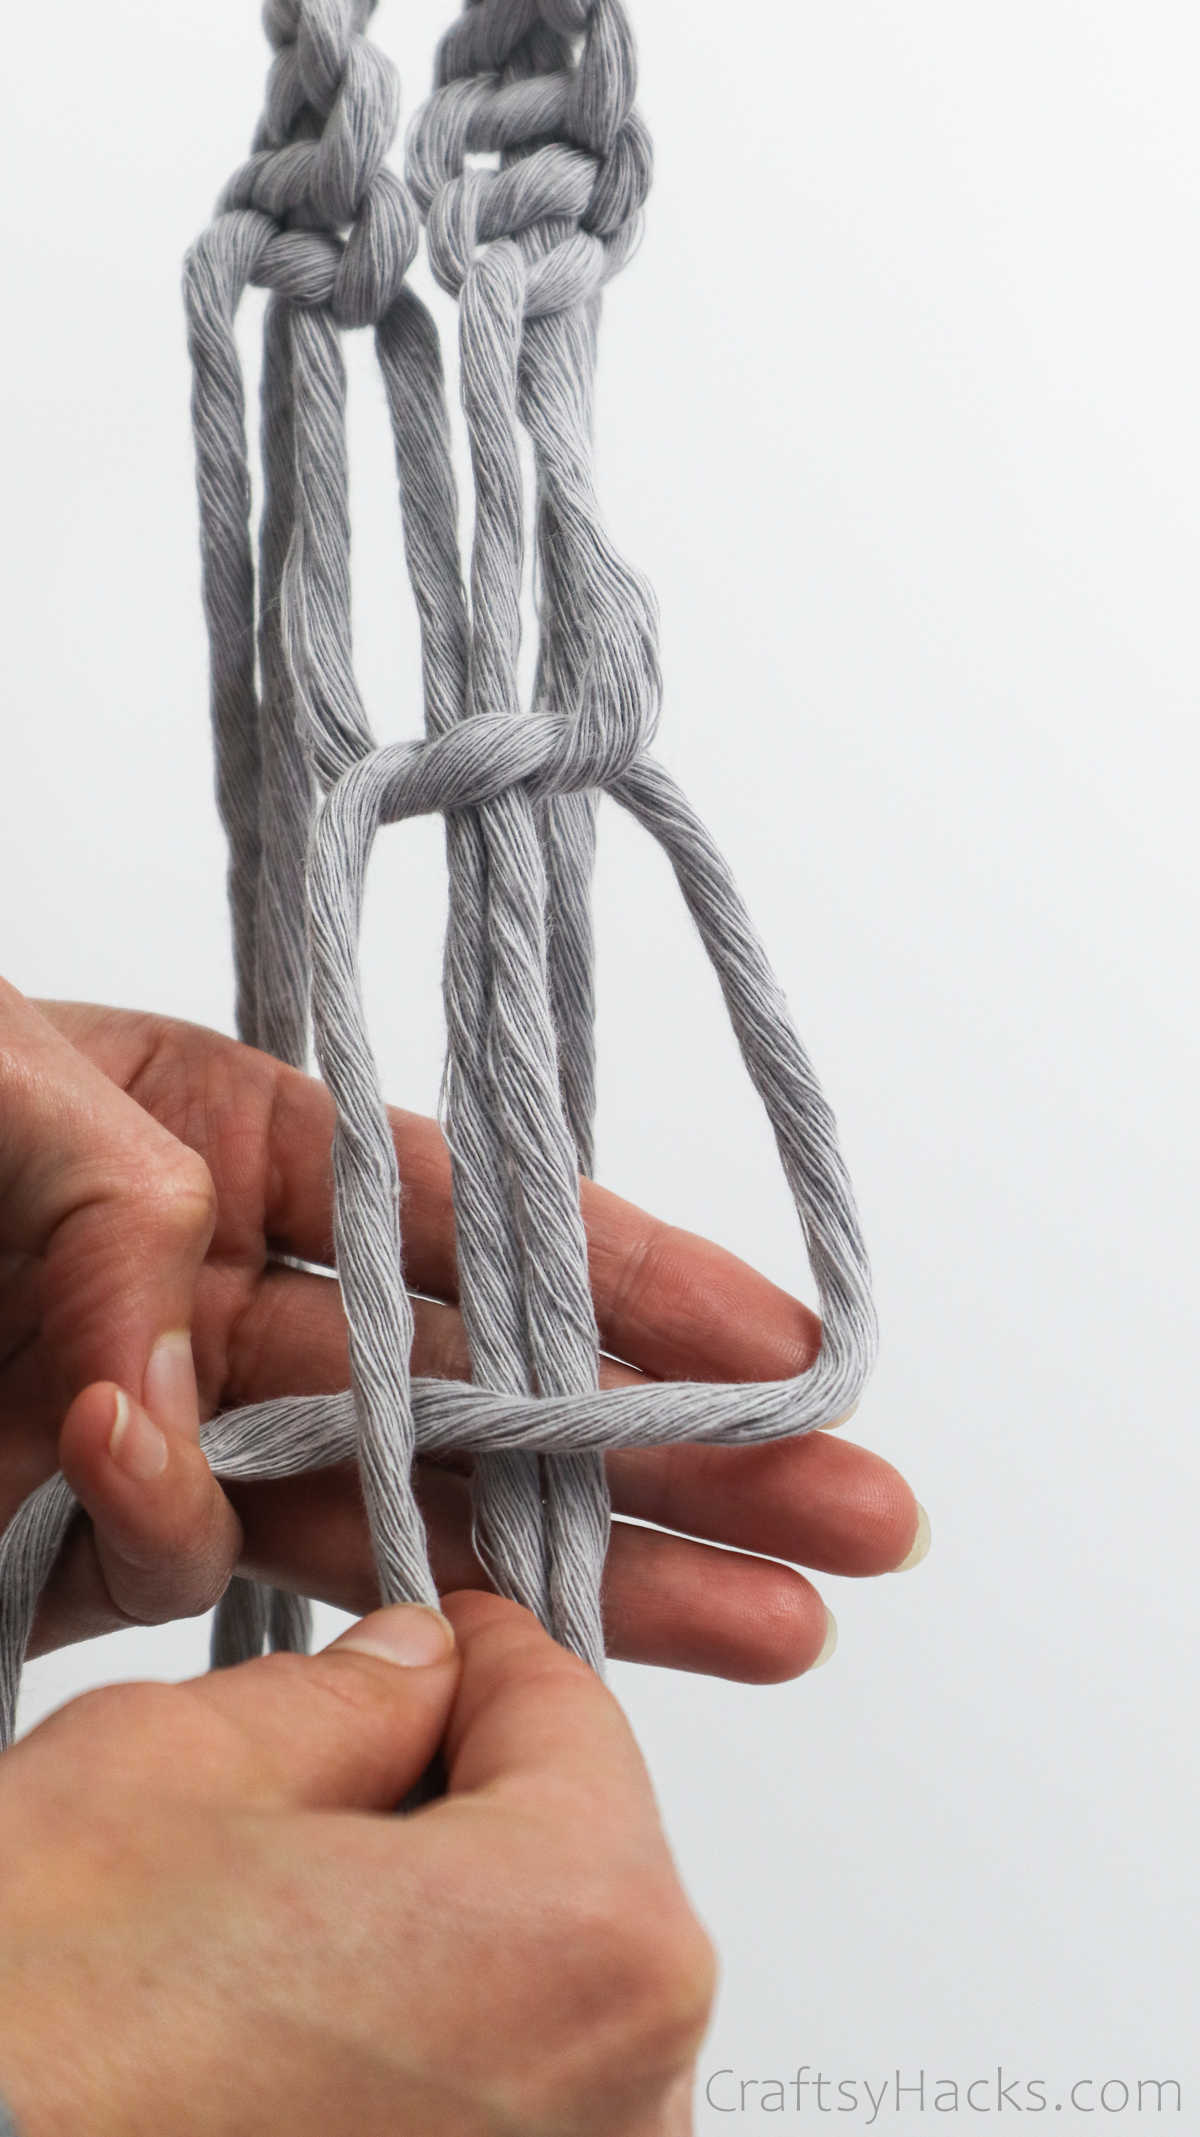
Step 12
Take the four cords in the middle and make a square knot.
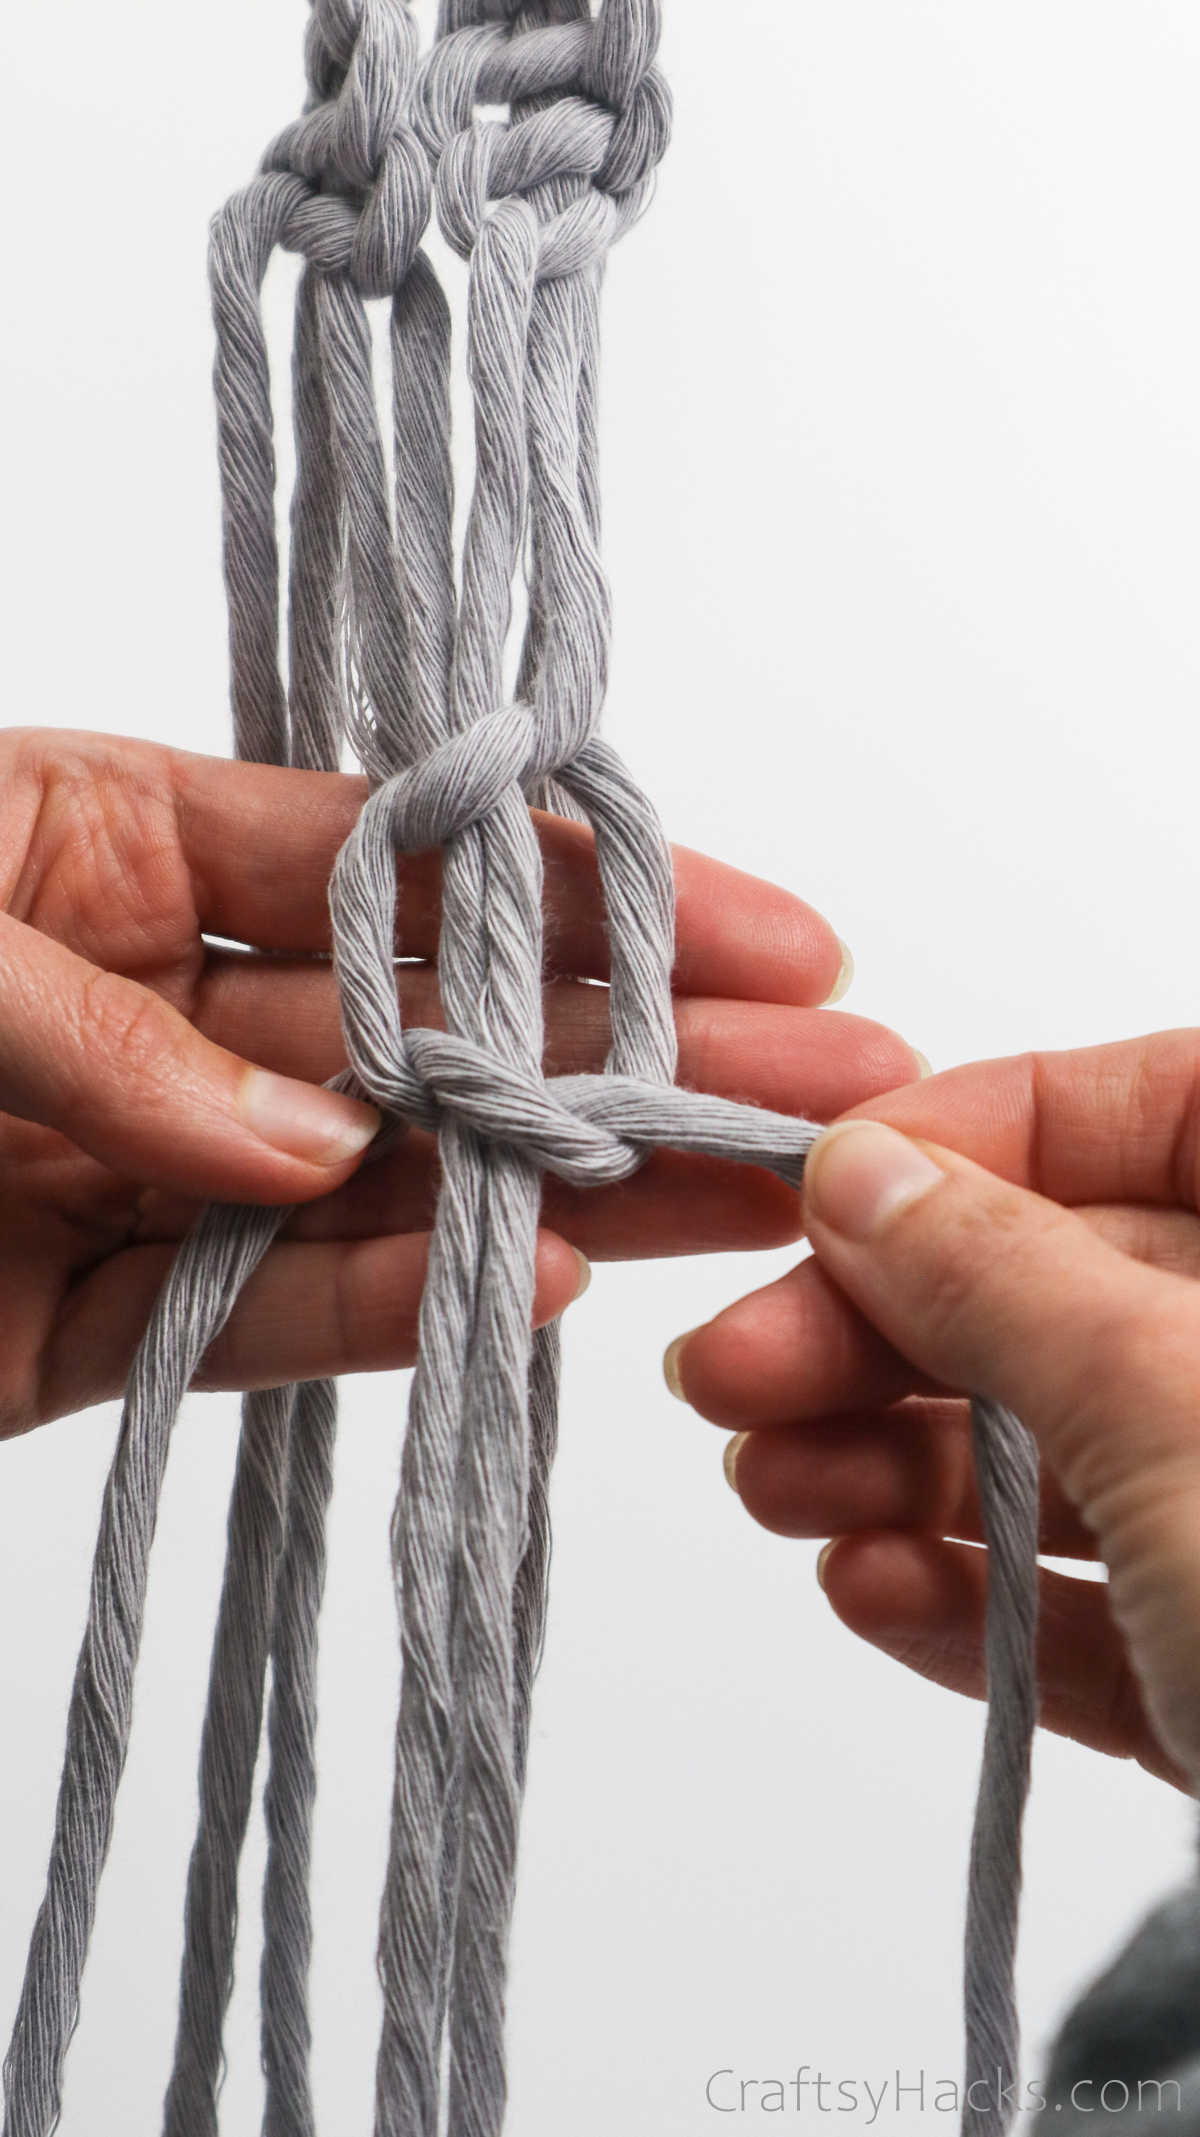
Step 13
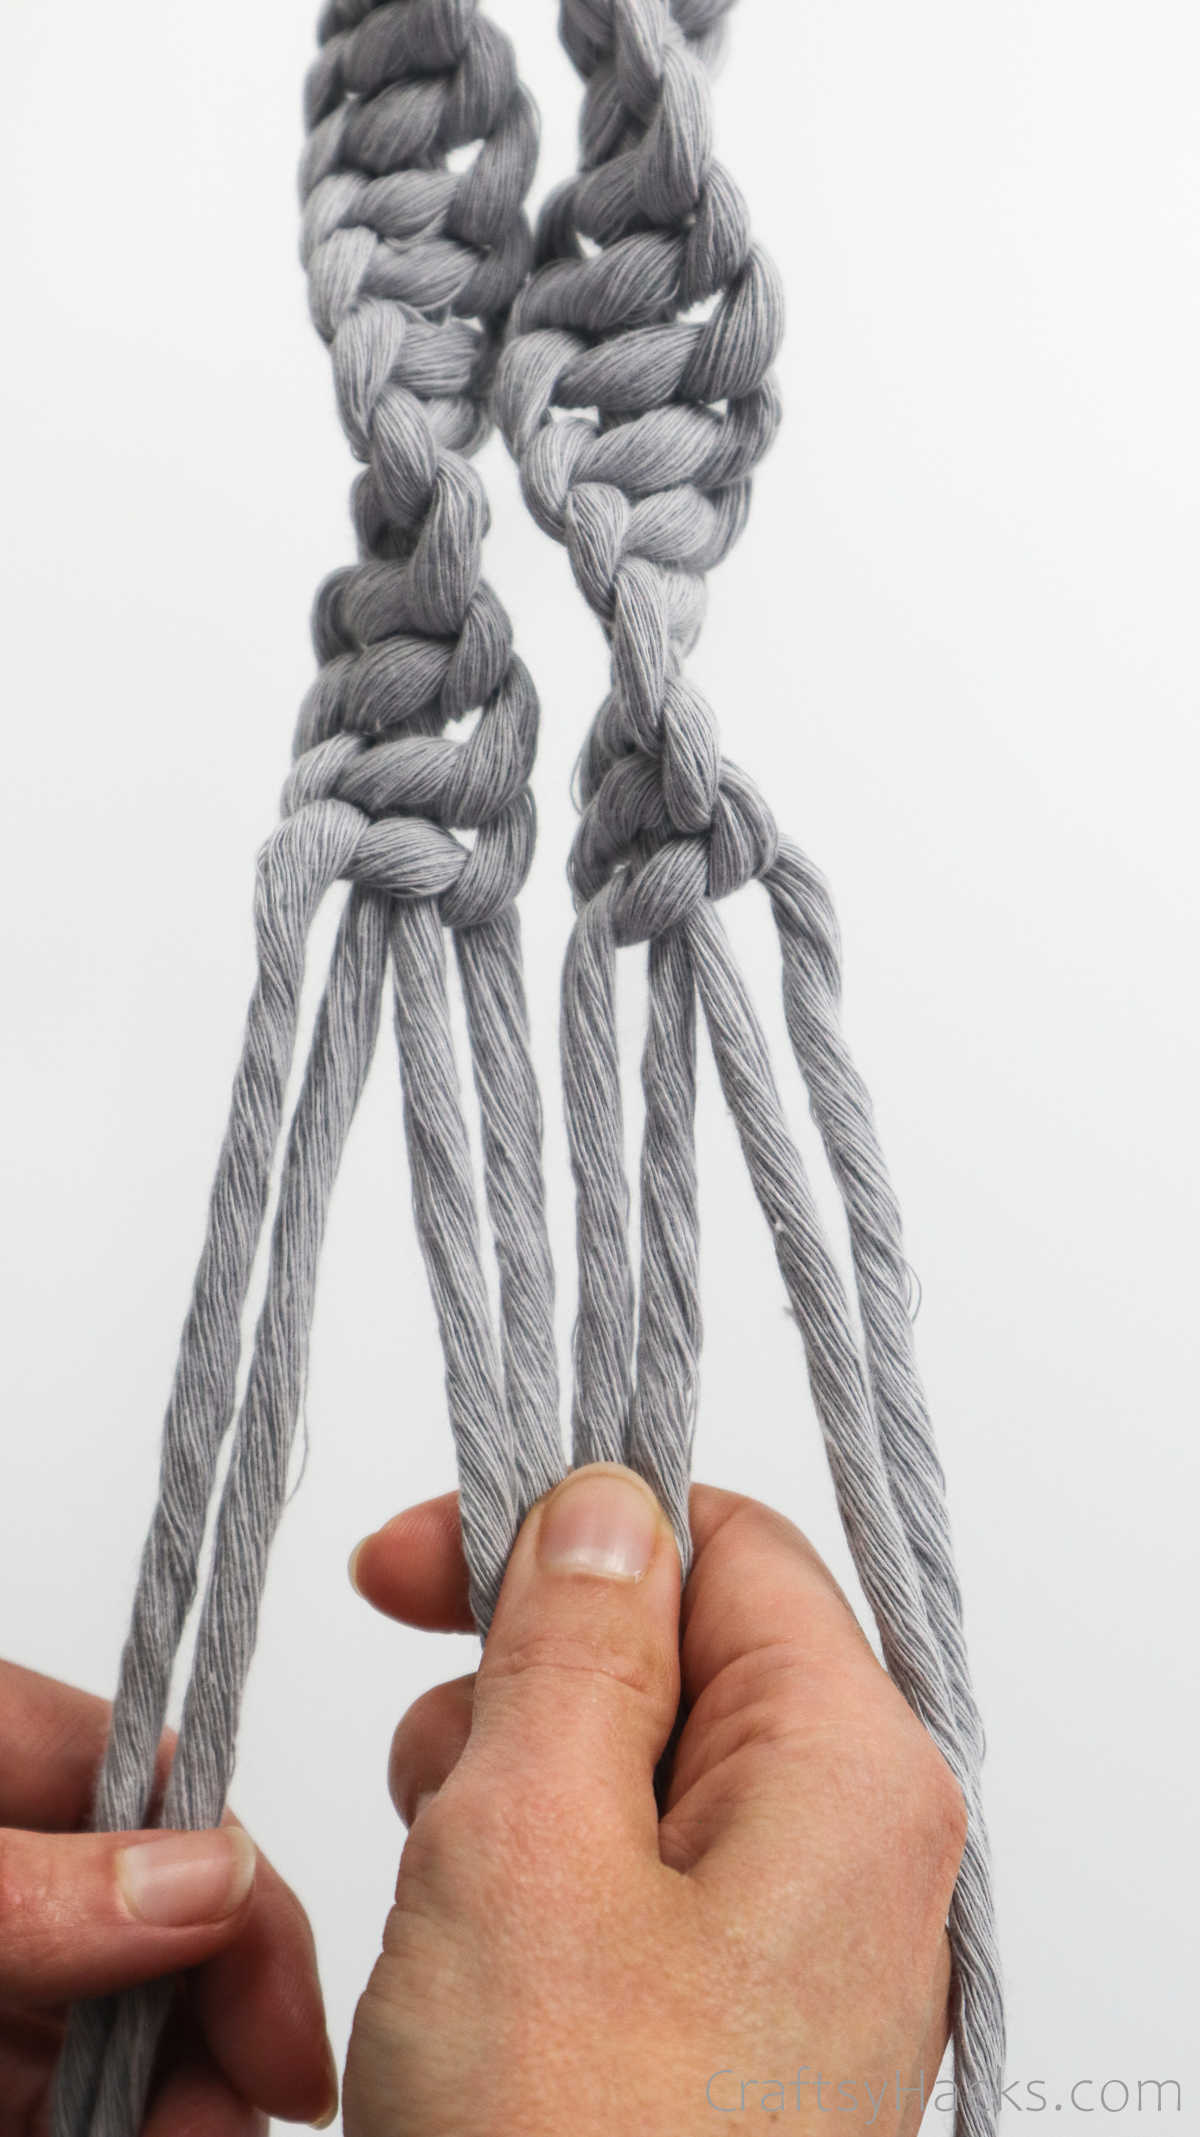
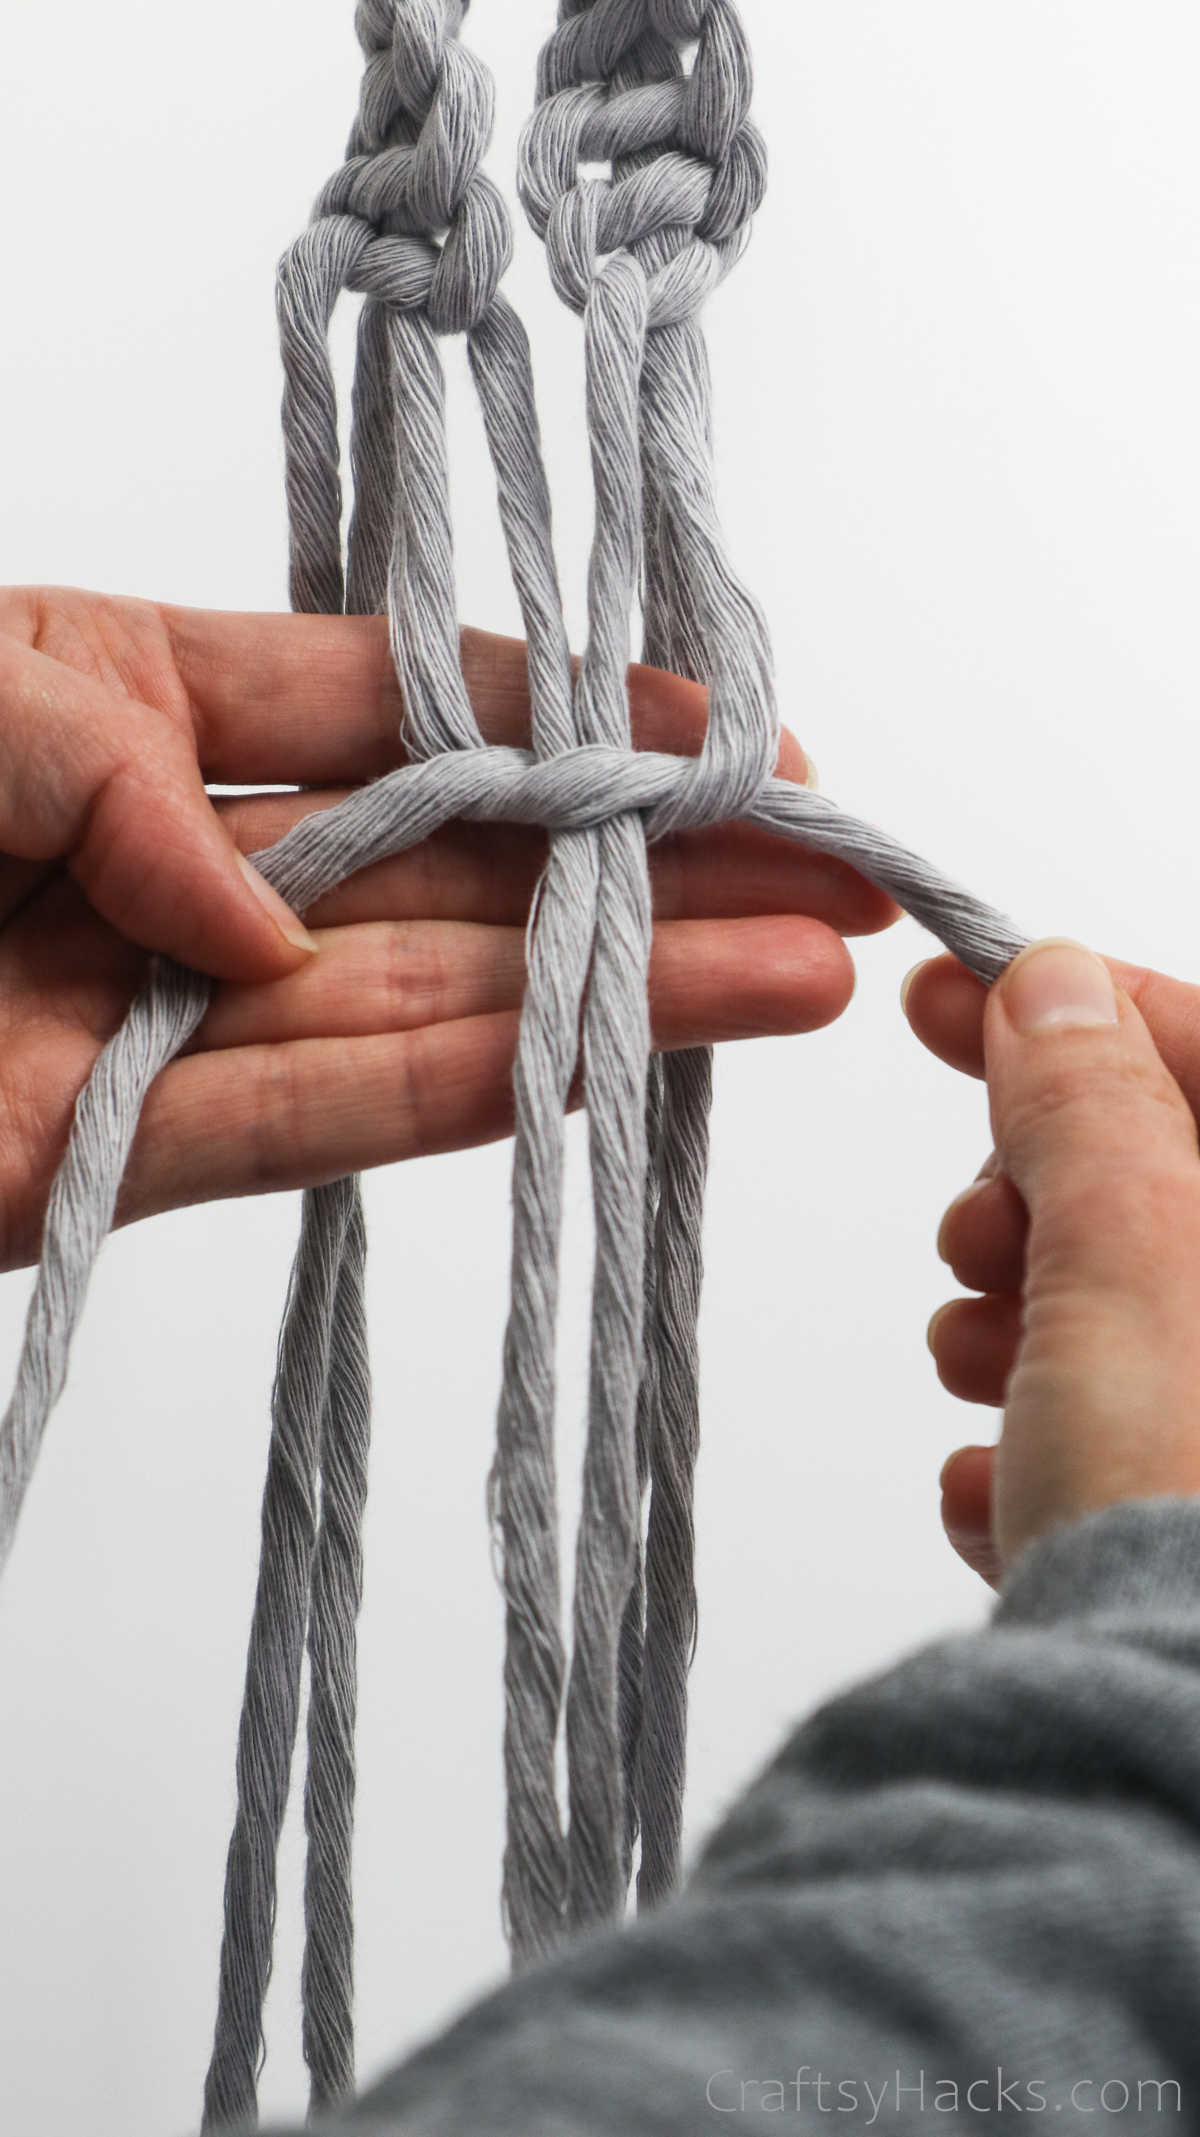
Grab the two strands on the right side of the middle strands.
Youre going to grab onto the two left strands from the other two sections you set aside earlier.
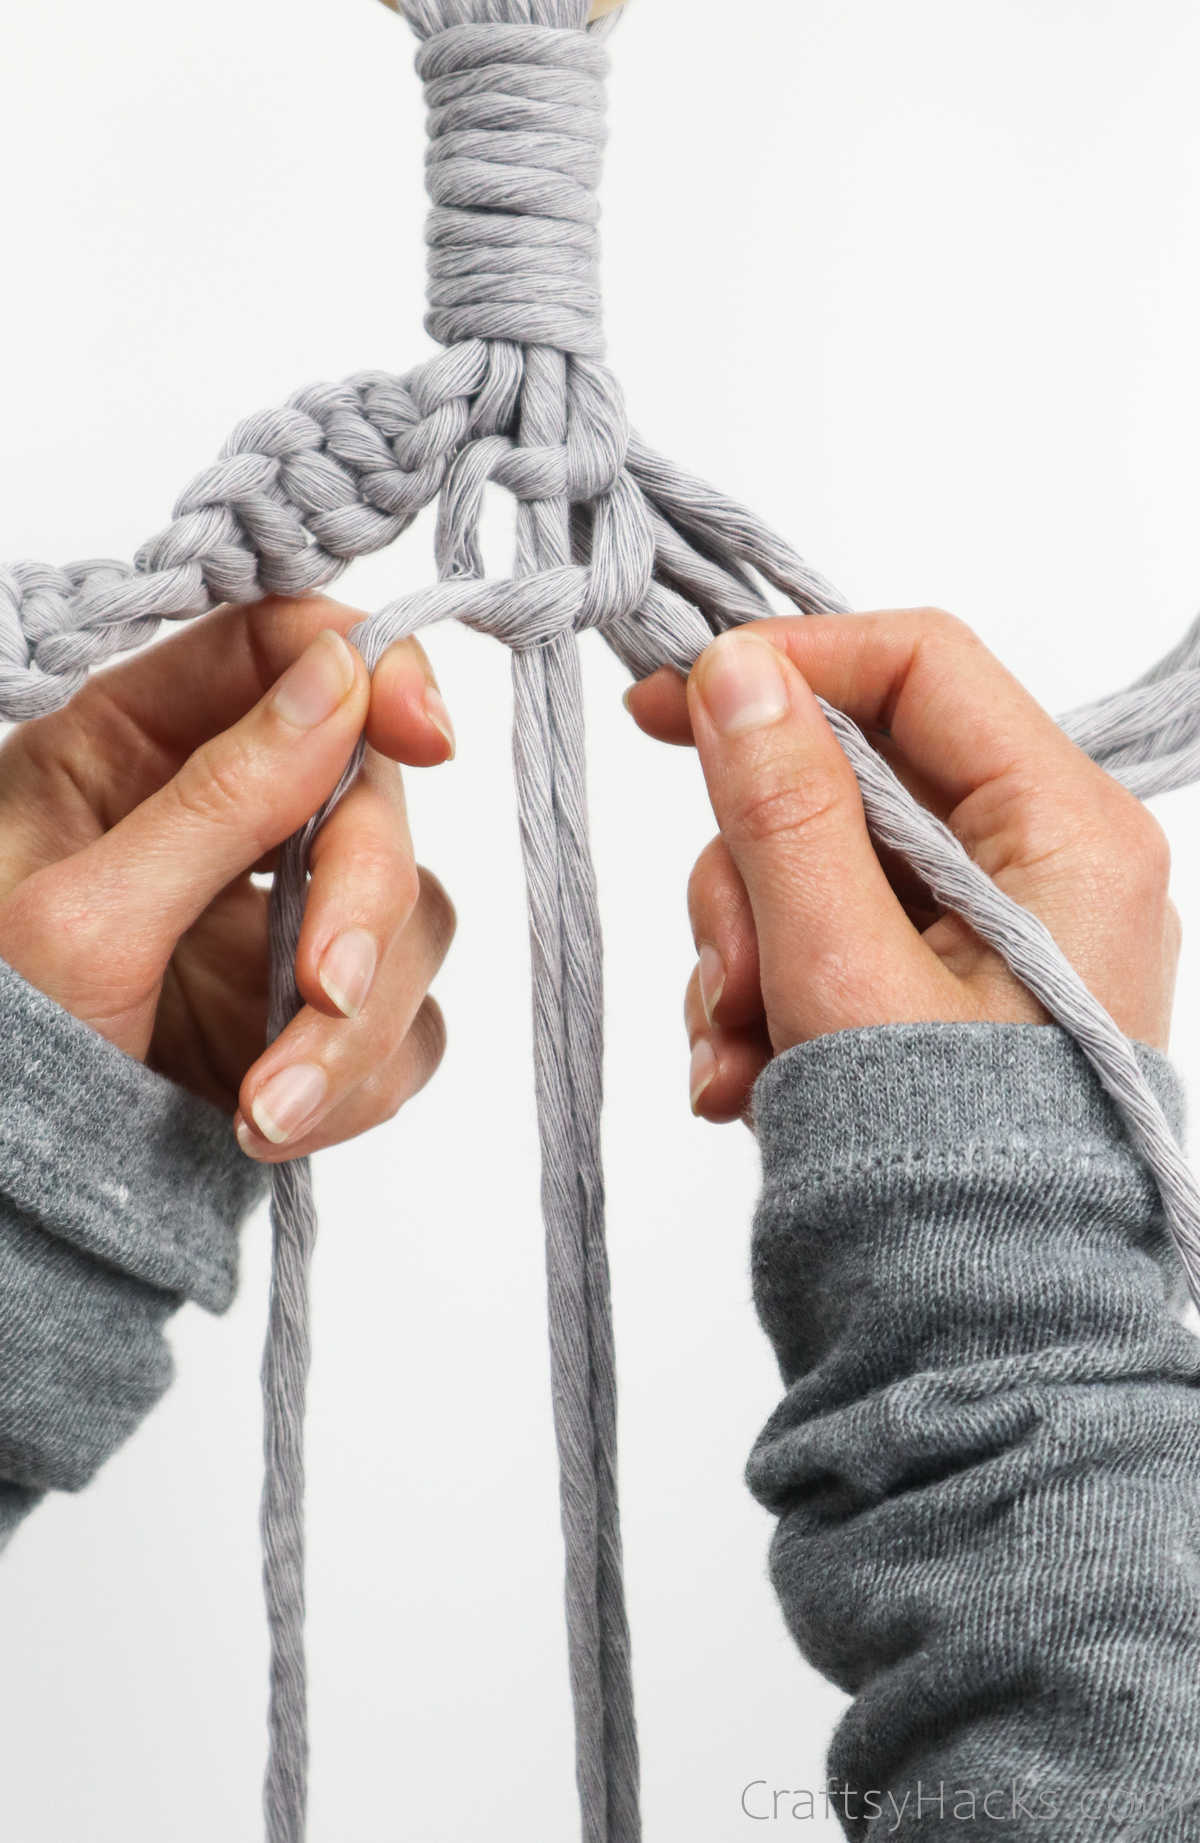
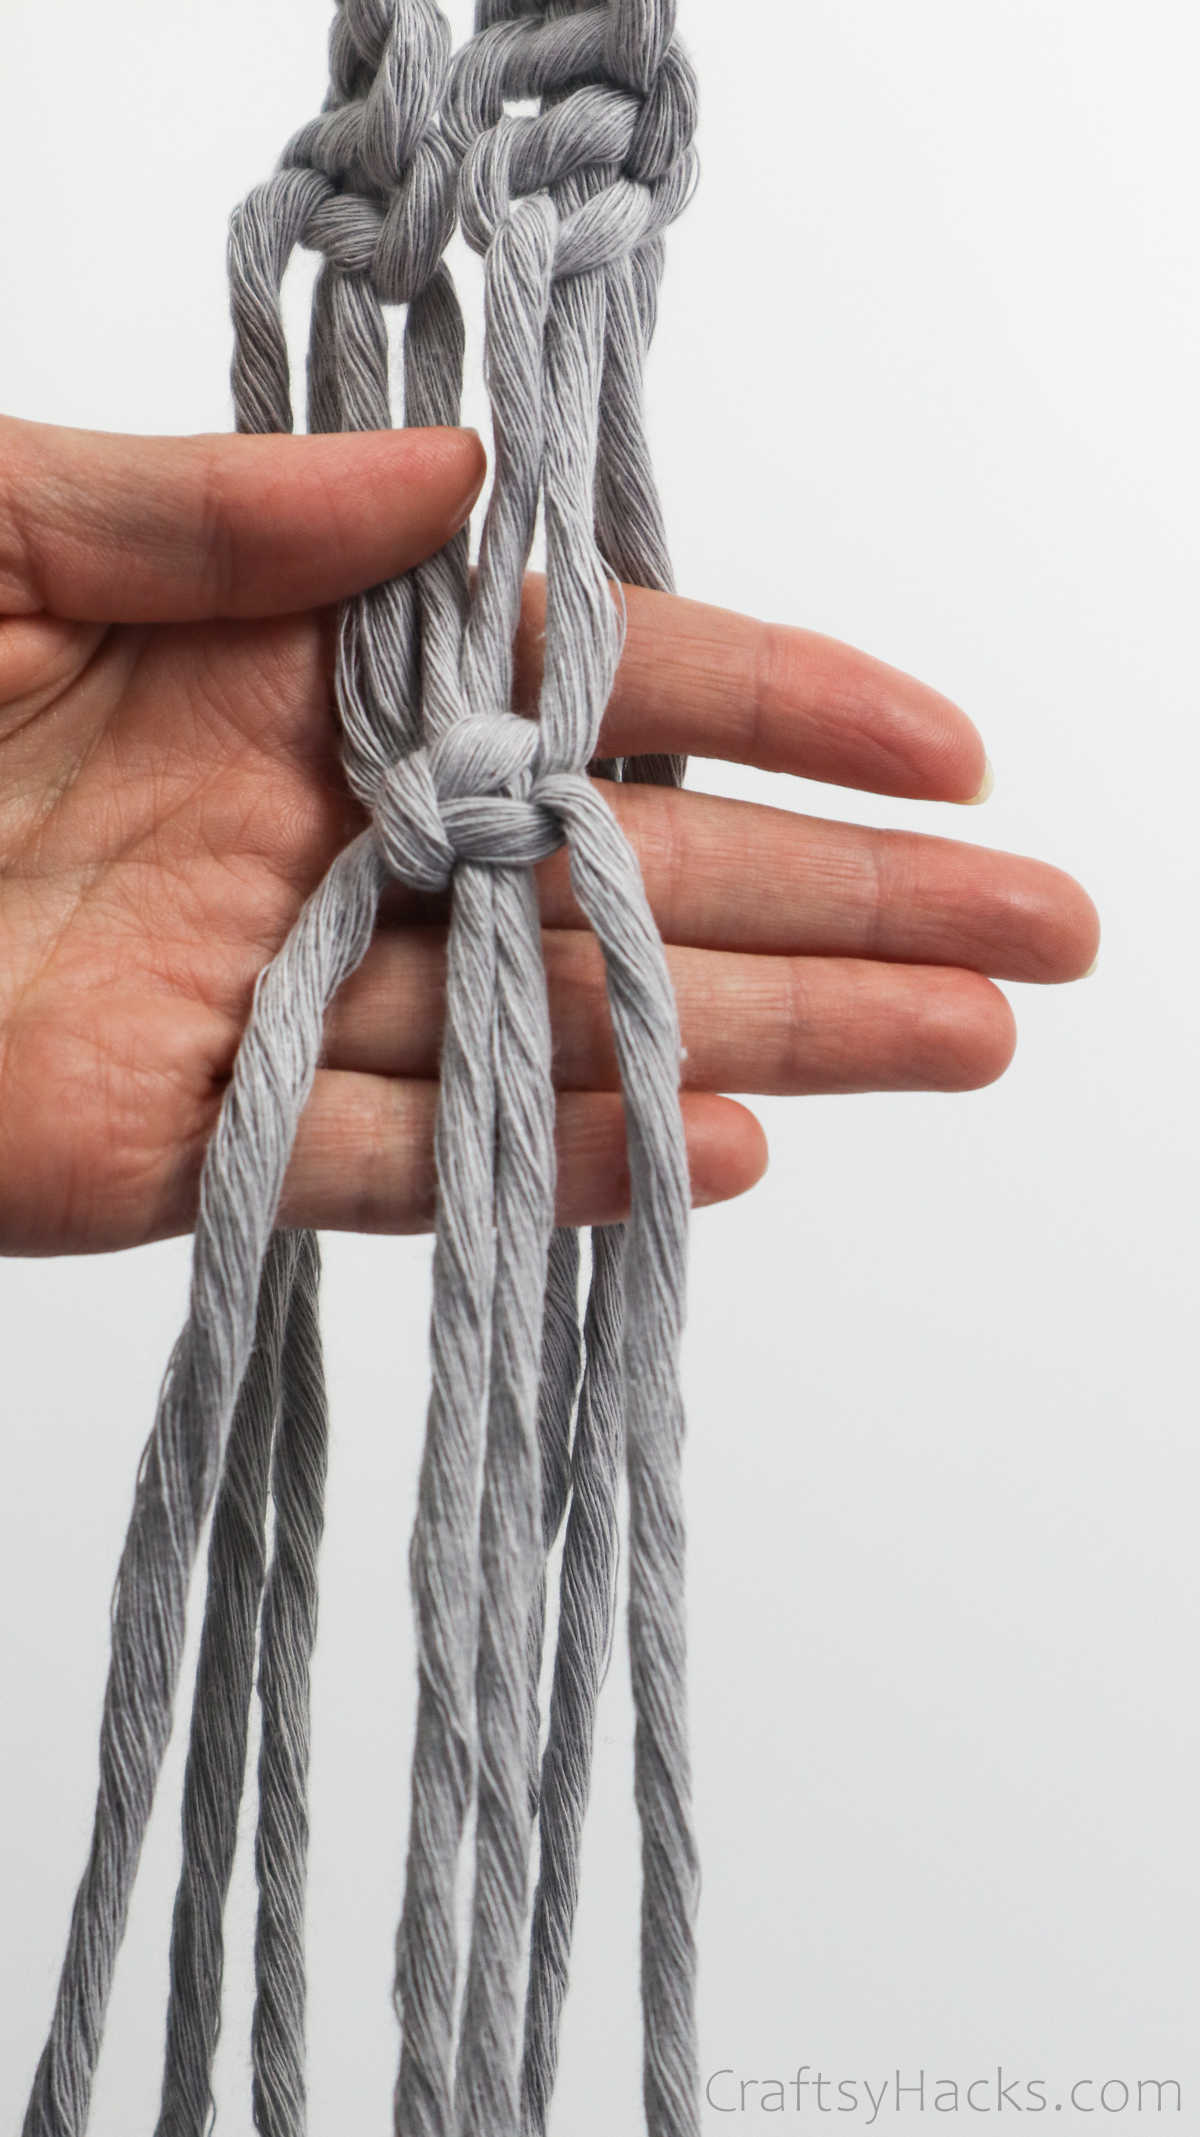
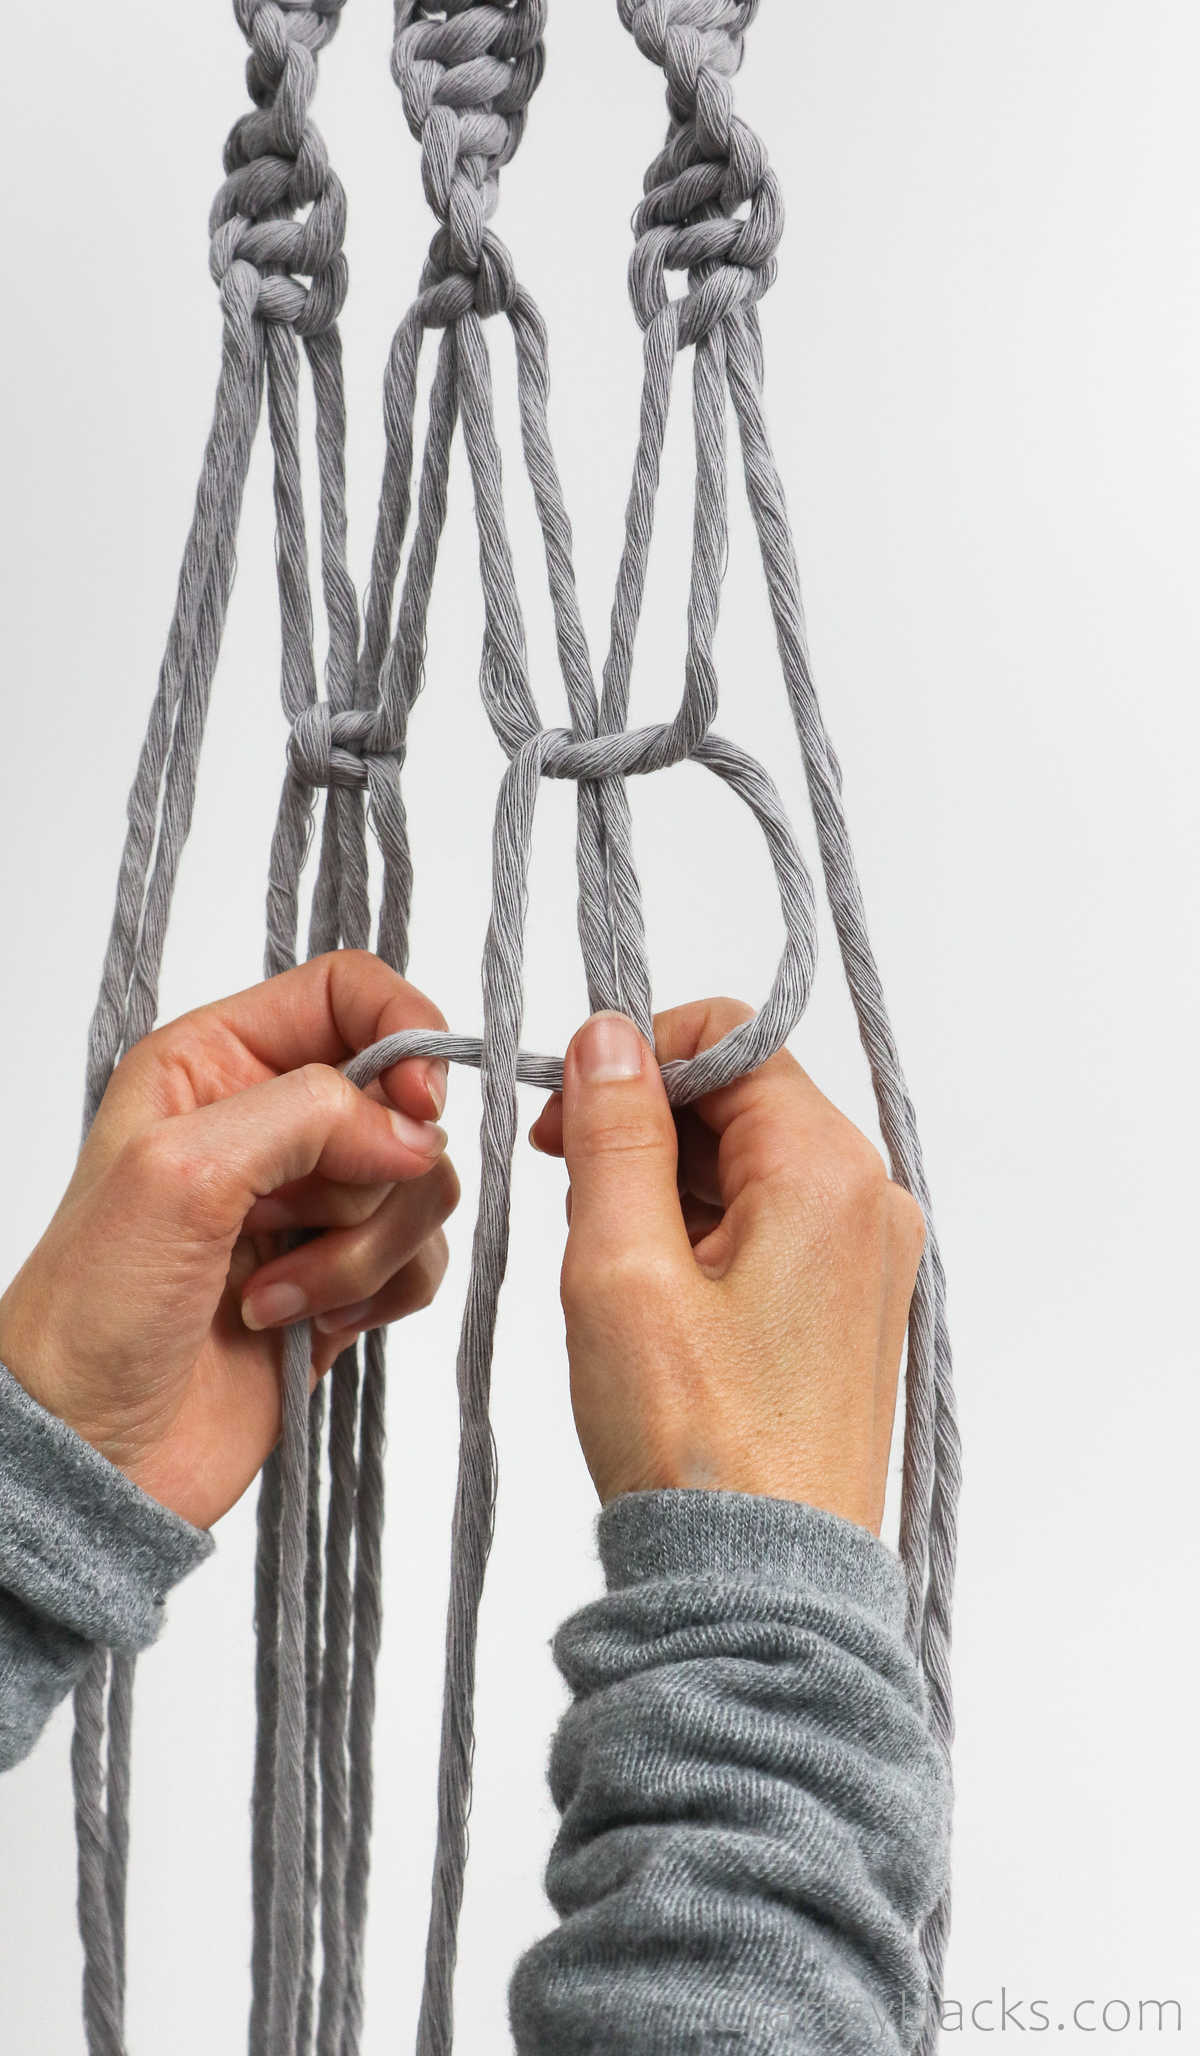
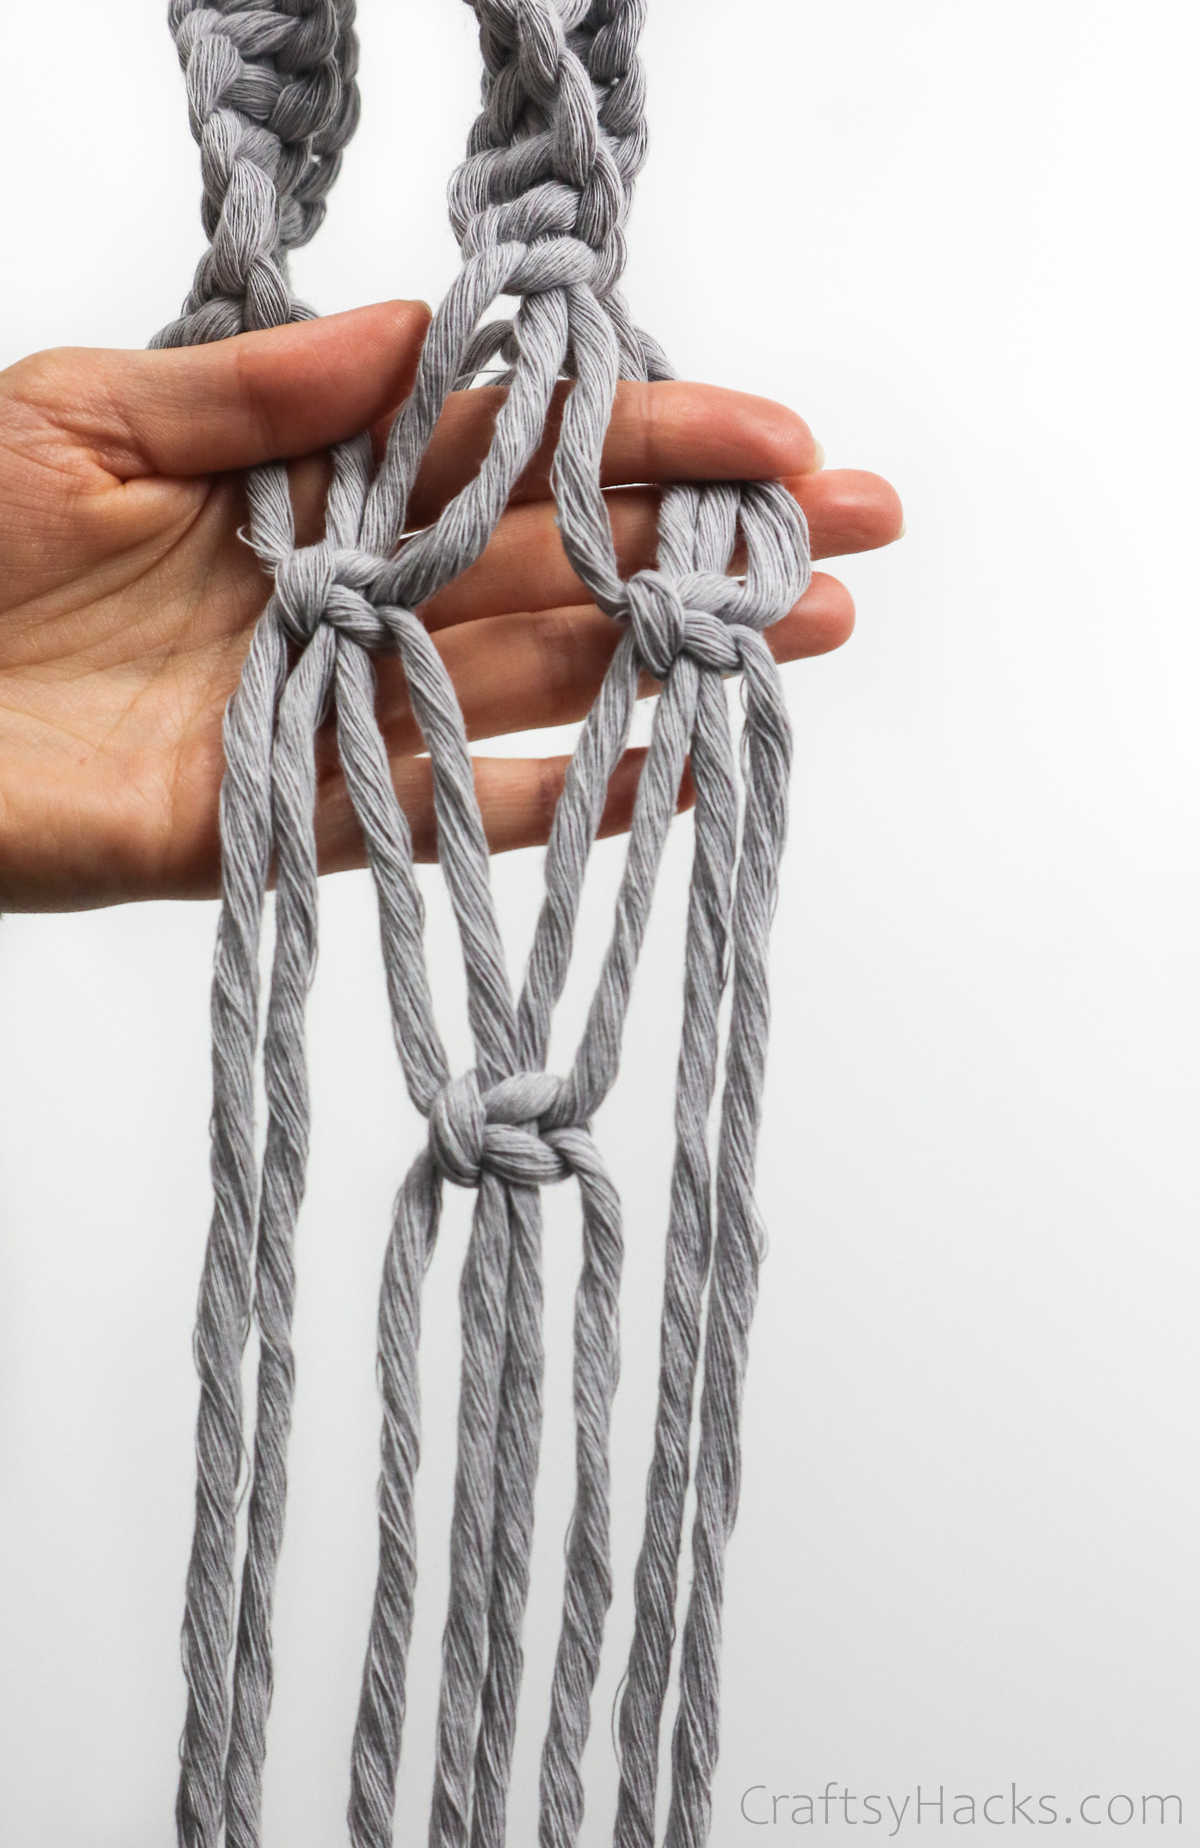
Step 14
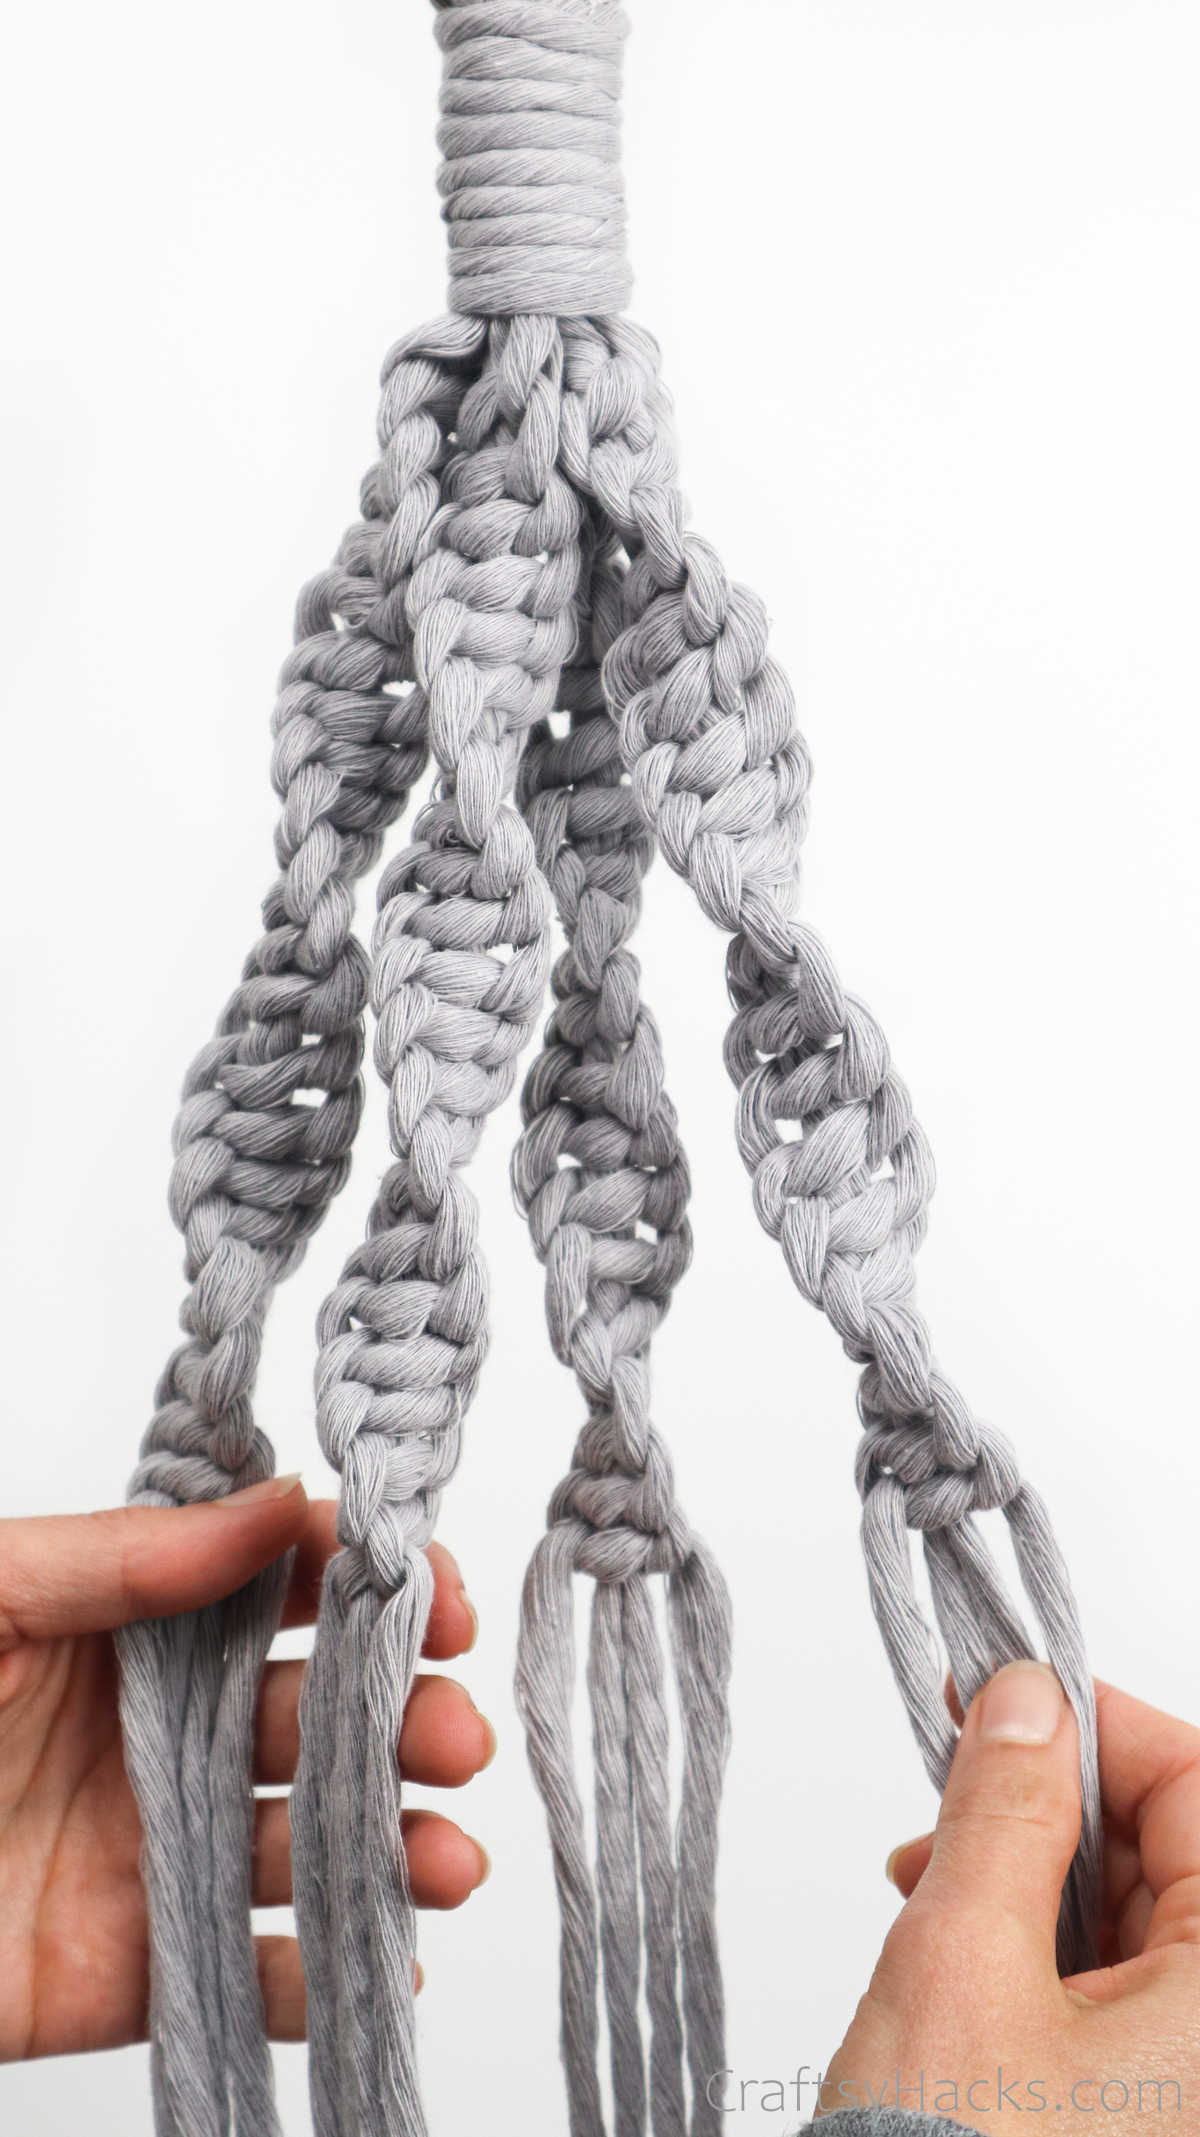
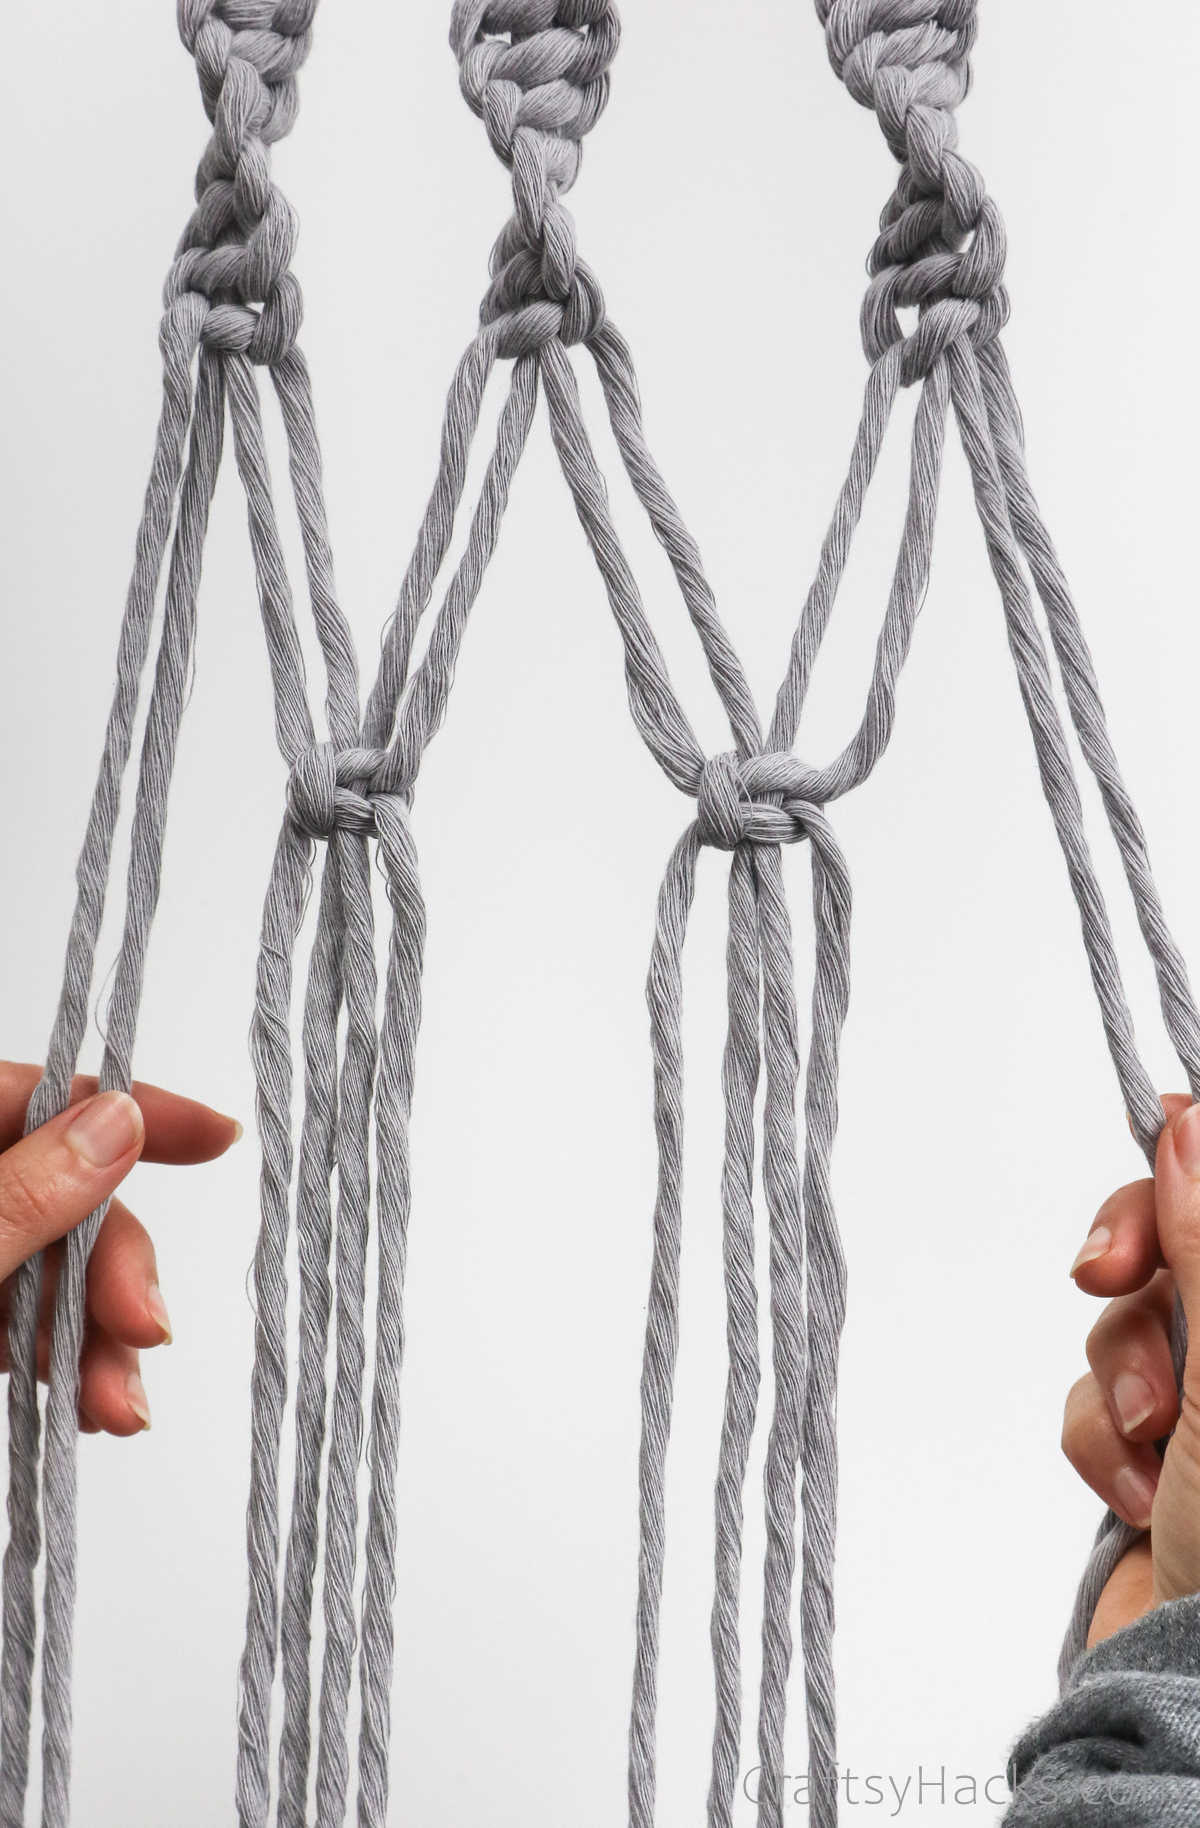
Work your way around until you have four sets of square knots.
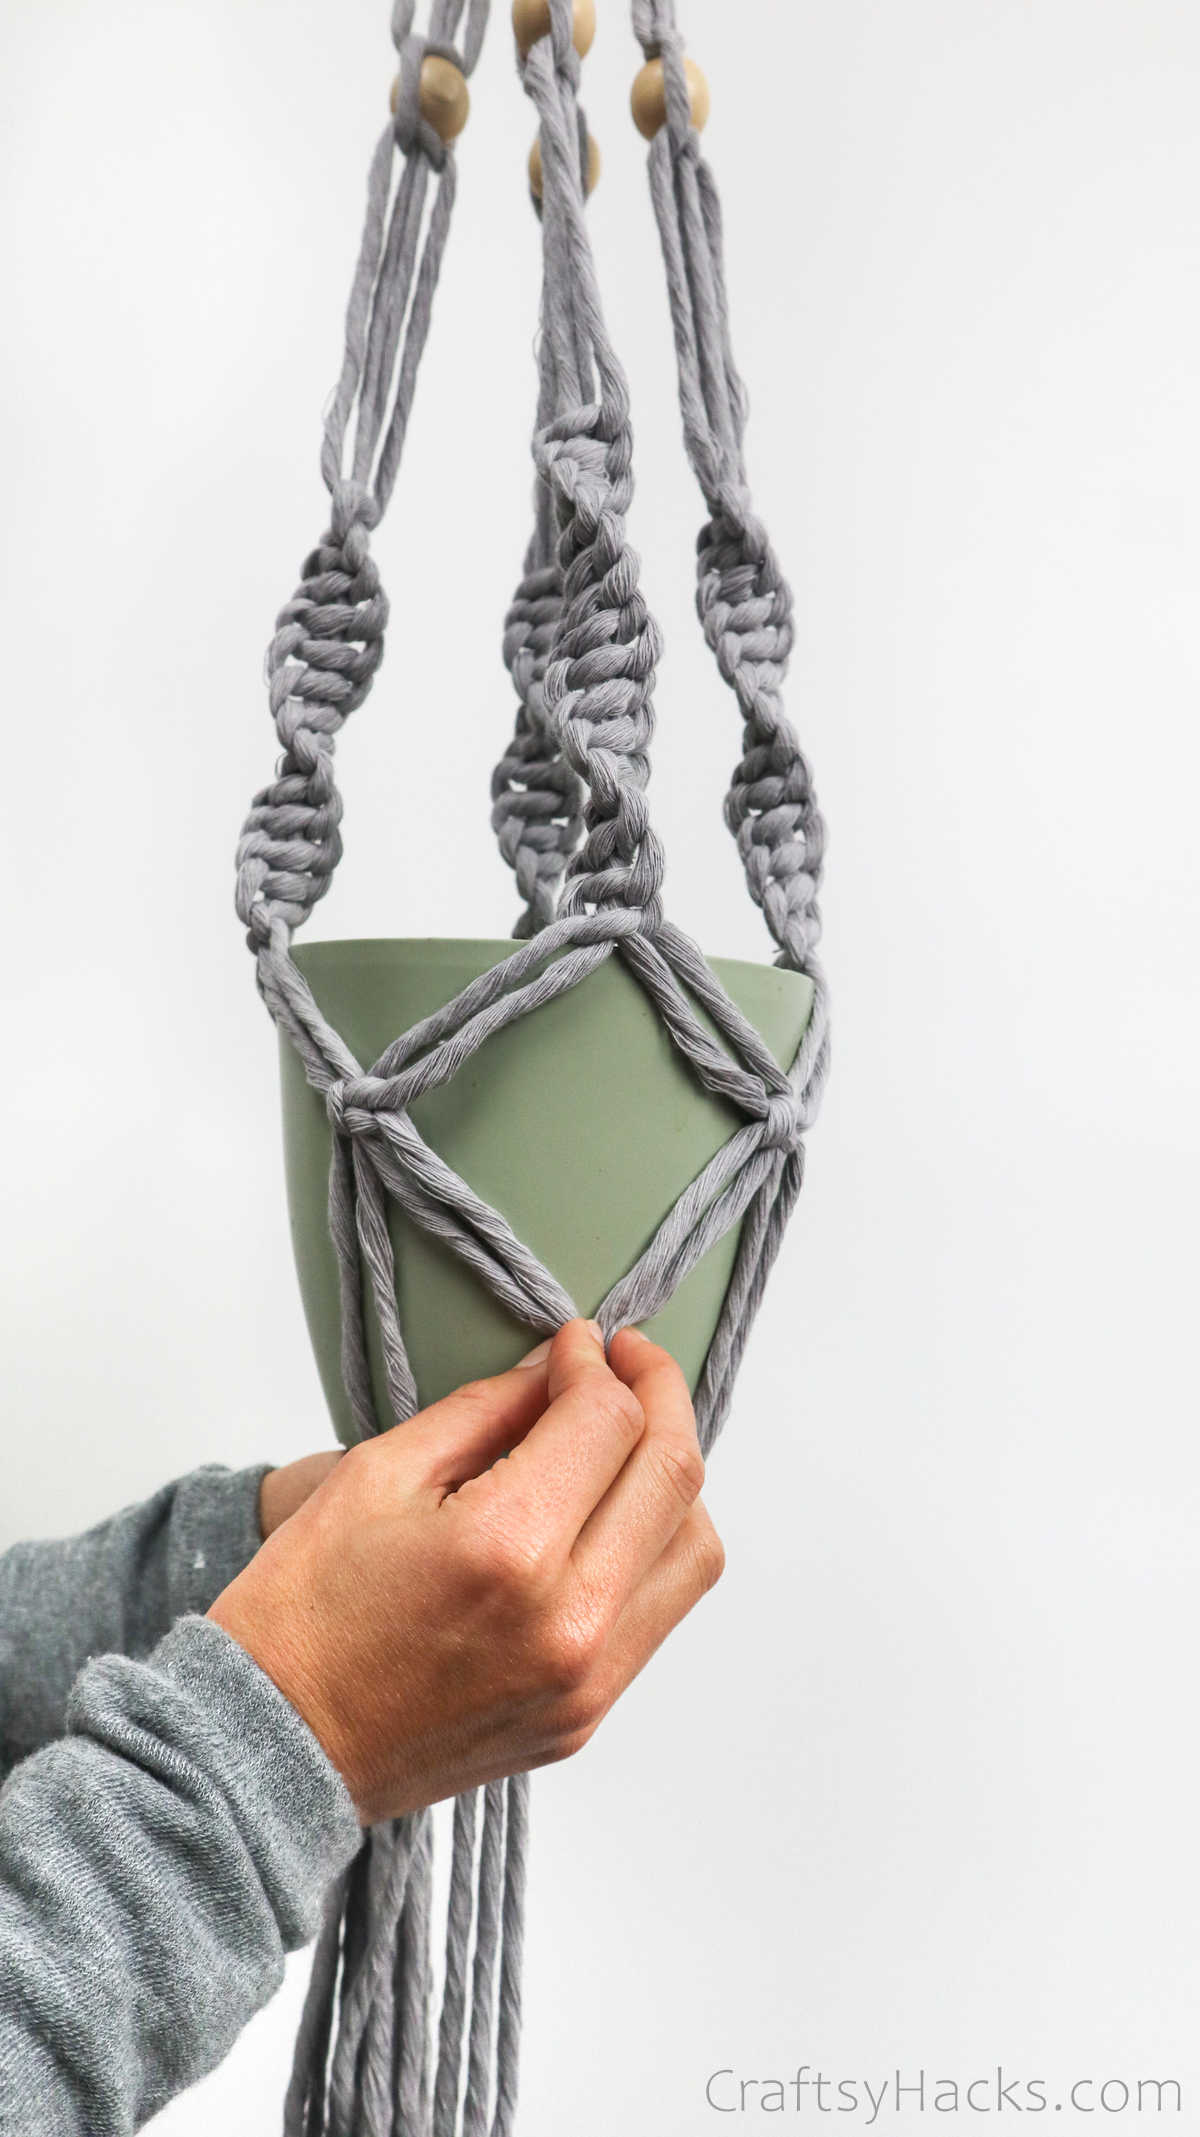
Place the pot snugly between the four sets of cords, as you see below.
Use the pot to figure out the center point where the next square knot needs to be.
Step 17
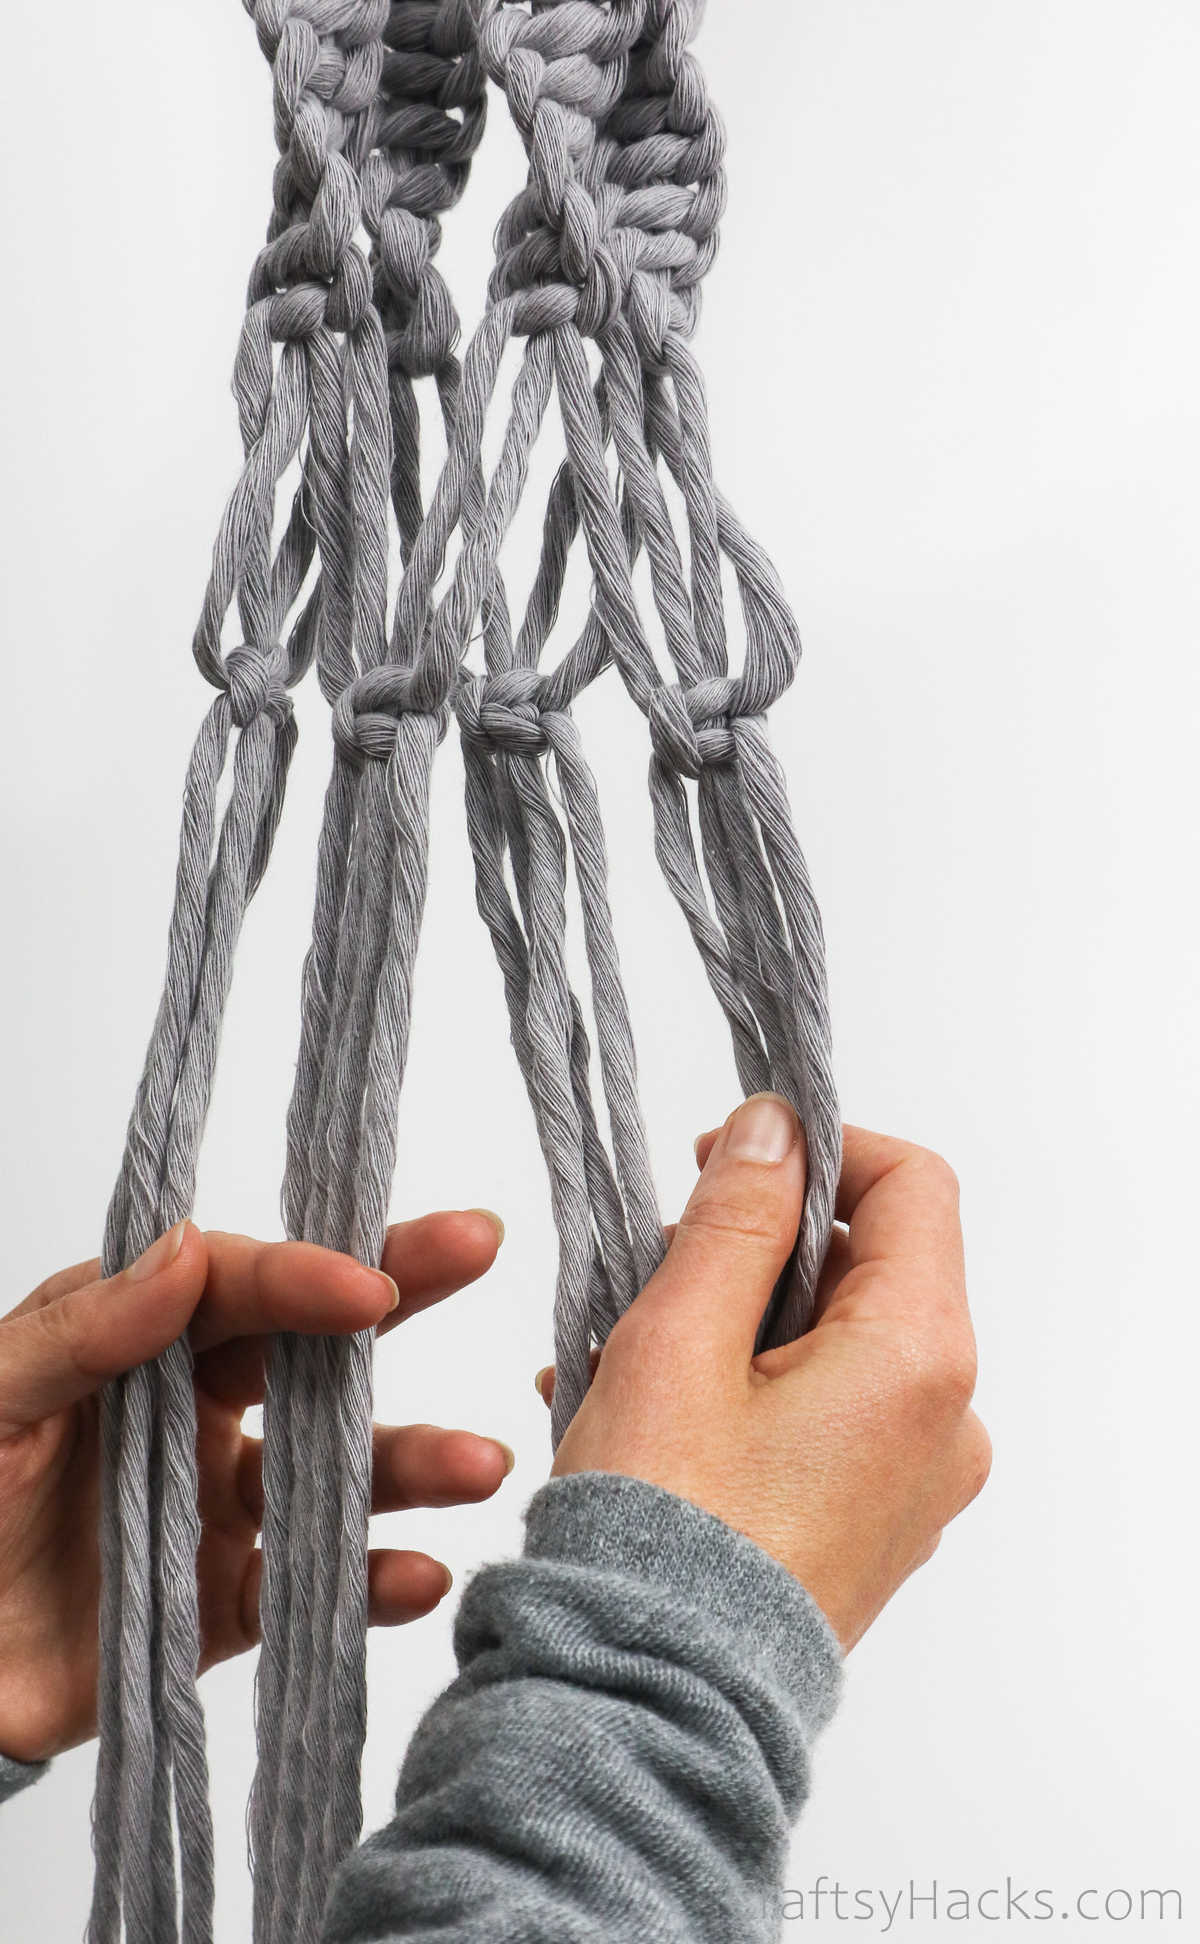
When youre happy with how the hanger looks, go ahead and remove the pot.
You already know how that goes.
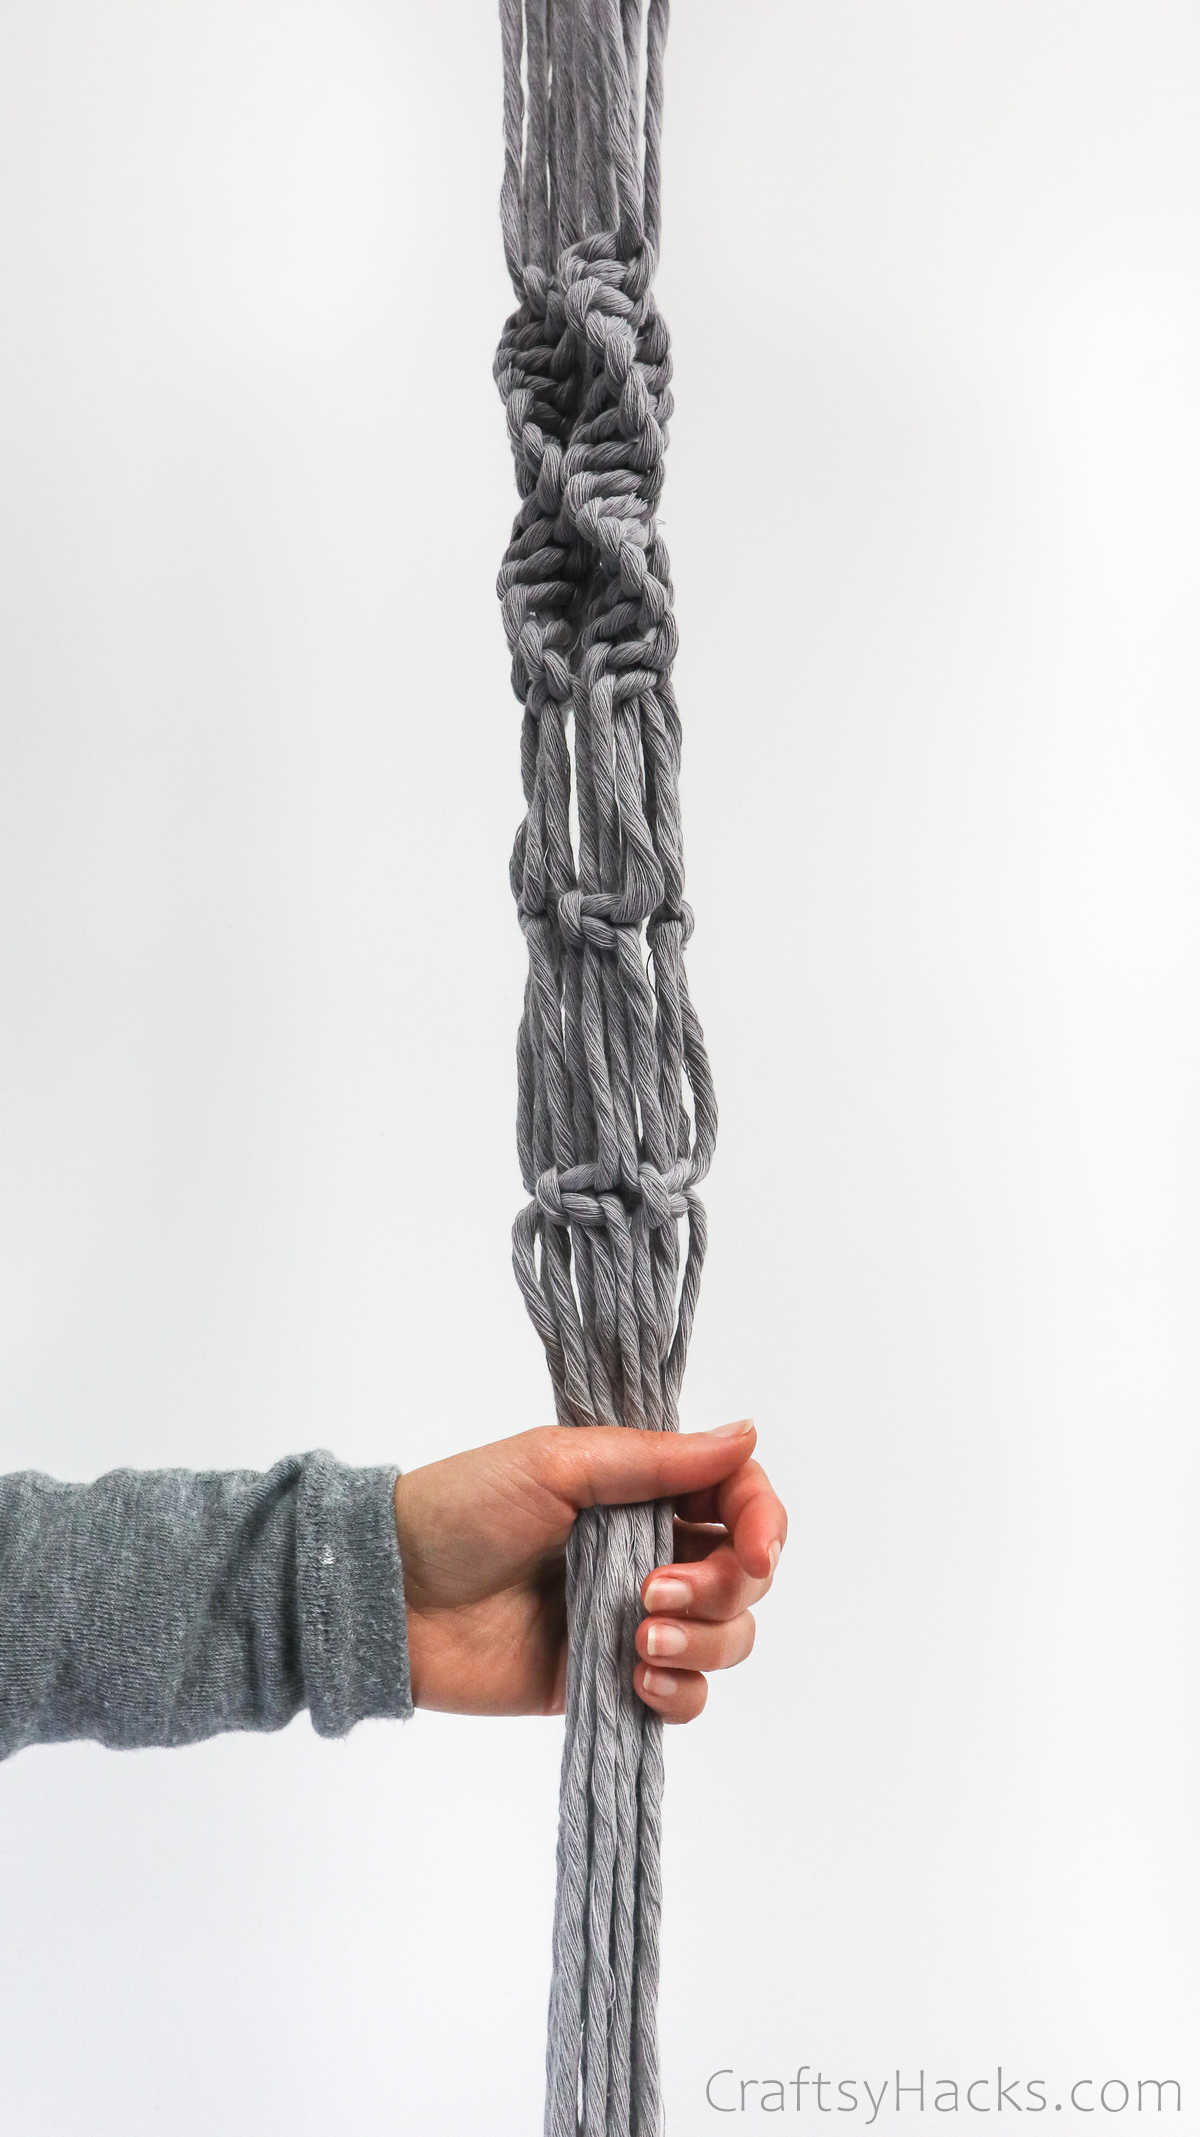
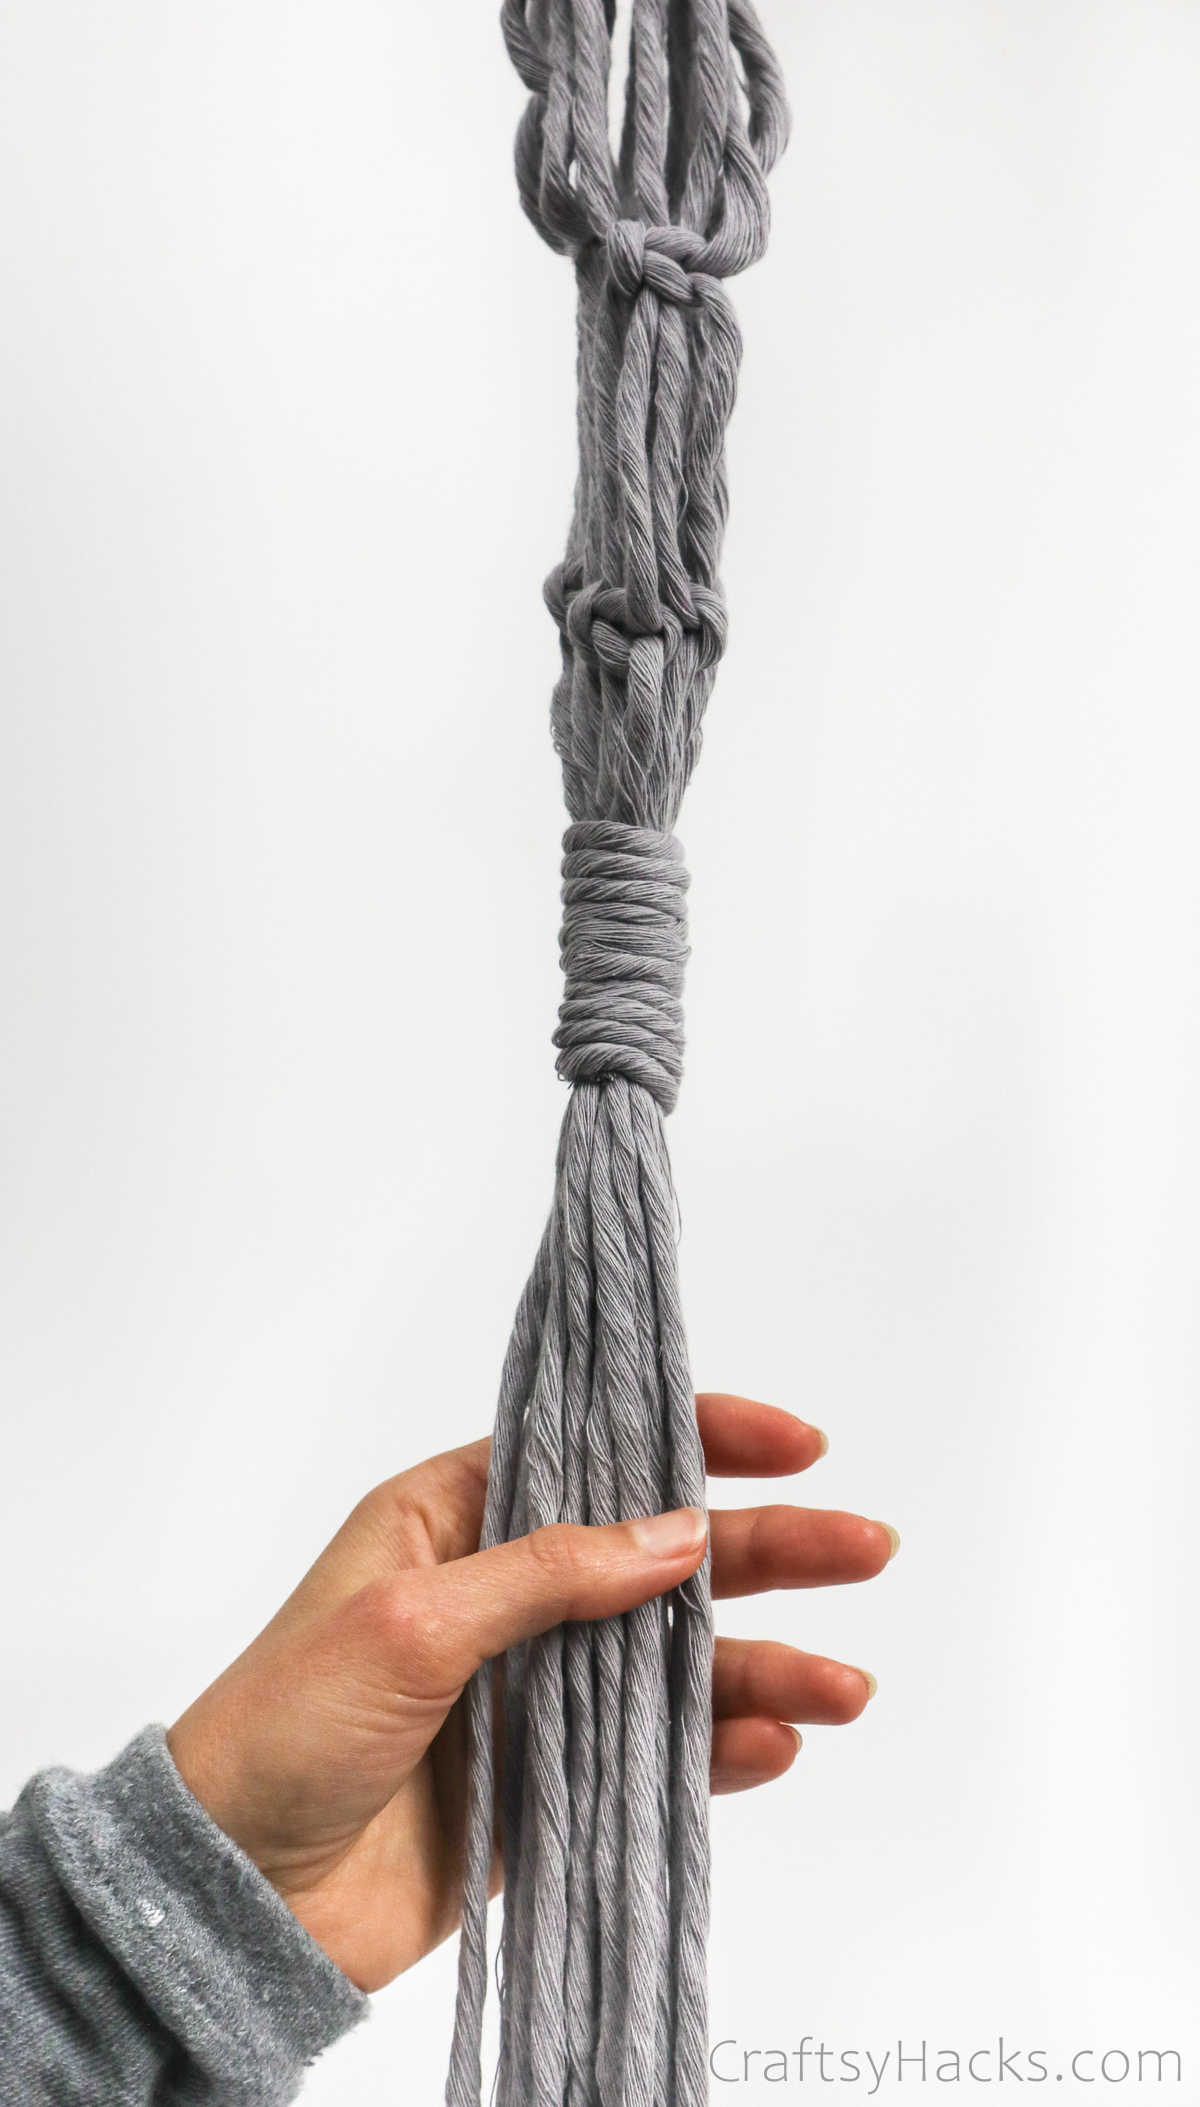
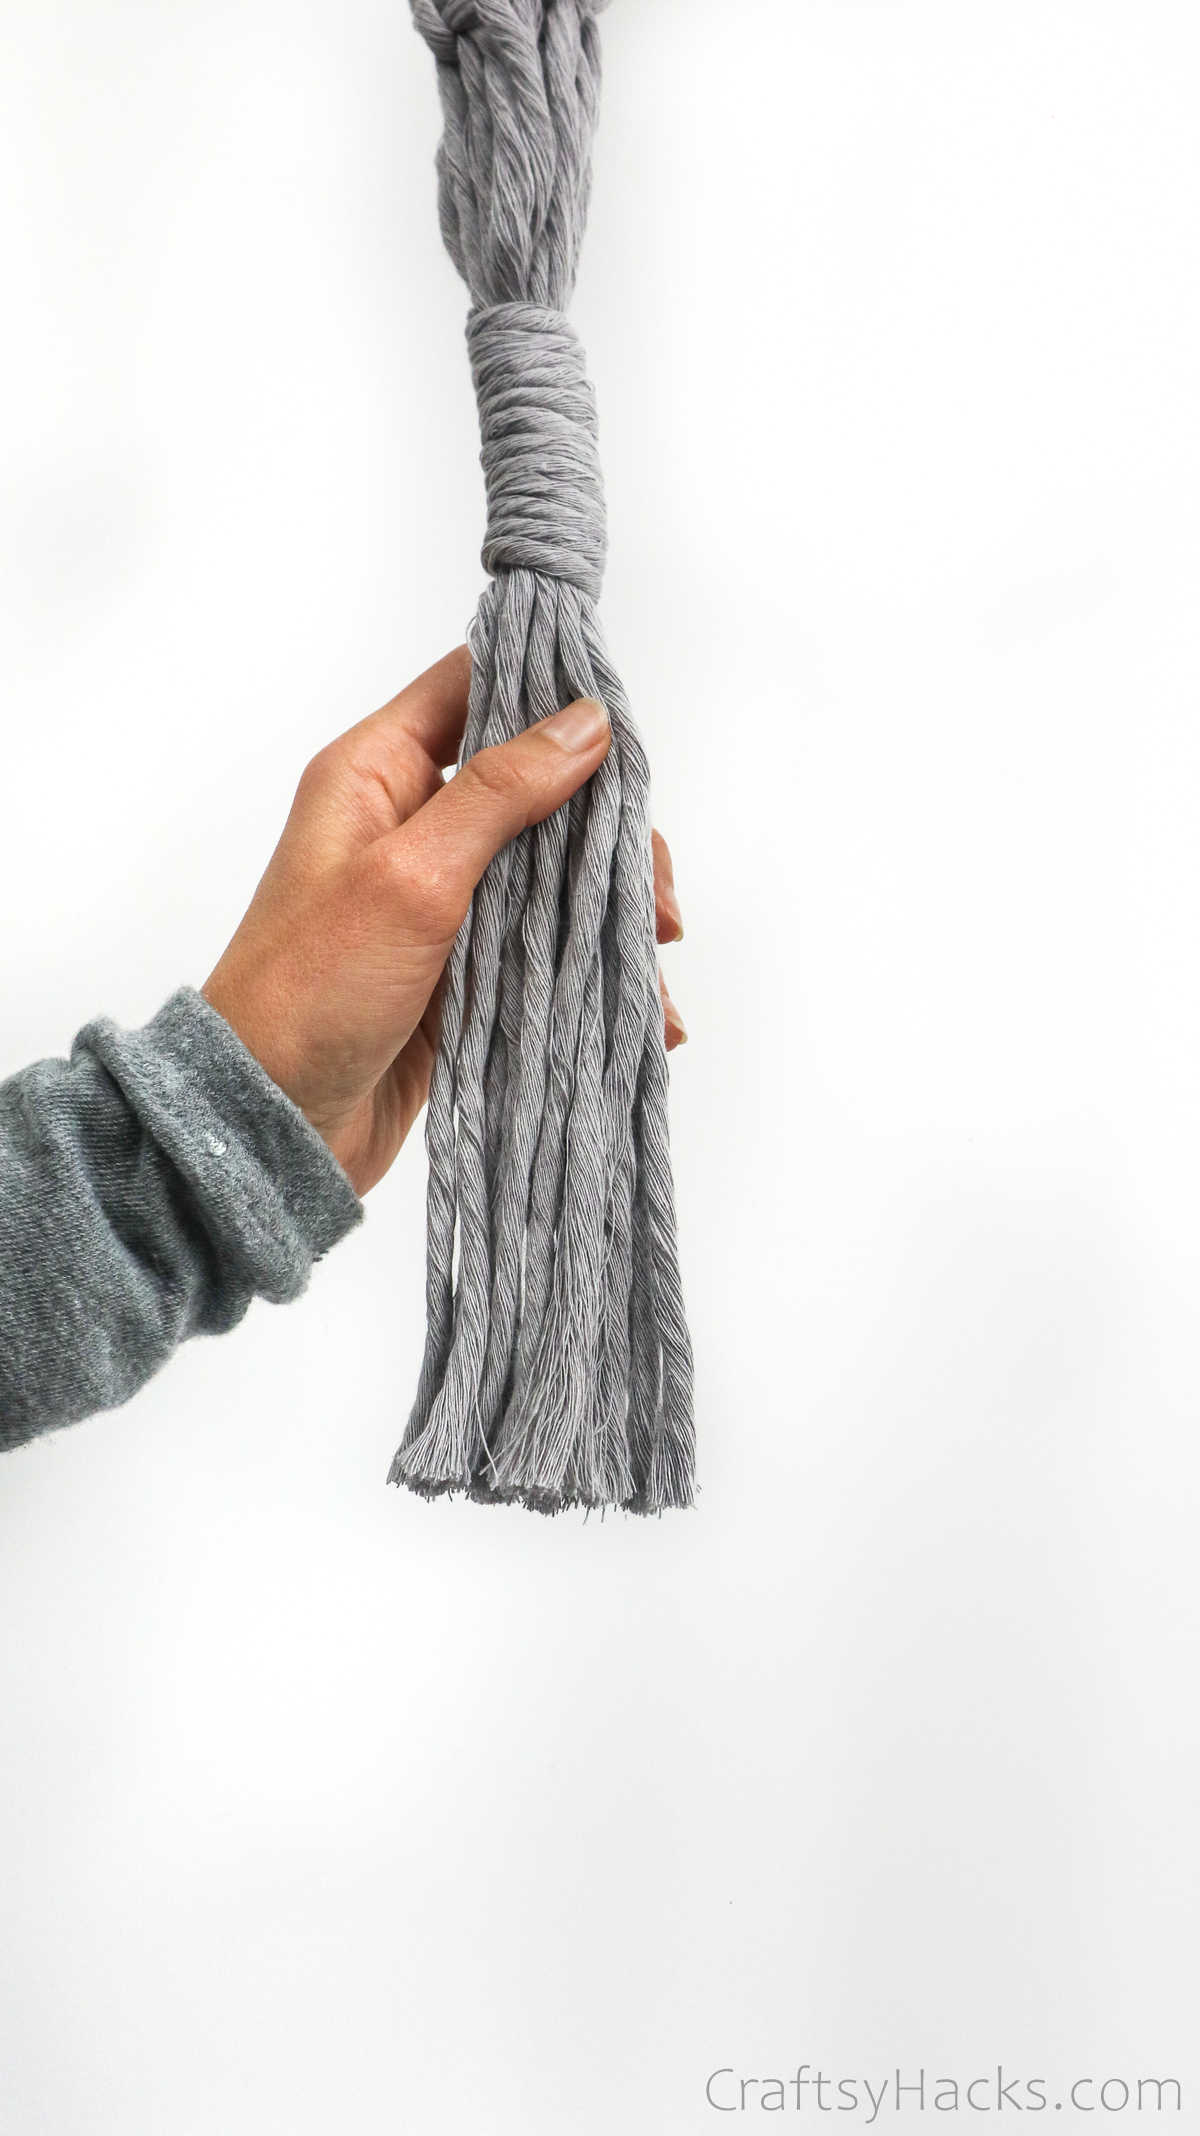
Just gather all sixteen strands and hold them in place while you take the second of the 40 strand.
Make a U-shaped loop and wrap the longer end around all the strands and over the loop.
Pull the end through the loop and tug the ends to pull the loop under the cords.
Finally, tug the two ends to tighten the knot.
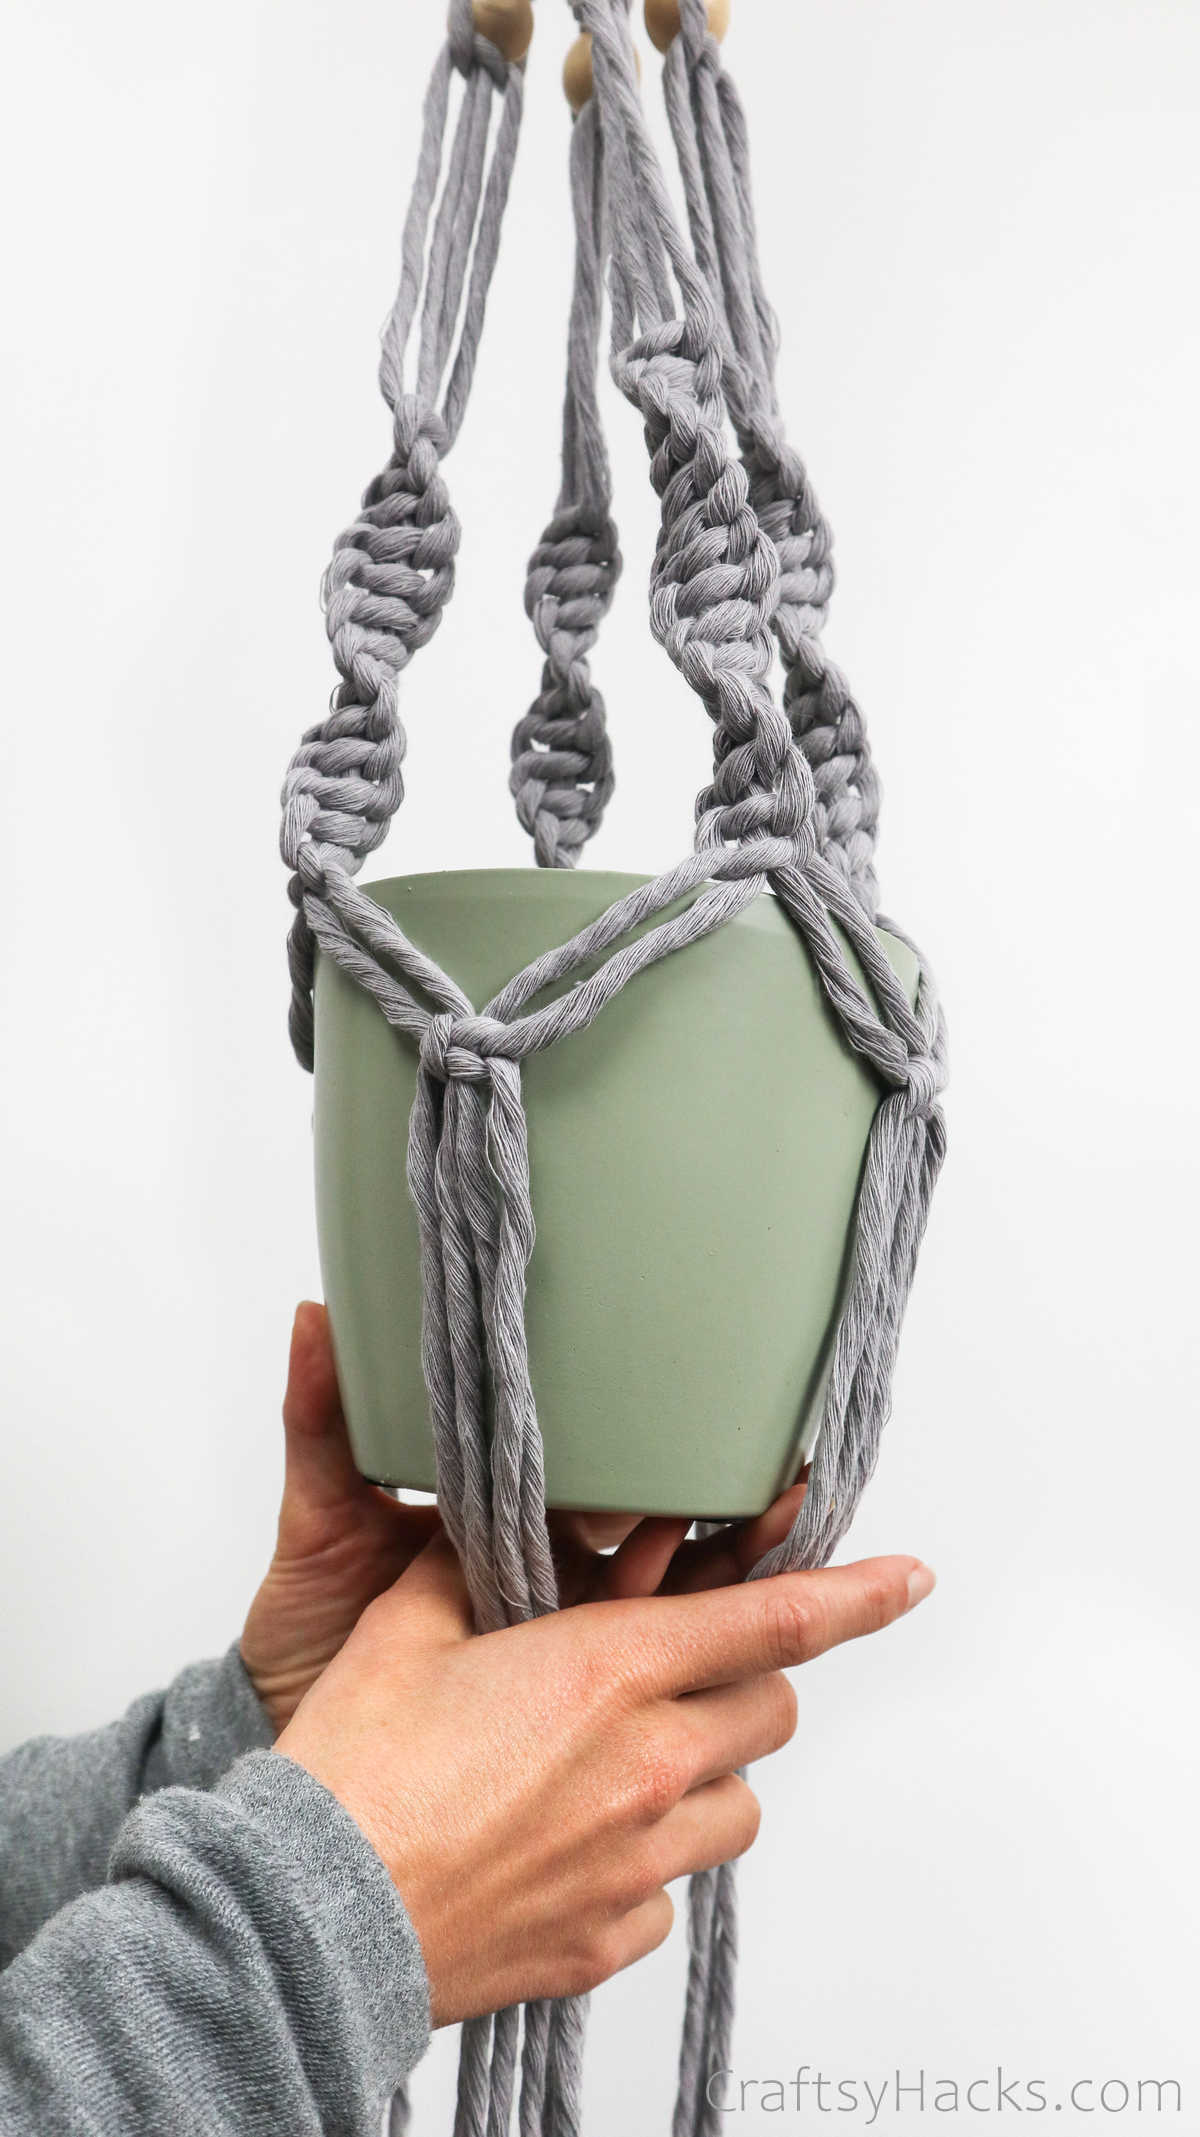
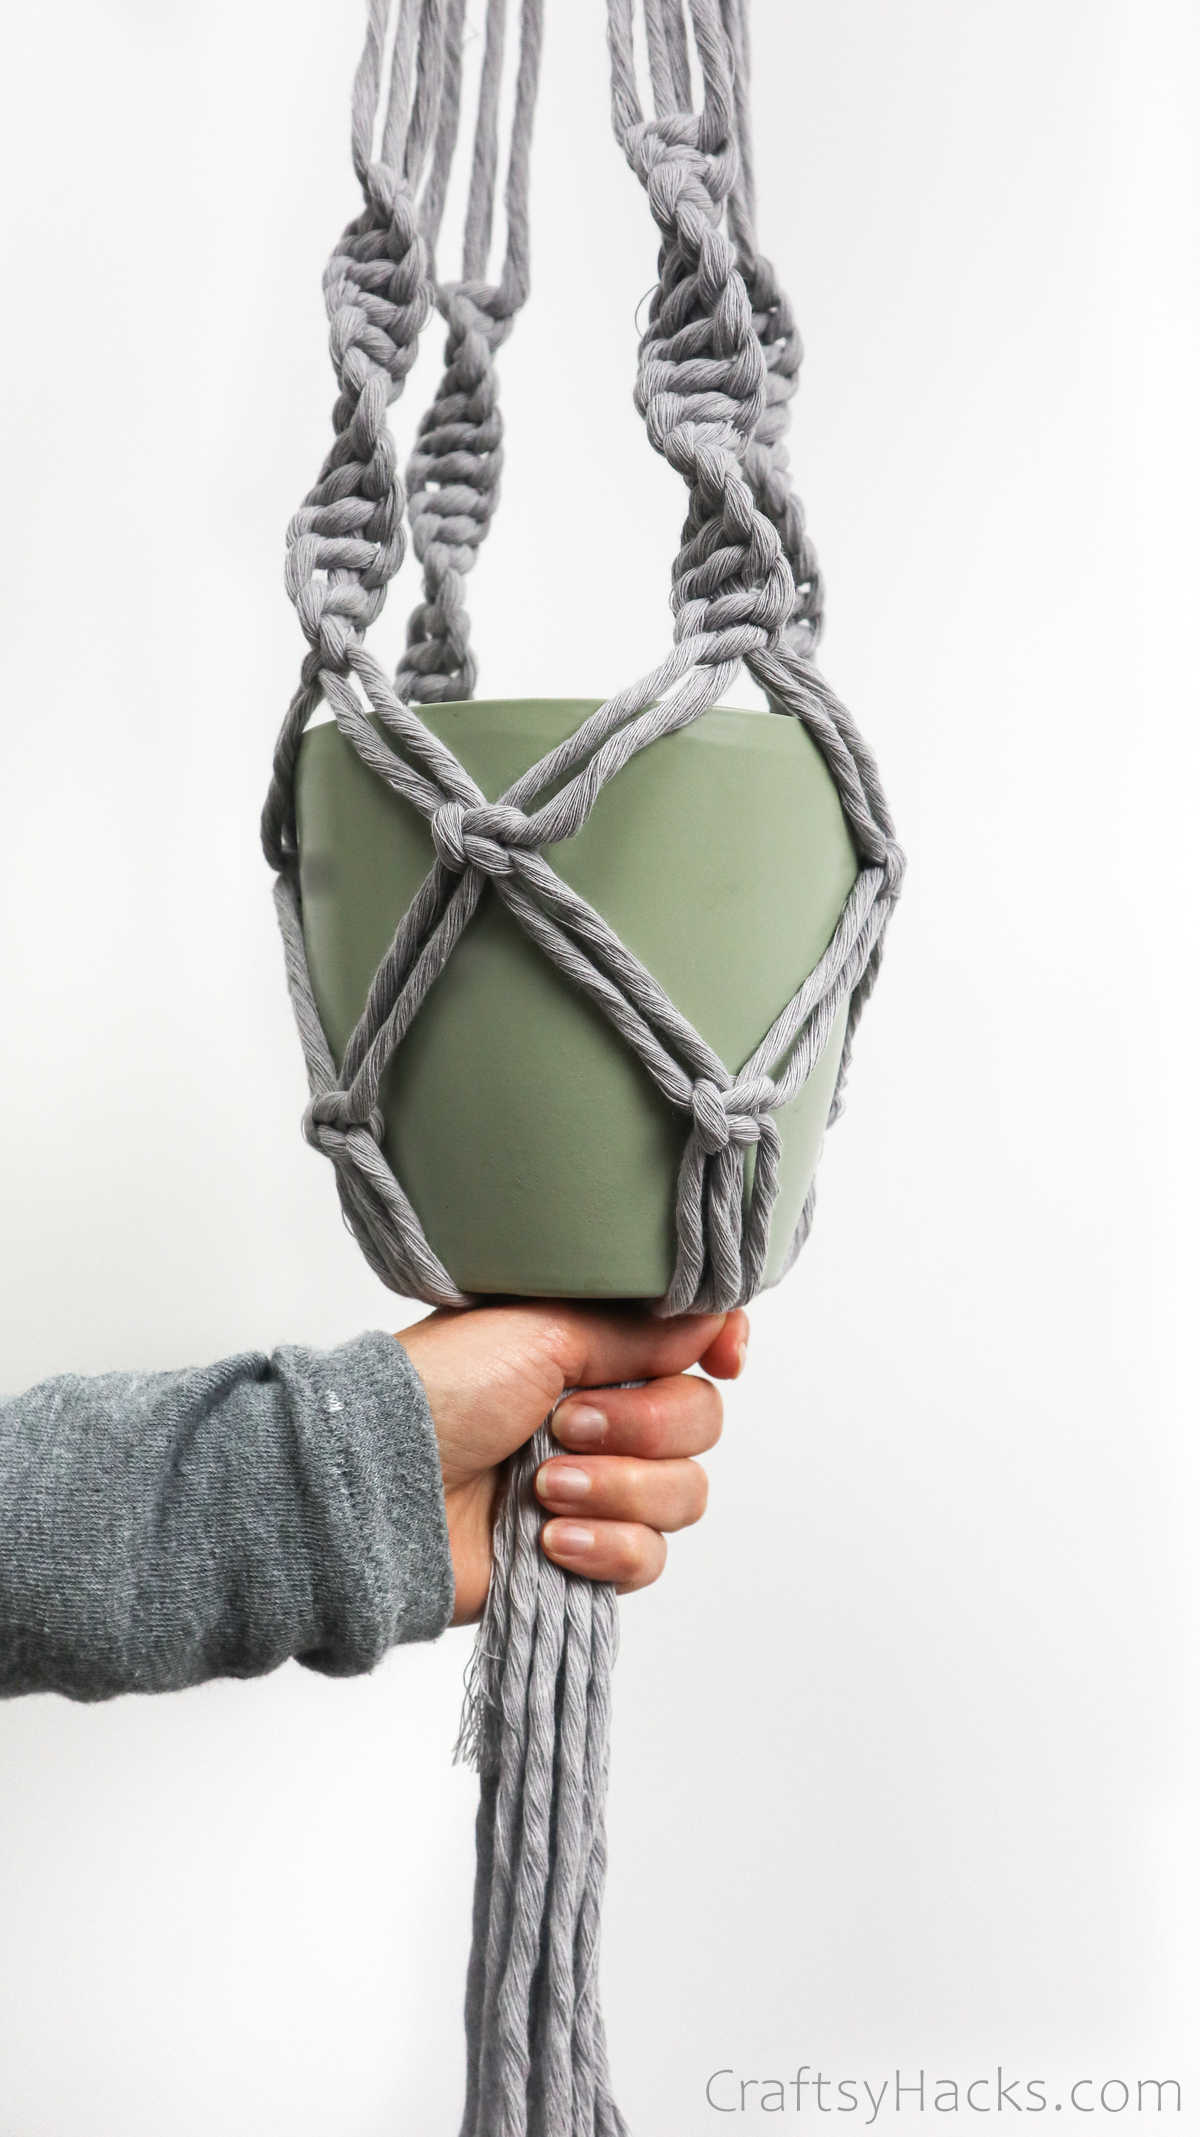
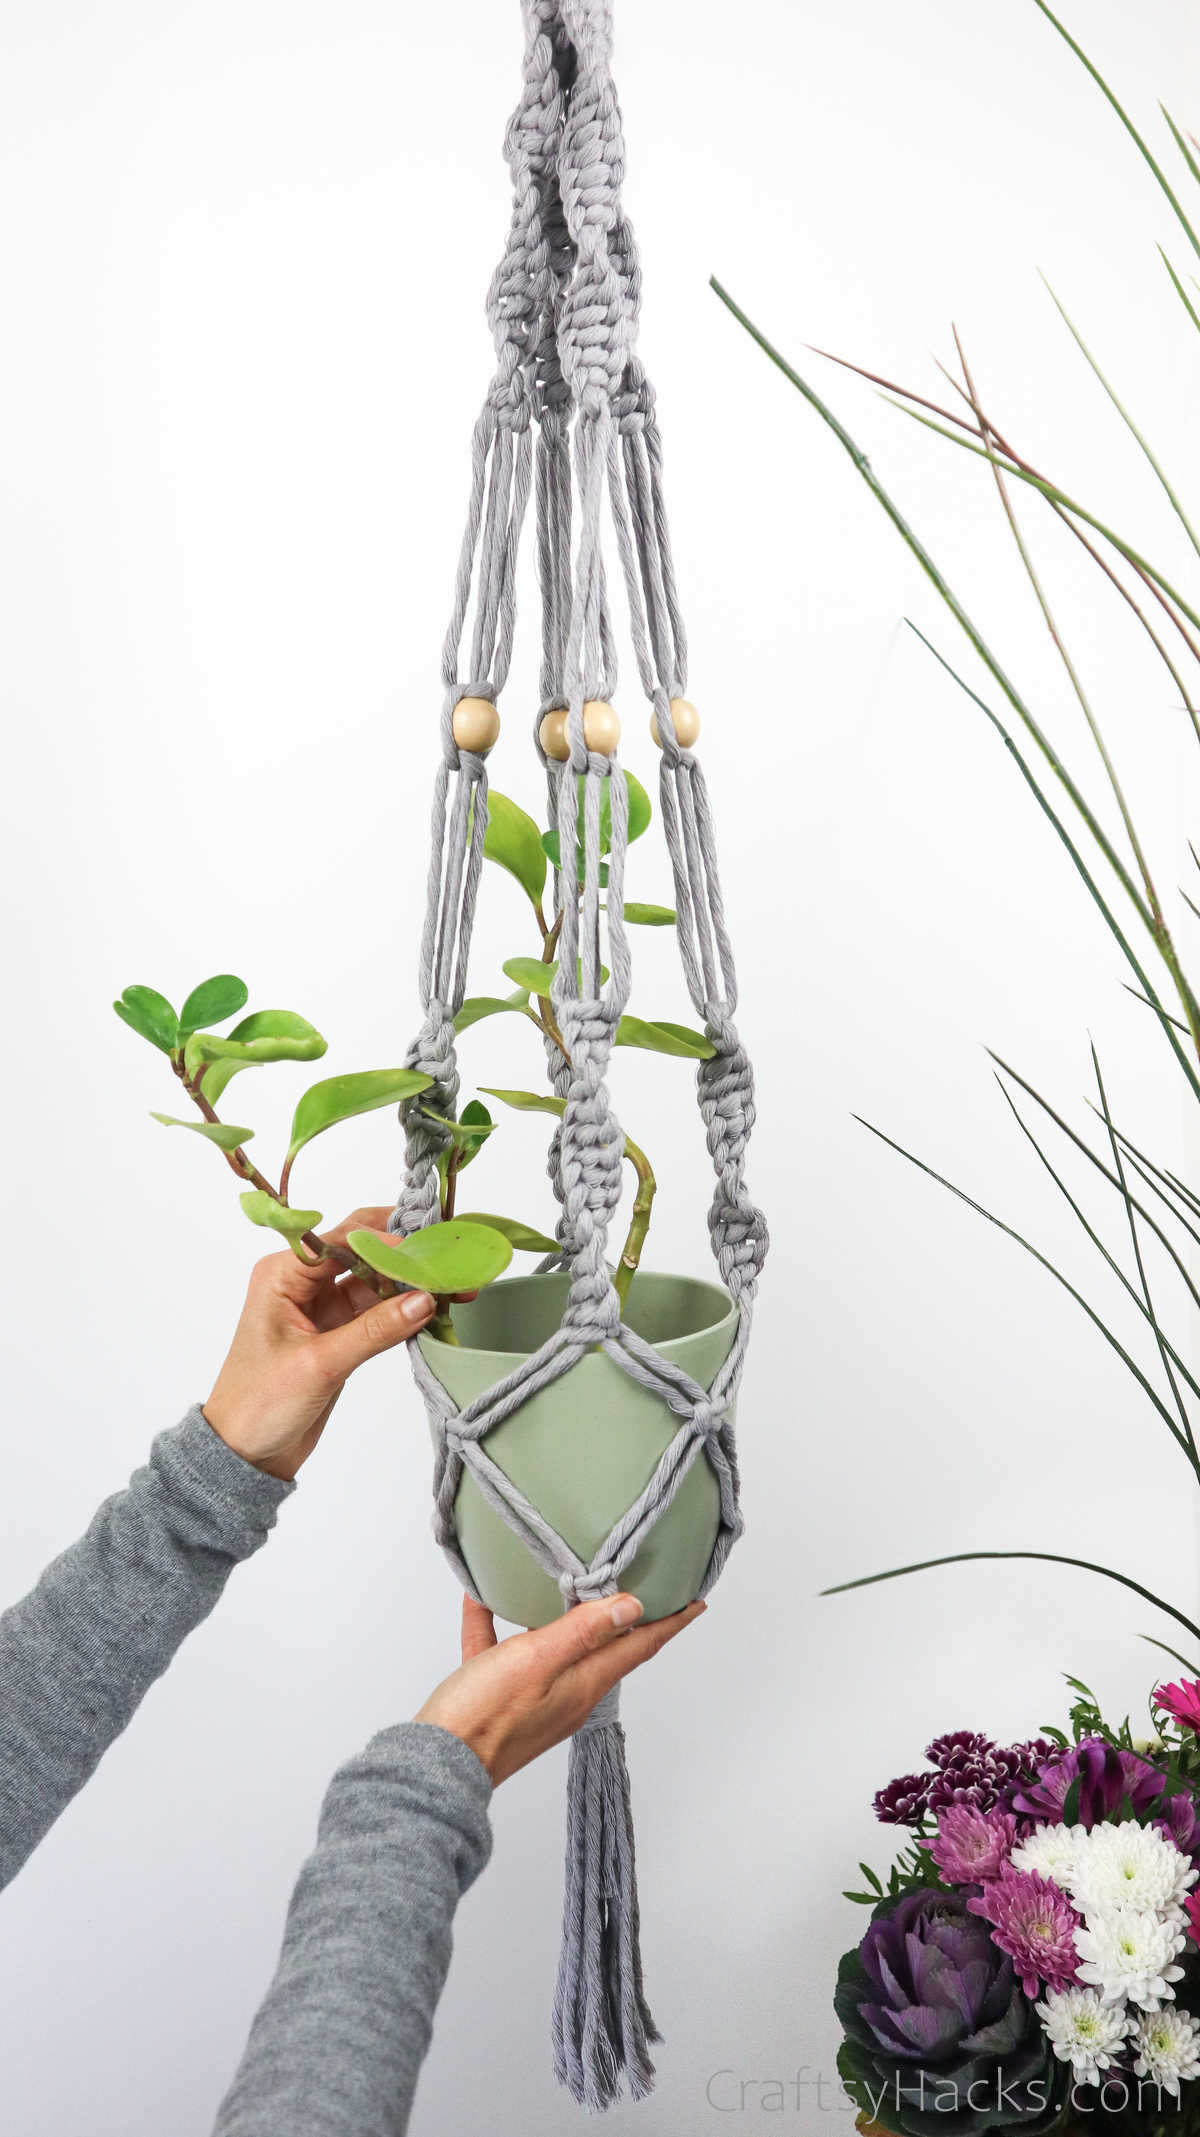
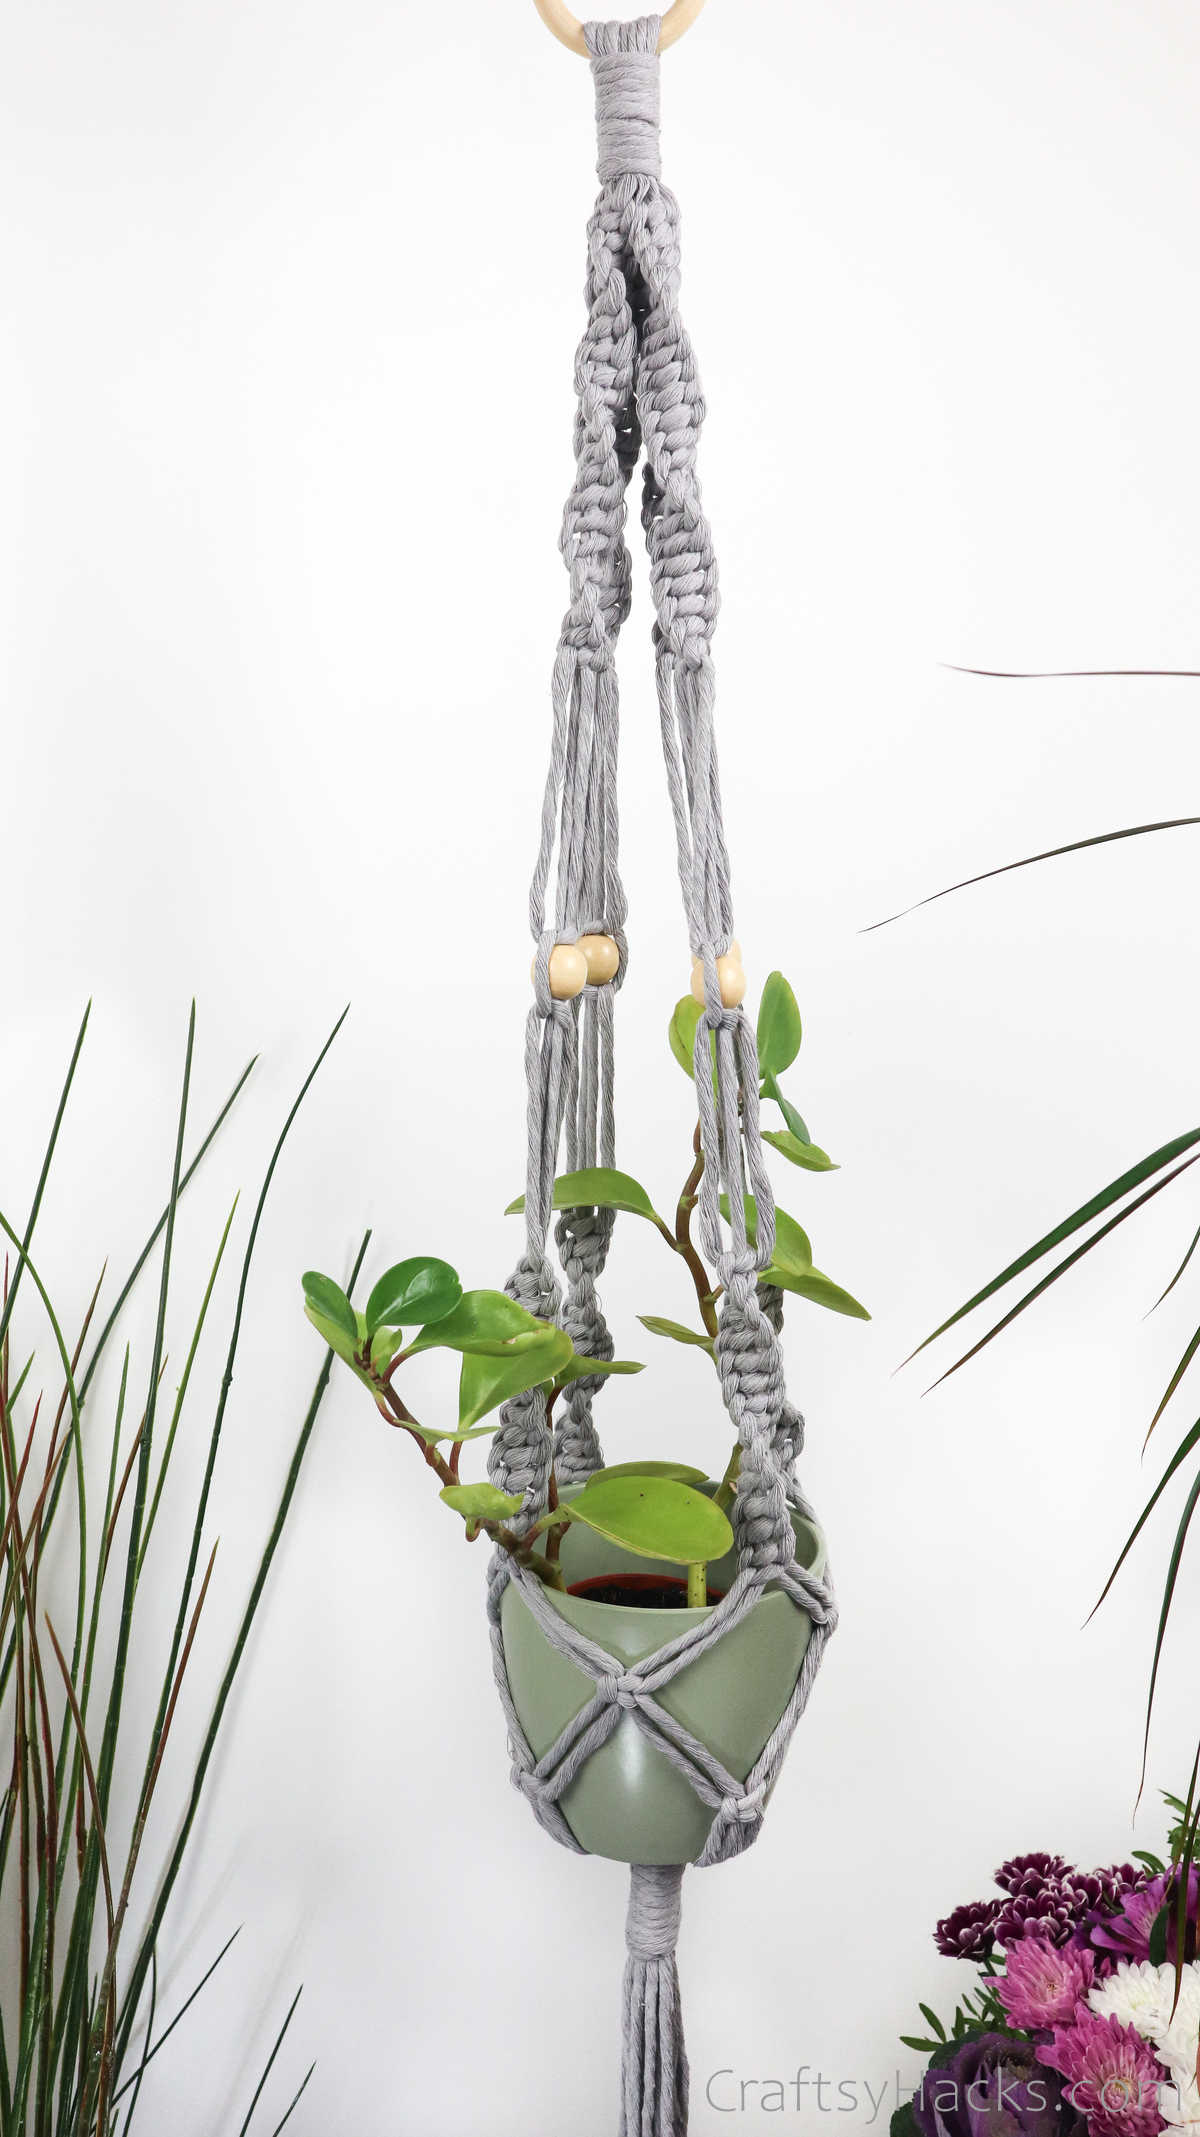
And there you go, your macrame hanger is ready to hang.
Just place the pot inside and its all done!
How to Use This Macrame Plant Hanger?