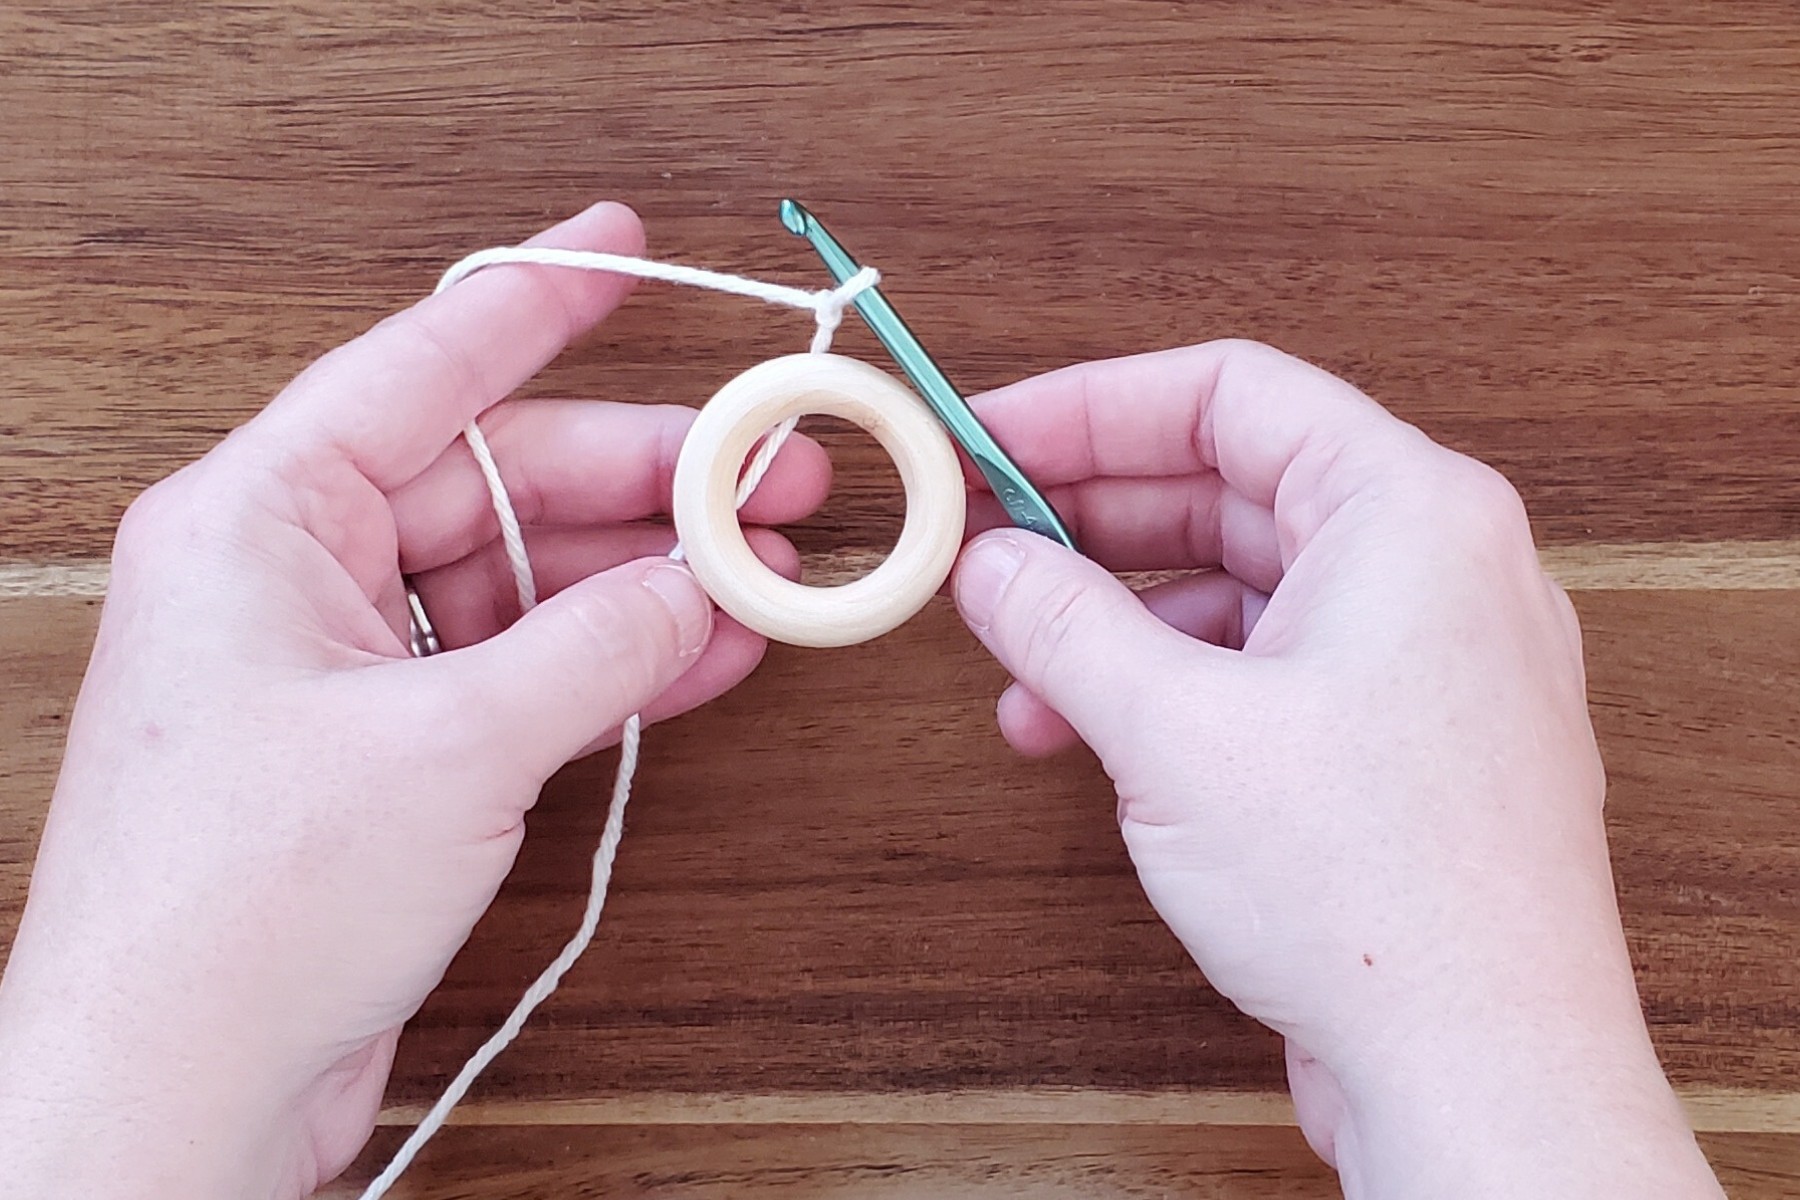
However, it is a bit more advanced since you will need to crochet around a wooden ring.
Homemade ornaments make each Christmas tree unique.
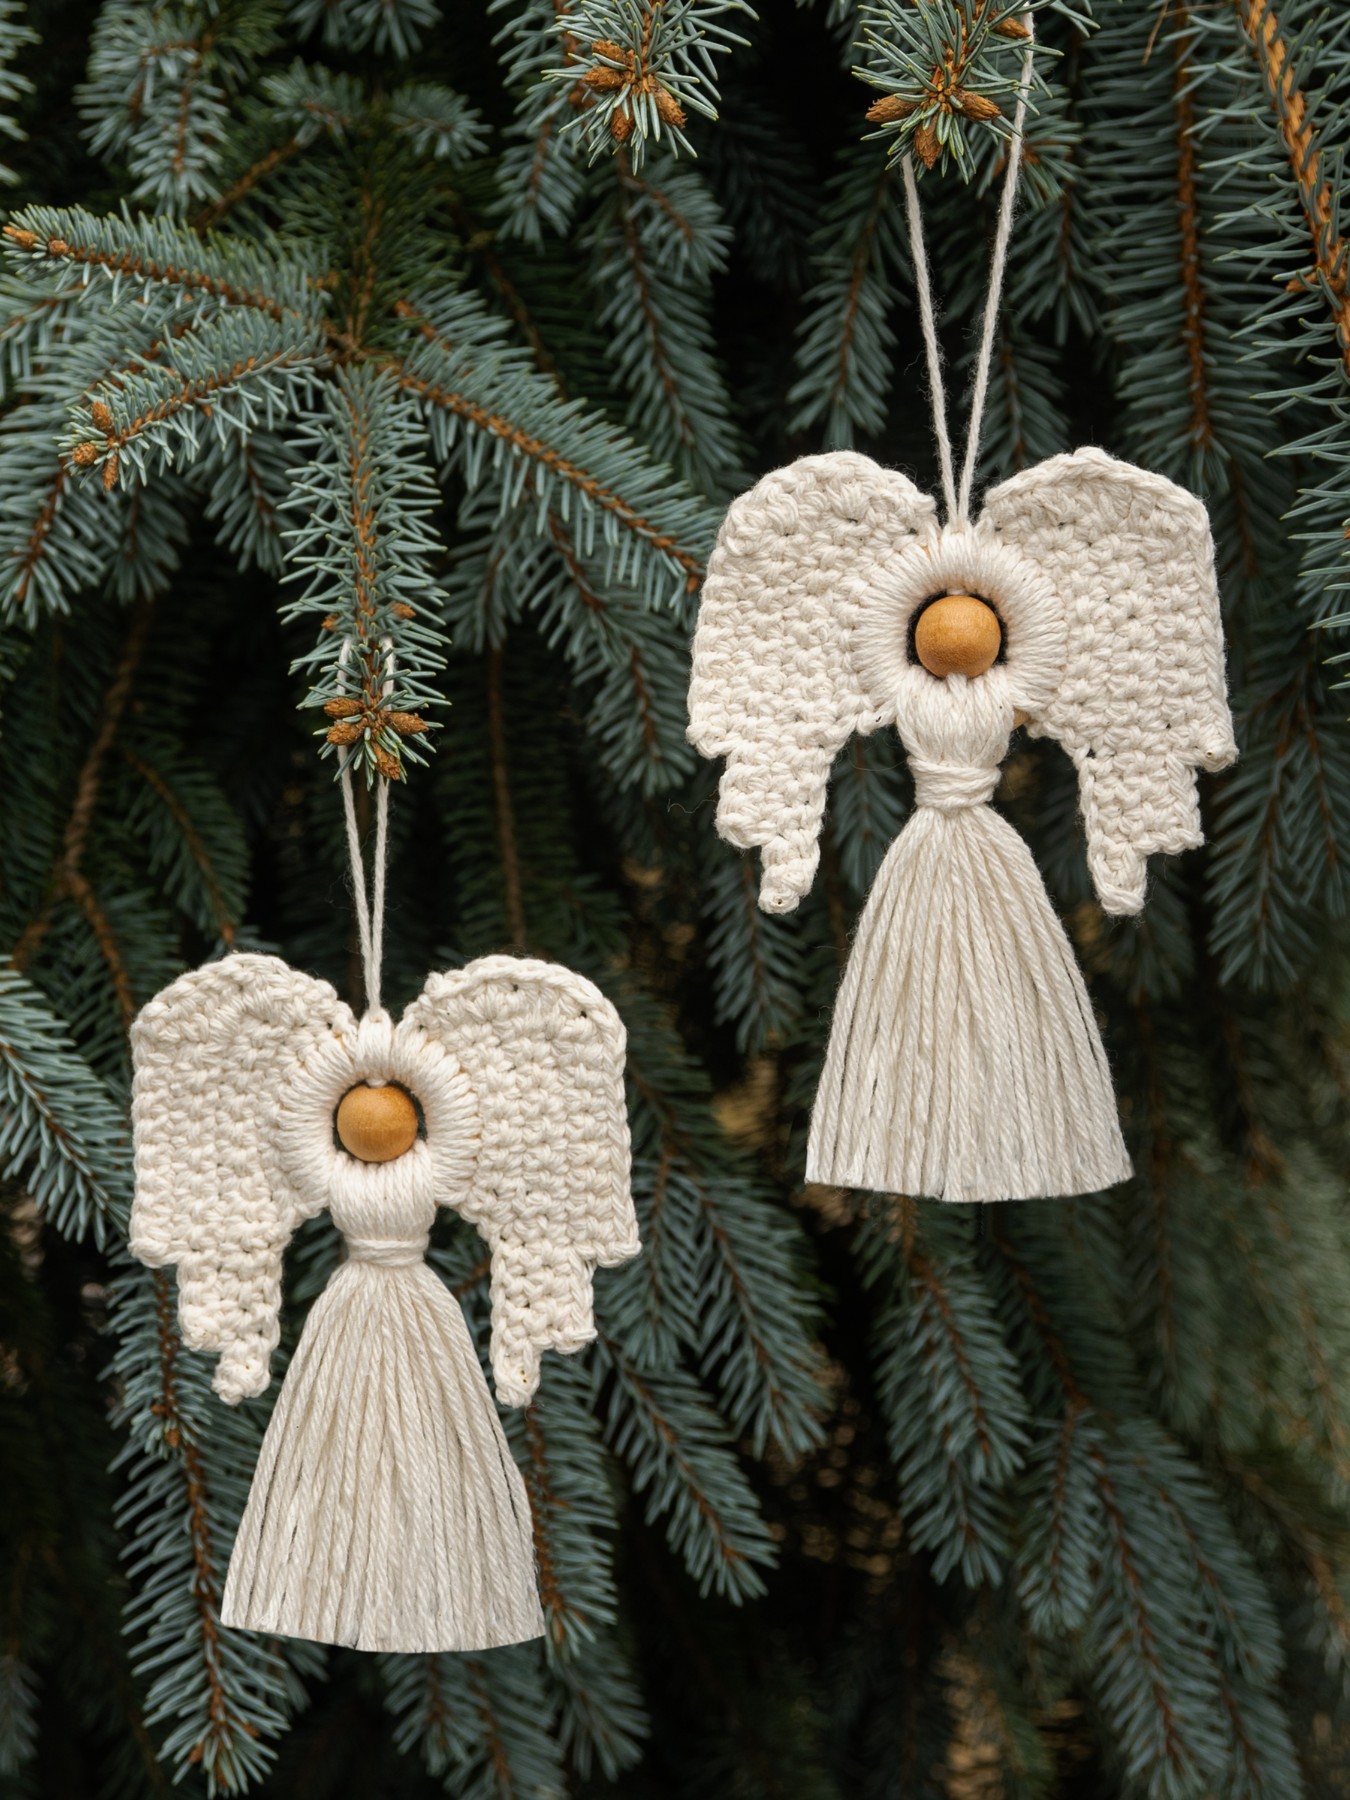
This year Im making some crochet ornaments and thought I would share my angel ornament with you.
Have you decorated your tree yet?
Why not add somehandmade joyto your Christmas tree this year with a crochet angel ornament?
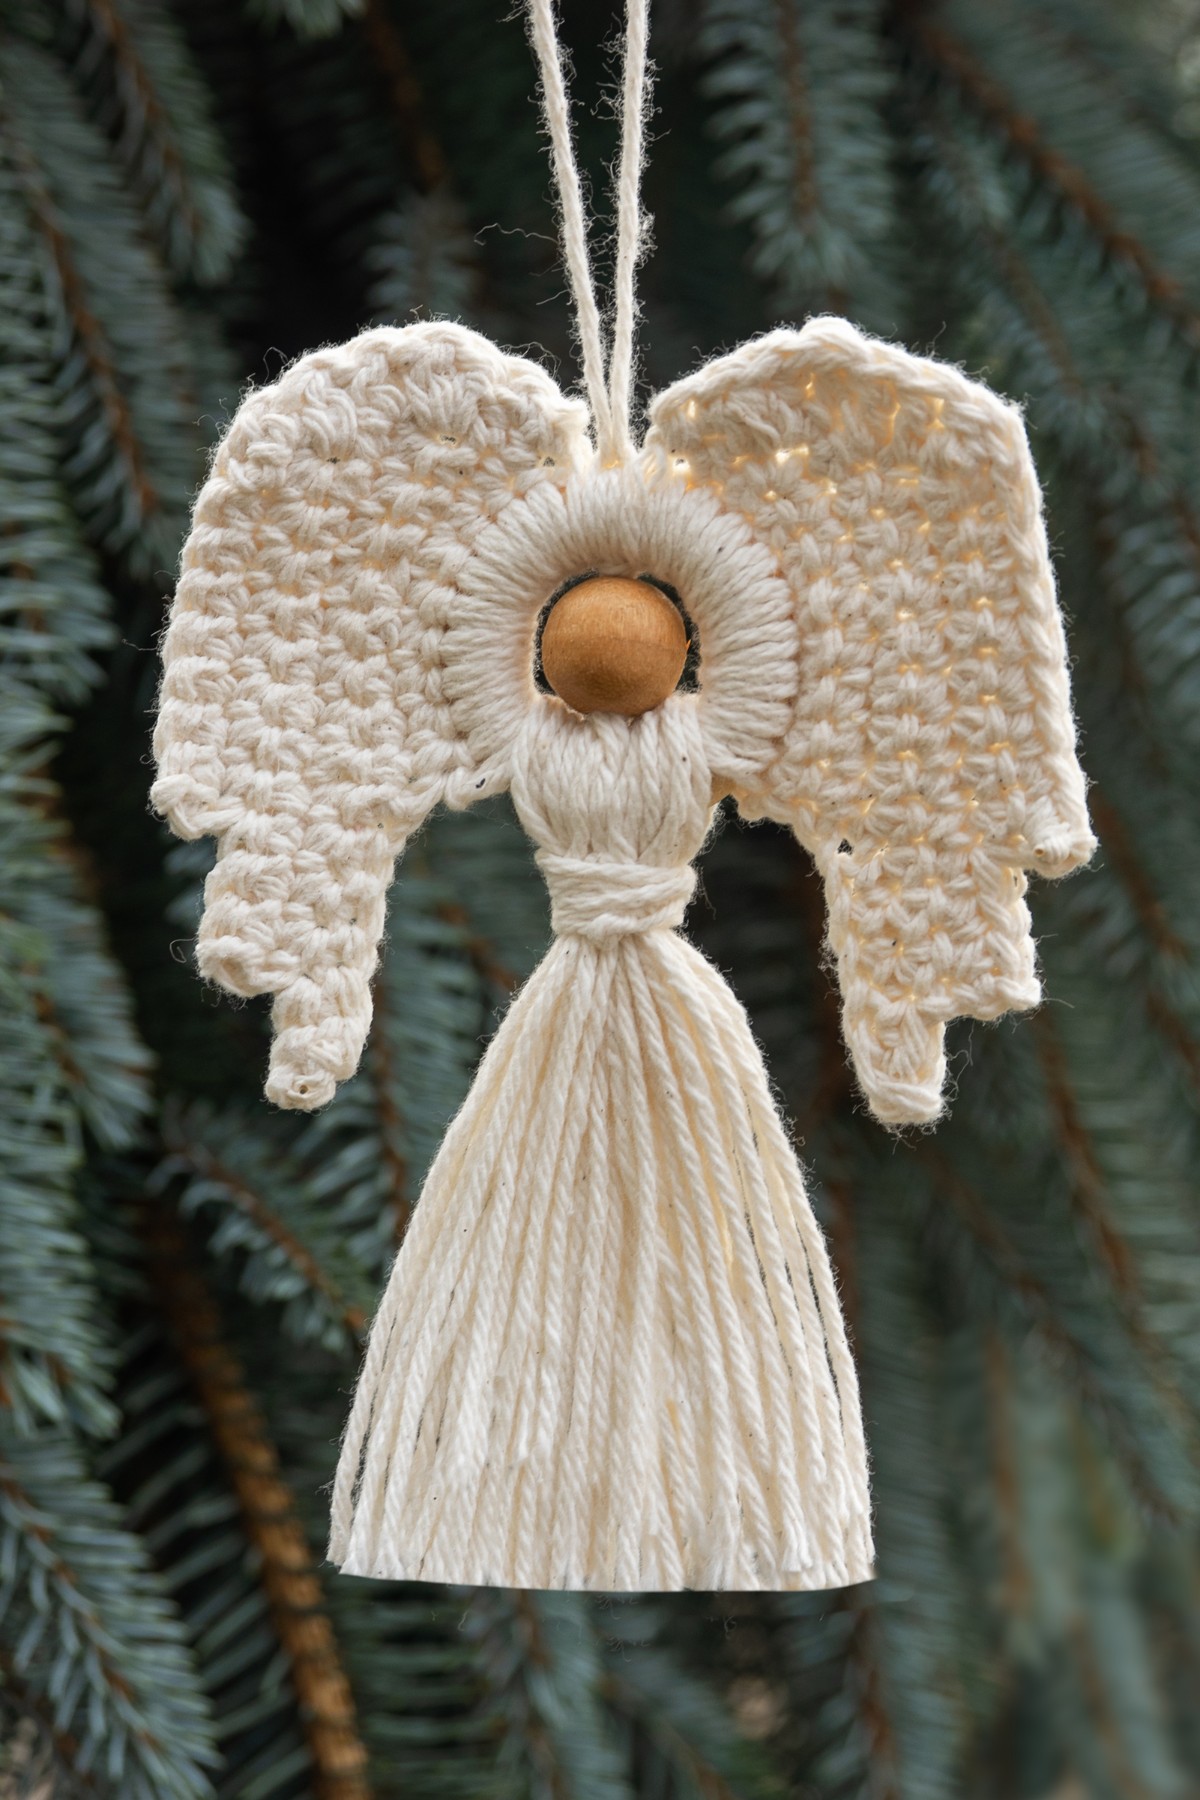
Once finished, it looks the same whether you hang it showing the front or the back!
Note: At the bottom of this post, youll find a printable version of thefree crochet pattern.
Crochet angel ornament supplies
First things first, lets gather our supplies!
Keep in mind,gauge is NOT importantfor this project.
Just stay consistent with your stitches throughout the pattern.
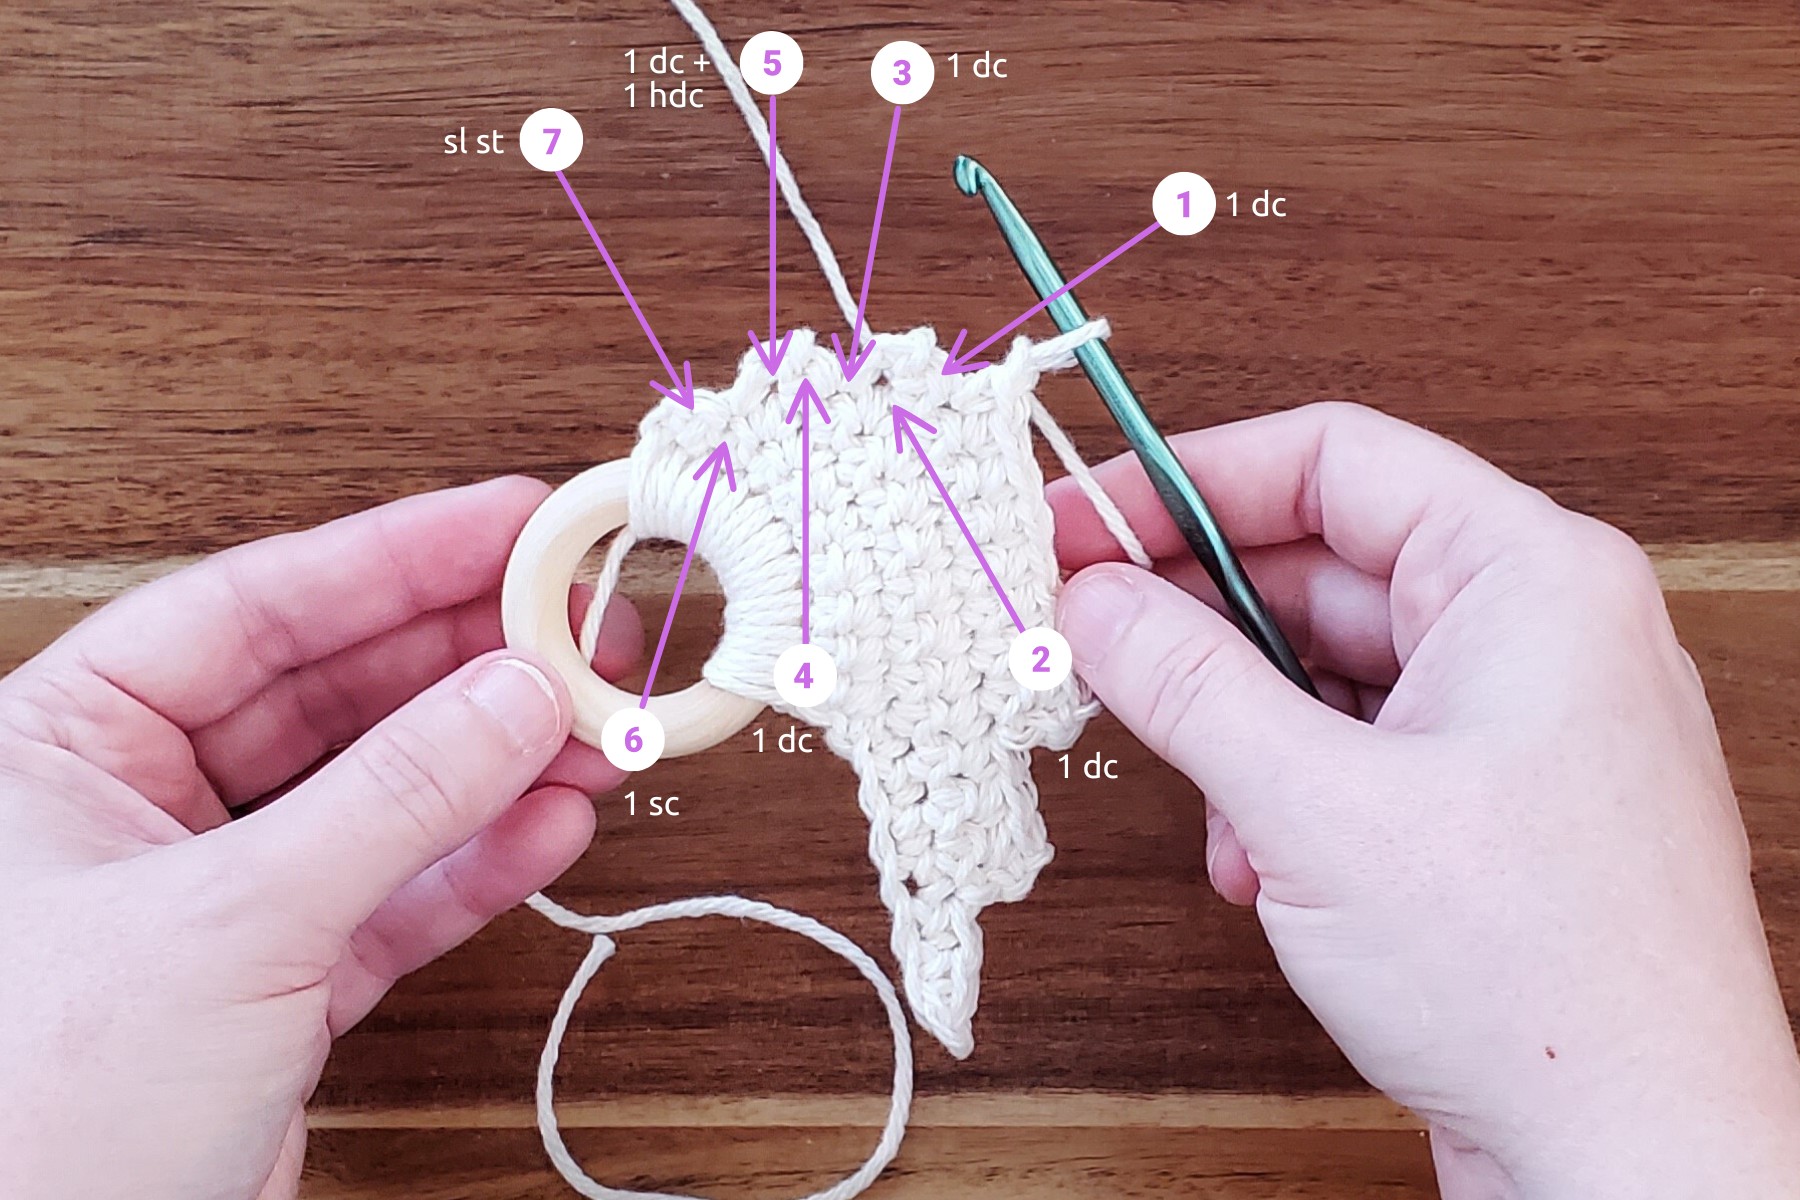
If you are unsure how to crochet on a ring, you canwatch this video.
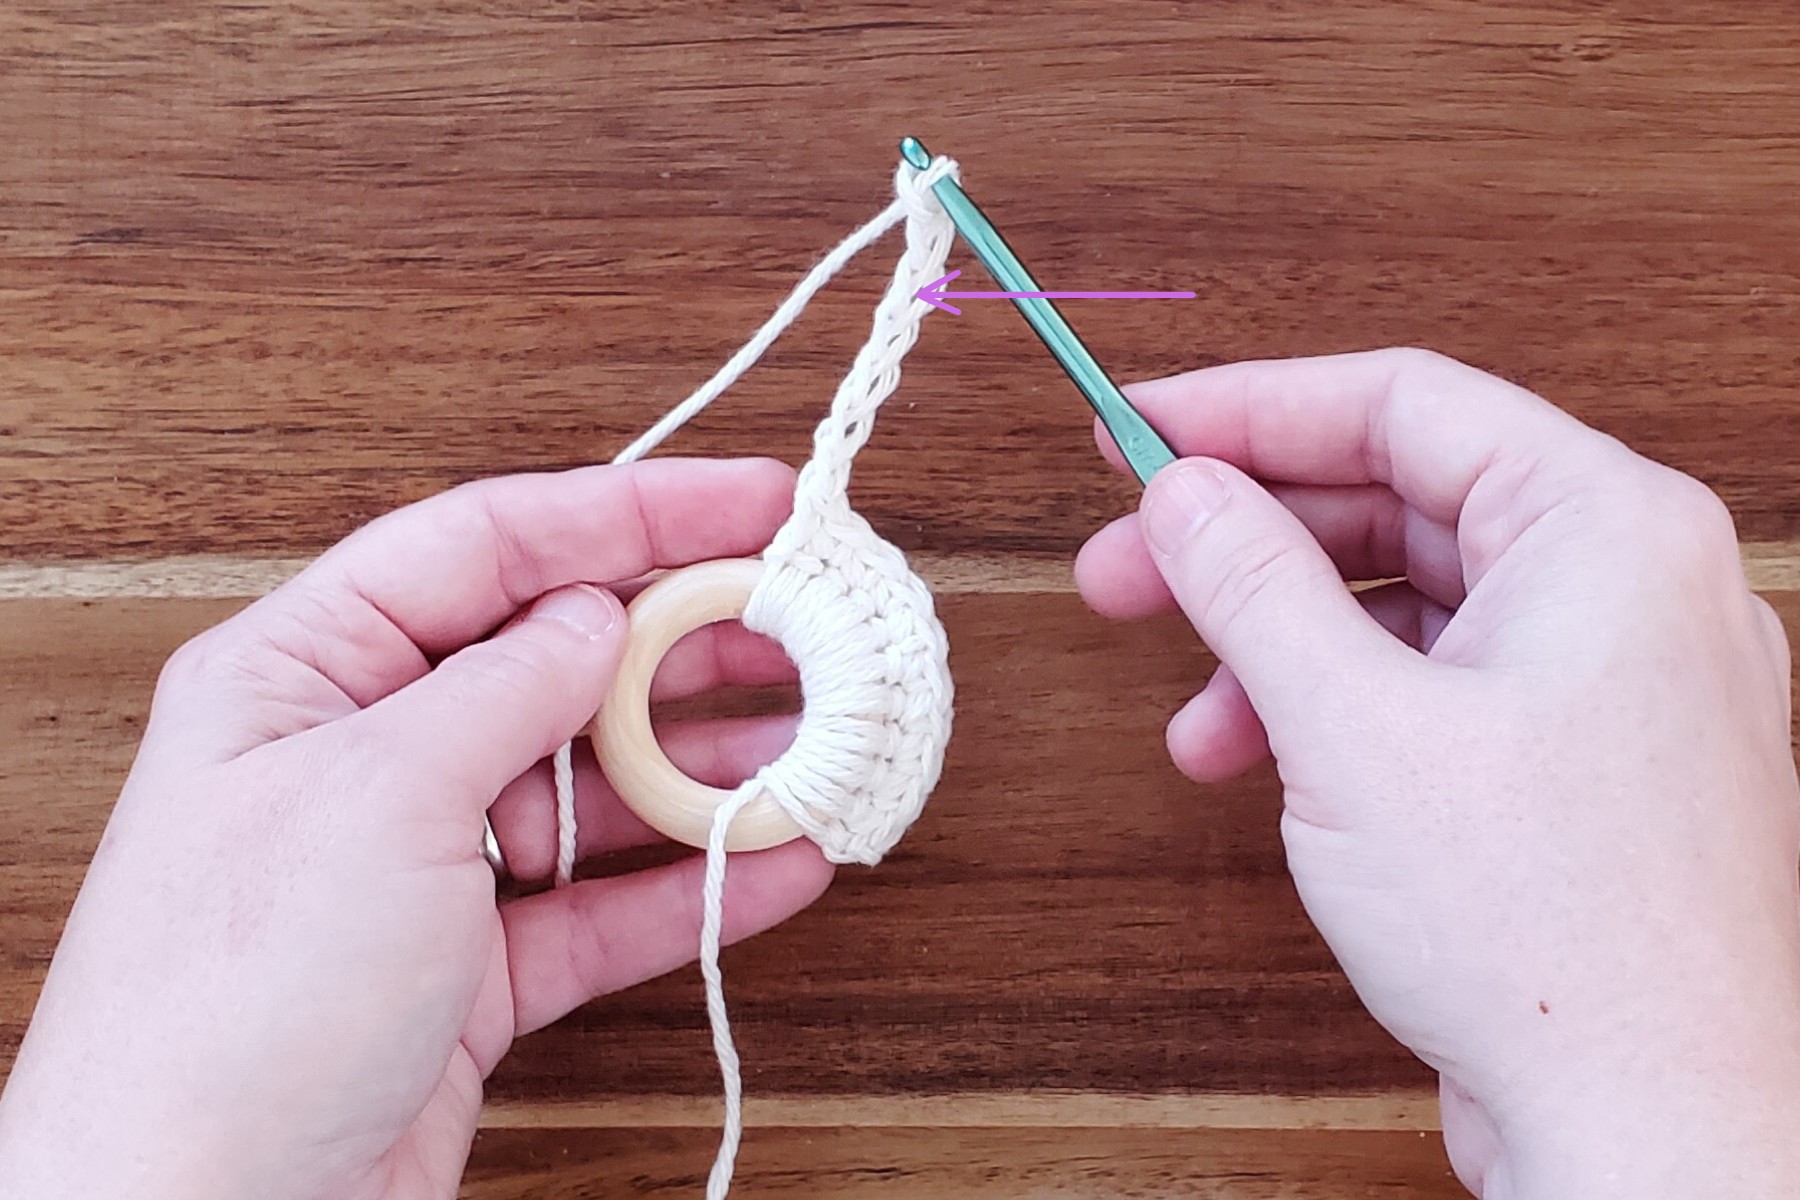
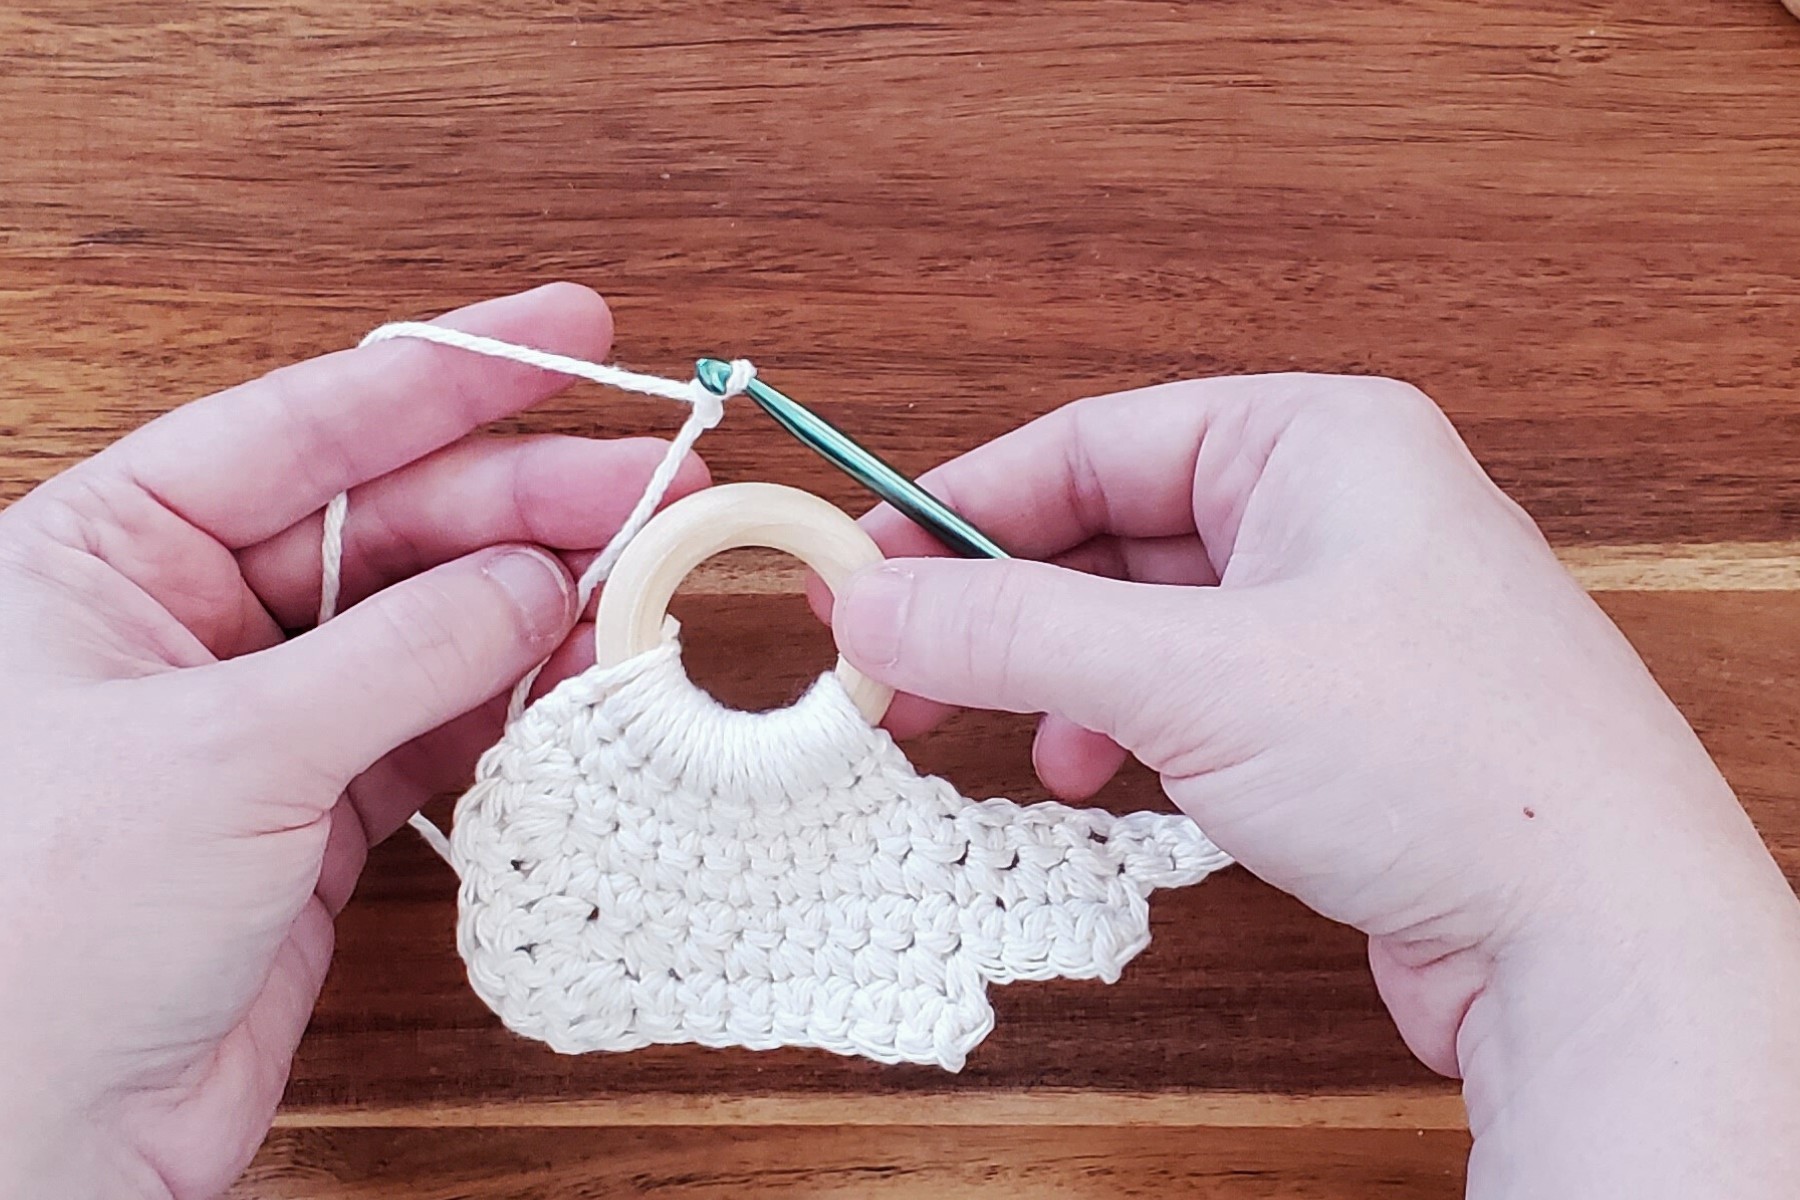
Row 2:10 sc, ch 7, turnYour work should look like the photo below.
Finish off.Photo below shows the placement of the last stitches.
Pull on starting yarn tail and trim it.
Turn wood ring over and repeat steps to complete 2nd wing.
Note: At this point, you may notice that your wings are curling up.
Dont worrywe will take care of that in the finishing of the ornament.
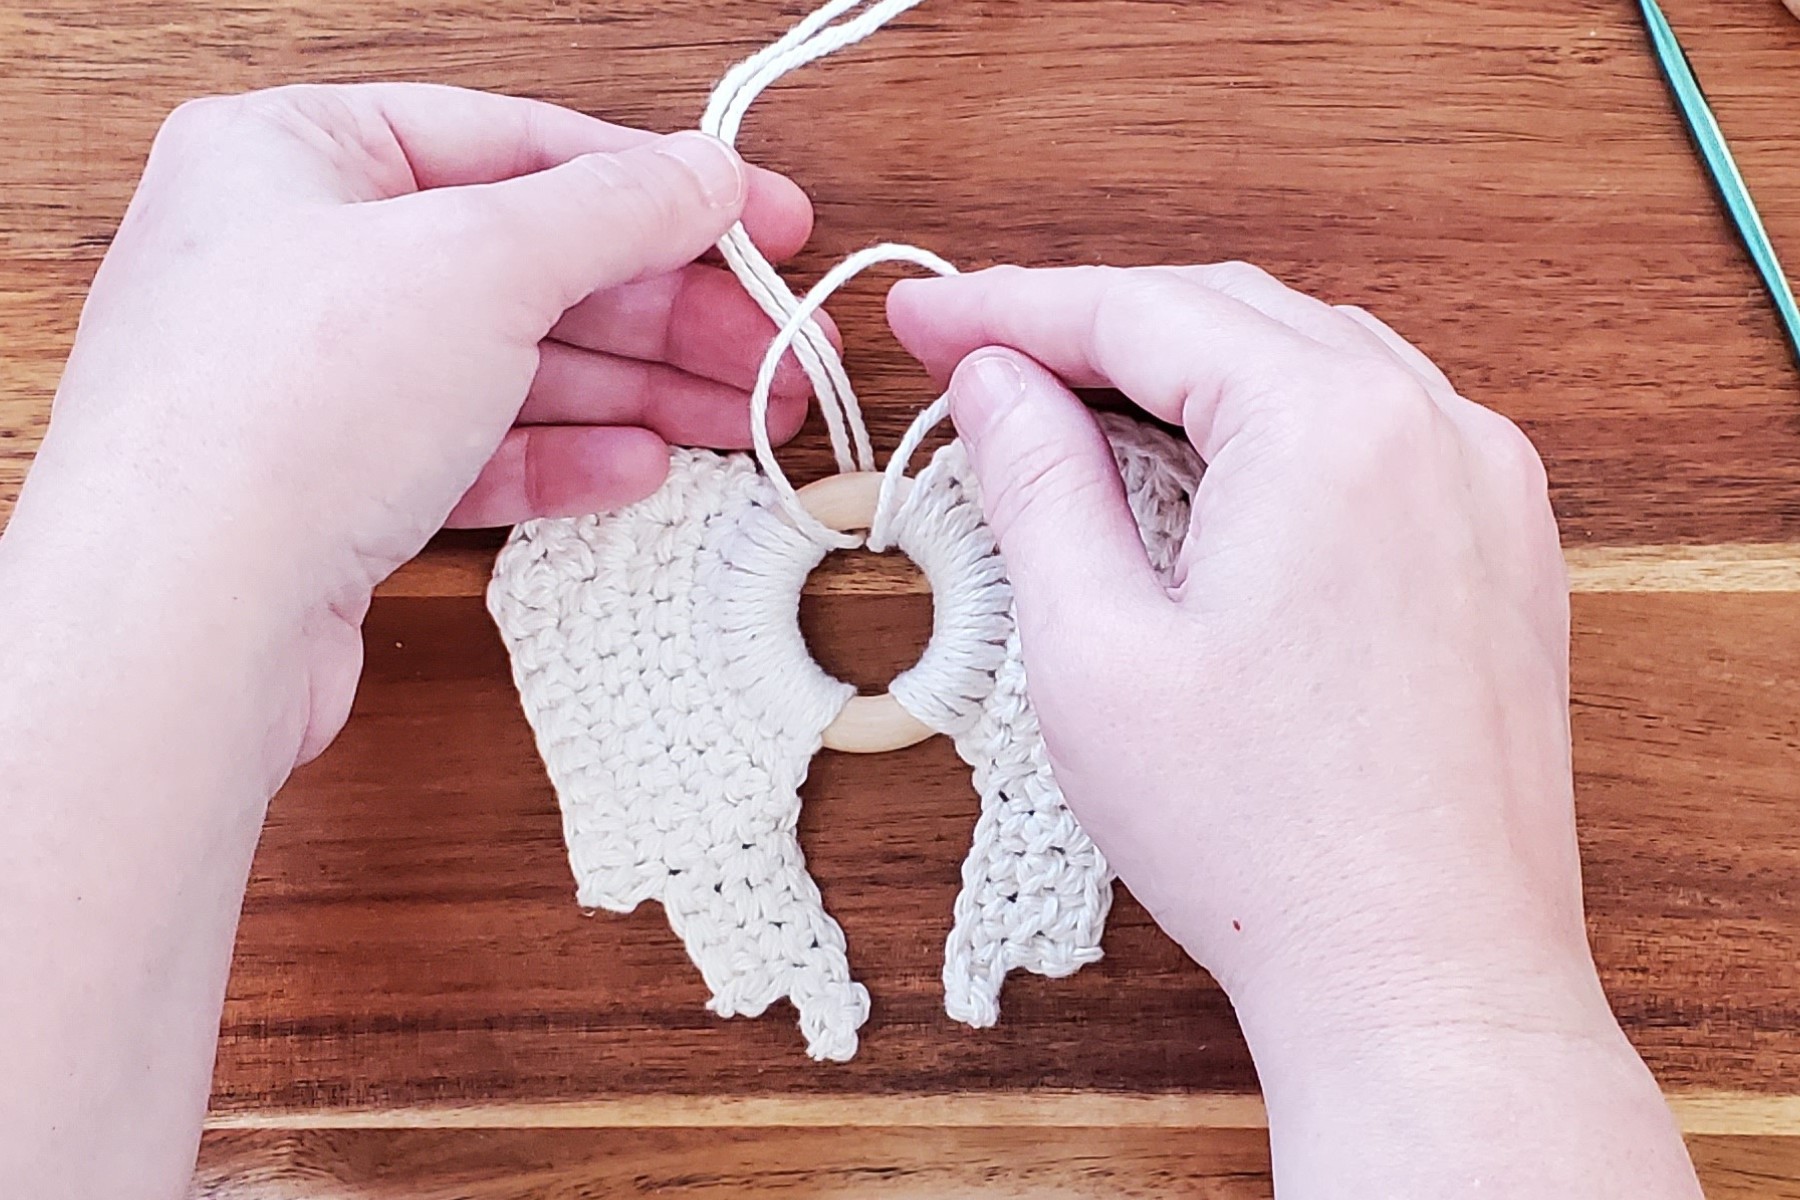
Add head to angel:
Cut 2 (24) piece of yarn.
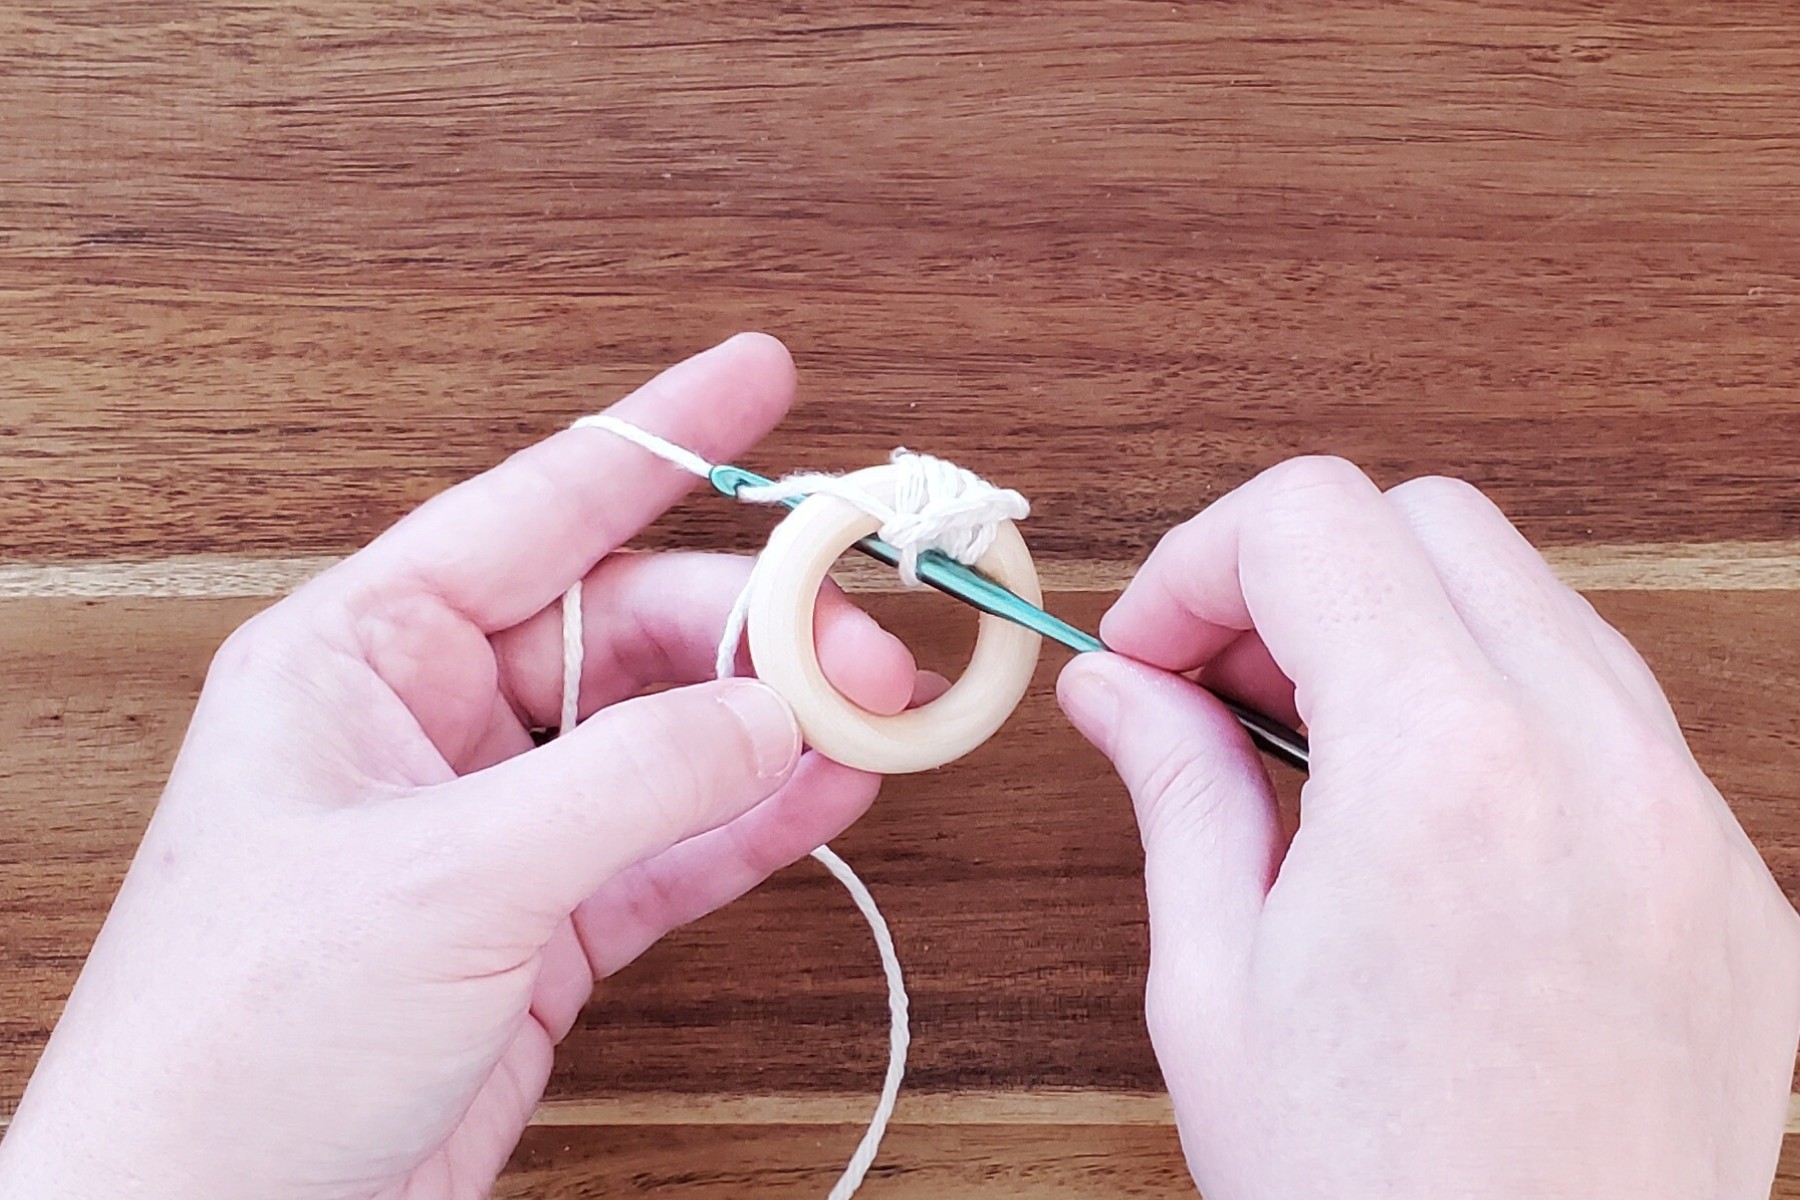
Attach yarn to wood ring between tops of wings using a larks head knot.Photo below shows beginning of knot.
Complete it by pulling the two ends through the loop.
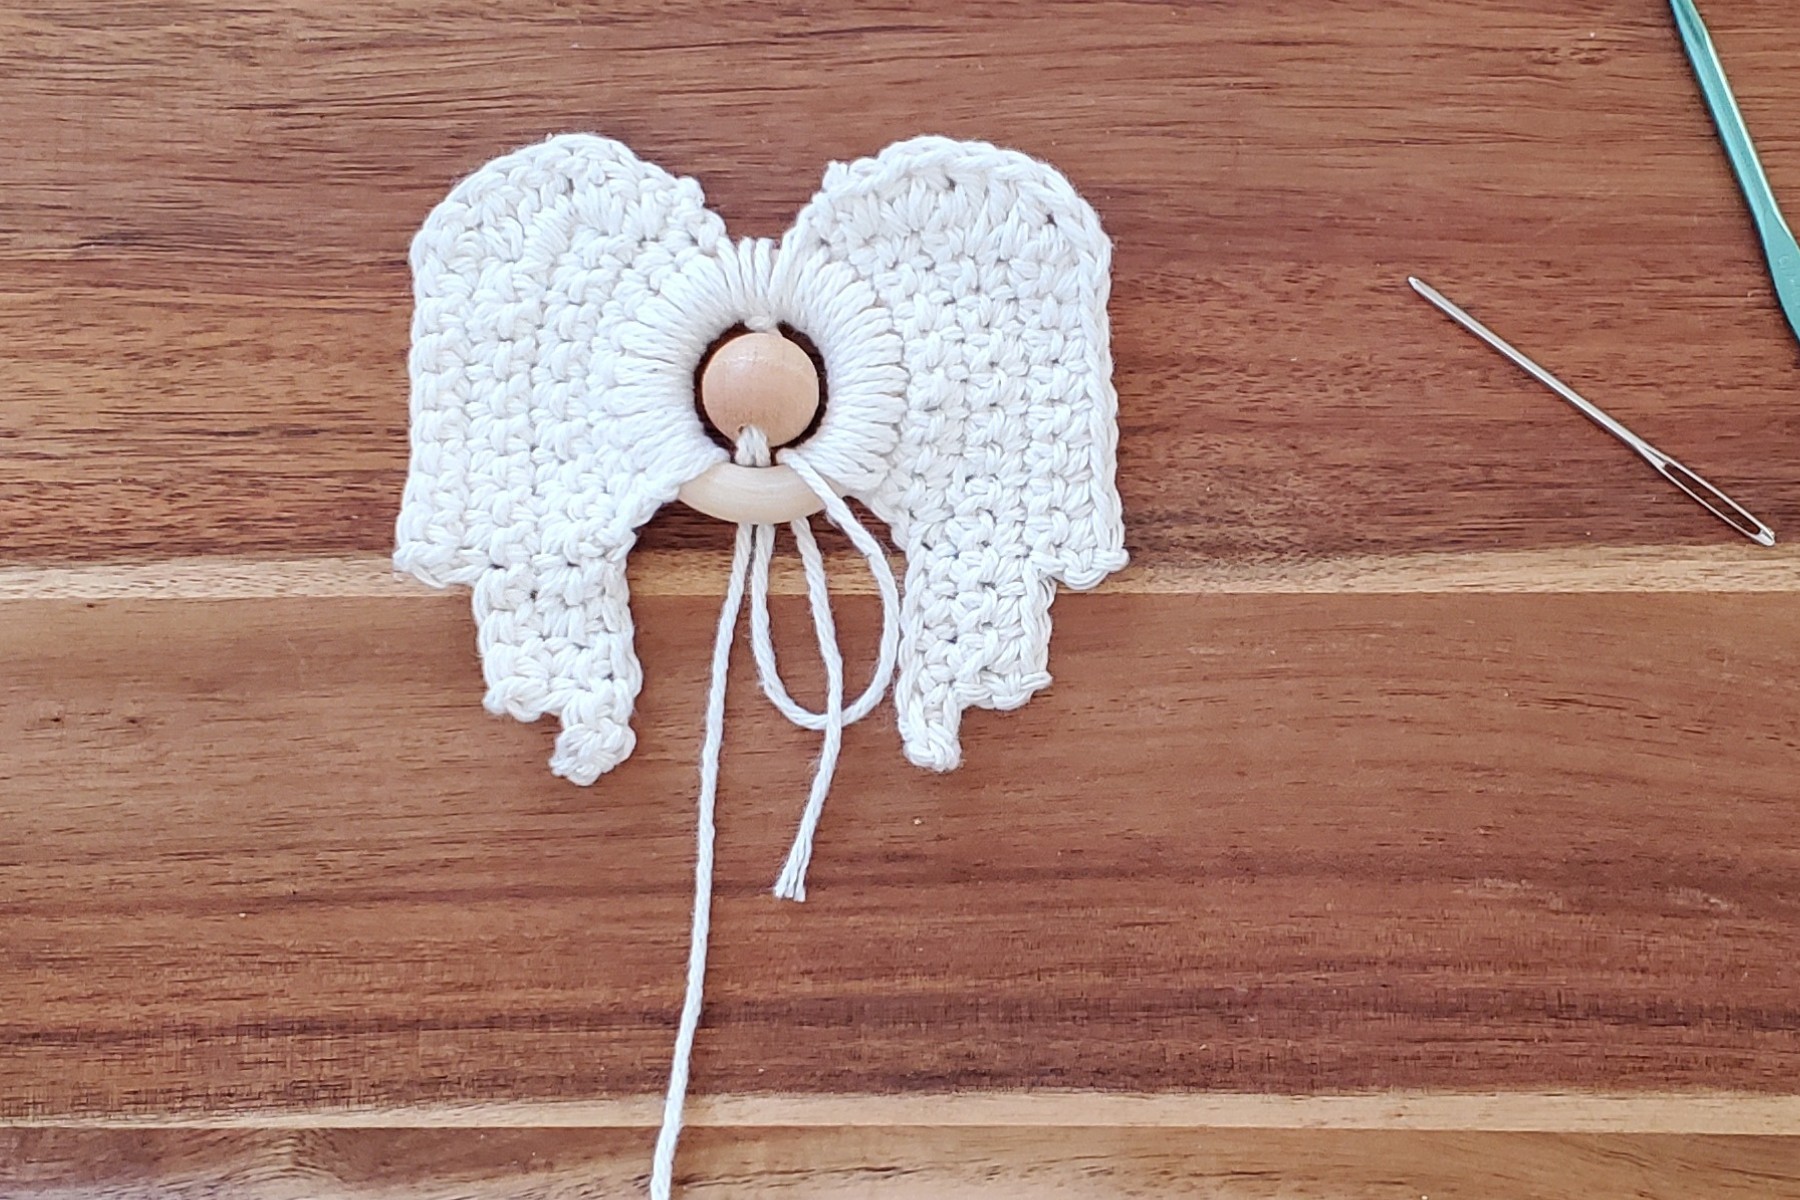
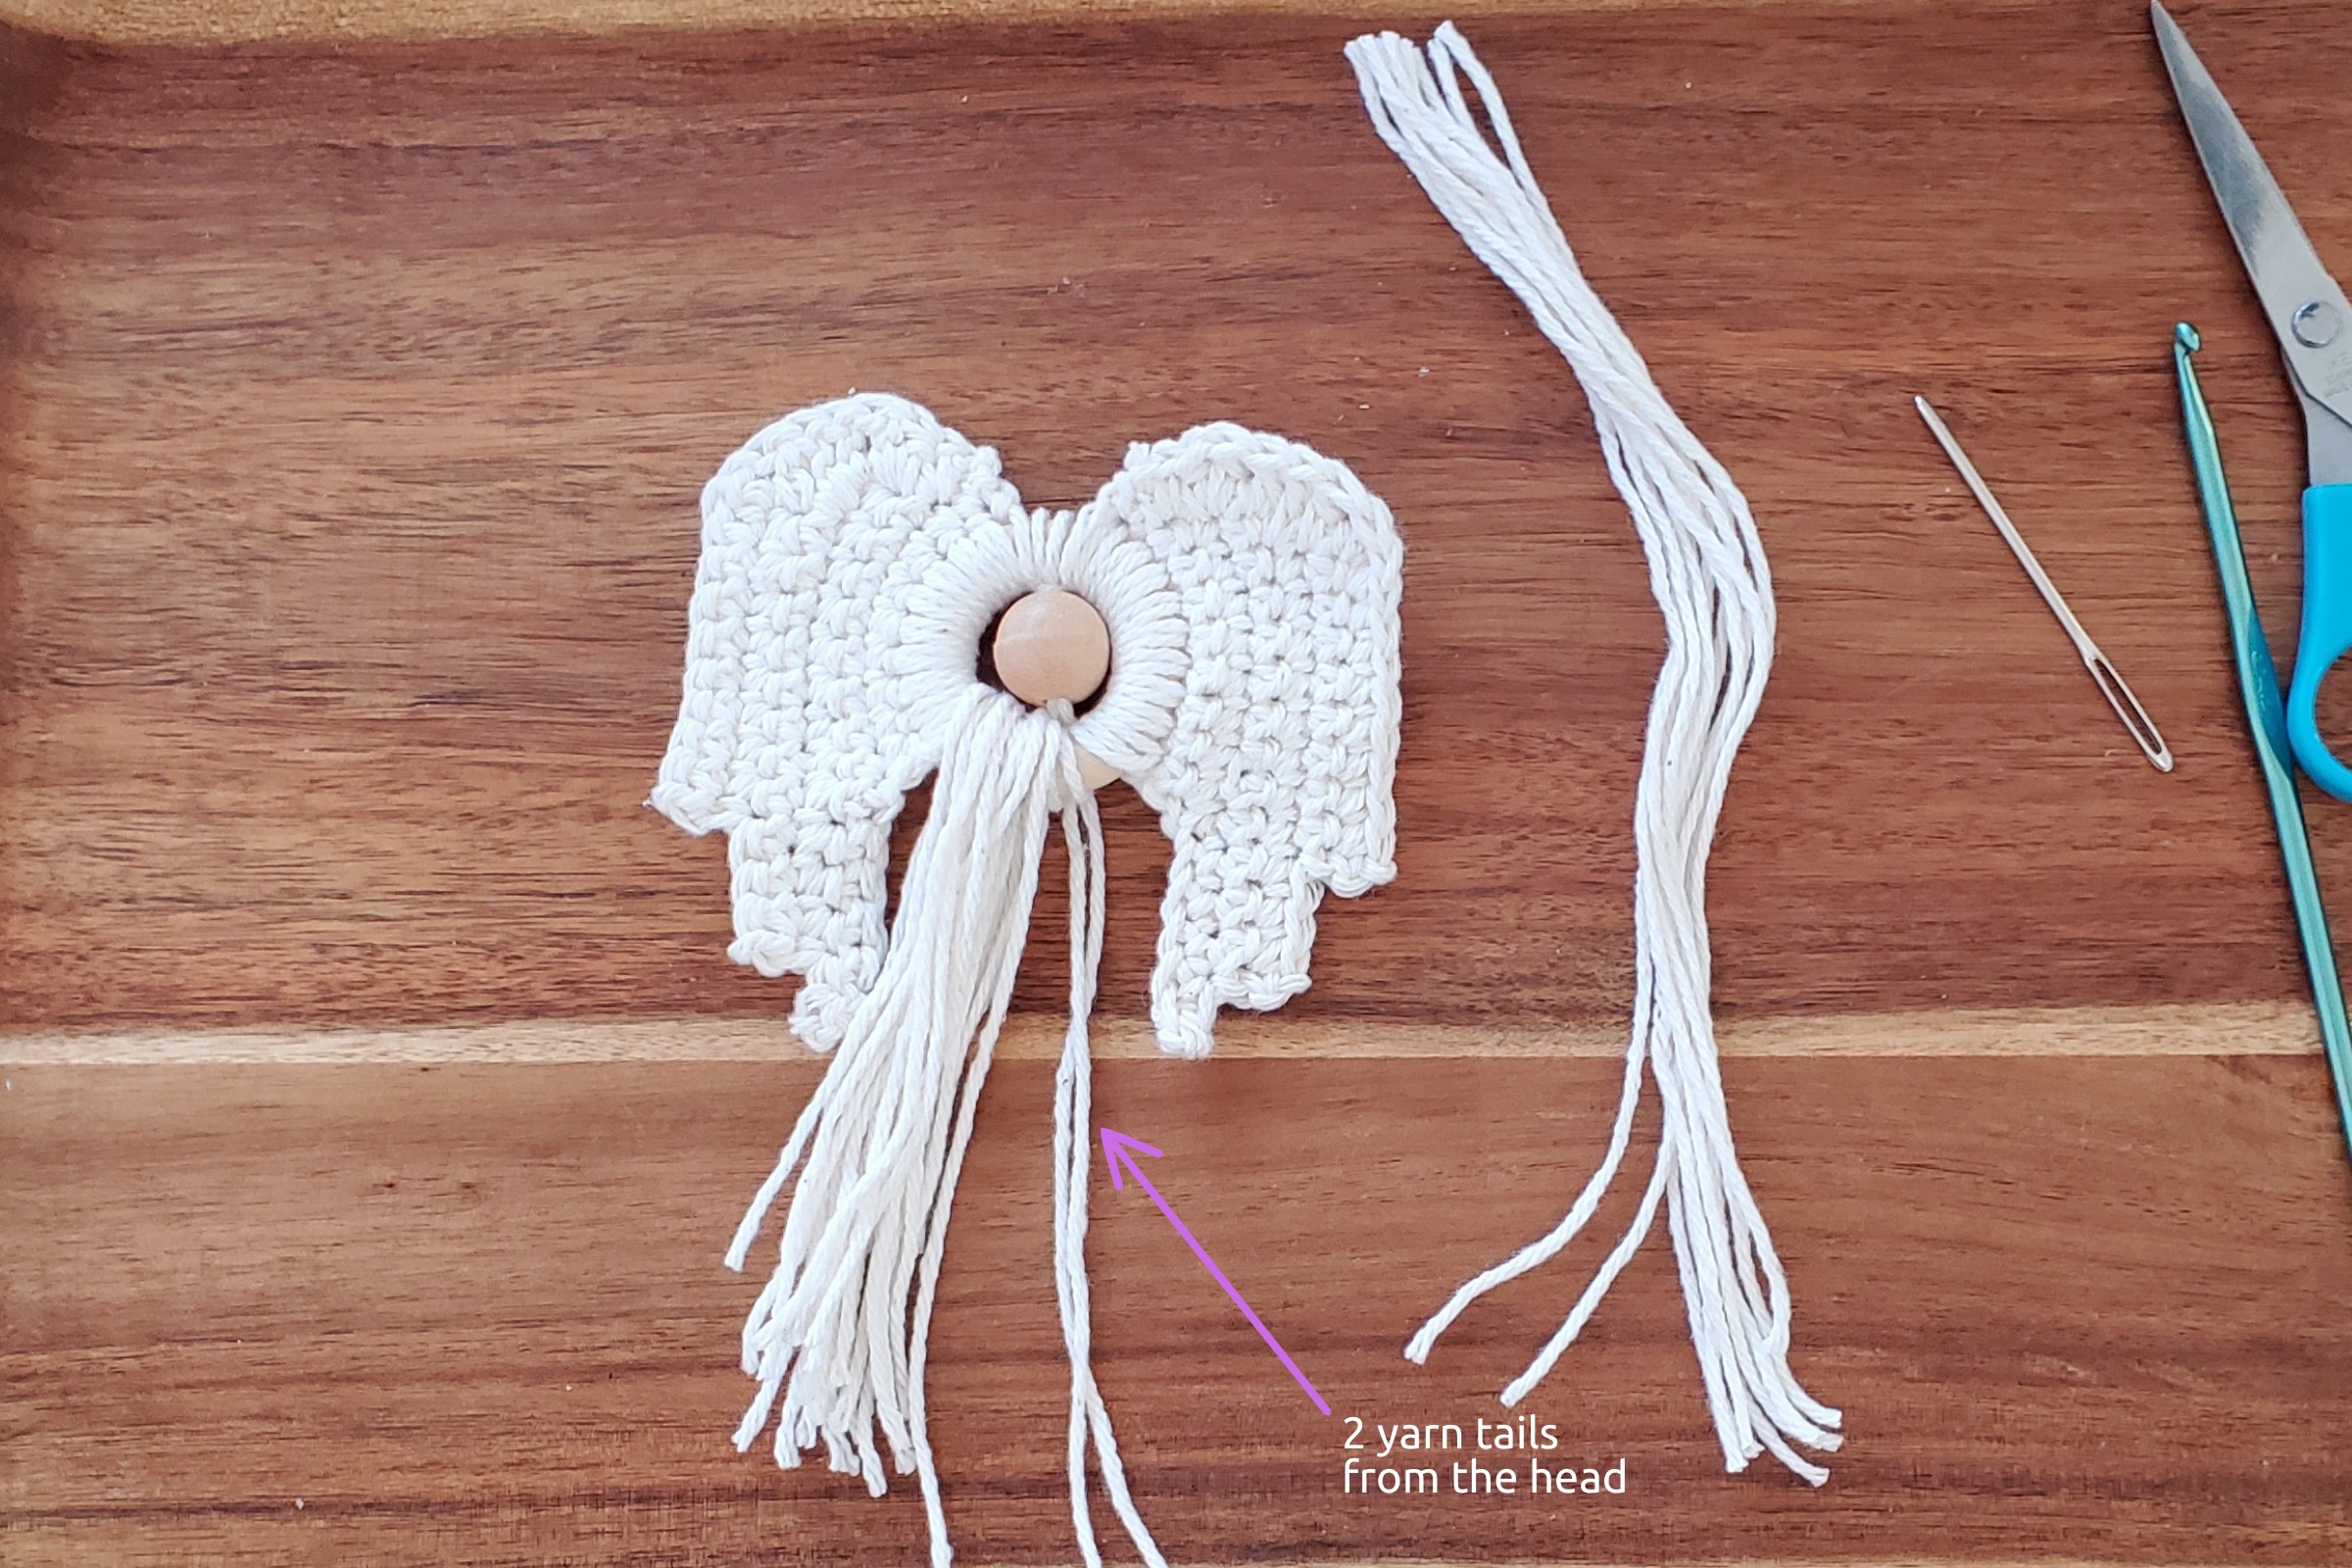
Thread tapestry needle with both ends of yarn and feed the needle through the wood bead.
Wrap each end of yarn around wood ring (as shown below) and pull tight.
Add body to angel ornament:
Cut 24 10 pieces of yarn.
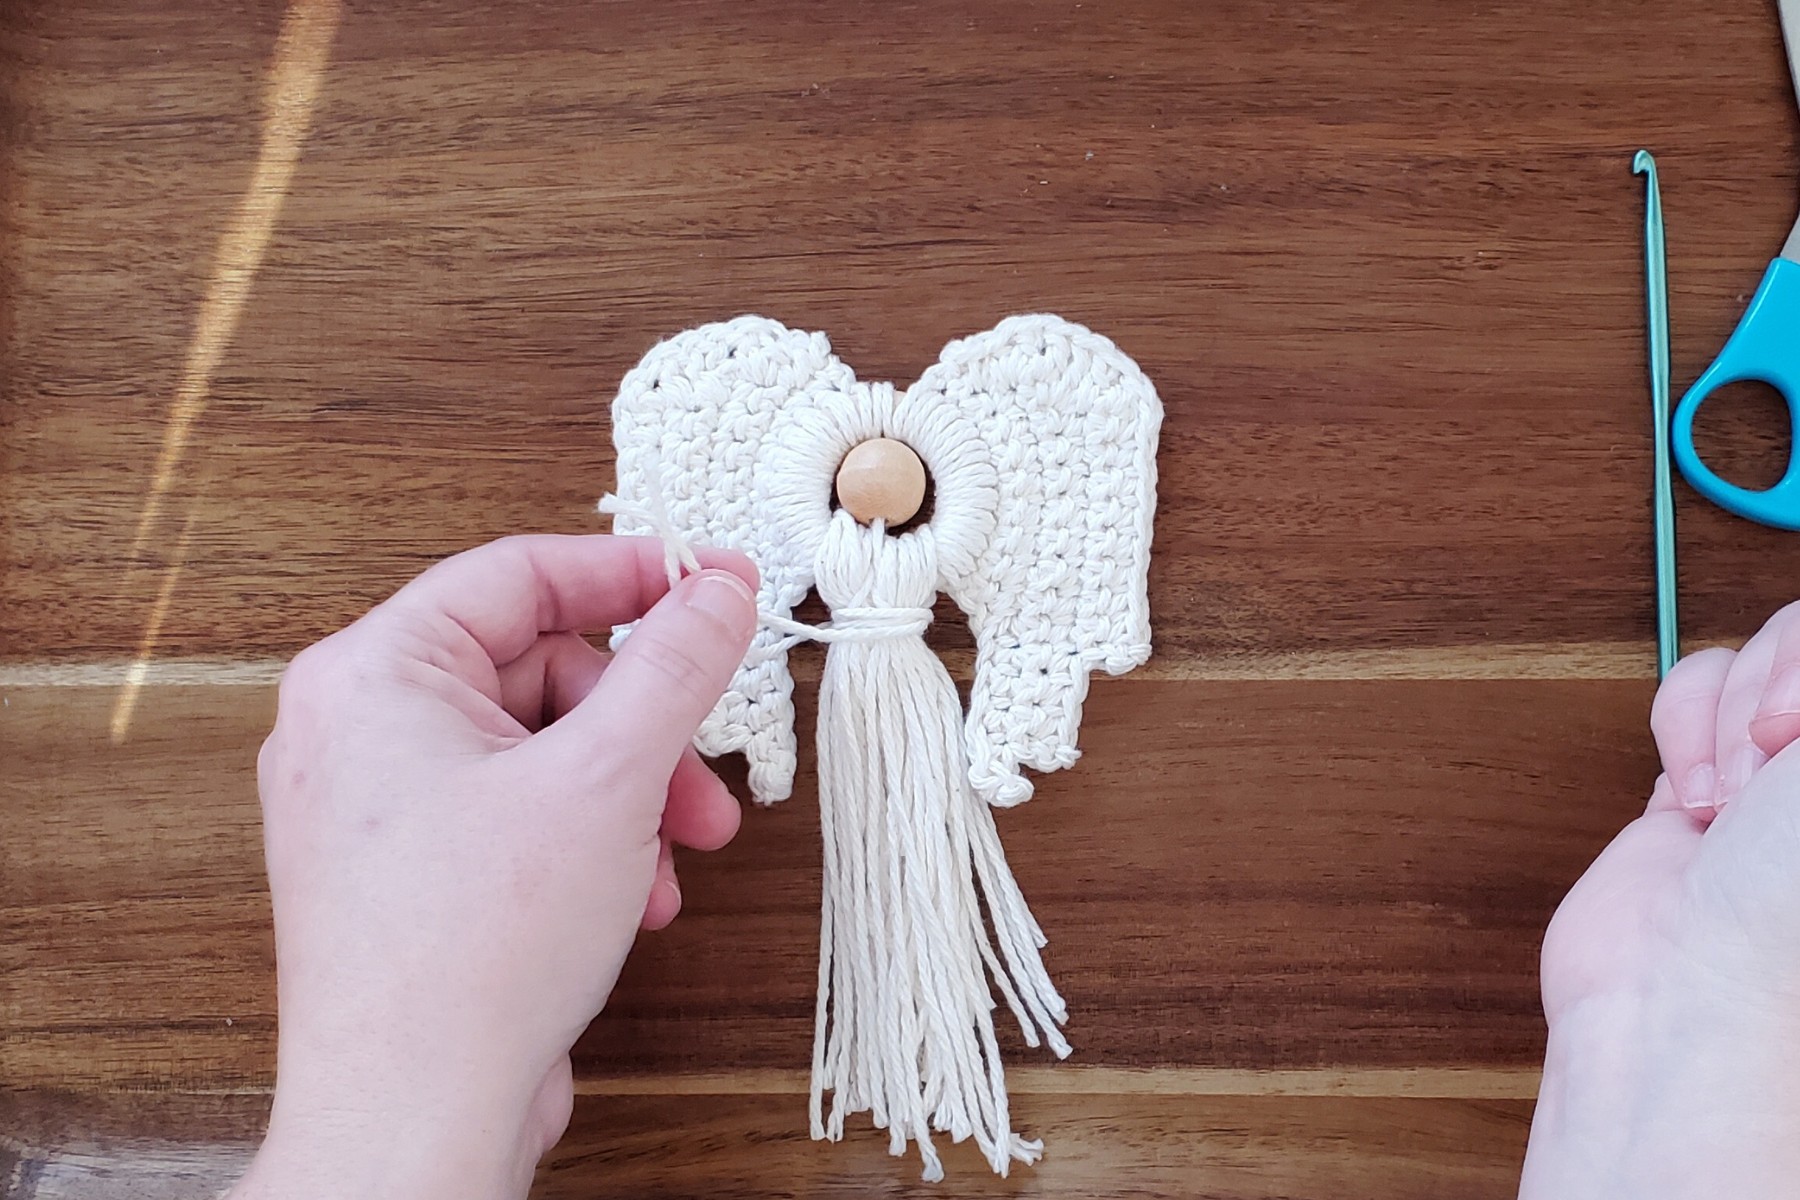
Gather together half of the pieces and feed through wood ring on one side of head.
Pull both ends down until they are even.
Gather together other 12 pieces of yarn and add them to right side of head.
Pull down until even.
Group all of the yarn together (except for ends that go with the head).
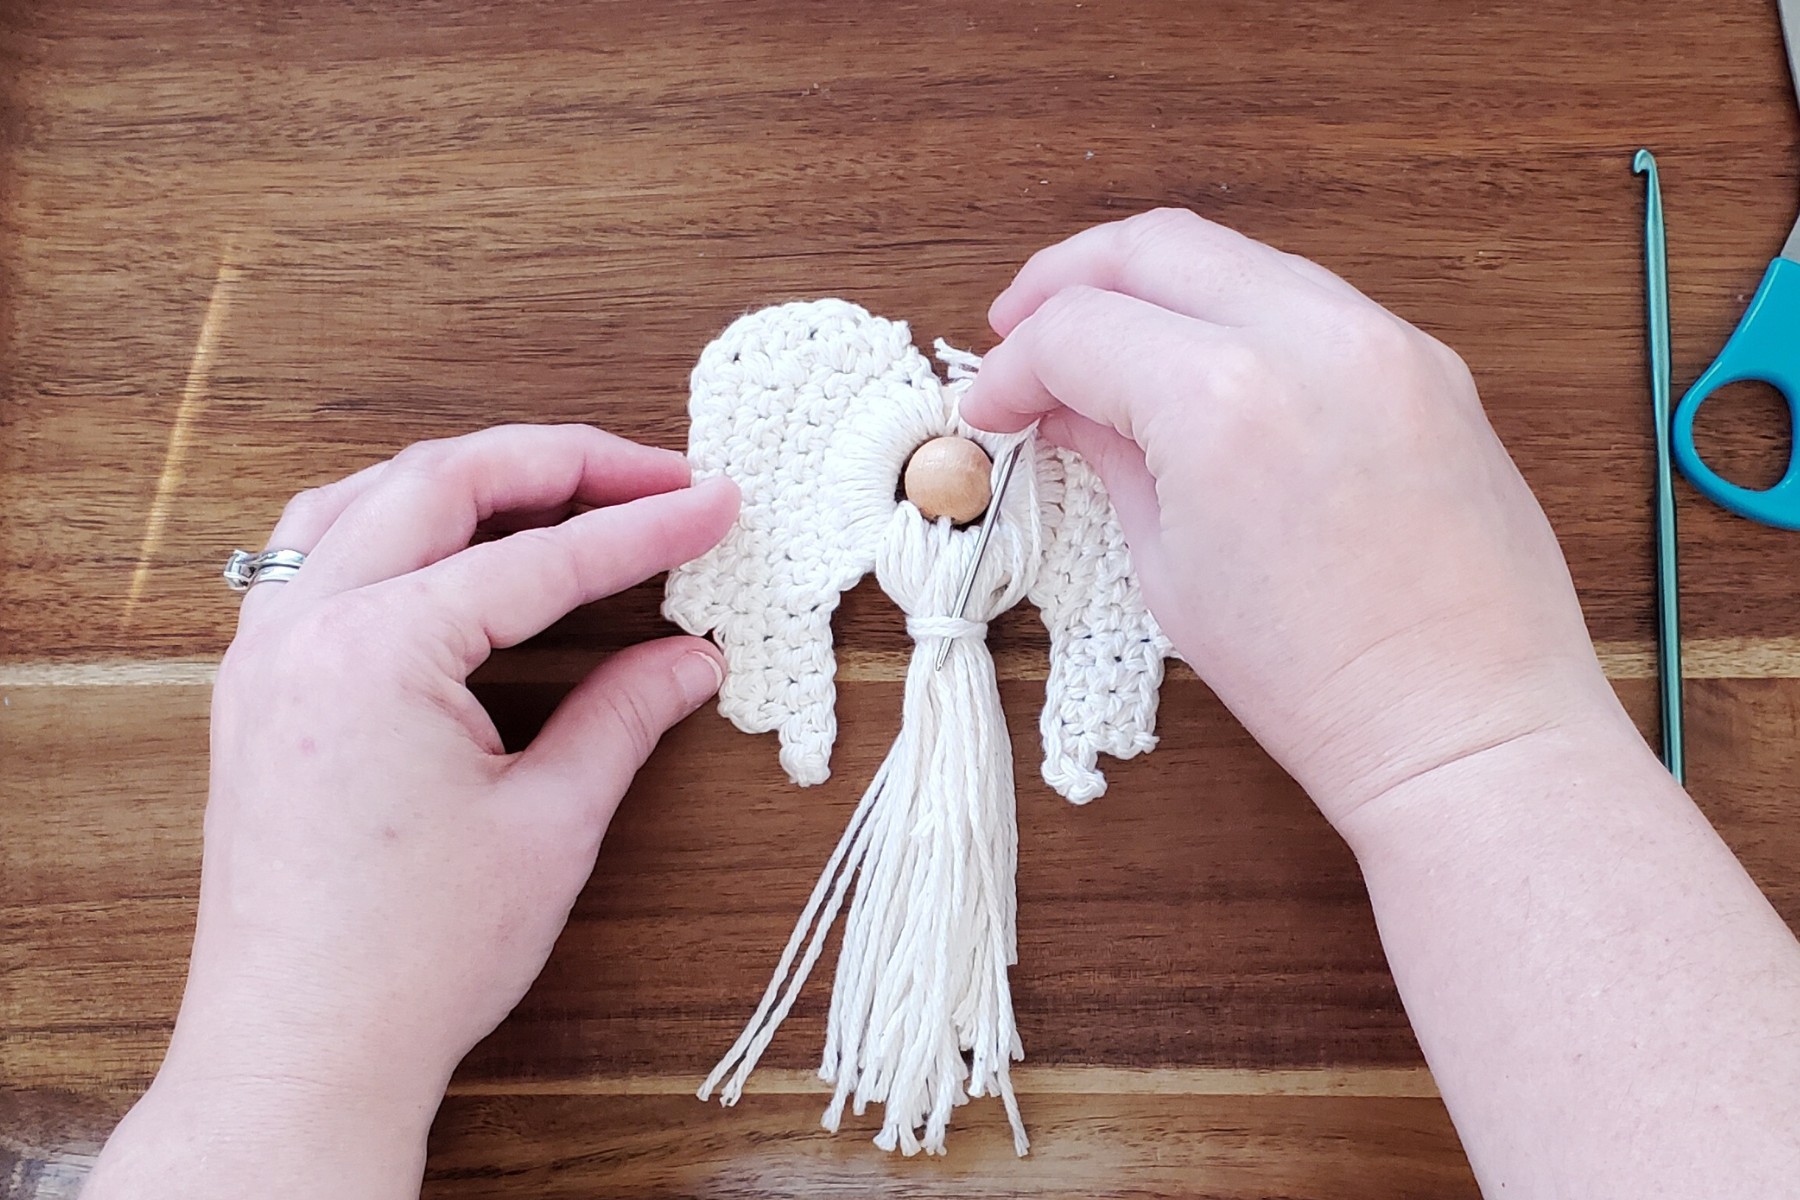
Thread these two ends through a tapestry needle and insert under the wrapped waist.
Adjust wings so that wood ring is completely covered.
Cut 1 10 piece of yarn and attach to top of ring using a larks head knot.
Tie two ends together to form loop for hanging the ornament.
Hang ornament and trim body yarn so it is even.
To stiffen the wings mix 1 part Mod Podge and 1 part water.
Pin ornament down with T-pins so it is the shape you would like.
Use your finger or a paint brush to add Mod Podge mixture to wings.
It is important to use rust-resistant pins; otherwise the liquid could cause rust to get on your ornament.
You dont want to ruin your masterpiece before it even makes it to the tree!
Let it dry for at least 1 hour and then turn over to repeat on the other side.

Enjoy your new handmade crochet angel ornament.
Then you should check out these other funyarn projects:
