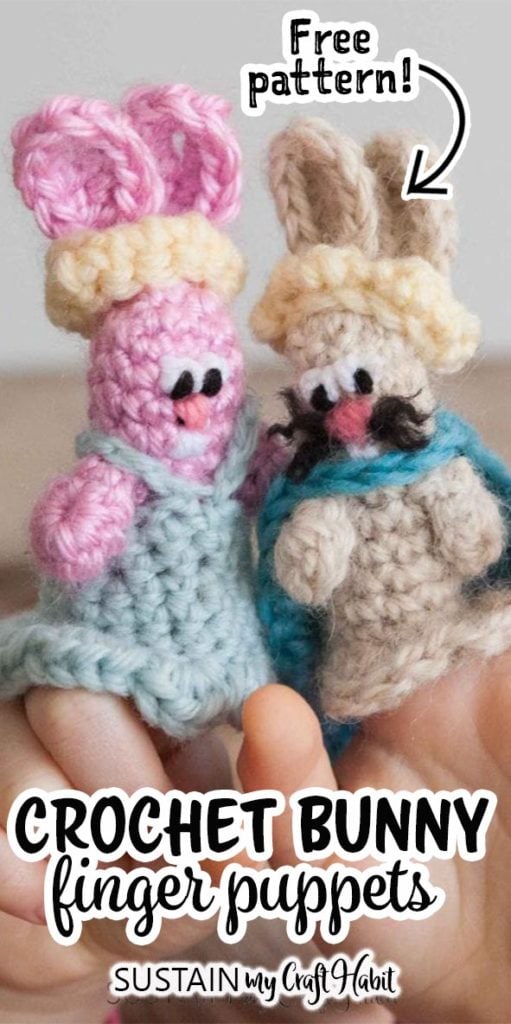
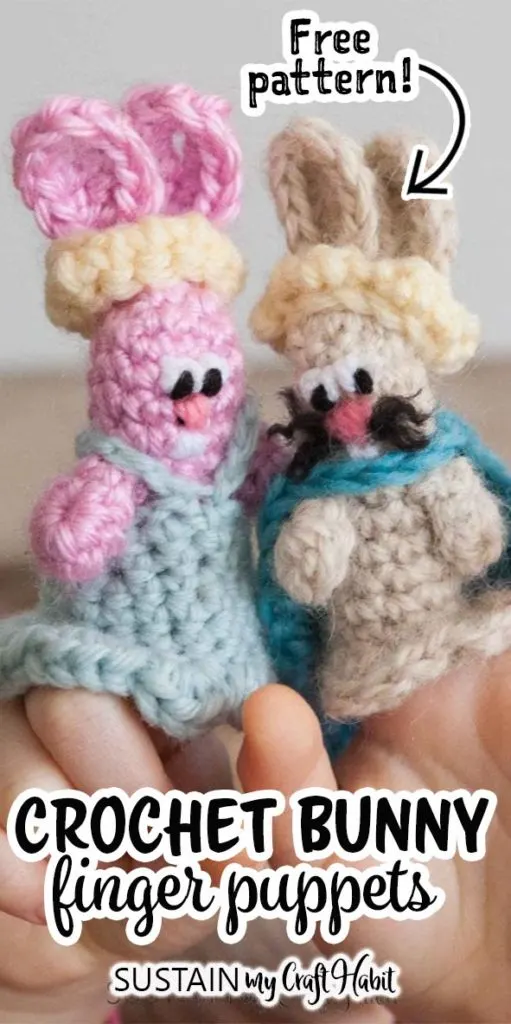
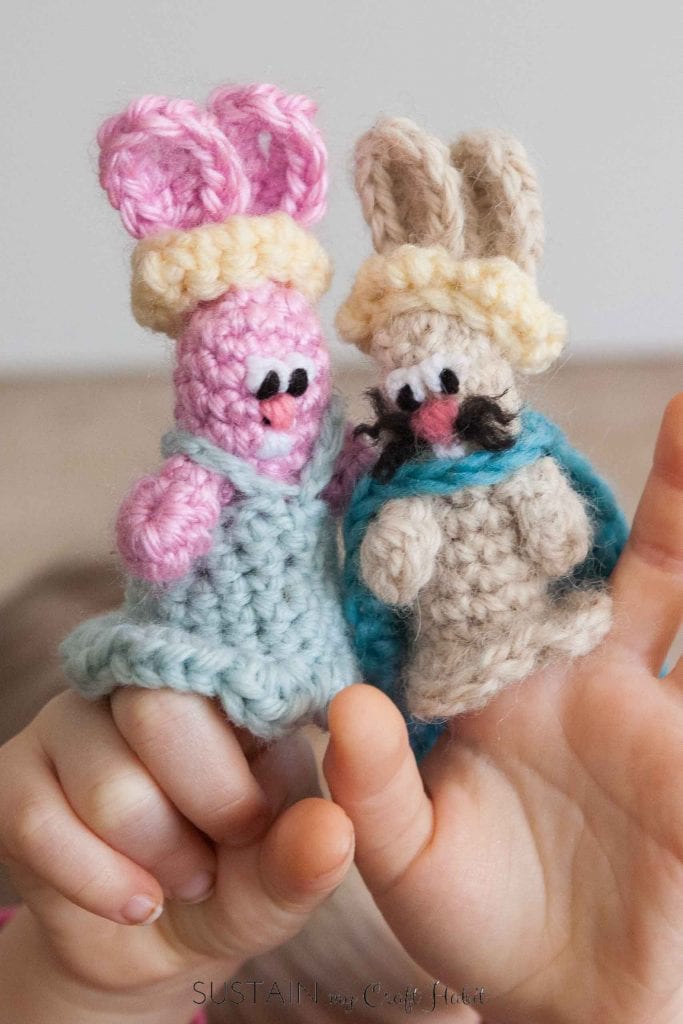
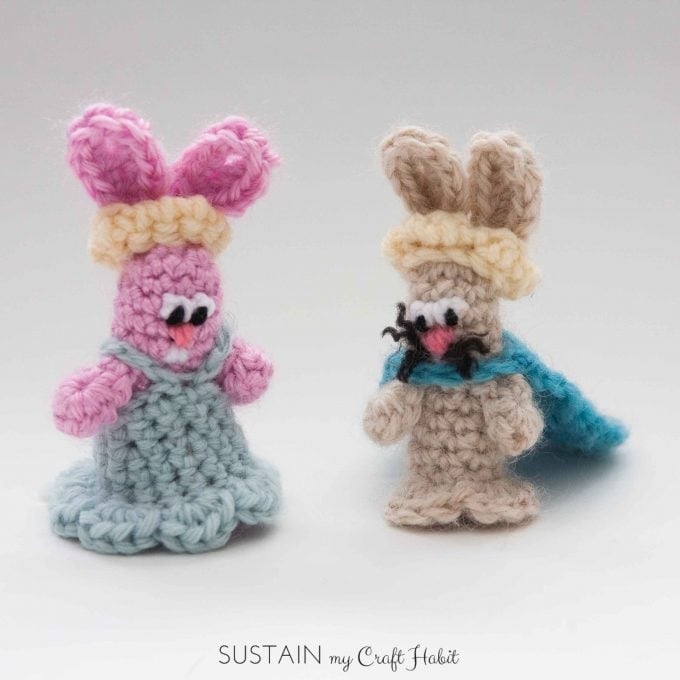
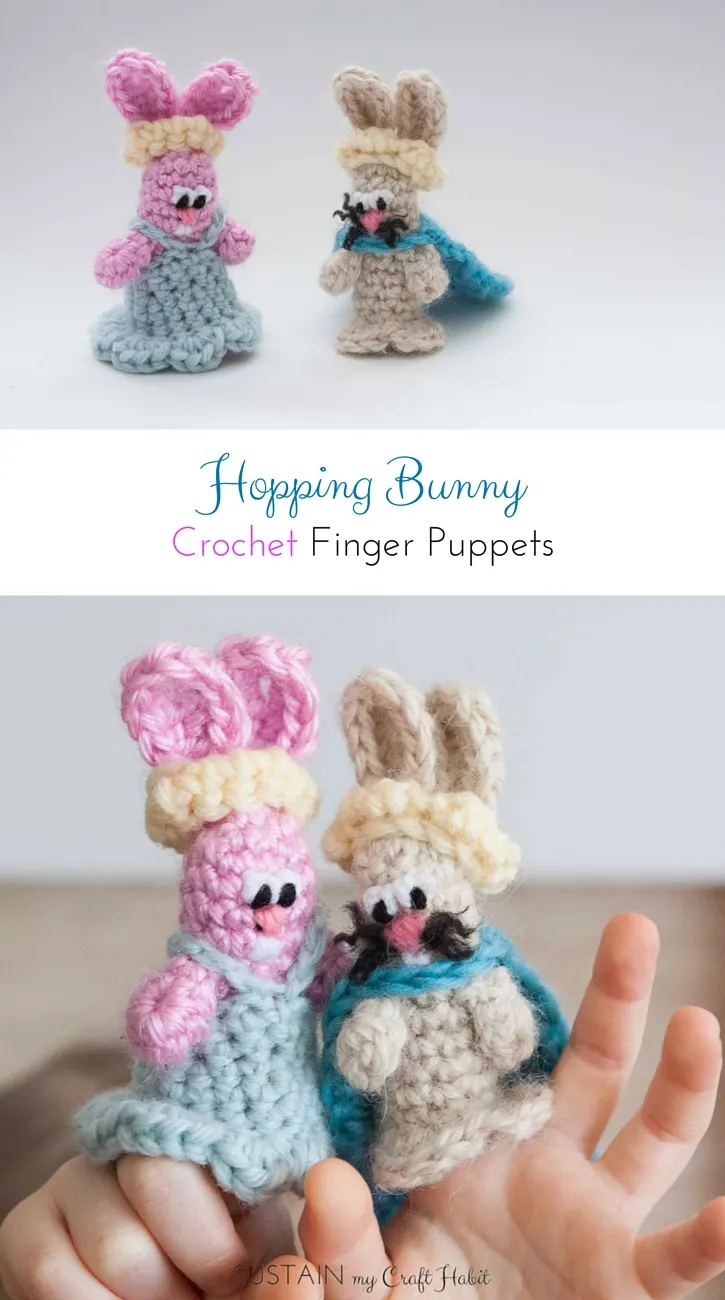
HomeArts and Crafts IdeasKnitting and Crochet PatternsAdorable Crochet Bunny Finger Puppets (Free Pattern!)
Its hard to believe that Easter is just a week away!
Well definitely be foregoing our traditionalcommunity Easter egg hunt.

It looks like our gathering will be smaller this year.
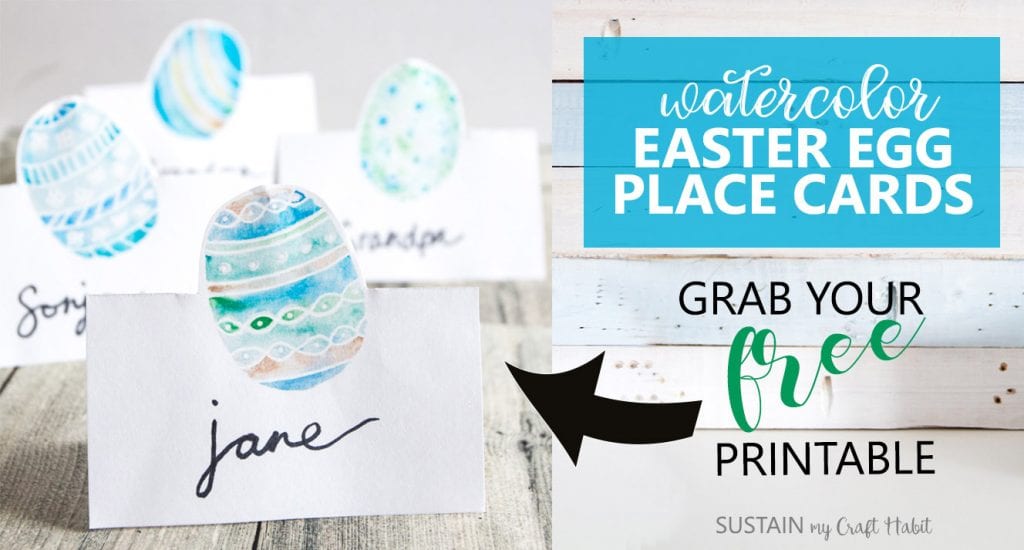
Well likely take the time this year then to set a pretty table with actualcloth napkinsandpretty place cards.
How have you been preparing for Easter?
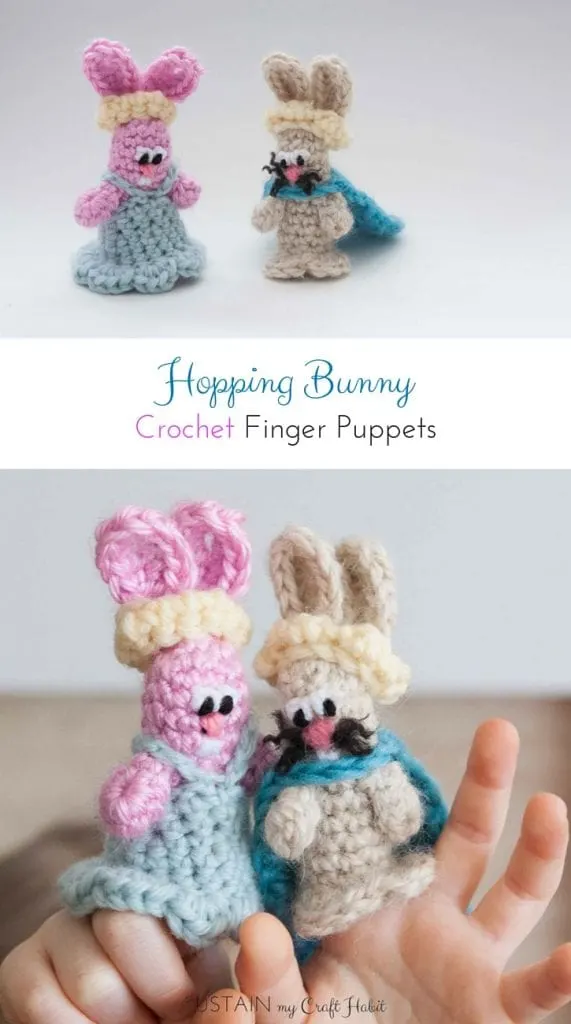
Free Bunny Crochet Finger Puppets Pattern
Disclosure: This post contains affiliate links for your shopping convenience.
you’ve got the option to readour full disclosure policy here.
Crochet hook (US 7/4.50mm).
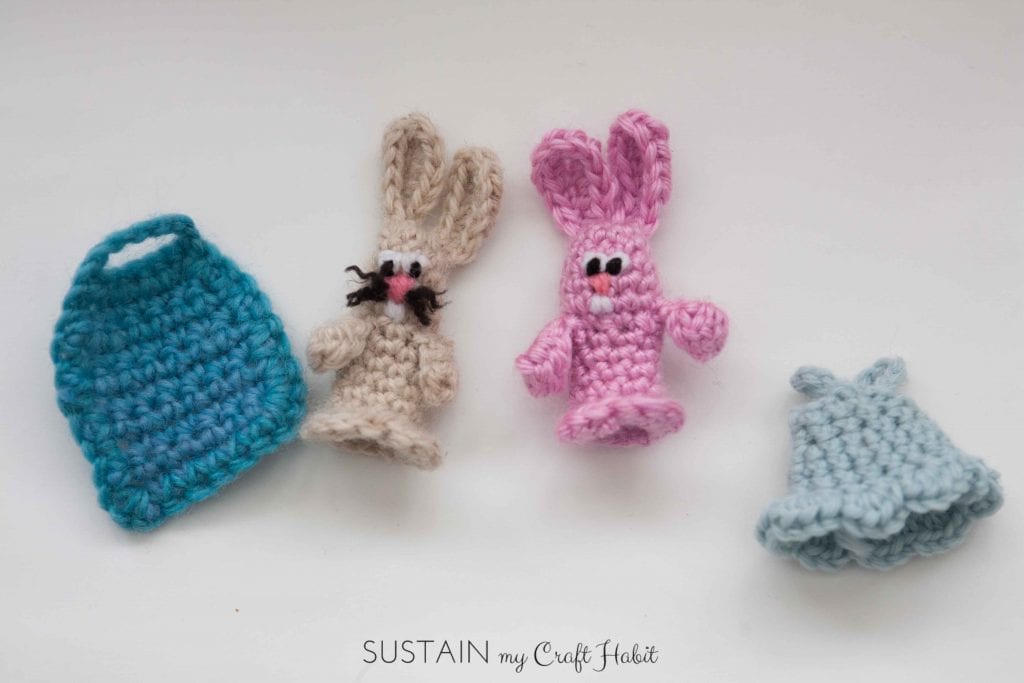
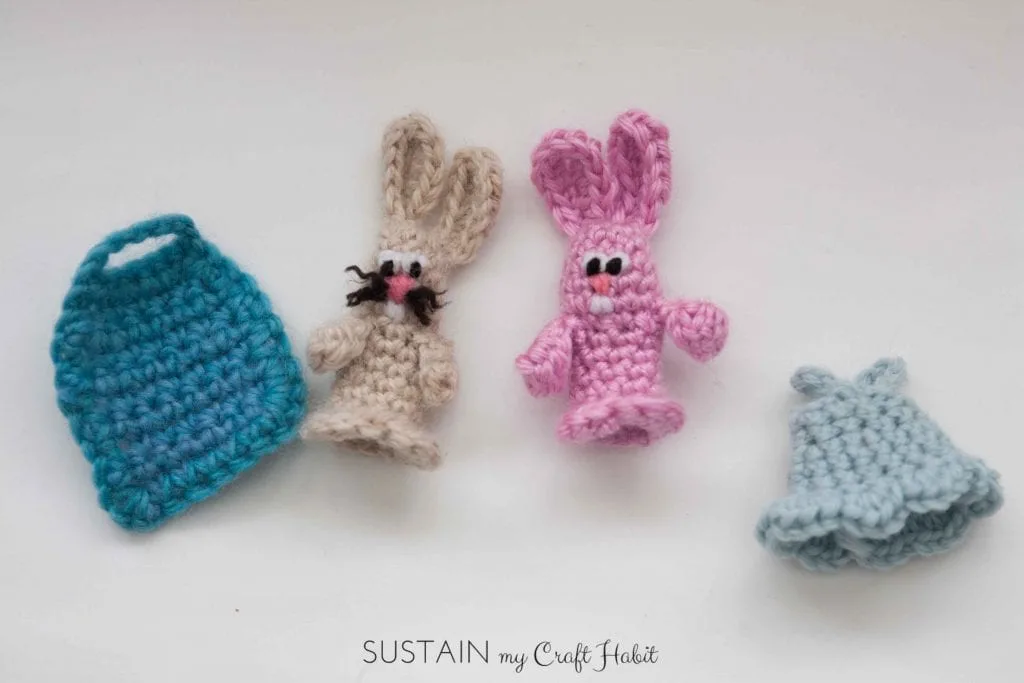
Bunny Body
This is worked as a continuous round.
Row 1: Magic chain 6.
Row 2: 2 sc in each stitch around.
(12 sts)
Rows 3-7: 1 sc in each stitch around.
(10 sts)
Rows 9-12: 1 sc in stitch around.
[Note: the 4 dc make the bunnies feet].
Sew end in to finish.
Ear (make 2)
Chain 5.
1 hdc in next stitch, 1 sc in next 2 stitches.

Fasten off leaving 4 length for sewing.
Paw (make 2)
Chain 2.
Fasten off leaving 4 length for sewing.
Repeat for the right ear.
Sew one paw to the left side of the body, between rows 6-7.
Repeat for the right paw.

Make a French knot and push the needle back into the bunny, just above the nose.
Repeat with the right eye.
Stitch twoteeth over row 5.
Sew the remaining white yarn through the inside of the bunny towards the back.
Pull the yarn out at the midside of the back, between rows 9 and 10.
Make a French knot for the tail.

Push the needle back in and make a knot on the inside to finish off.
Cover the white French knots with stitches with the black yarn to complete the eyes.
Stitch each eye then come out beside the other side of the nose.
Trim yarn to desired length and separate apart the threads of the yarn to form the whiskers.
1 sc in next 5 stitches.
(6 sts).
Row 2: Chain 1.
1 sc in next 6 stitches.
2 sc in last stitch.

(8 sts).
Rows 3-7: Chain 1.
1 sc in next 7 stitches.
(8 sts).
Row 8: Chain 1.
1 sc in next 4 stitches.
1 sc in last stitch.
(6 sts).
Row 9: Chain 1.
1 sc in next 4 stitches.
3 sc in last stitch (to go around the corner).
sc in each stitch around the three sides, making 3 sc in each corner.
Join with a sl st to the first stitch of top row (Row 8).
Chain 5 for neck strap.
Join to other side of the top row with sl st from the back of the cape.
Sew end into piece.
BunnyKing Crown:
Chain 12.
Join to chain 1 space with sl st to create a circle.
(1 sc in next stitch, 1 hdc in next stitch) around.
Join with a sl st and finish off.
Join to chain 1 space with sl st to create a circle.
1 sc in each of the 12 stitches from the starting chain.
(12 sts)
Row 2: 1 sc in each of the 12 stitches.
(12 sts).
Up to this point you will be working the stitches from the inside of the piece.
Turn the piece inside out and continue working the stitches from the outside.
Row 3: (1 sc in next stitch, 2 sc in next stitch) around.
(18 sts)
Rows 4-6: 1 sc in each stitch around.
(45 sts).
Fasten off and sew end into piece.
Bunny Queen Crown:
Chain 12.
Join to chain 1 space with sl st to create a circle.
1 sc in each stitch around.
1 hdc, 1 dc, 1 hdc, in next stitch.
Join with a sl st in next stitch and finish off.
Enjoy your new crochet finger puppets!
